Create EC2 Instance
EC2
Amazon Elastic Compute Cloud (Amazon EC2) is a cloud computing infrastructure provided by Amazon Web Services (AWS) that provides virtualized computing resources on demand.
Amazon EC2 Instance Type
Amazon EC2 Instance Type are predefined hardware configurations on Amazon EC2, including CPU, RAM, storage, and network bandwidth. Therefore, in this Workshop, we will use t2.medium to optimize resources and save costs.
Why choose t2.medium
- Cost-effective: Supports Burstable Performance, only using high CPU when needed.
- Suitable Performance: 2 vCPU, 4GB RAM, sufficient for web server, API backend, development environment.
- Easy to Scale: Can upgrade to higher instances when needed.
- Good Integration: Supports AWS services like RDS, S3, CloudWatch. 🚀
Create an EC2 Instance on AWS
In this section, we will create an EC2 instance to run our web application. Although AWS provides many advanced options, we will focus on the most basic steps to quickly get a working server.
If you want to learn more about advanced options, you can refer to AWS’s official documentation on Launch Instance Wizard.
Let’s start with these simple steps:
1. Access AWS Console
- Open your browser and access the Amazon EC2 console at https://console.aws.amazon.com/ec2/.
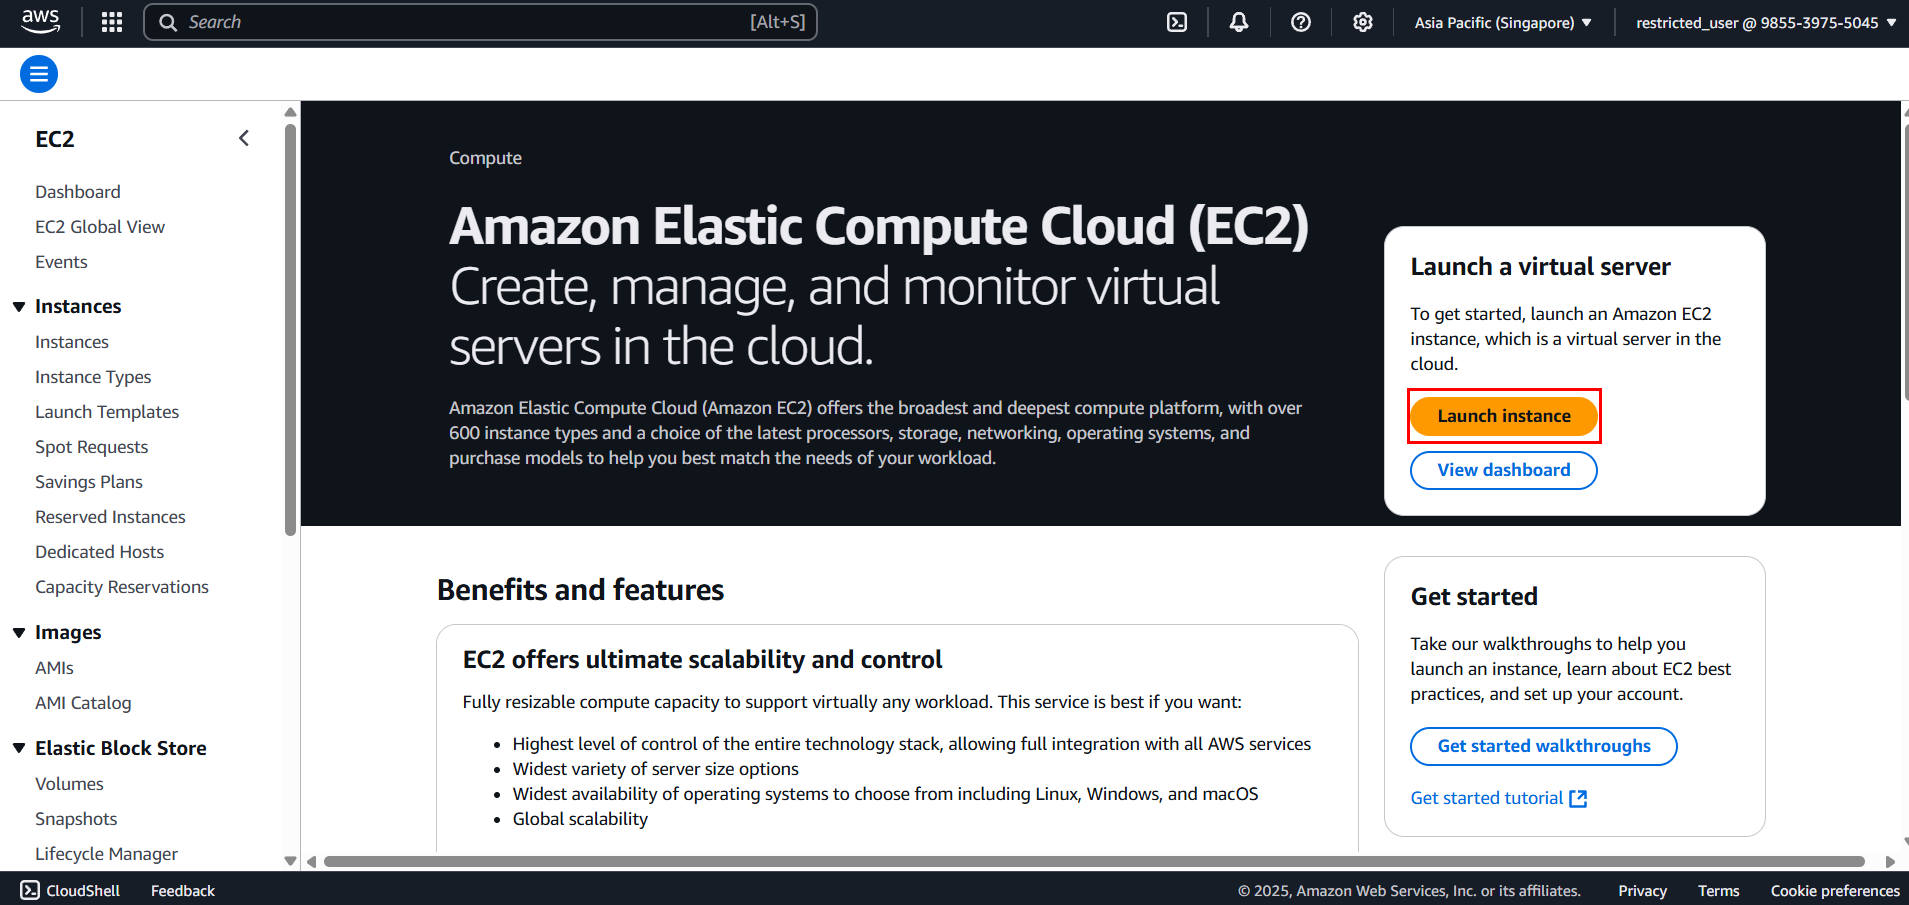
2. Choose Launch instance
- On the EC2 console dashboard, in the Launch instance box, select Launch instance, then choose Launch instance from the options that appear.
3. Name your instance
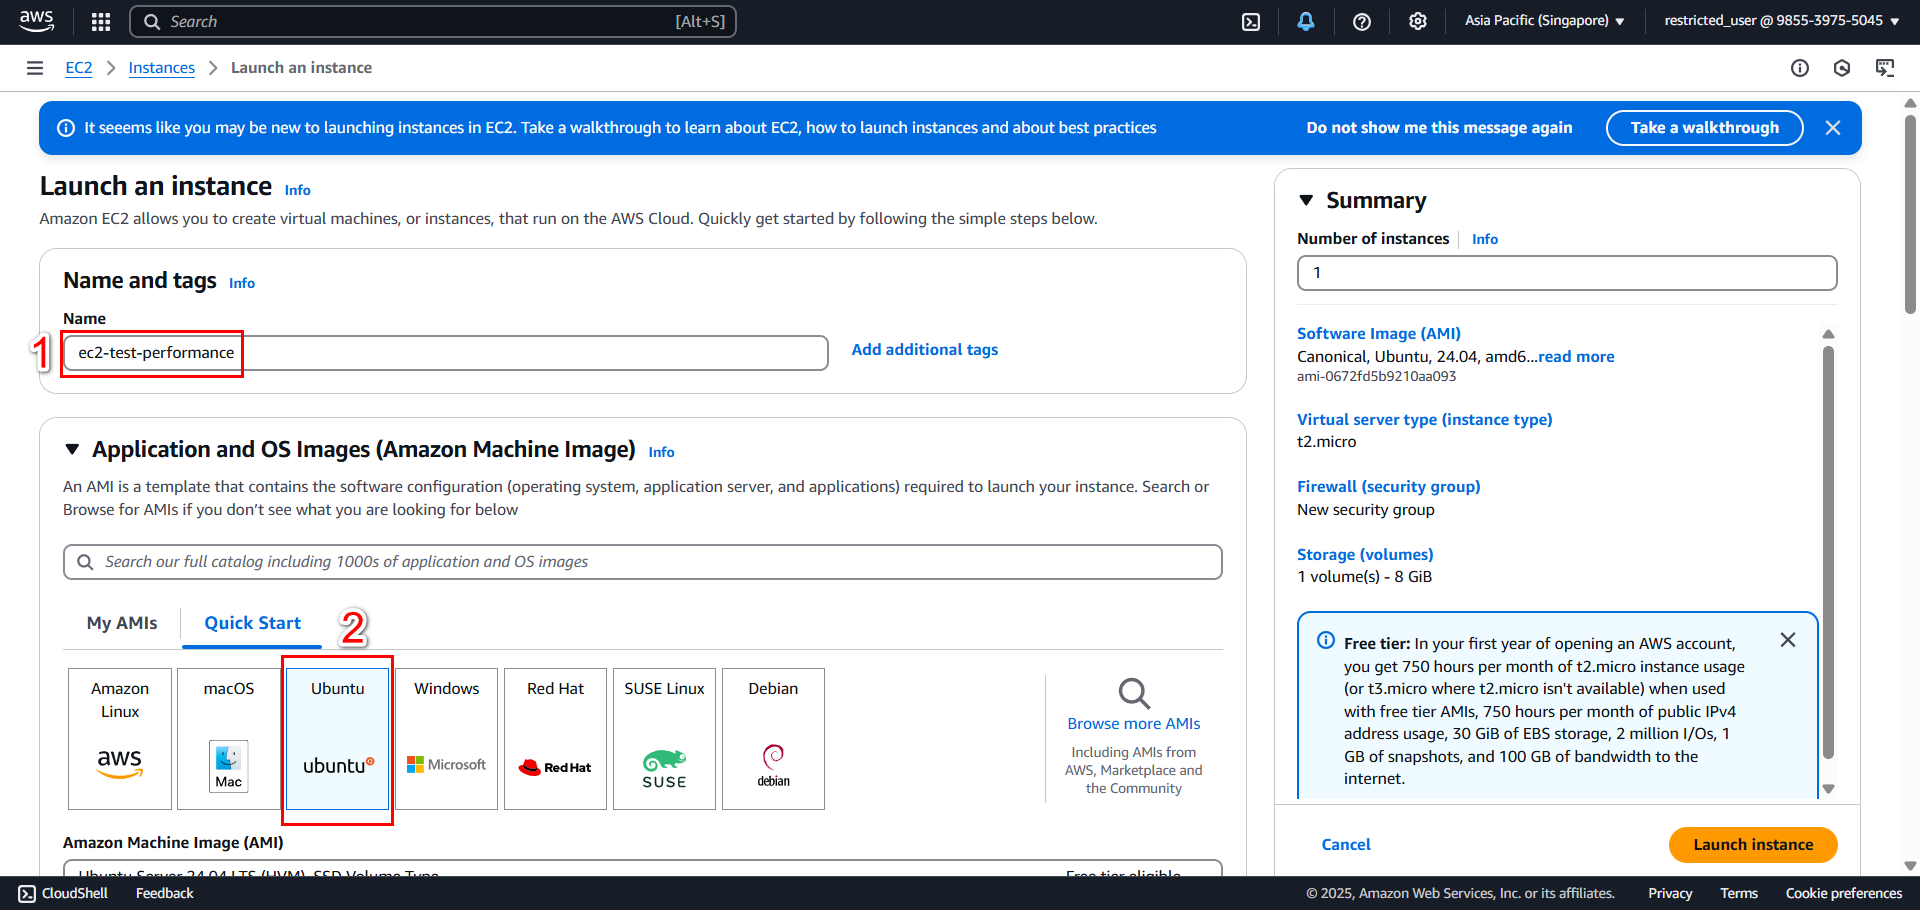
- Under Name and tags, for Name, enter a descriptive name for your instance.
4. Choose image (Amazon Machine Image - AMI)
- Under Application and OS Images (Amazon Machine Image), follow these steps:
- Select Quick Start
- Select Ubuntu
- From the AMI list, choose Ubuntu Server 22.04 LTS (HVM)
- Verify the AMI is labeled Free tier eligible
Why choose Ubuntu 22.04 LTS:
- LTS (Long Term Support): Supported and security updates for 5 years
- Stable and thoroughly tested
- Rich software repository, easy to install Node.js and necessary packages
- Popular in the developer community
5. Choose instance type
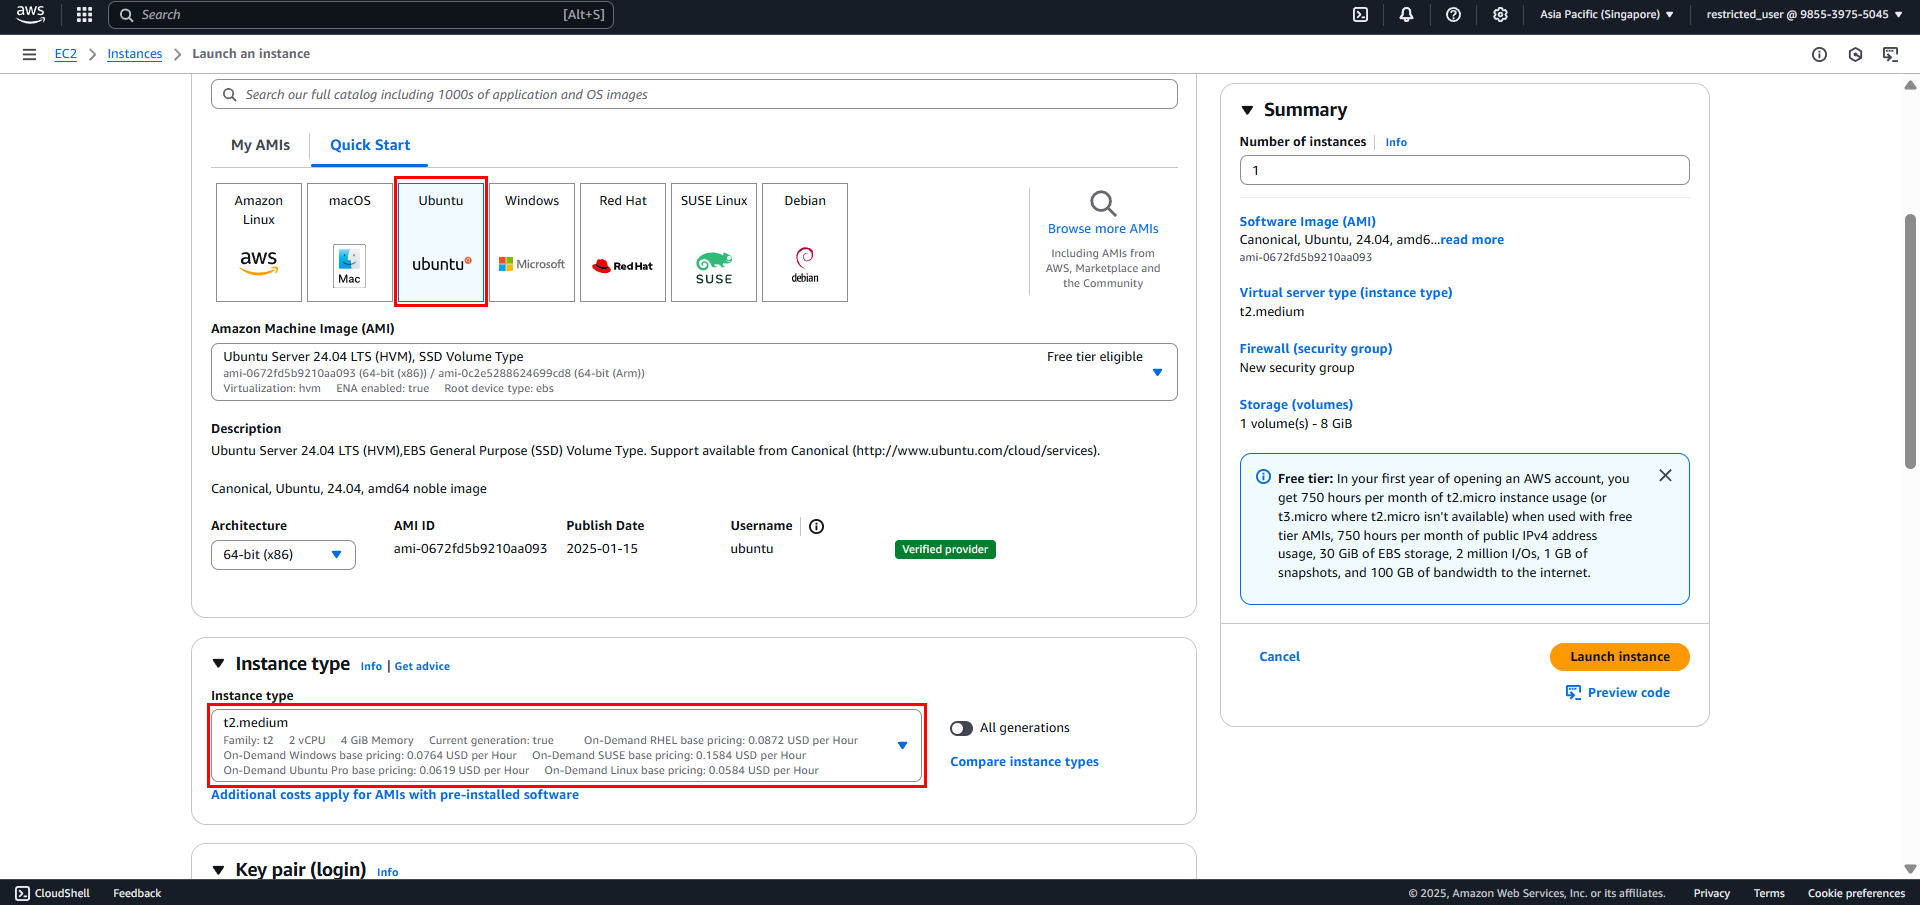
- Under Instance type, from the Instance type list, select t2.medium
- 2 vCPU
- 4GB RAM
- Network performance: Low to Moderate
- EBS-optimized available
6. Choose Key Pair
Create Key pair
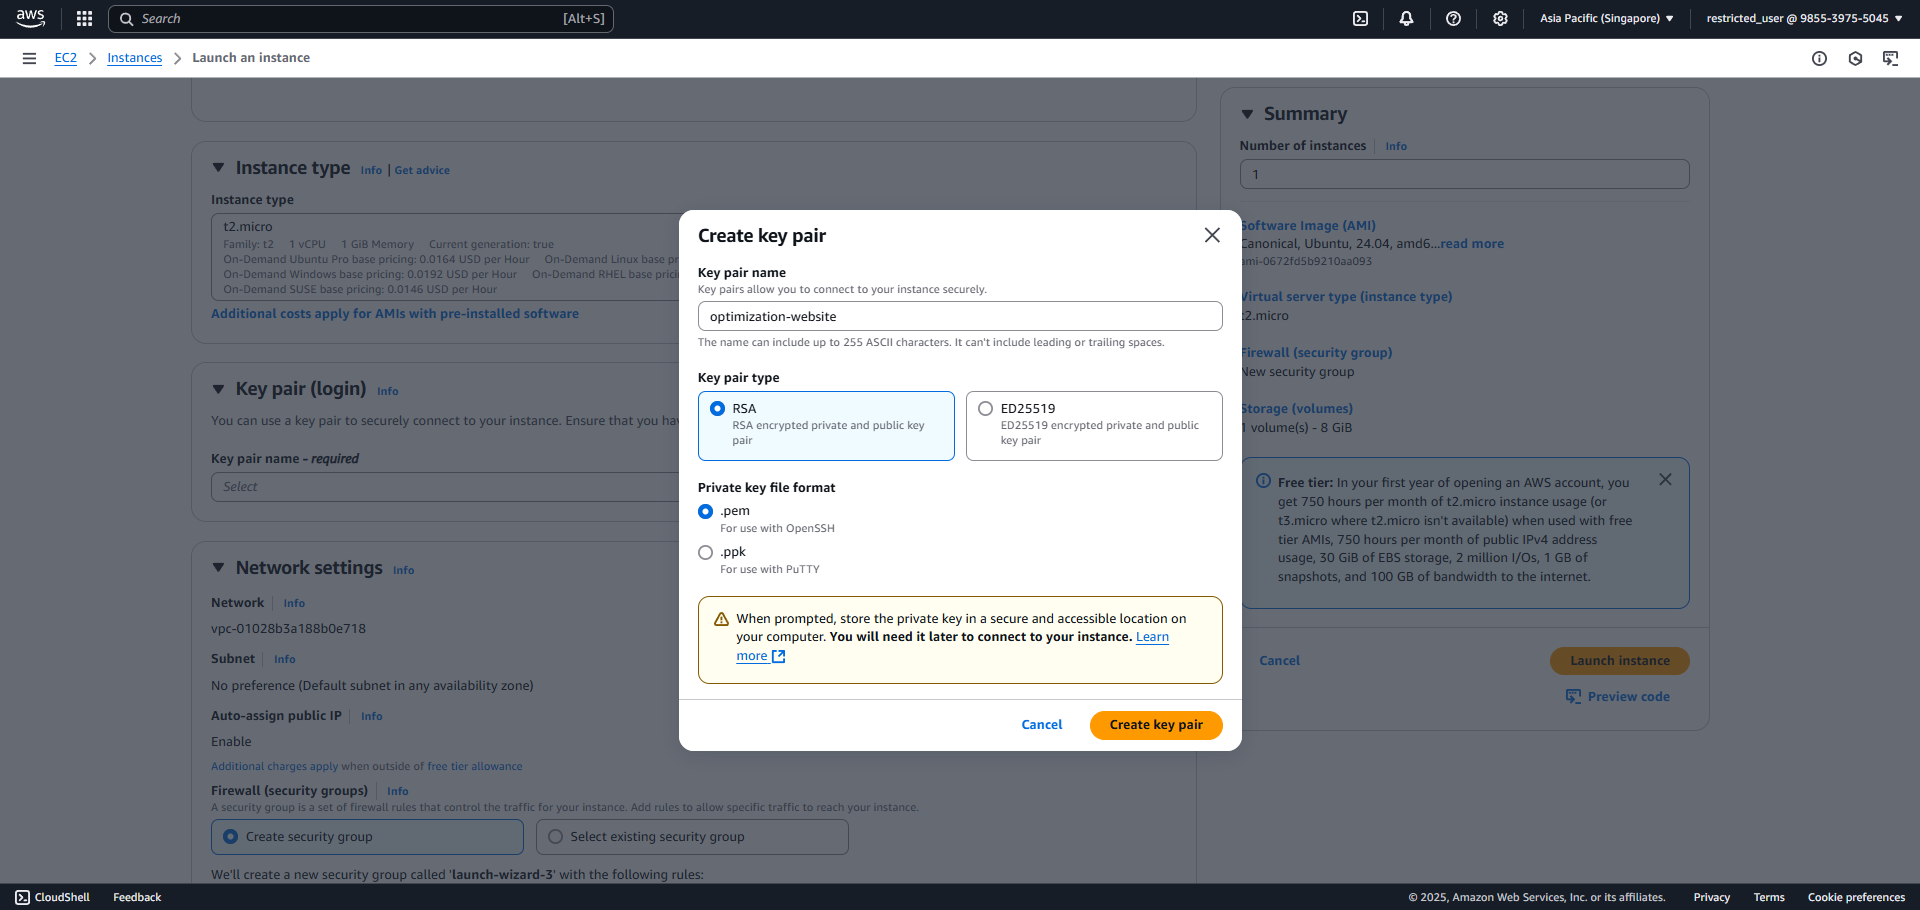
Then use the created Key pair
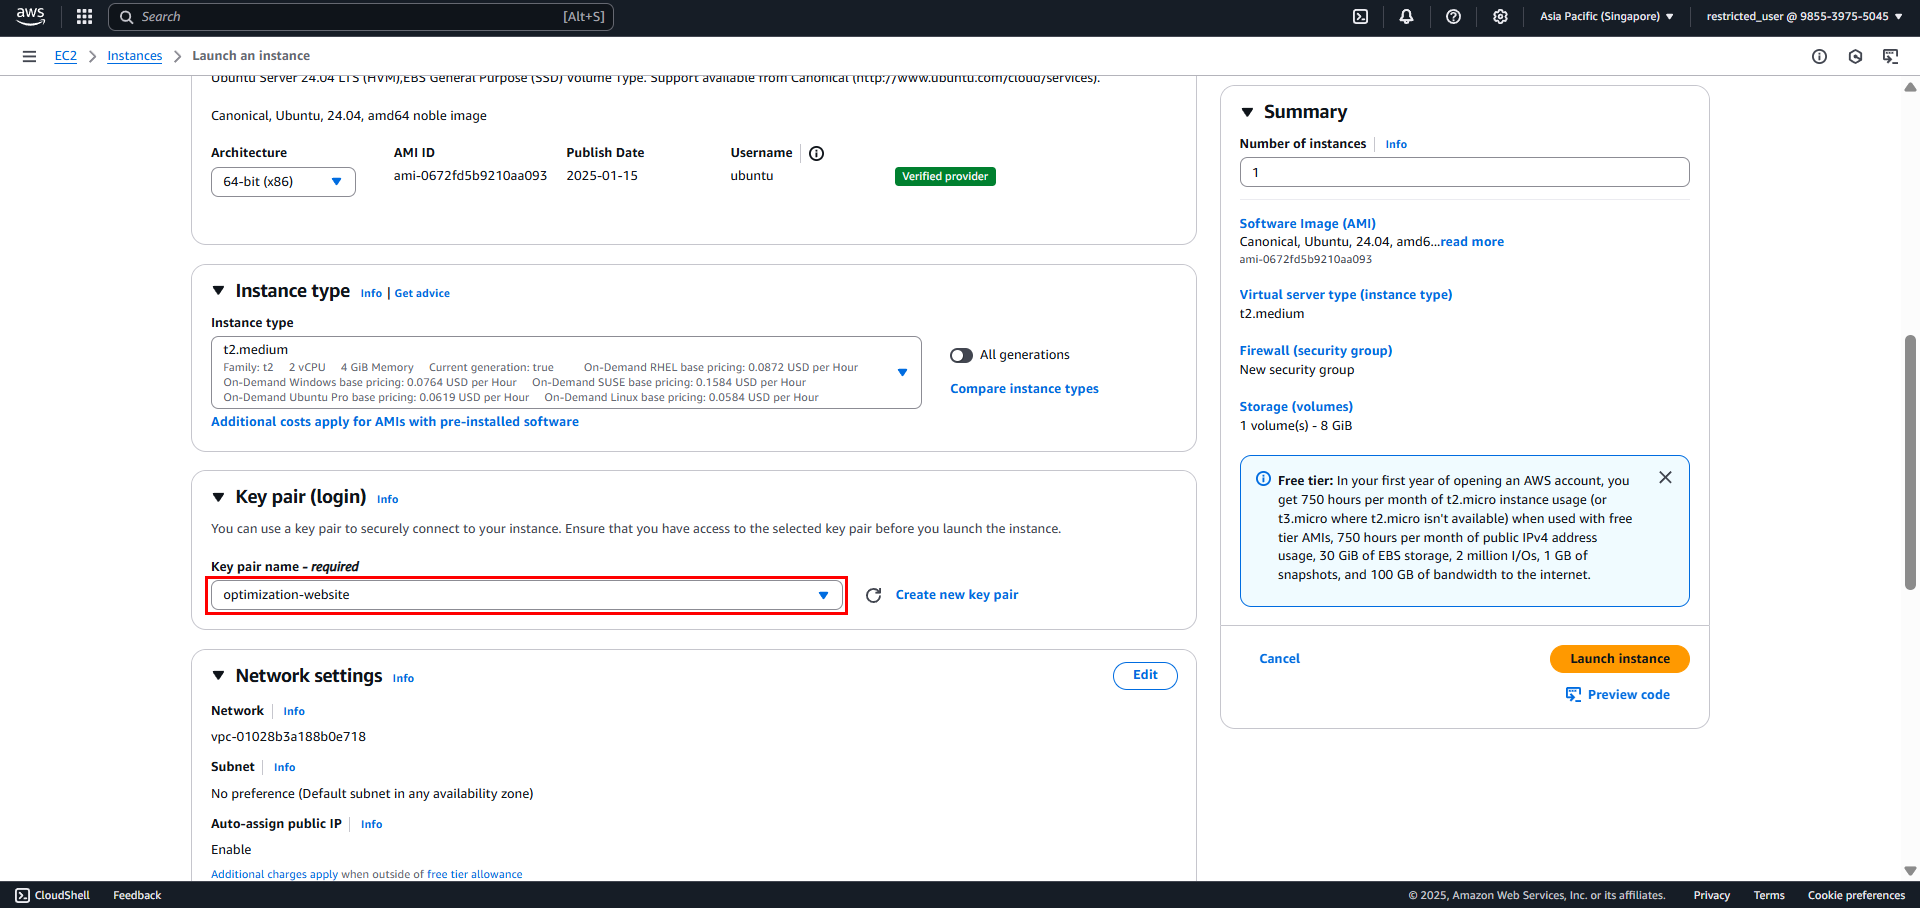
Warning: Don’t select Proceed without a key pair (Not recommended). If you create an instance without a key pair, you won’t be able to connect to it.
7. Configure Security Group
Next to Network settings, choose Edit. For Security group name, you’ll see that the wizard has created and selected a security group for you. Choose the security group you created during setup using these steps:
Network settings:
- VPC: Choose created VPC
- Subnet: Choose public subnet
- Auto-assign public IP: Enable
Firewall (security groups):
- Choose Select existing security group
- From Common security groups, select public-ec2-sg
- Verify security group has these rules:
- HTTP (80) from ALB
- HTTPS (443) from ALB
- Custom TCP (9000) from ALB
- SSH (22) from your IP
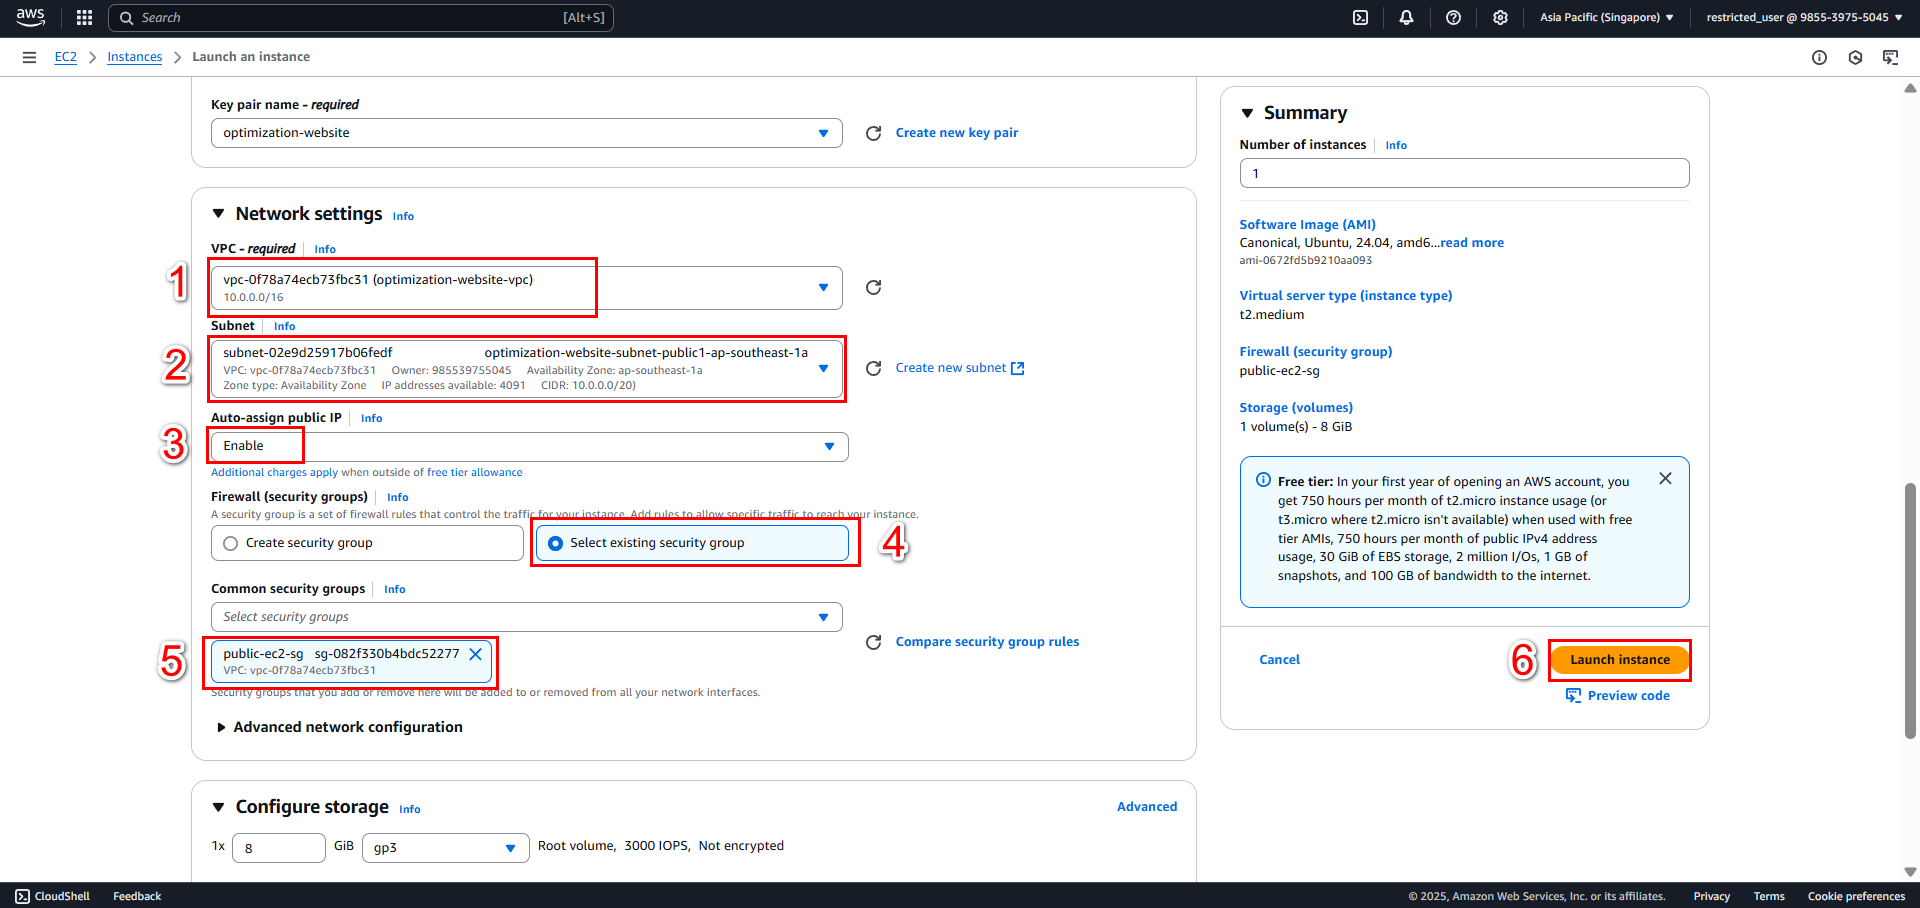
8. Review and verify
- A confirmation page will notify that your instance is launching. Choose View all instances to close the confirmation page and return to the console.
- On the Instances screen, you can view the status of the launch process. It takes a short time for an instance to launch. When you launch an instance, its initial state is pending. After the instance starts, its state changes to running and it receives a public DNS name. If the Public IPv4 DNS column is hidden, choose the settings icon (Settings icon) in the top right corner, turn on Public IPv4 DNS, and choose Confirm.
- It might take a few minutes for the instance to be ready for you to connect to it. Check that your instance has passed its status checks; you can view this information in the Status check column.
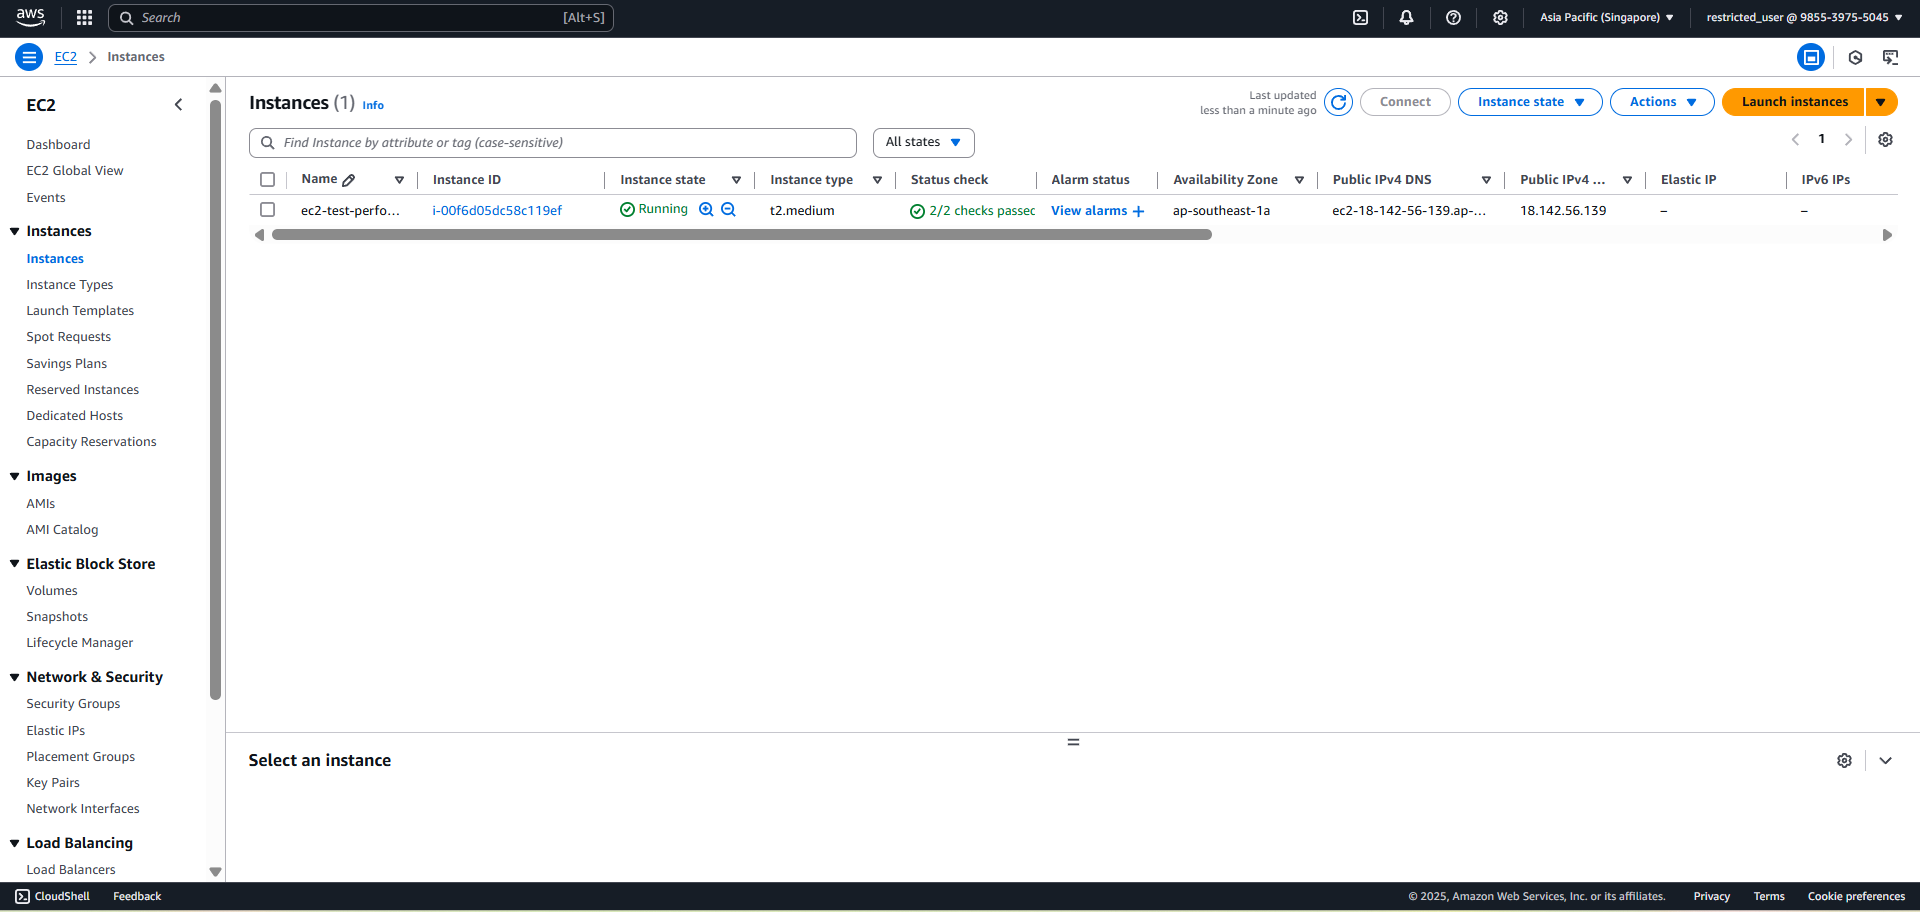
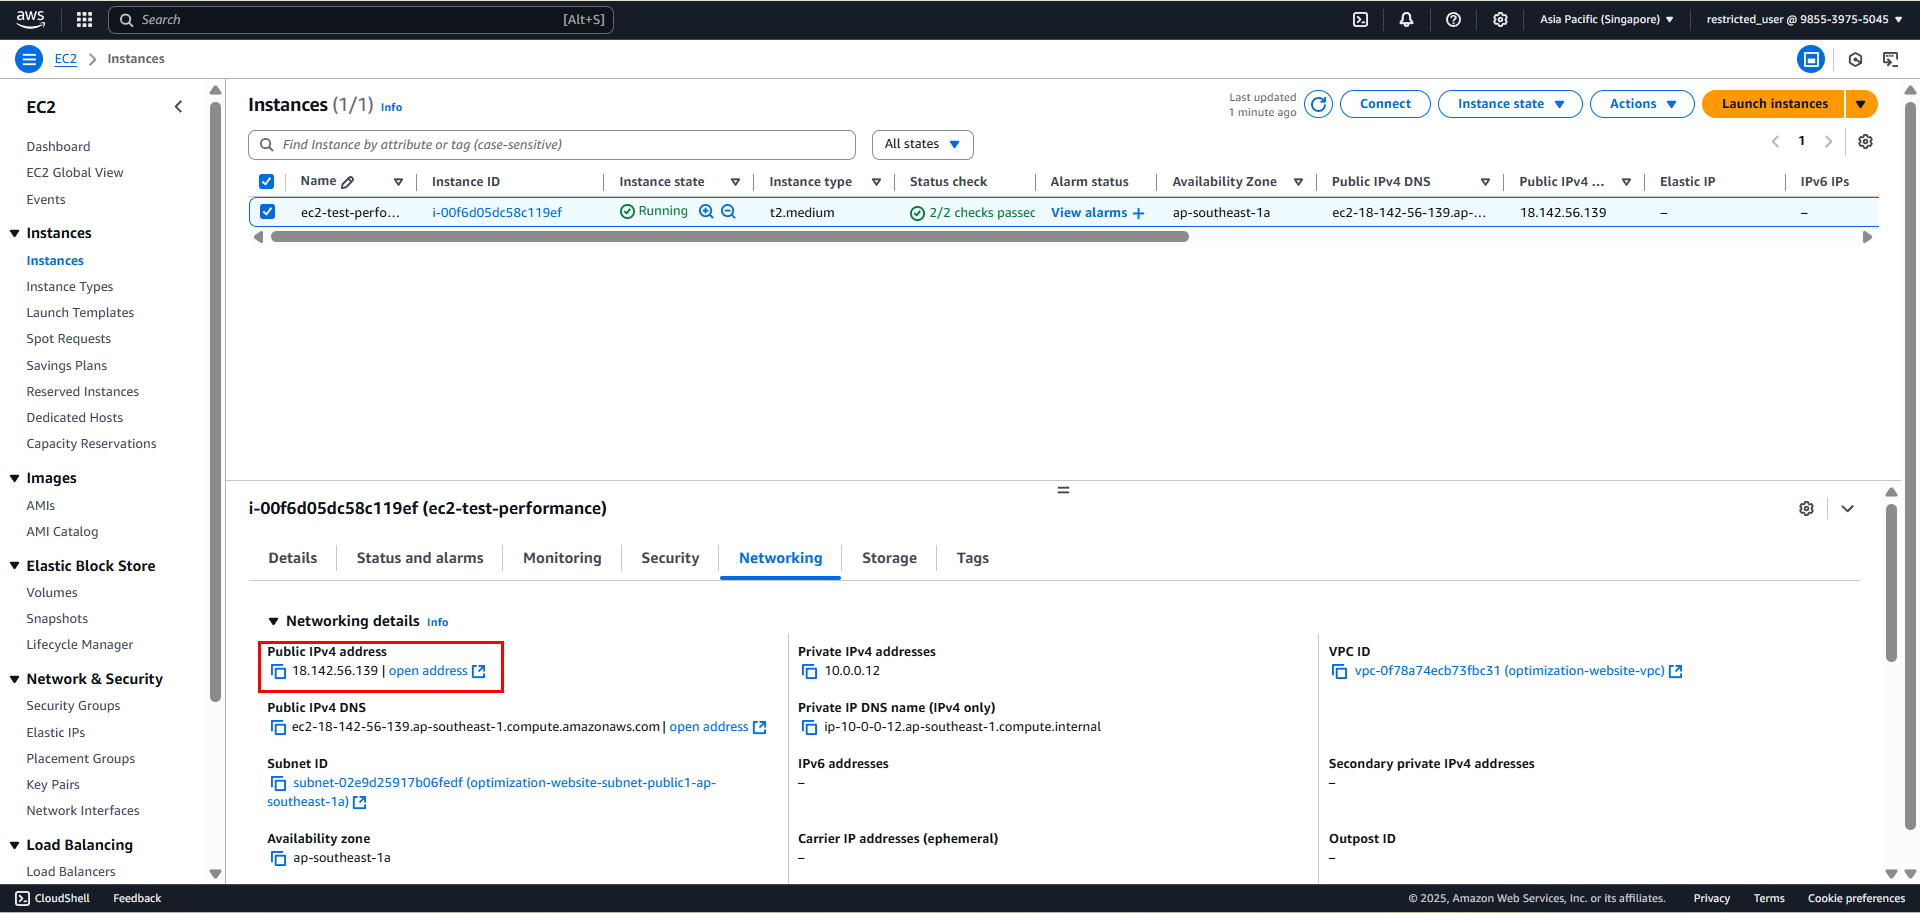
- Check Public IPv4 by clicking on EC2 Instance > Networking tab > Public IPv4 Address
Check connection to EC2 Instance
1. Connect to EC2 Instance via AWS Console
- Select the newly created EC2 Instance, choose Connect
- At the Connect to instance interface, select the EC2 Instance Connect tab
- Verify the information:
- User name: ubuntu
- Instance ID: i-xxxxxxxx (ID of your created instance)
- Click the Connect button to connect to the instance
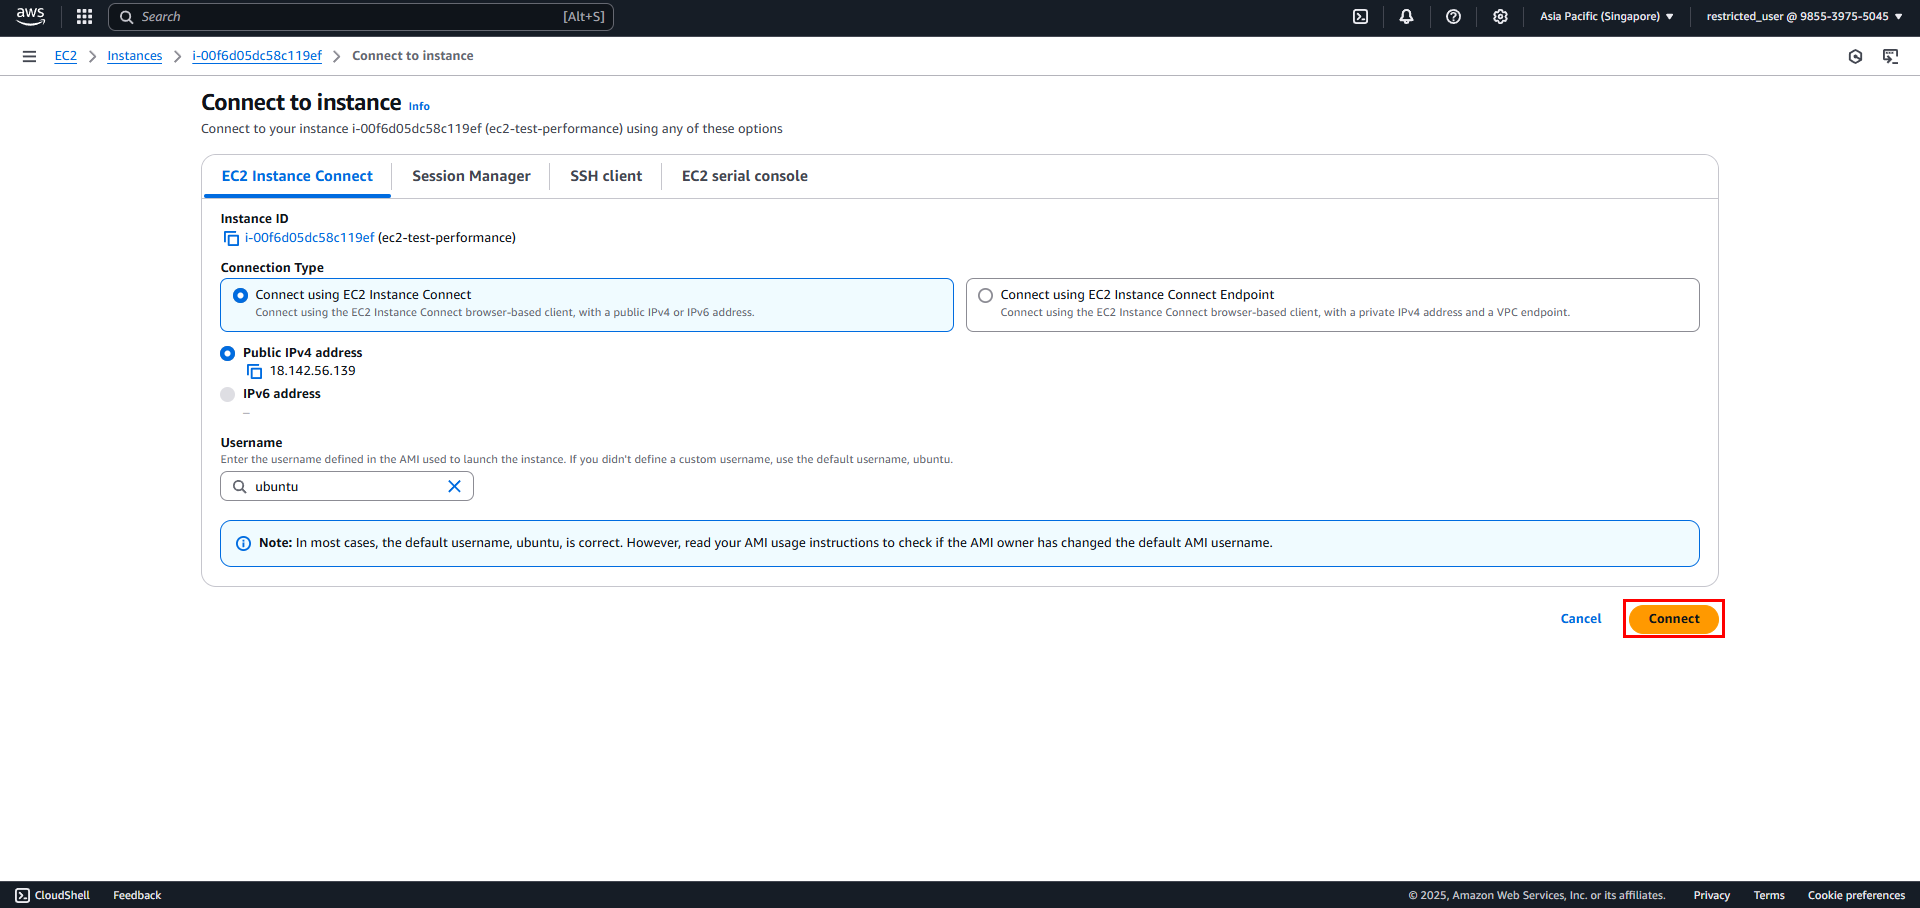
EC2 Instance Connect is a simple and secure connection method that allows you to access the instance through a web browser without needing to configure SSH keys or install additional software.
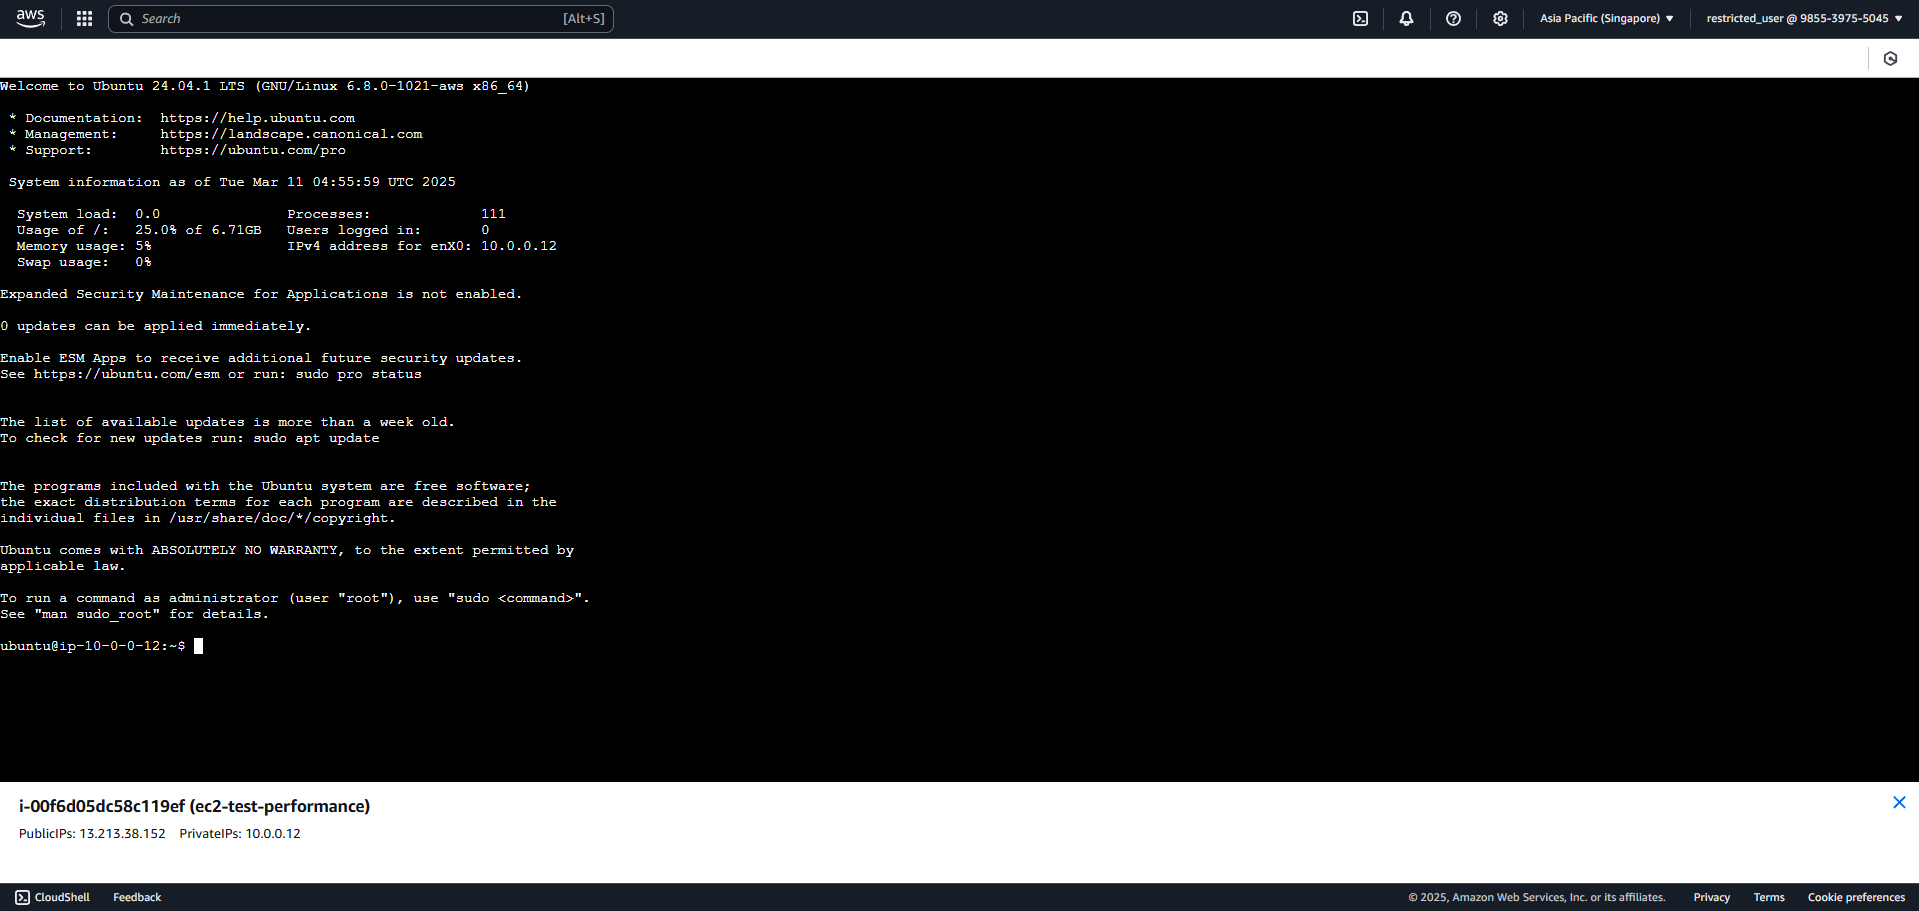
2. Successful Access
After connecting, you will see the terminal in the web browser displaying Ubuntu server information.