Create CloudFront
After deploying the application to EC2, we will initialize CloudFront to improve the website’s performance
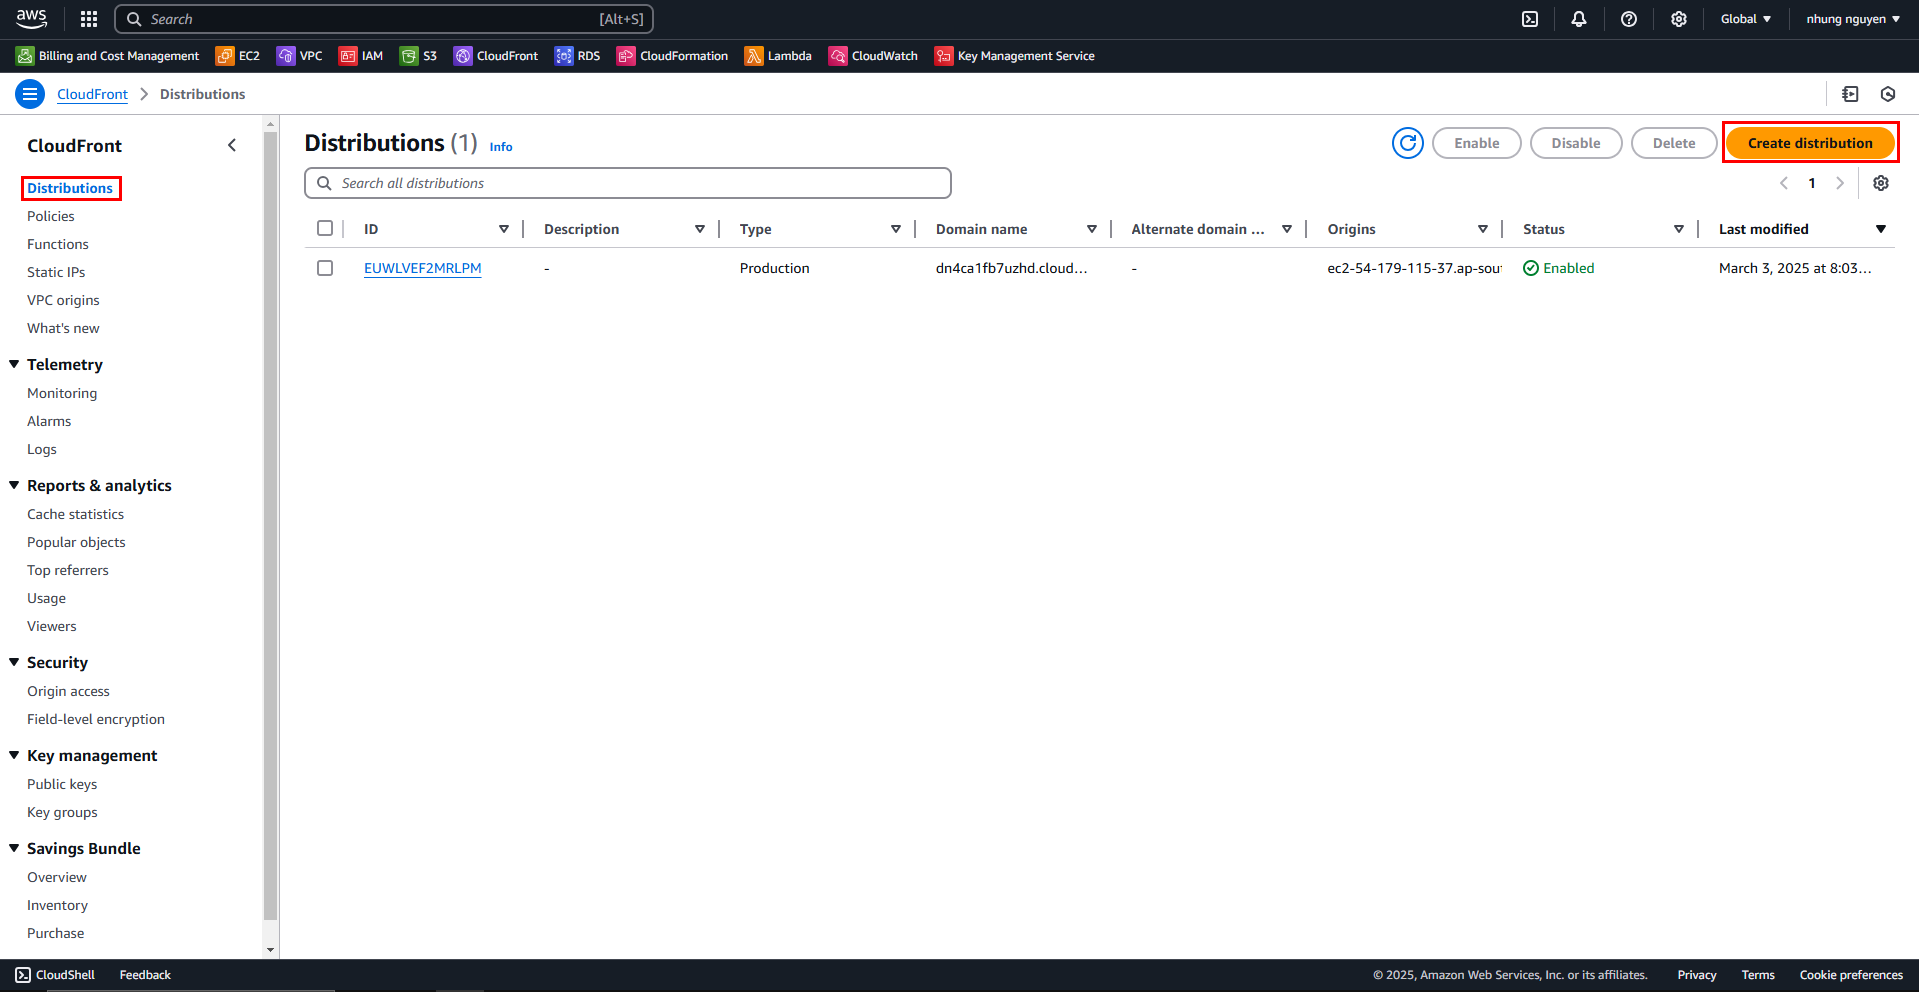
1. Create CloudFront Distribution
Go to the CloudFront interface and select Create distribution
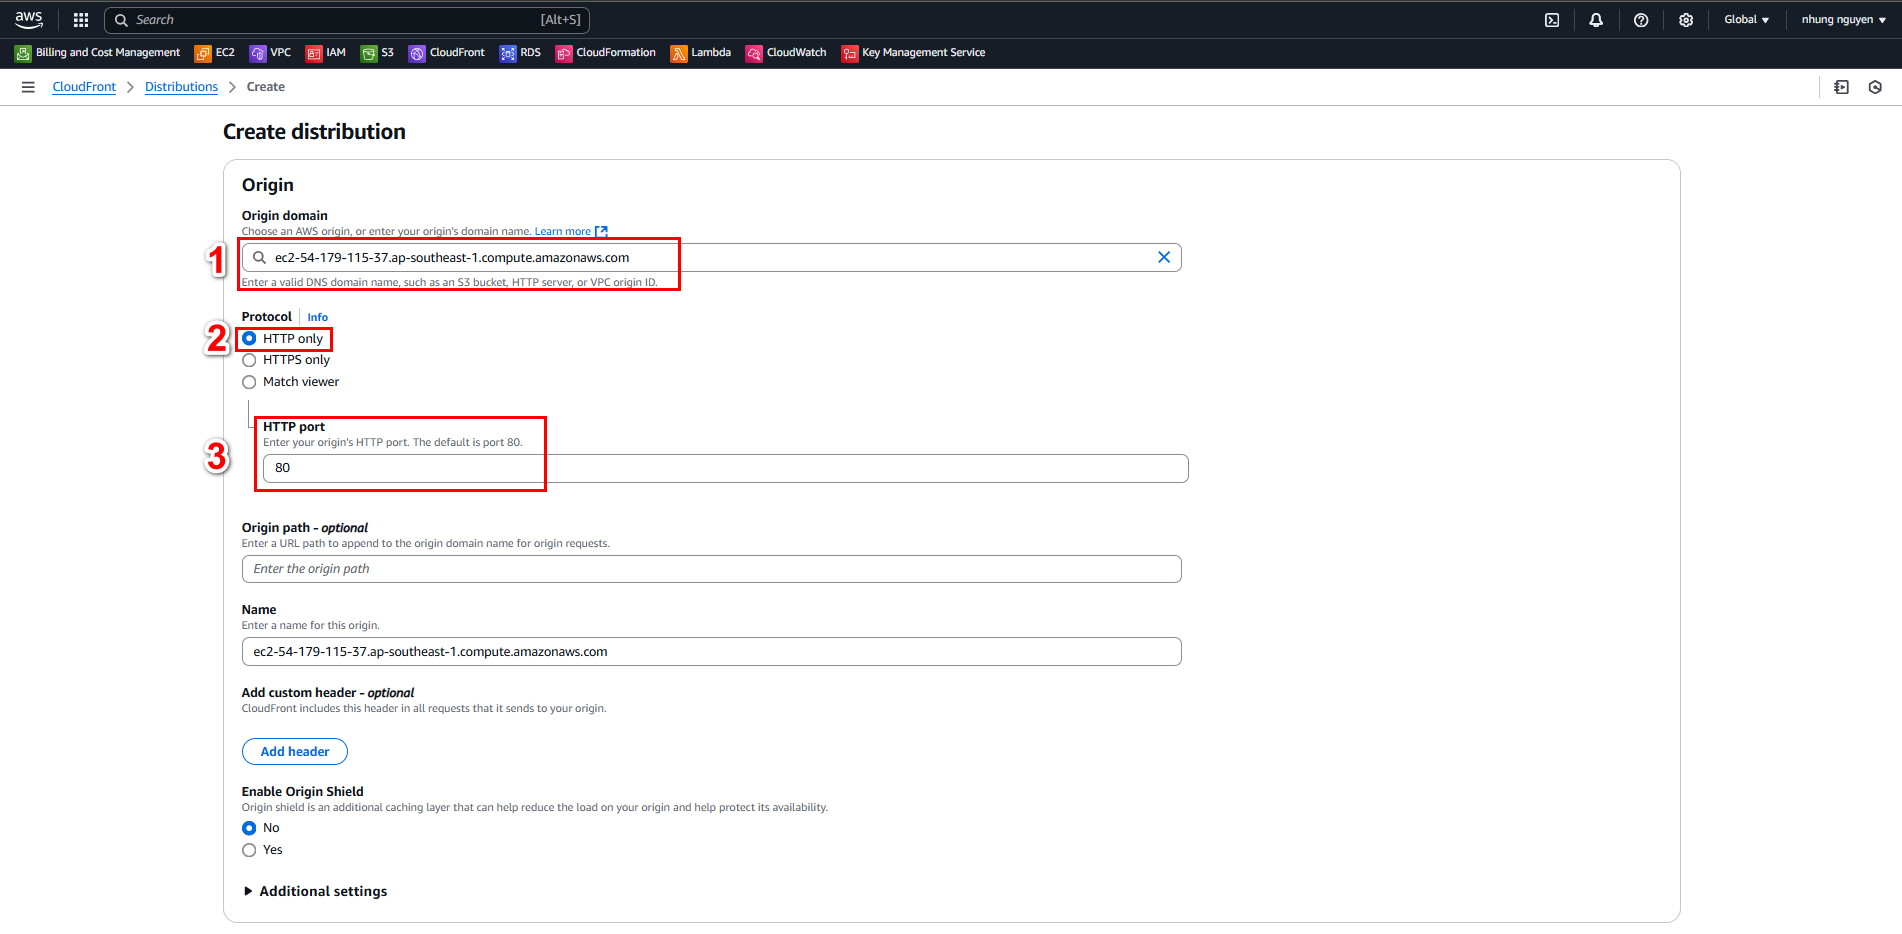
In Create distribution, select the following options:
- Origin domain: your-public-ipv4-dns-ec2
- Protocol: HTTP only
- HTTP Port: 80
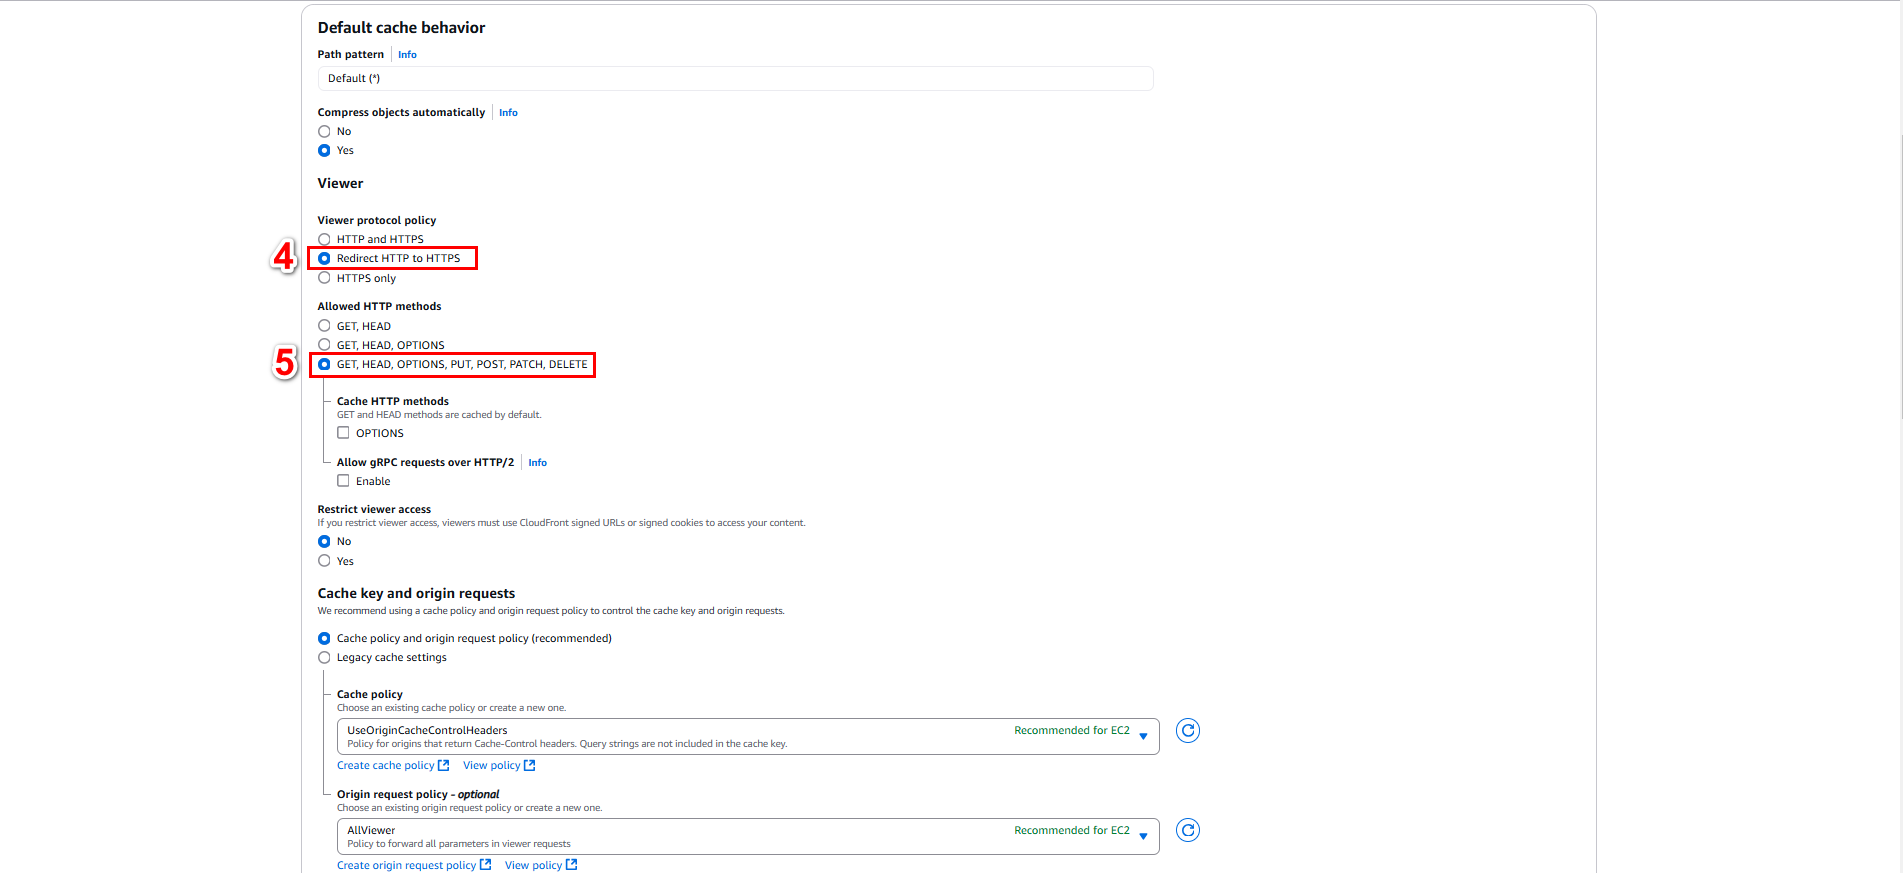
- Viewer protocol policy: HTTP and HTTPS
- Allowed HTTP methods: GET, HEAD, OPTIONS, PUT, POST, PATCH, DELETE
- Web Application Firewall (WAF): Do not enable security protections
- Then select Create distribution to create the distribution

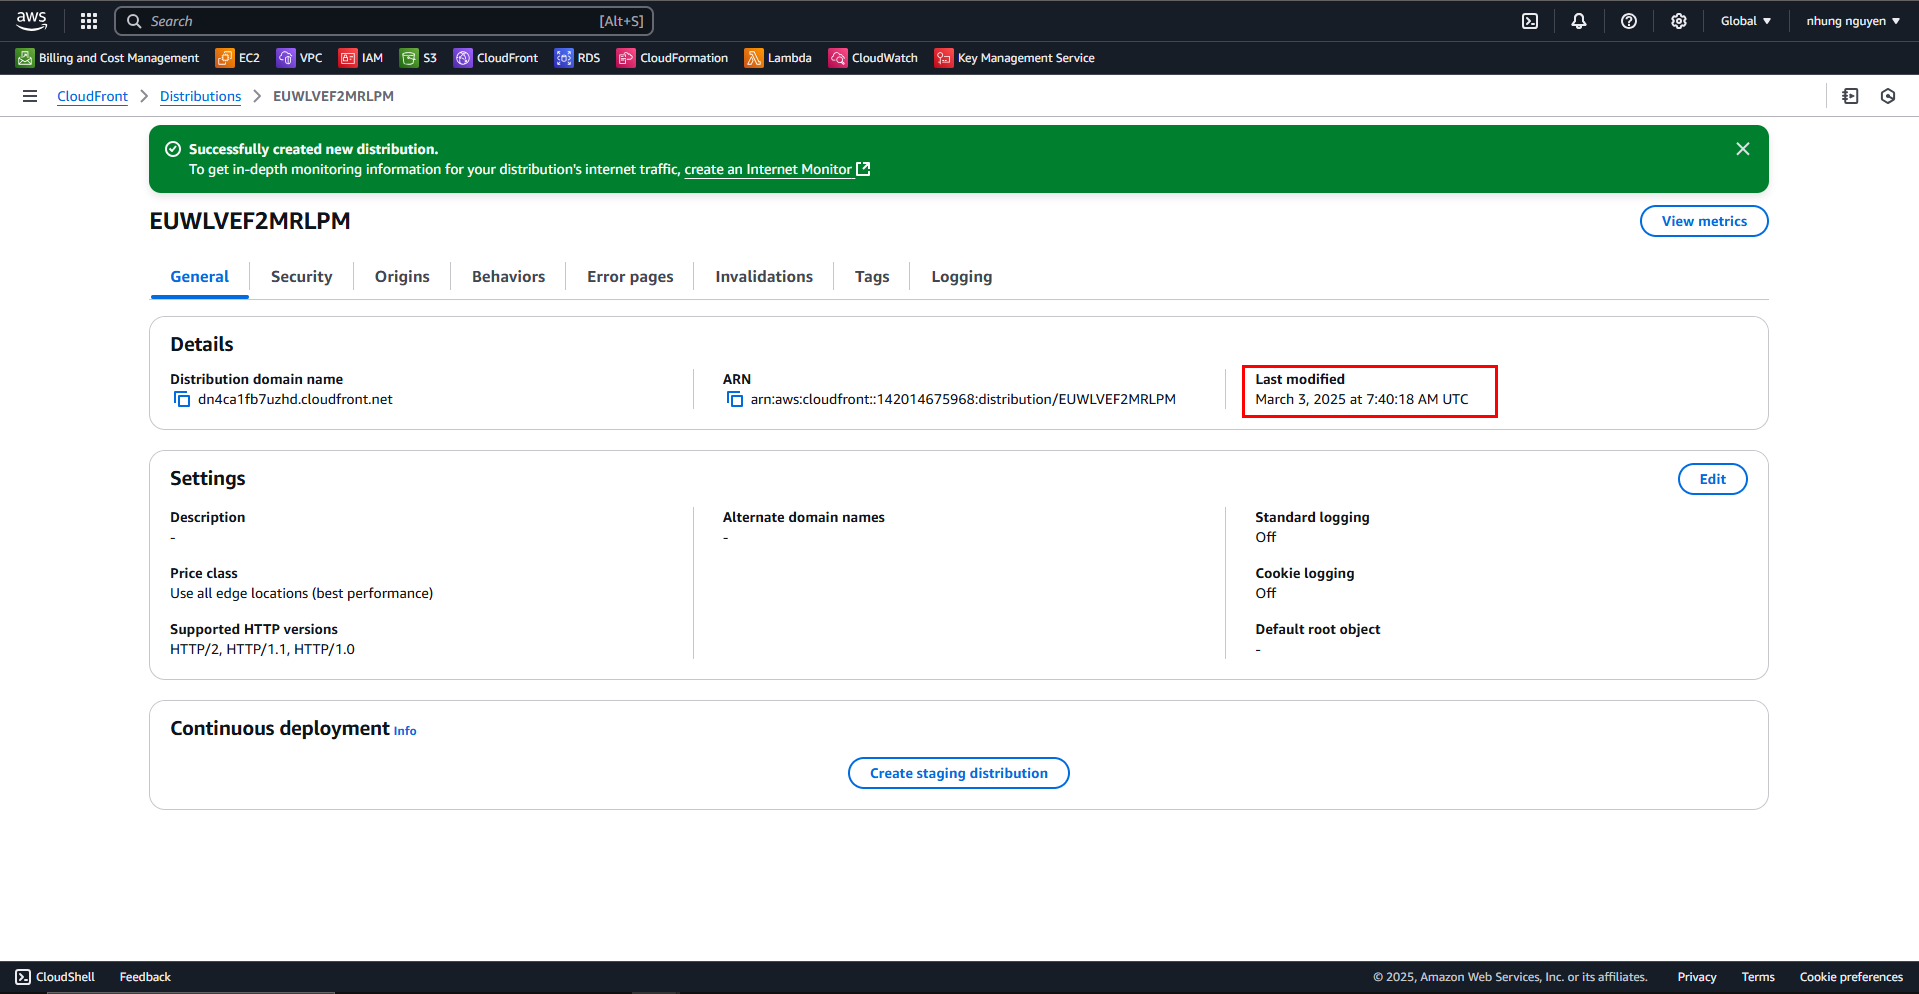
It will take about 5-10 minutes to create. Once successfully created, you will see Last modified
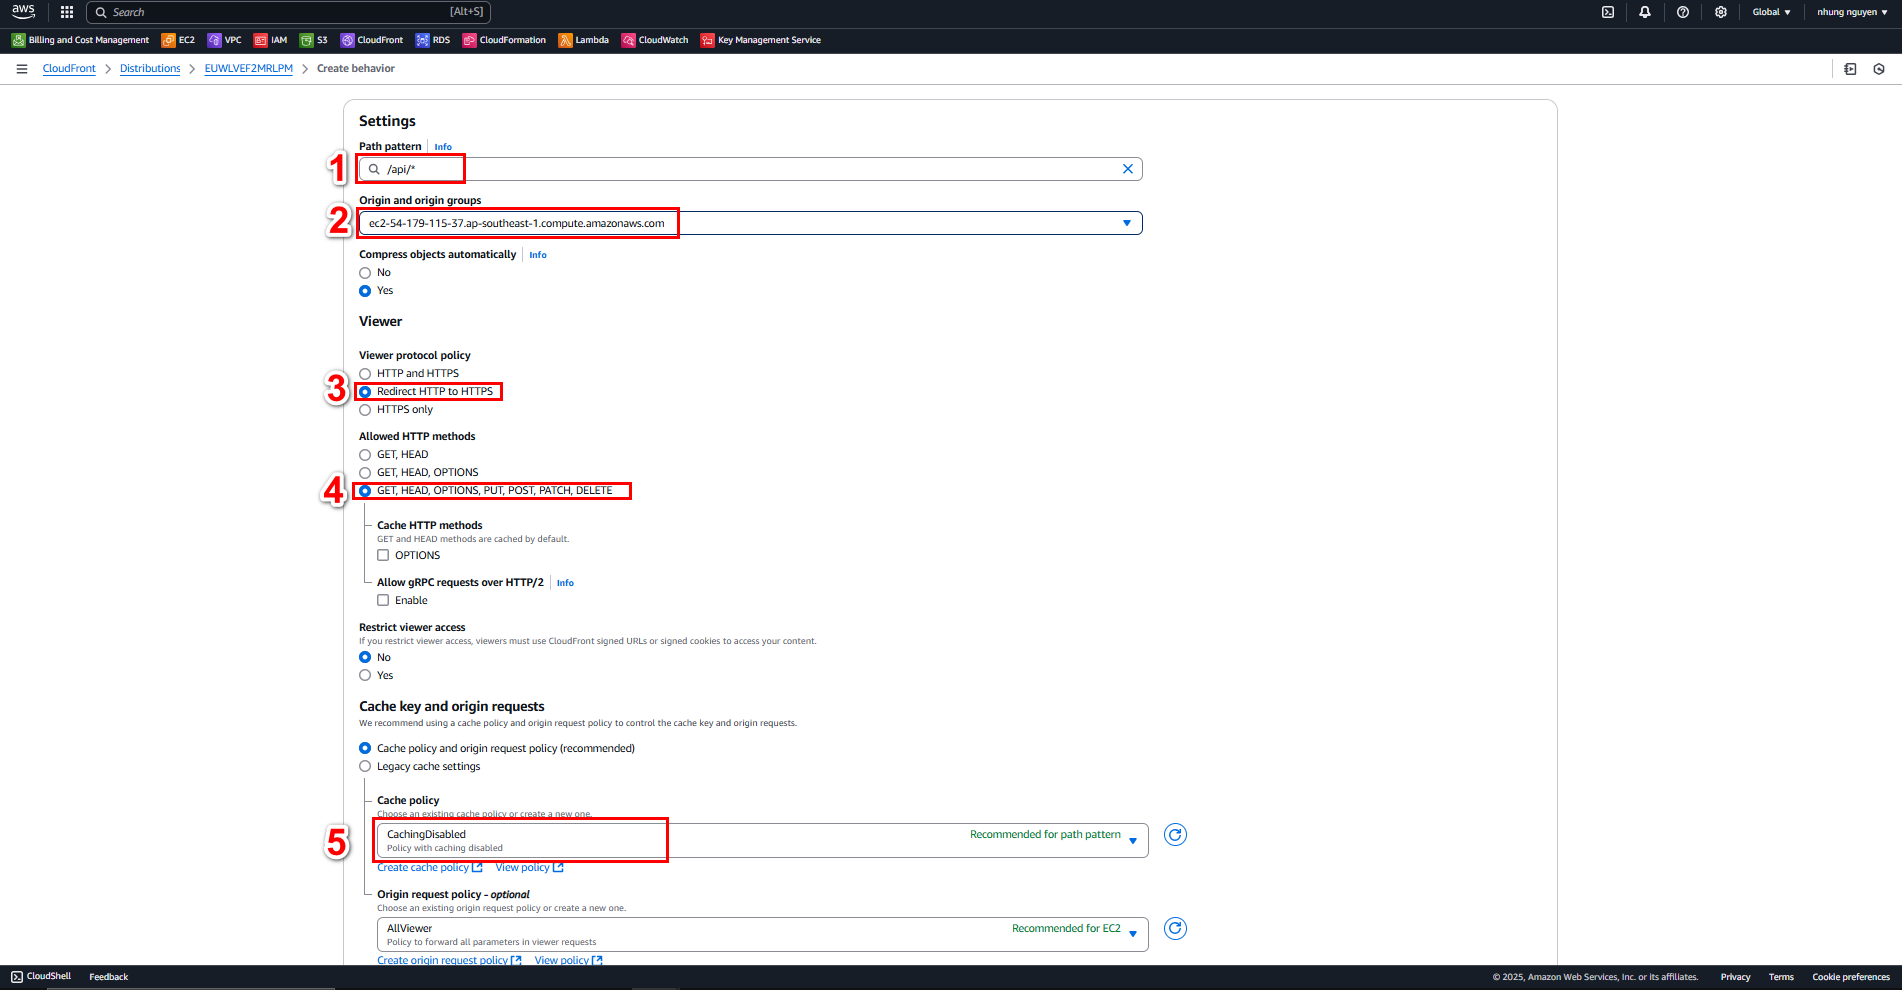
2. Create Behavior Route API
In the newly created distribution, go to the Behaviors tab
Click Create Behavior
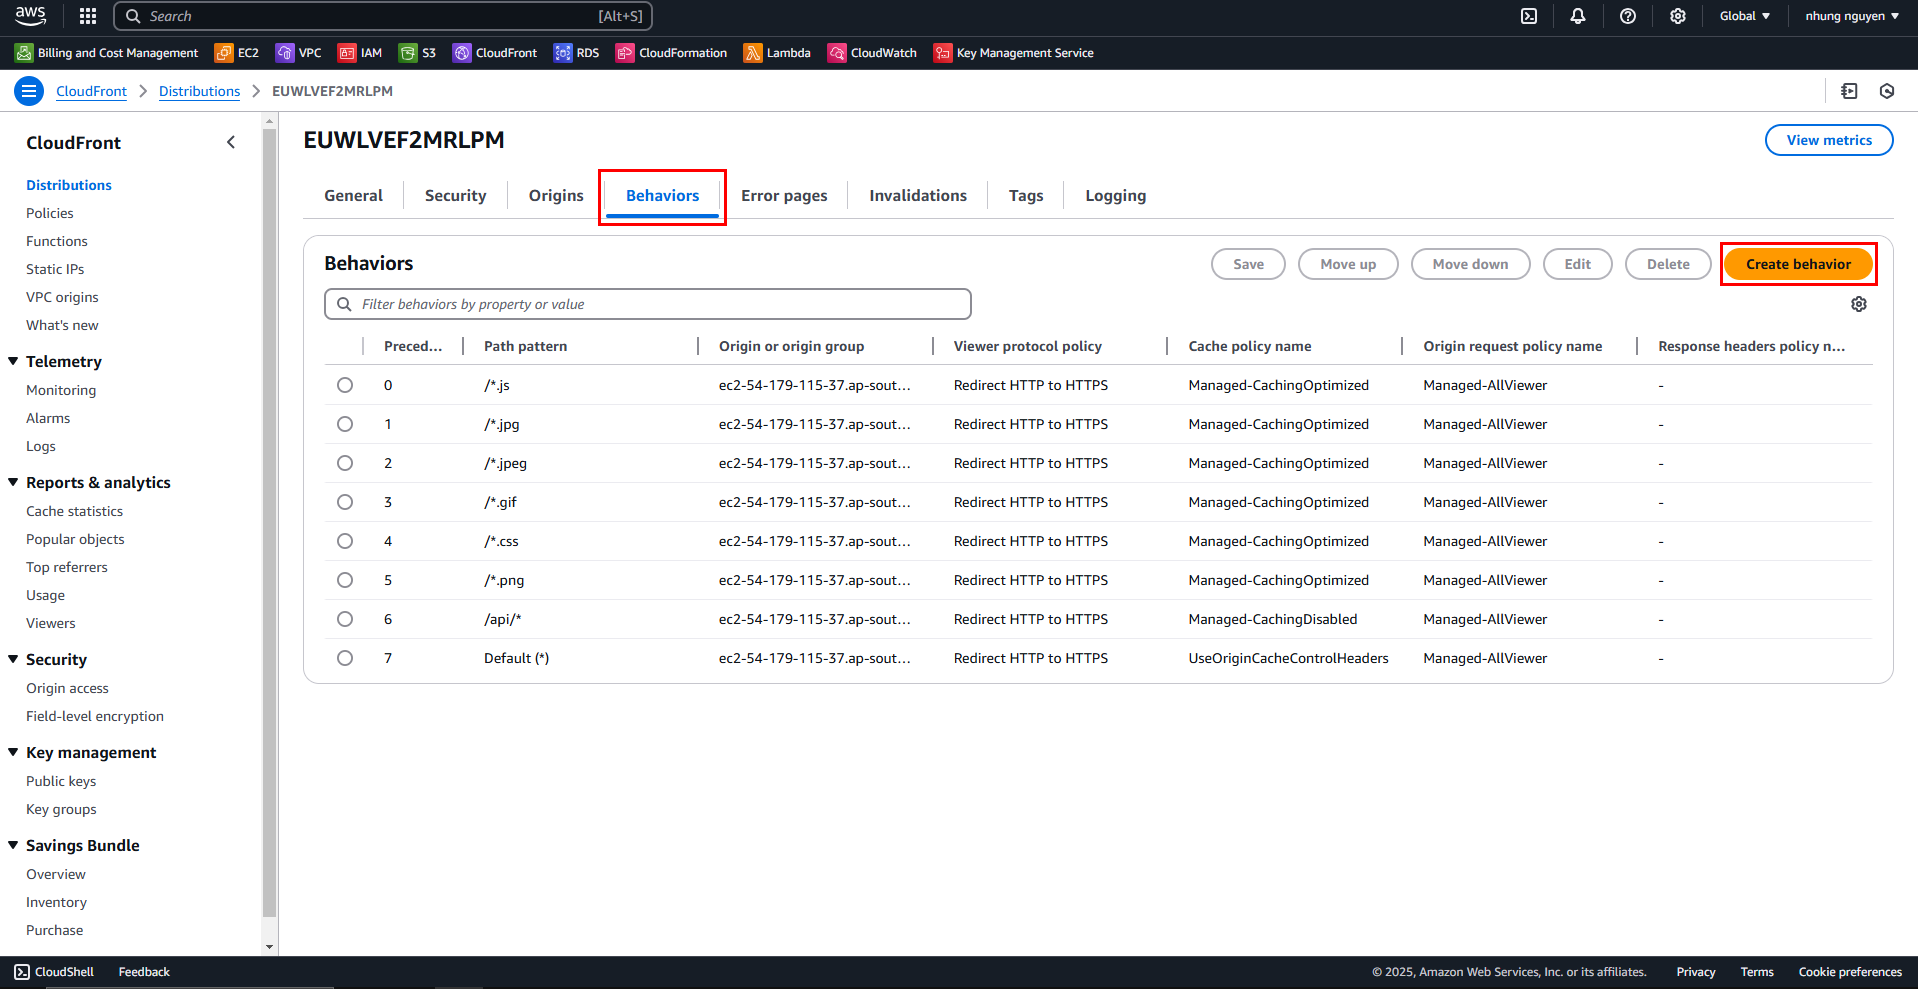
In Create behavior, fill in the following details:
- Path pattern:
/api/* - Origin: Select the EC2 instance you created
- Viewer Protocol Policy: Redirect HTTP to HTTPS
- Allowed HTTP Methods: GET, HEAD, OPTIONS, PUT, POST, PATCH, DELETE
- Cache Policy: CachingDisabled (to prevent API caching)
- Path pattern:
Click Create behavior
3. Update API URL in the .env File
Connect to EC2 using EC2 Instance Connect
Run the following command to open the .env file for editing
cd e-commerce-furniture
nano .env
In .env, update NEXT_PUBLIC_API_URL to the Distribution domain name of CloudFront, then press Ctrl + X -> Y -> Enter to save

After updating the .env file, run the following command to rebuild the project
npm run buildOnce the build is complete, restart pm2
pm2 restart all
4. Install Nginx
Reasons for using Nginx in this workshop:
Reverse Proxy:
Initially, the application runs on EC2 at port 3000. Nginx helps redirect (proxy_pass) requests from ports 80 or 443 to 3000, allowing access via the domain name or CloudFront without specifying a port
For example, after setup, you can access: http://your-ip-ec2 (without :3000). Nginx will automatically forward requests to localhost:3000 (where your application runs)
Install Nginx
sudo apt update
sudo apt install nginx -y
Configure Nginx to redirect CloudFront
Edit the Nginx config file:
sudo nano /etc/nginx/sites-available/defaultAdd the following:
server {
    listen 80;
    server_name _;

    location / {
        proxy_pass http://localhost:3000;
        proxy_http_version 1.1;
        proxy_set_header Upgrade $http_upgrade;
        proxy_set_header Connection 'upgrade';
        proxy_set_header Host $host;
        proxy_cache_bypass $http_upgrade;
    }
}
Save the file (Ctrl + X → Y → Enter)
Check for configuration errors
sudo nginx -tIf no errors are found, restart Nginx
sudo systemctl restart nginx
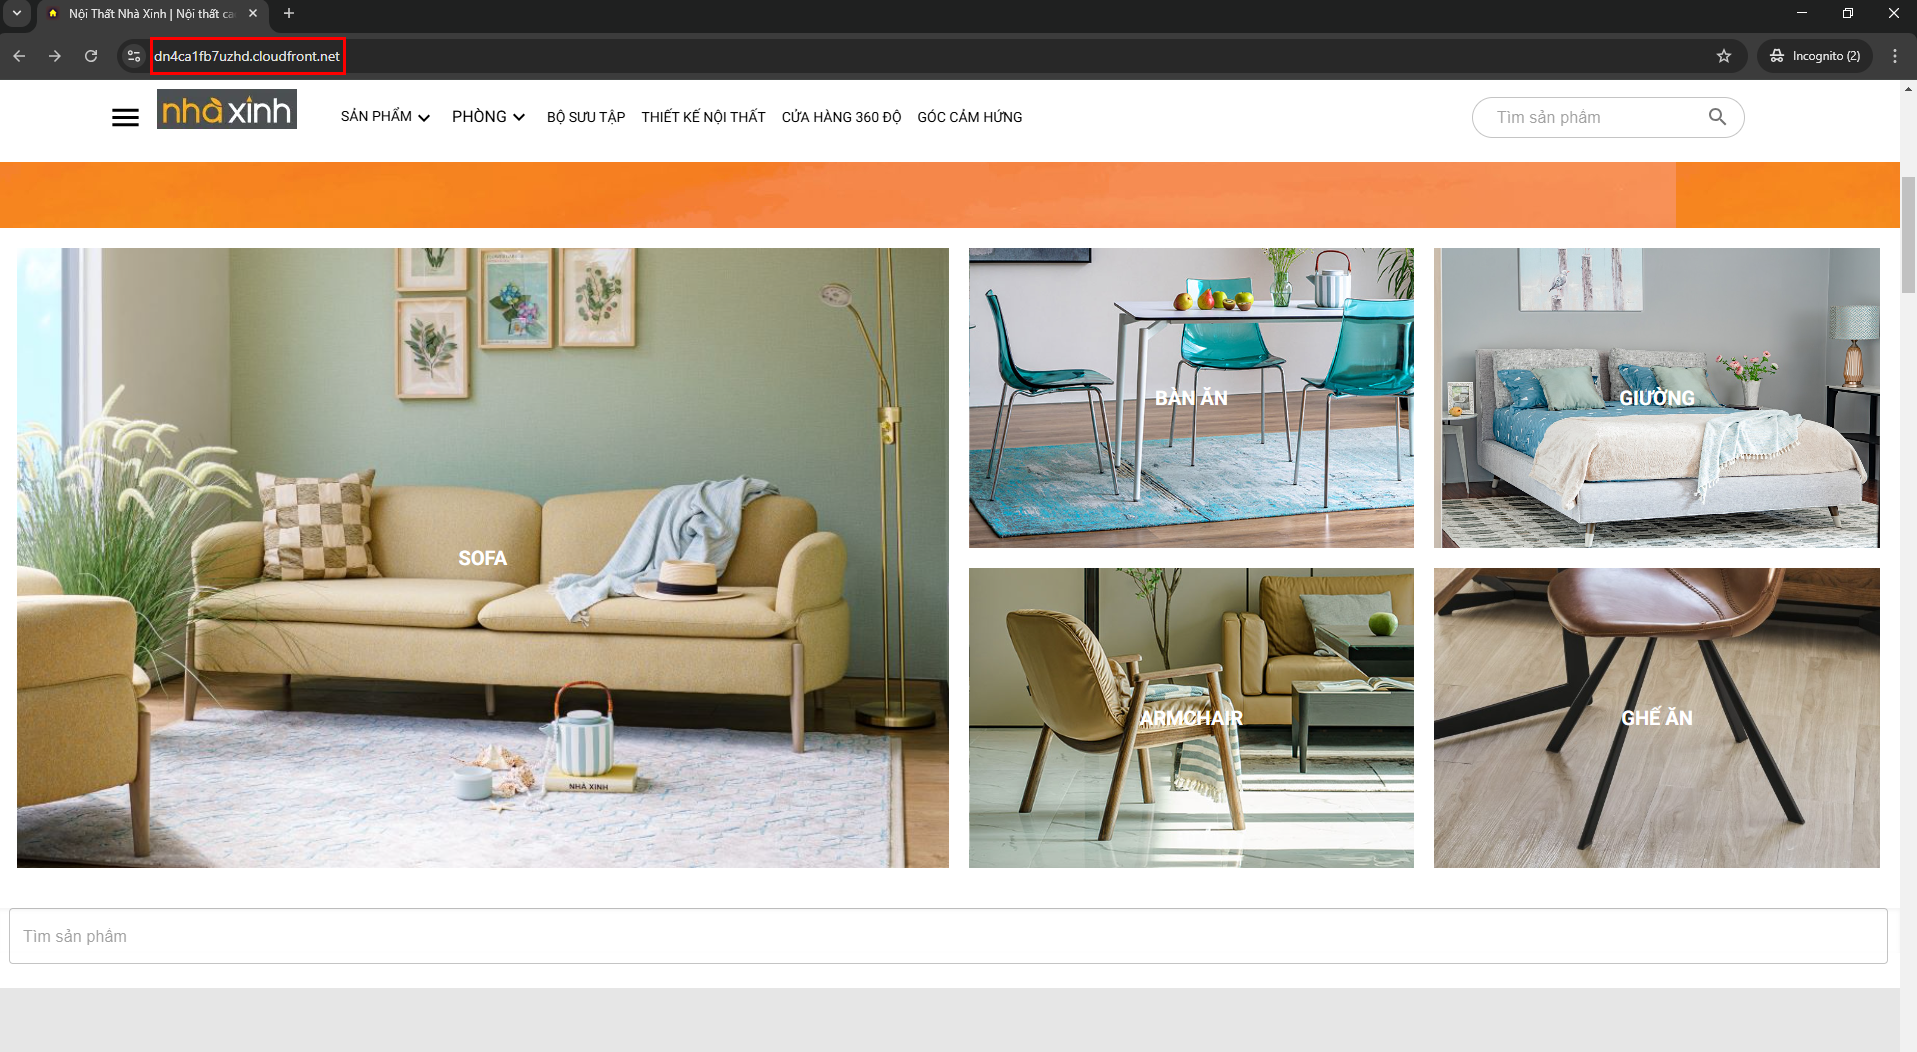
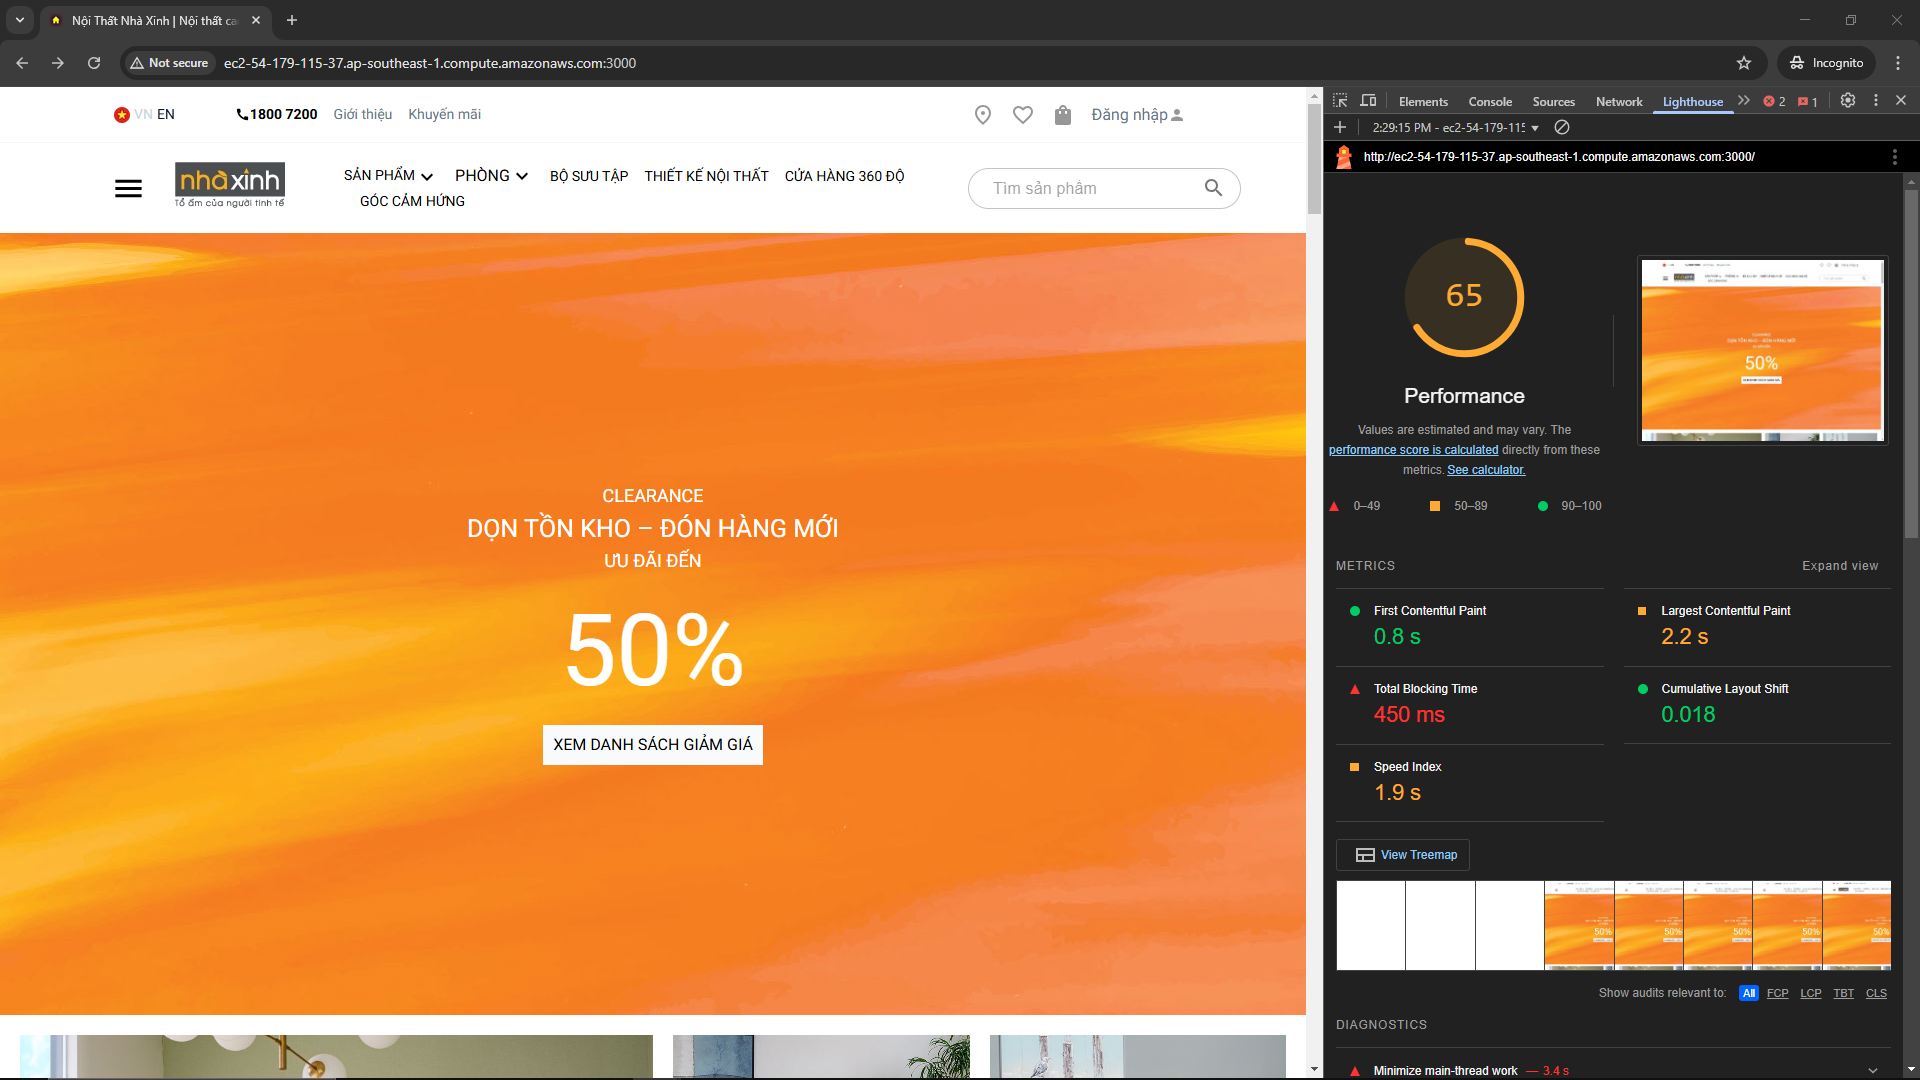
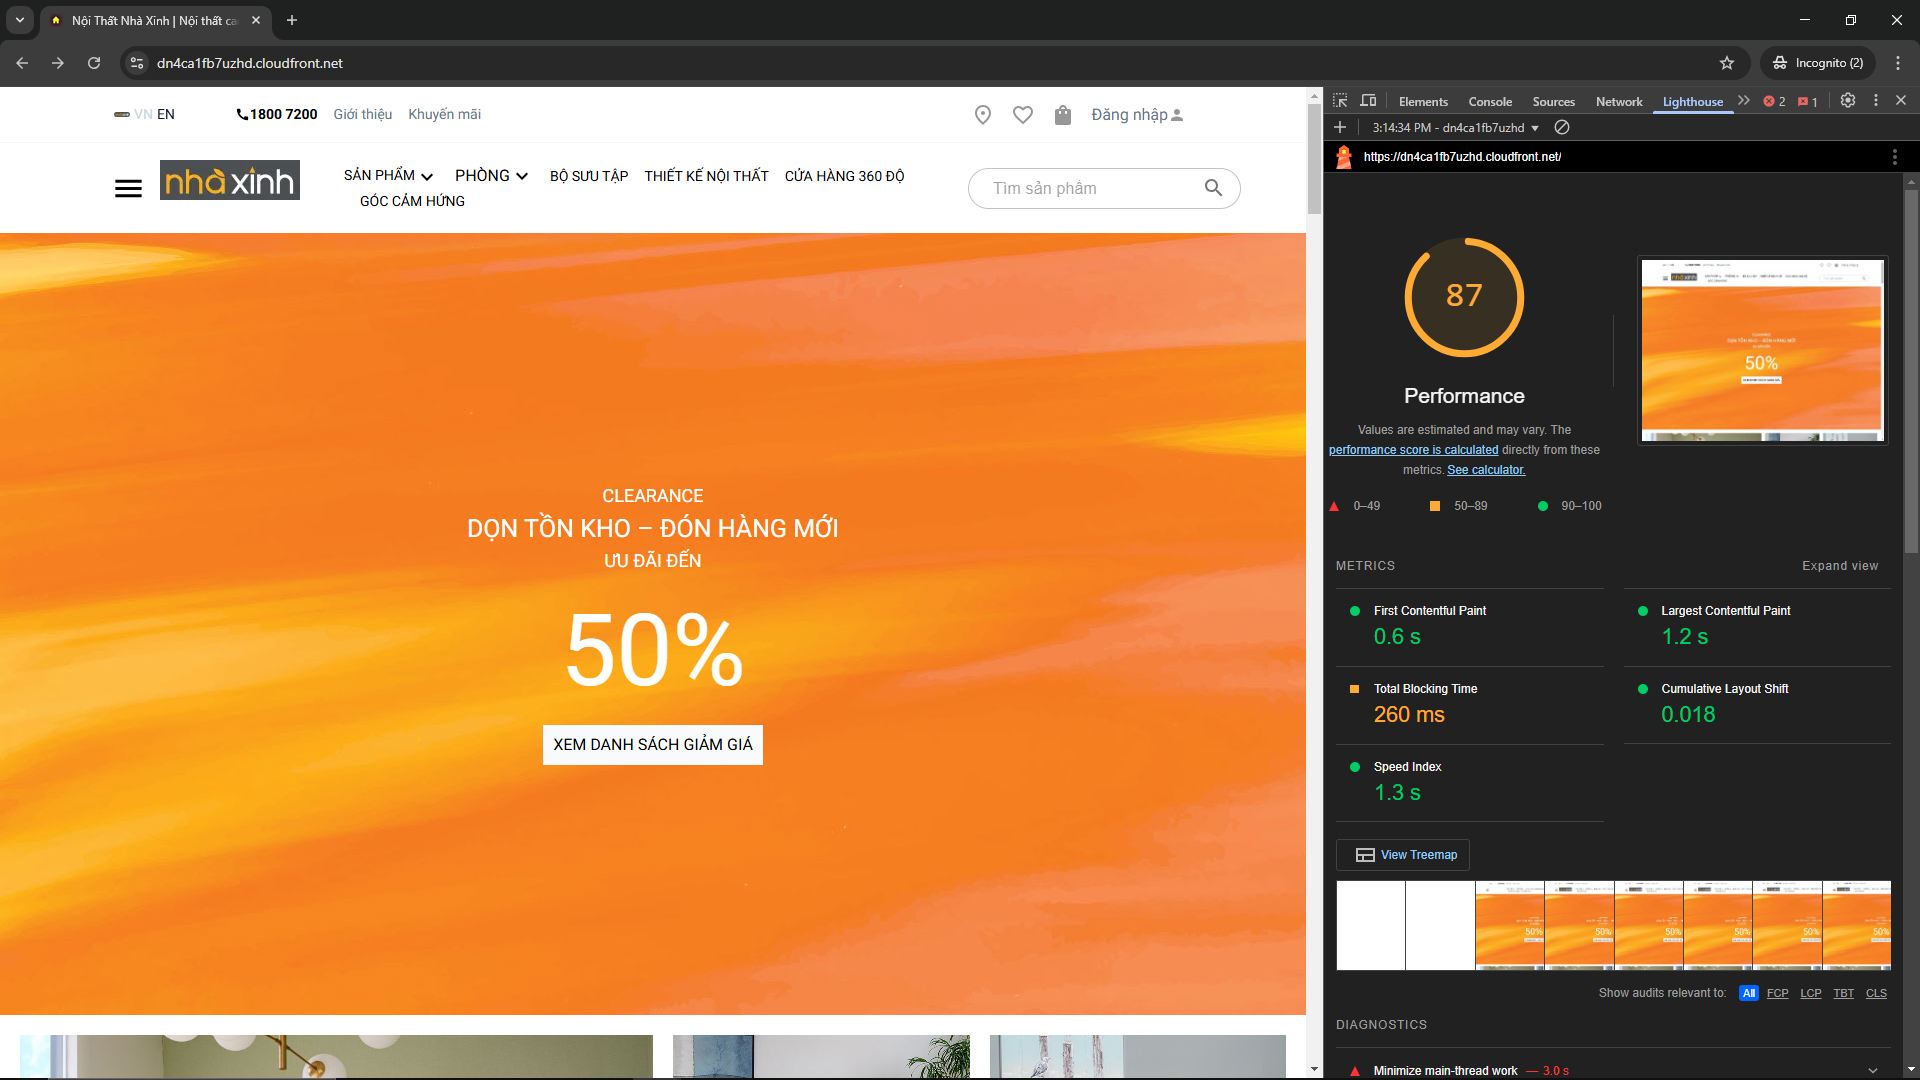
5. Test the Setup
- Copy Distribution domain name and paste it into a new browser tab
We can compare the performance between EC2 (left) and CloudFront (right) -> CloudFront has optimized the performance over EC2
 |  |
|---|