Create EC2 Instance
Amazon EC2
Amazon Elastic Compute Cloud (Amazon EC2) is a cloud computing infrastructure provided by Amazon Web Services (AWS) that offers on-demand virtual computing resources.
Amazon EC2 Instance
An Amazon EC2 Instance is a cloud server. With an AWS account, you can create and use multiple Amazon EC2 Instances. These instances run on the same physical server and share memory, CPU, storage, etc.
EC2 Deployment Model in the Workshop
In this workshop, we will initialize an EC2 Instance to run a Next.js Fullstack application with API Routes. EC2 will act as an Application Server handling both the Frontend and Backend.
Why choose t2.medium:
- Balanced performance and cost:
- t2.medium provides 2 vCPUs and 4GB RAM, sufficient to run a Next.js Fullstack application (including API Routes).
- t2.medium provides 2 vCPUs and 4GB RAM, sufficient to run a Next.js Fullstack application (including API Routes).
- Supports Burstable Performance: T2 instances are Burstable Performance Instances, meaning they can increase CPU performance when needed.
- Scalability: If expansion is needed, switching to t3.medium or m5.large is easy without changing the architecture.
In this workshop, we will choose the t2.medium instance on an On-Demand basis in the ap-southeast-1 (Singapore) region
| On-Demand hourly rate | vCPU | Memory |
|---|---|---|
| $0.0584 | 2 | 4 GiB |
Why Choose On-Demand Instances: Pay per use without long-term commitments.
Estimated Cost Using On-Demand:
- t2.medium (2 vCPUs, 4GB RAM): $0.0584/hour
- If running 24/7 (730 hours/month): ~$42.63/month
👉 Cost Optimization: Only turn on EC2 when needed, turn it off when not in use.
Create an EC2 Instance
1. Access AWS Console
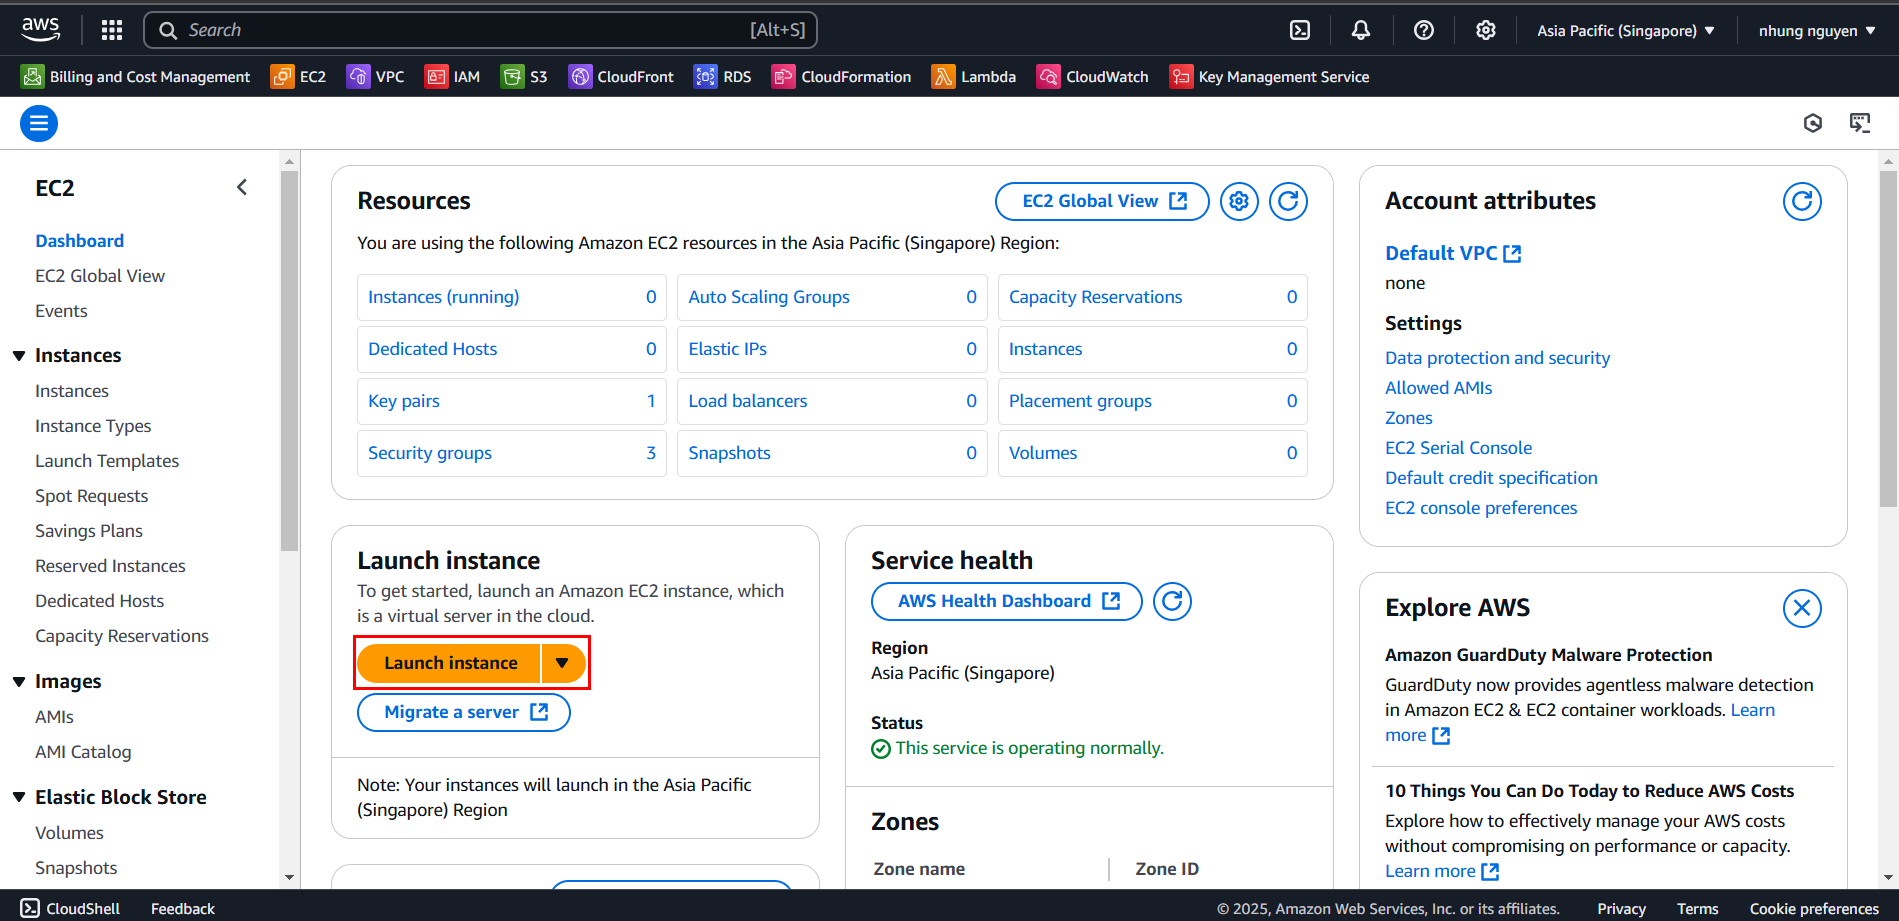
- Open a browser and go to the Amazon EC2 console at https://console.aws.amazon.com/ec2/.
2. In the Dashboard, select Launch instance
3. Name the Instance
In the Name and tags section:
Name:
nextjs-ec2
4. Select an Image (Amazon Machine Image - AMI)
Under Application and OS Images (Amazon Machine Image), follow these steps:
Select Quick Start, then choose Ubuntu. This is the operating system (OS) for your instance.
From Amazon Machine Image (AMI), select Ubuntu 24.04 LTS HVM. Note that this AMI is marked as Free tier eligible. An Amazon Machine Image (AMI) is a base configuration used as a template for your instance.

5. Choose an Instance Type
- In Instance type, select t2.medium, then under Key pair (login), select Create new key pair
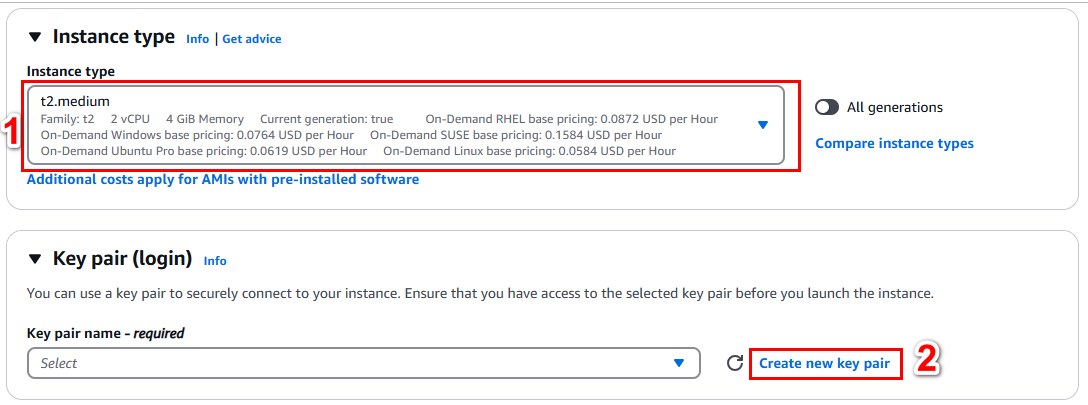
6. Create a Key Pair
In Create key pair, enter the following information:
Key pair name:
nextjs-kpKey pair type: Select RSA
Private key file format: .pem
Then click Create key pair. A .pem file will automatically be downloaded to your computer
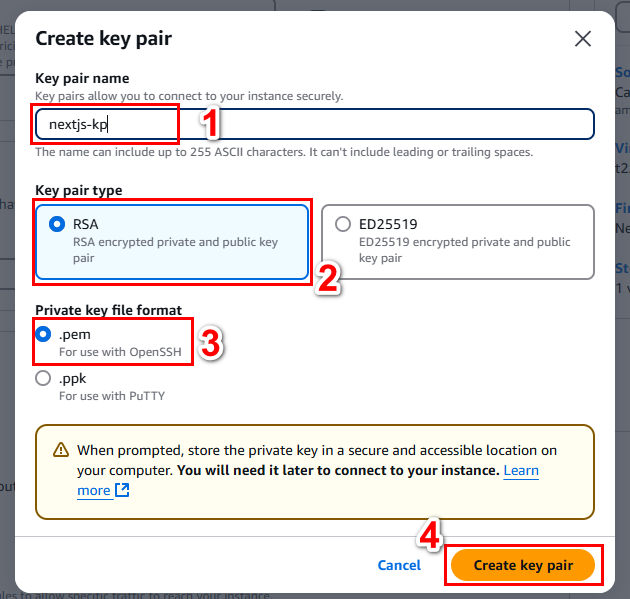
Warning: Do not select Proceed without a key pair (Not recommended). If you create an instance without a key pair, you will not be able to connect to it.
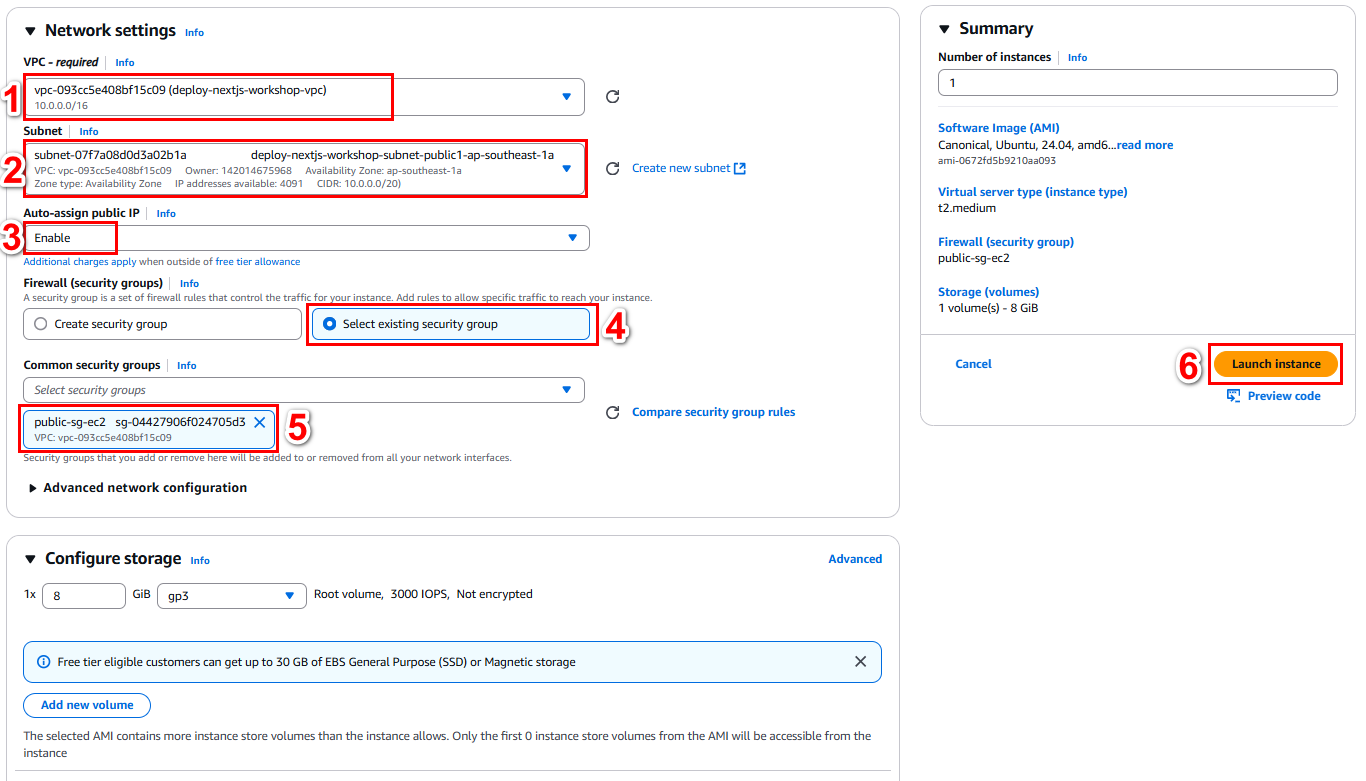
7. Configure Security Group
In Network settings, click Edit next to it. For Security group name, select a security group that you created during setup by following these steps:
Select Select existing security group.
From Common security groups, choose your security group from the list.
Confirm and launch the instance.
Keep the default selections for other instance settings.
Review the instance configuration summary in Summary, and when ready, click Launch instance.
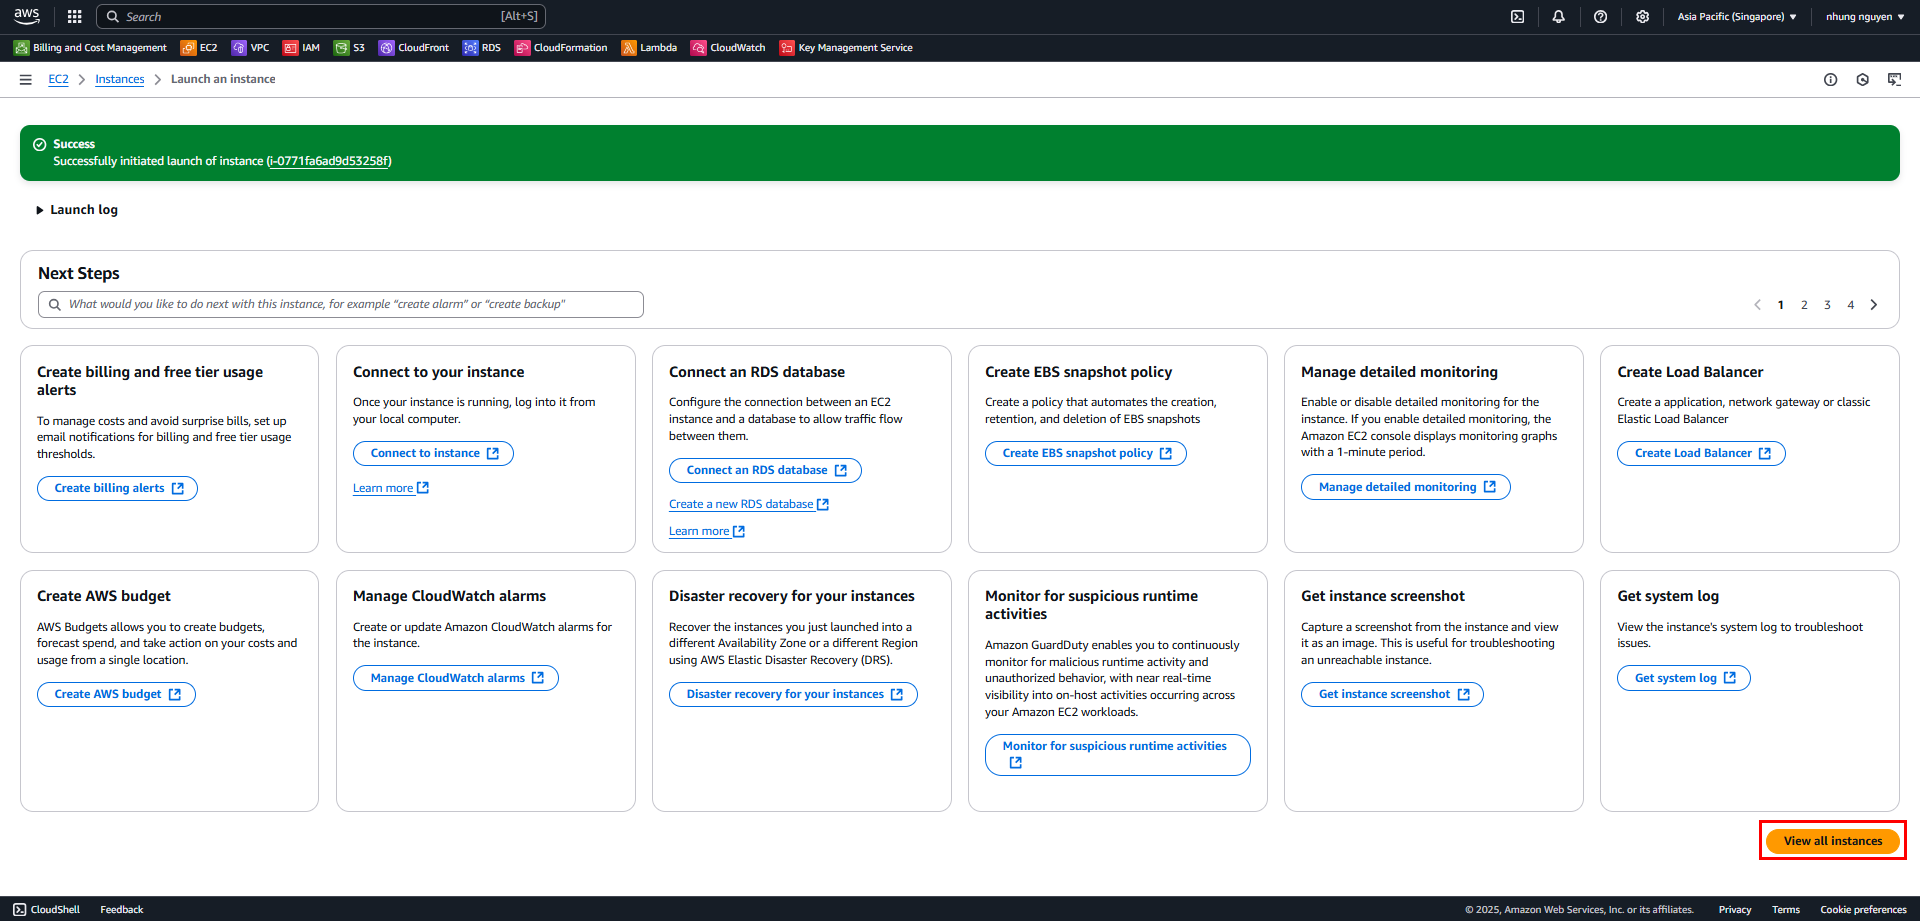
8. Confirm and Check Status
A notification page will appear indicating that your instance is launching. Click View all instances to return to the console.
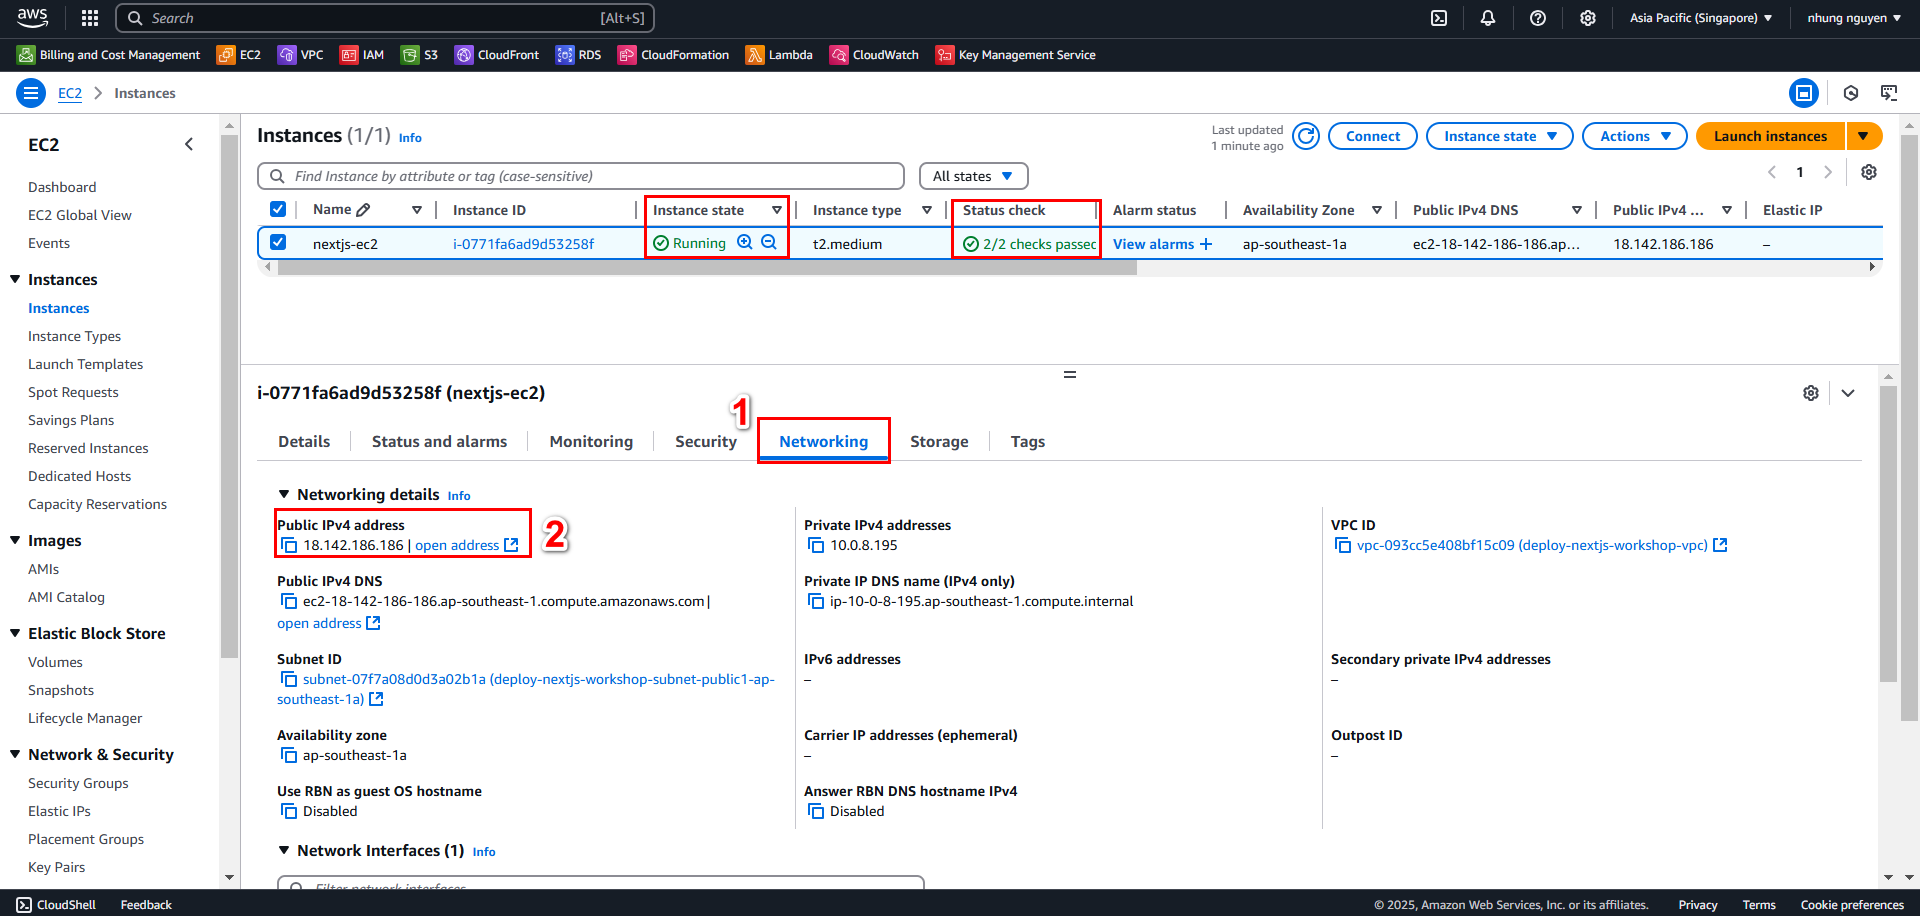
In the Instances screen, check the EC2 status:
pending → booting up
running → successfully started, has a Public DNS
Wait a few minutes for EC2 to be ready, check Status check to ensure stability.
View the Public IPv4 at EC2 Instance > Networking > Public IPv4 Address.
9. Connecting via EC2 Instance
Select the created EC2 Instance, then choose Connect

In the Connect to instance interface, select the EC2 Instance Connect tab and click Connect
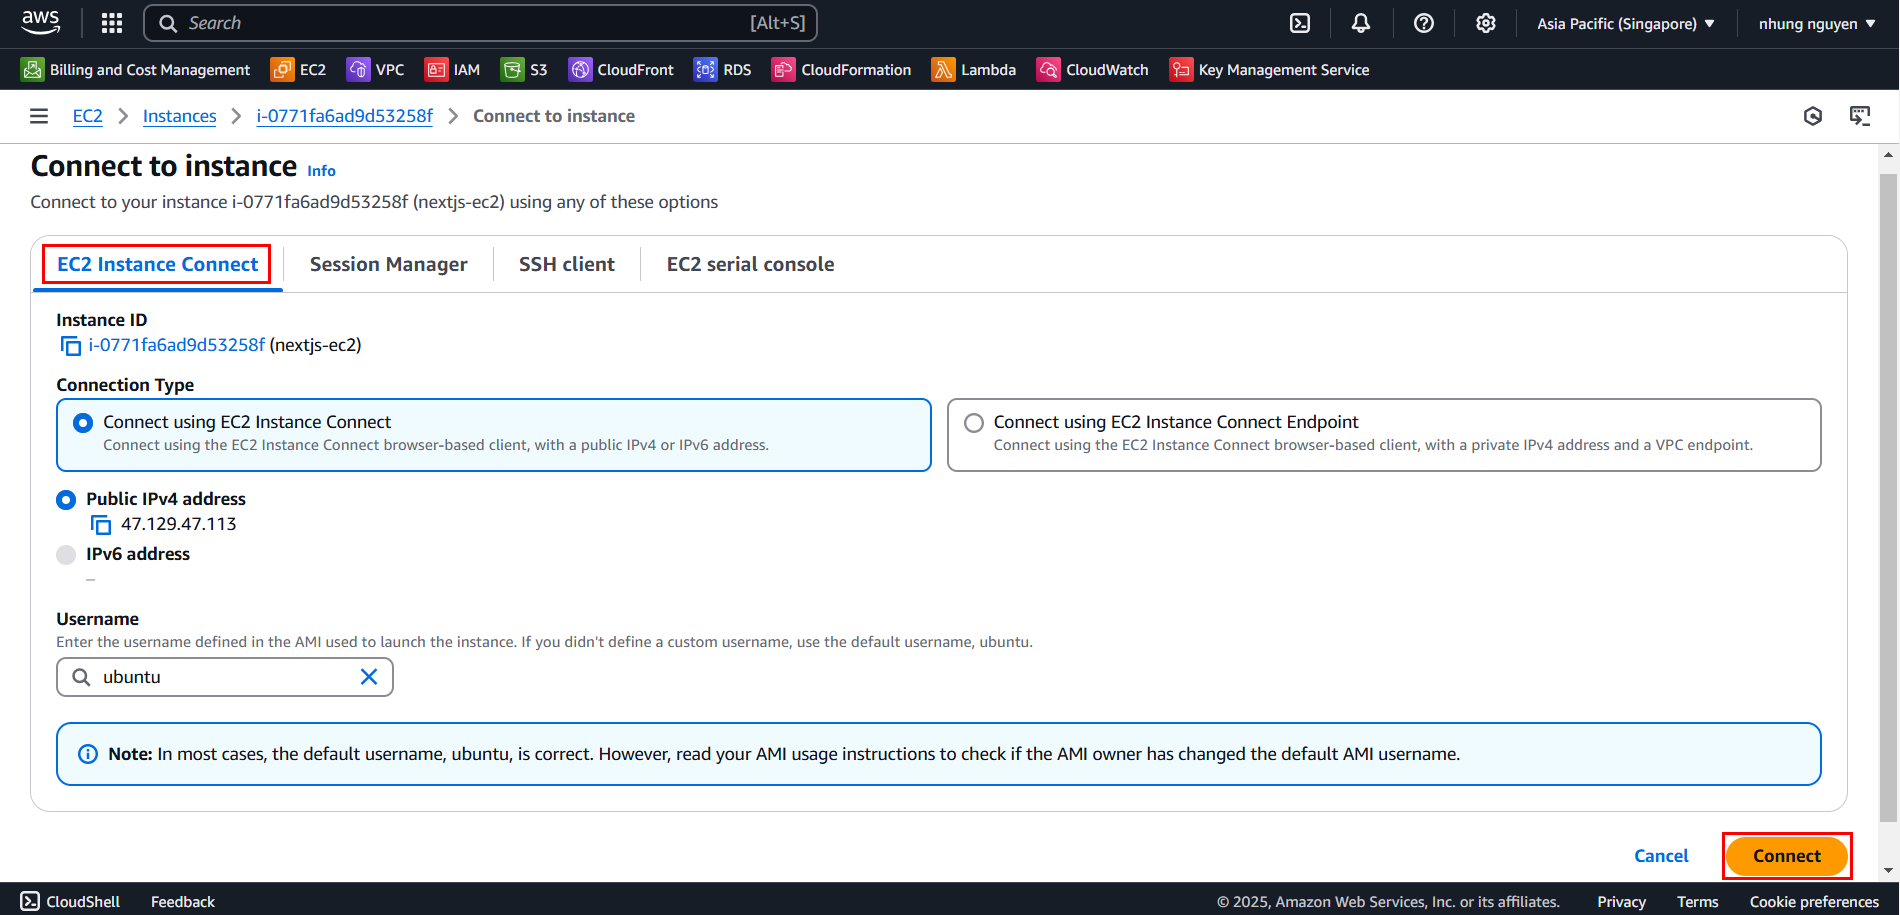
Successfully connected
