Create a VPC Instance
Pricing for VPC
There is no cost associated with using VPC itself. However, charges apply for VPC-related services, such as NAT Gateways, IP Address Manager, traffic mirroring, Reachability Analyzer, and Network Access Analyzer.
Create a VPC Instance
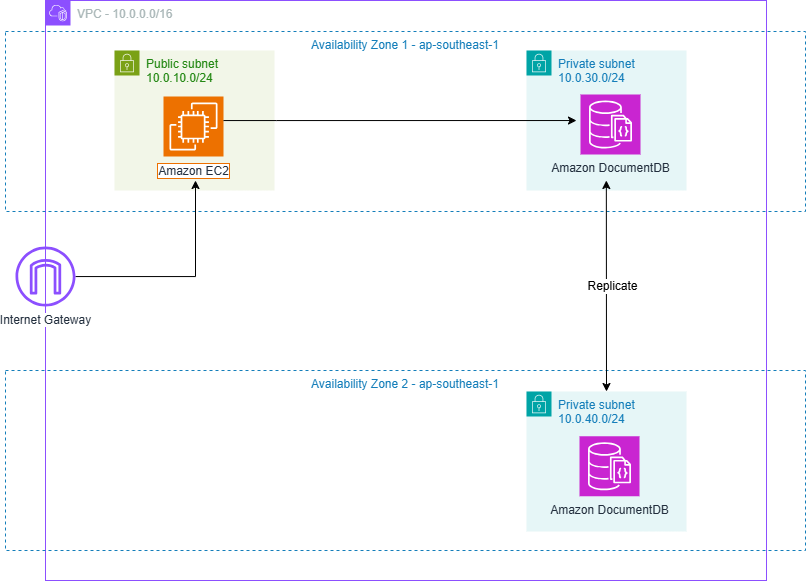
In this section, we will create a VPC Instance, which includes 2 Availability Zones (AZs), 2 Public Subnets and 2 Private Subnets.
1. Create the VPC Instance
Go to Your VPCs, and
Select Create VPC.
In the VPC Settings, choose the option VPC and more.
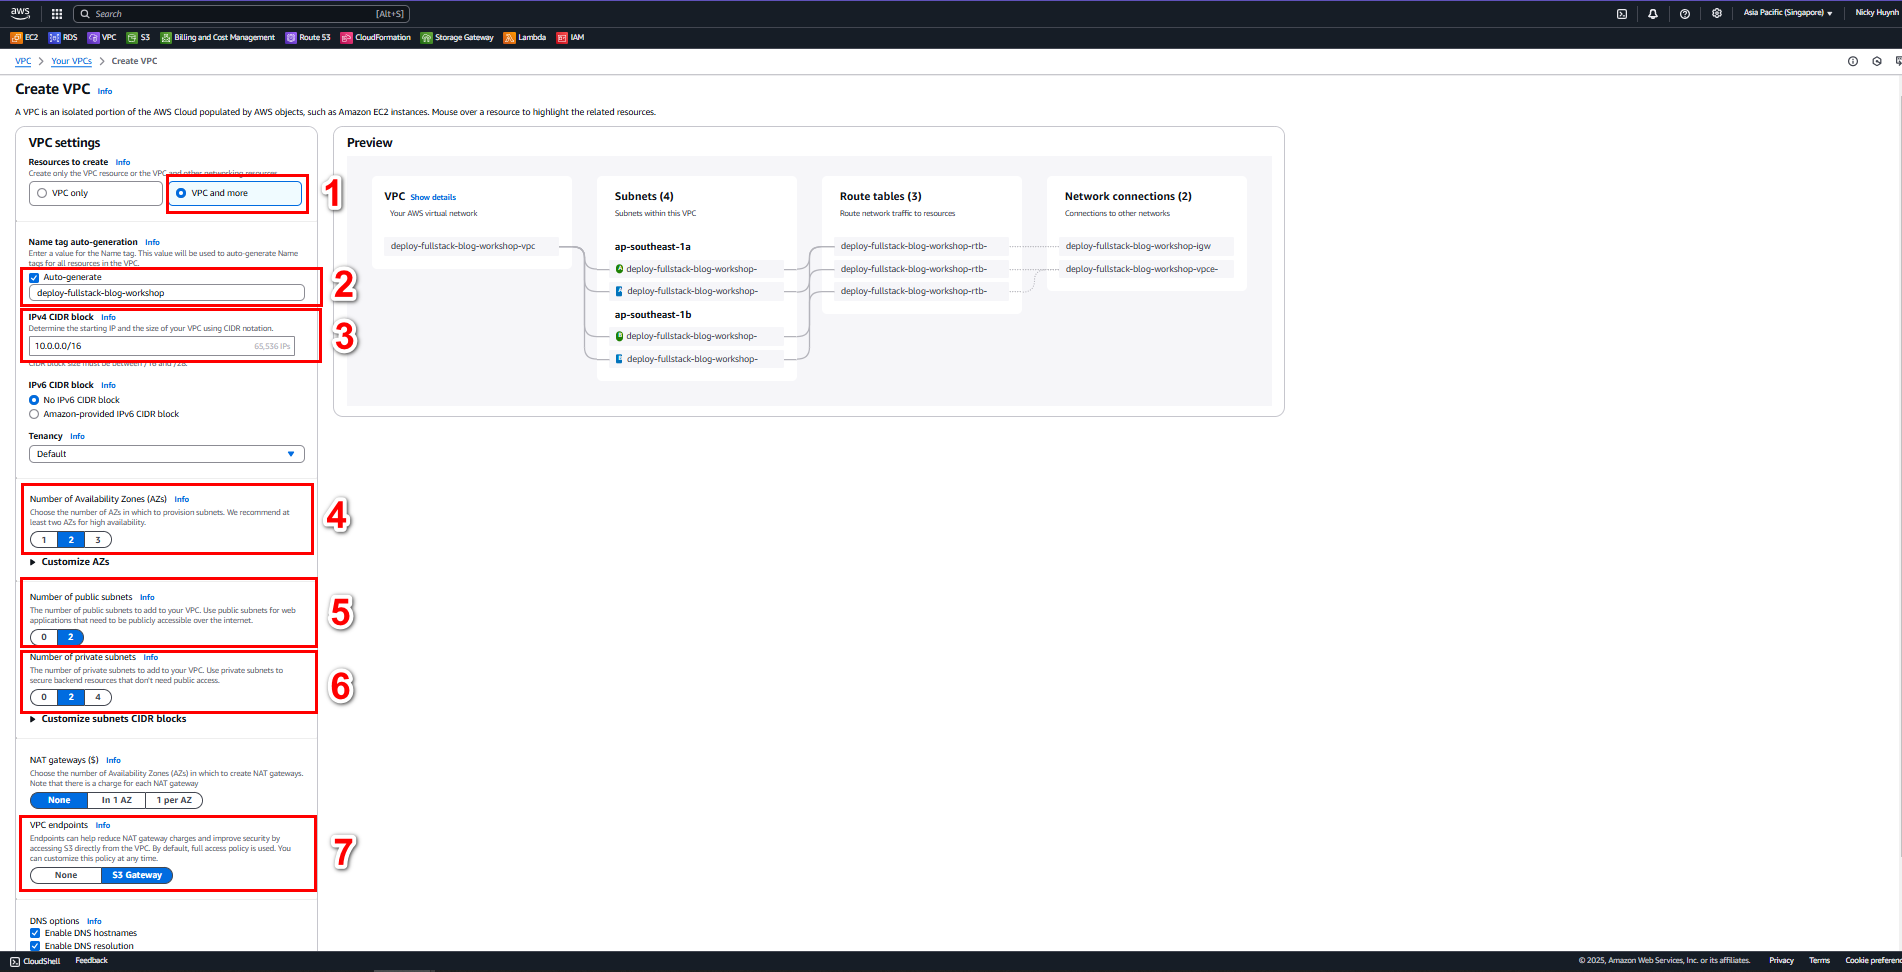
Enter a name tag and leave other fields as default, then click Create VPC.
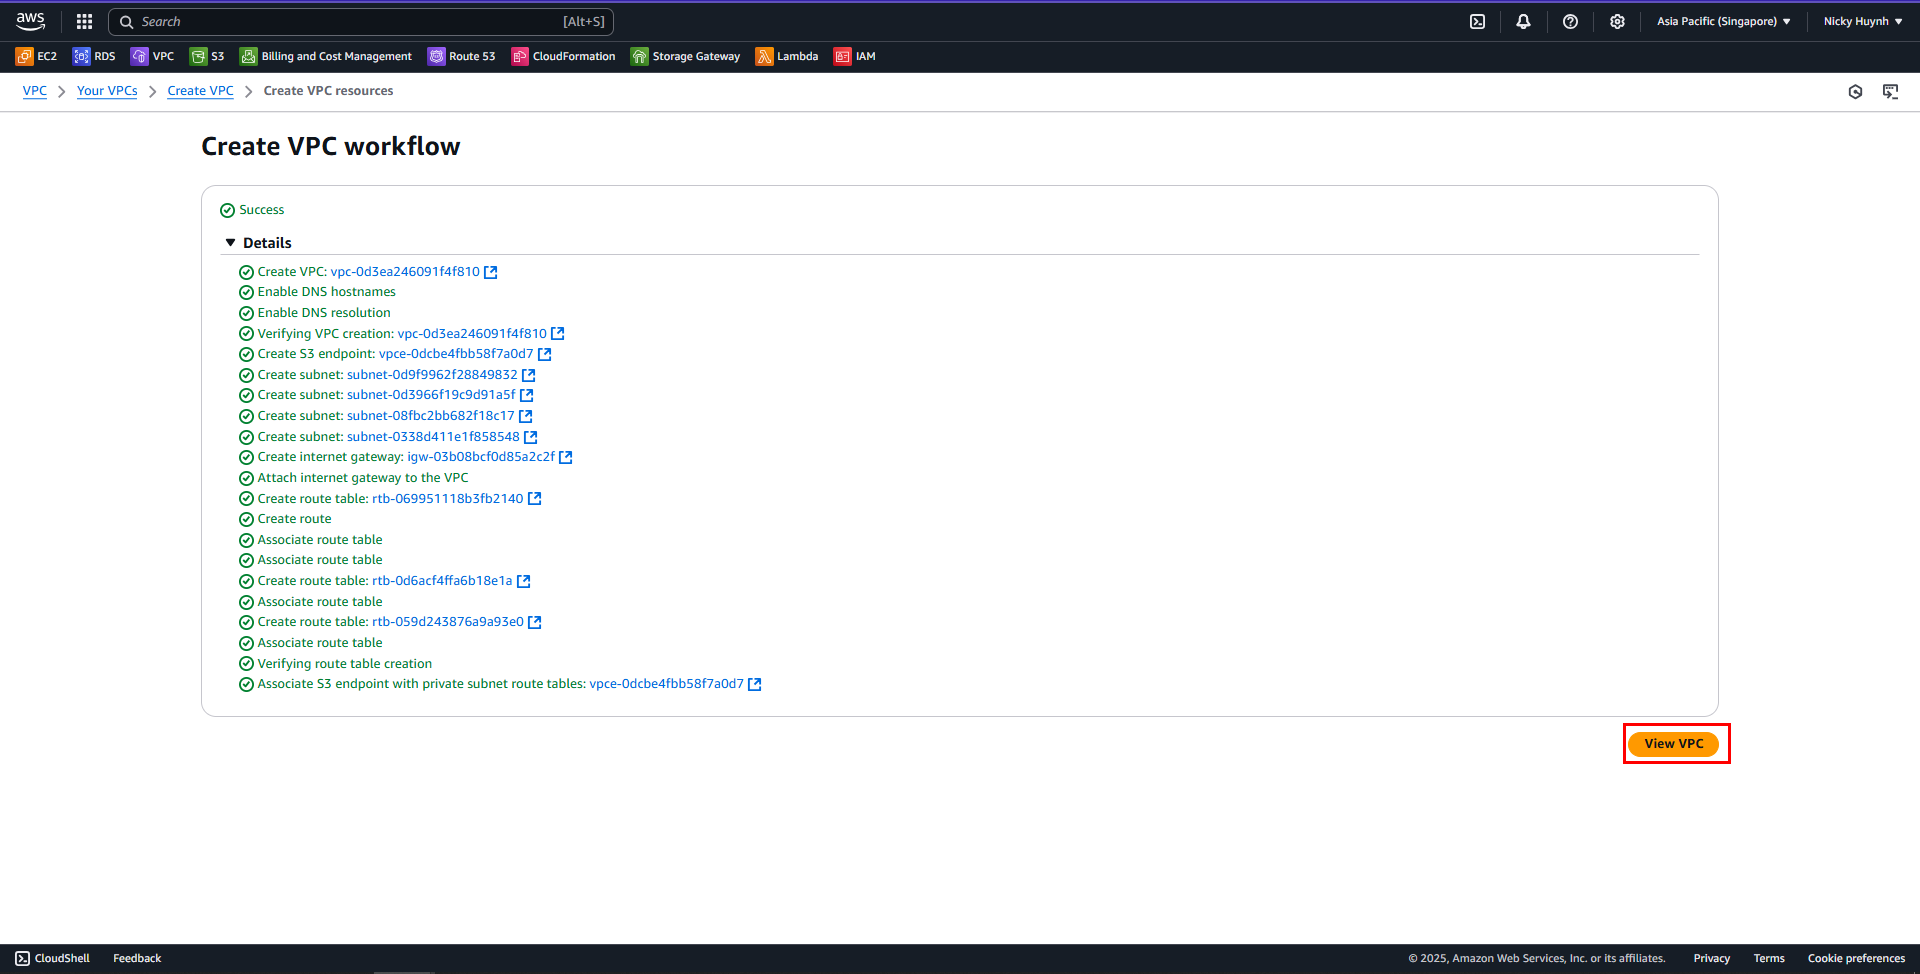
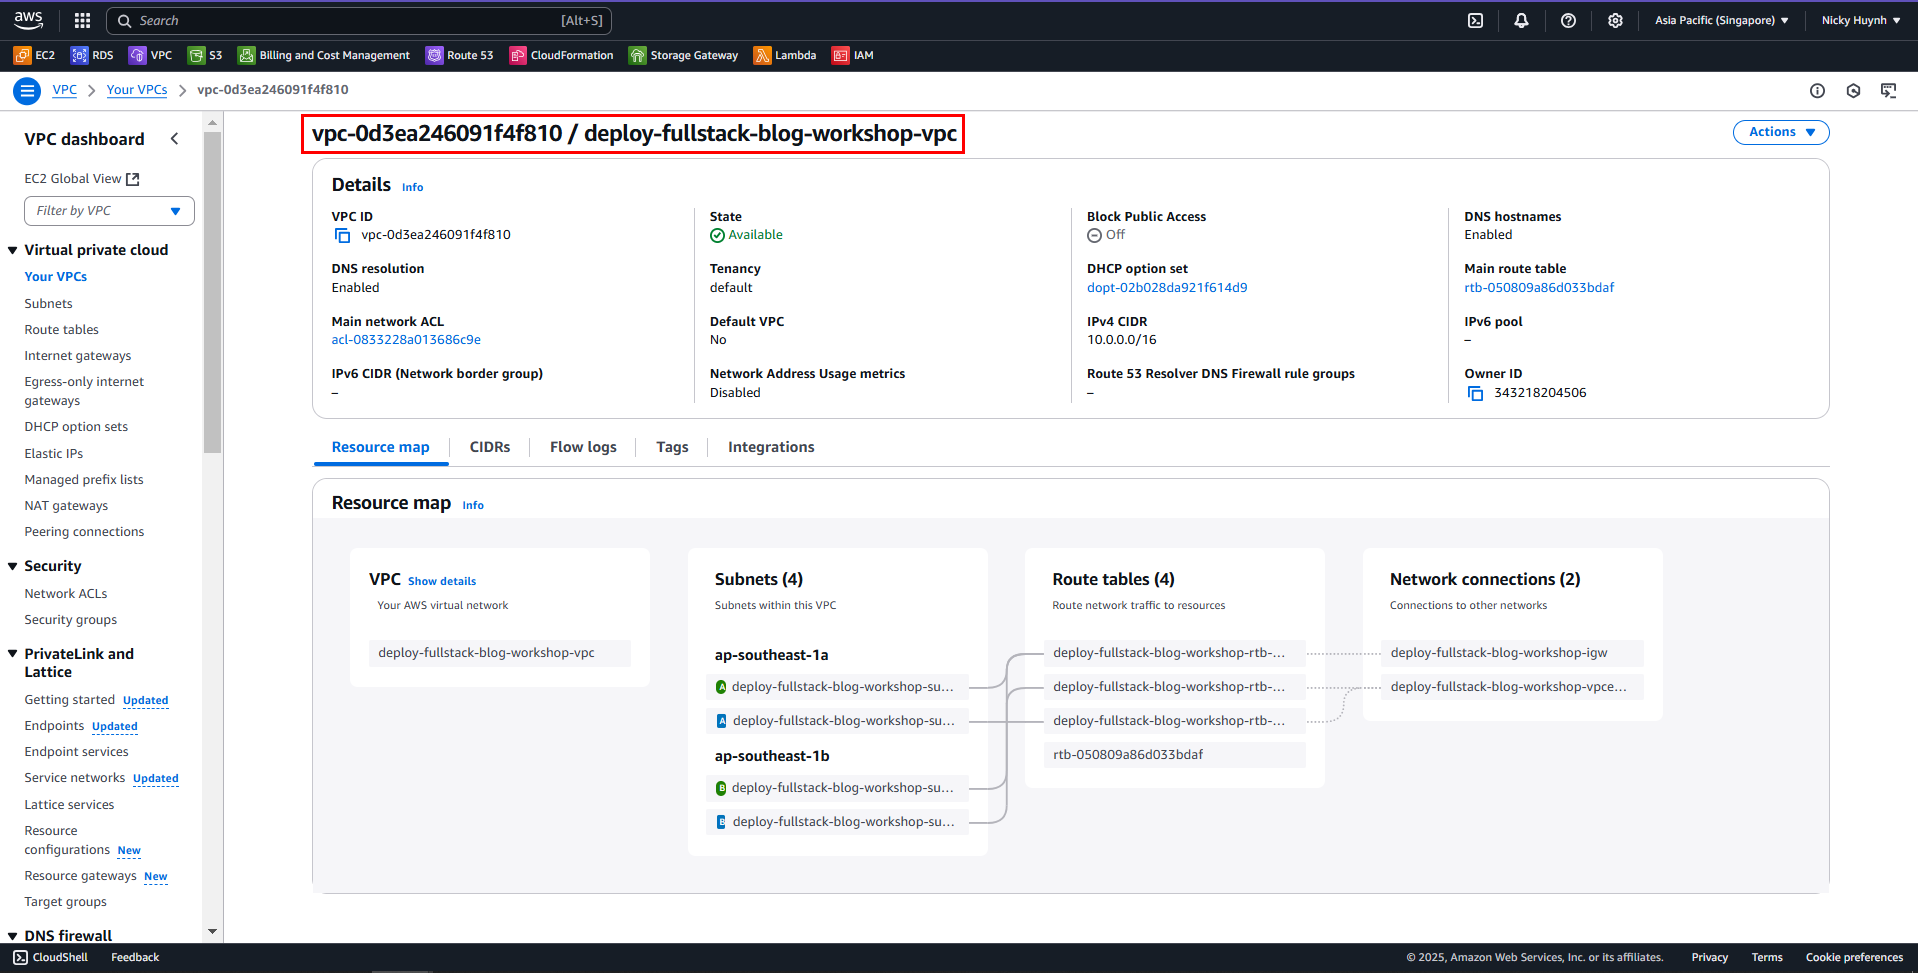
Click View VPC to see the details of the created VPC
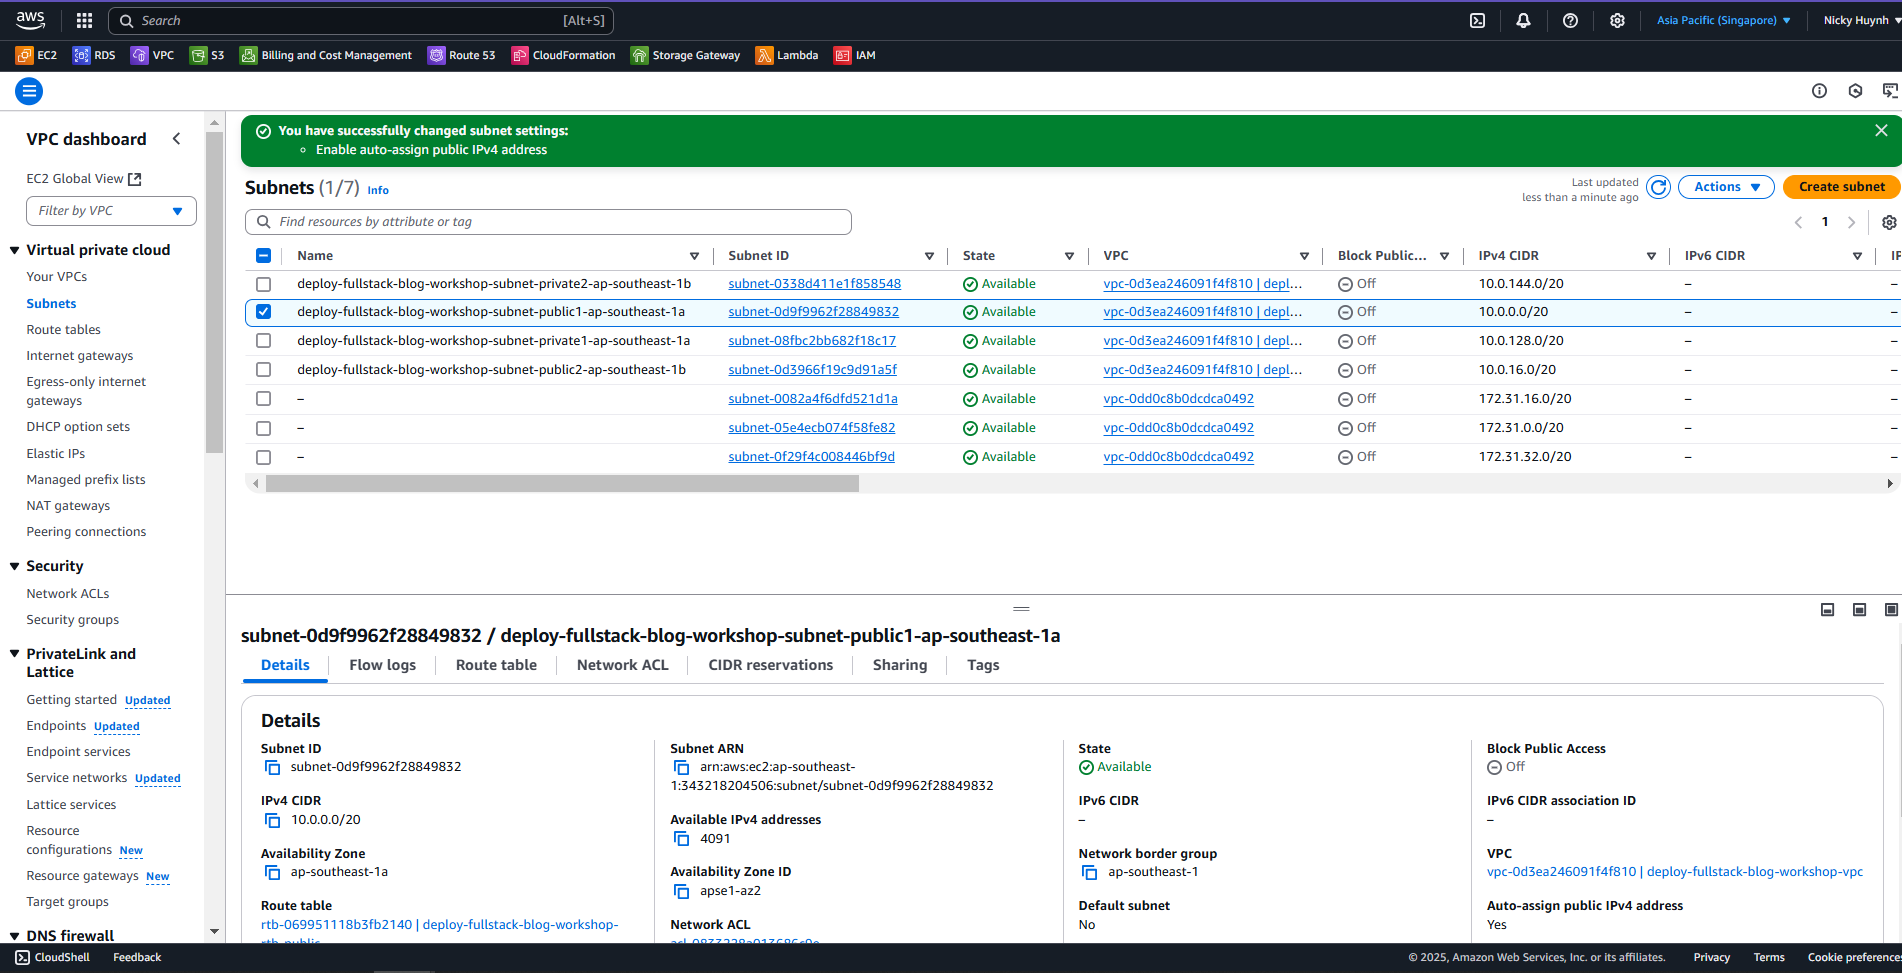
2. Assign Public IPv4 to Public Subnets
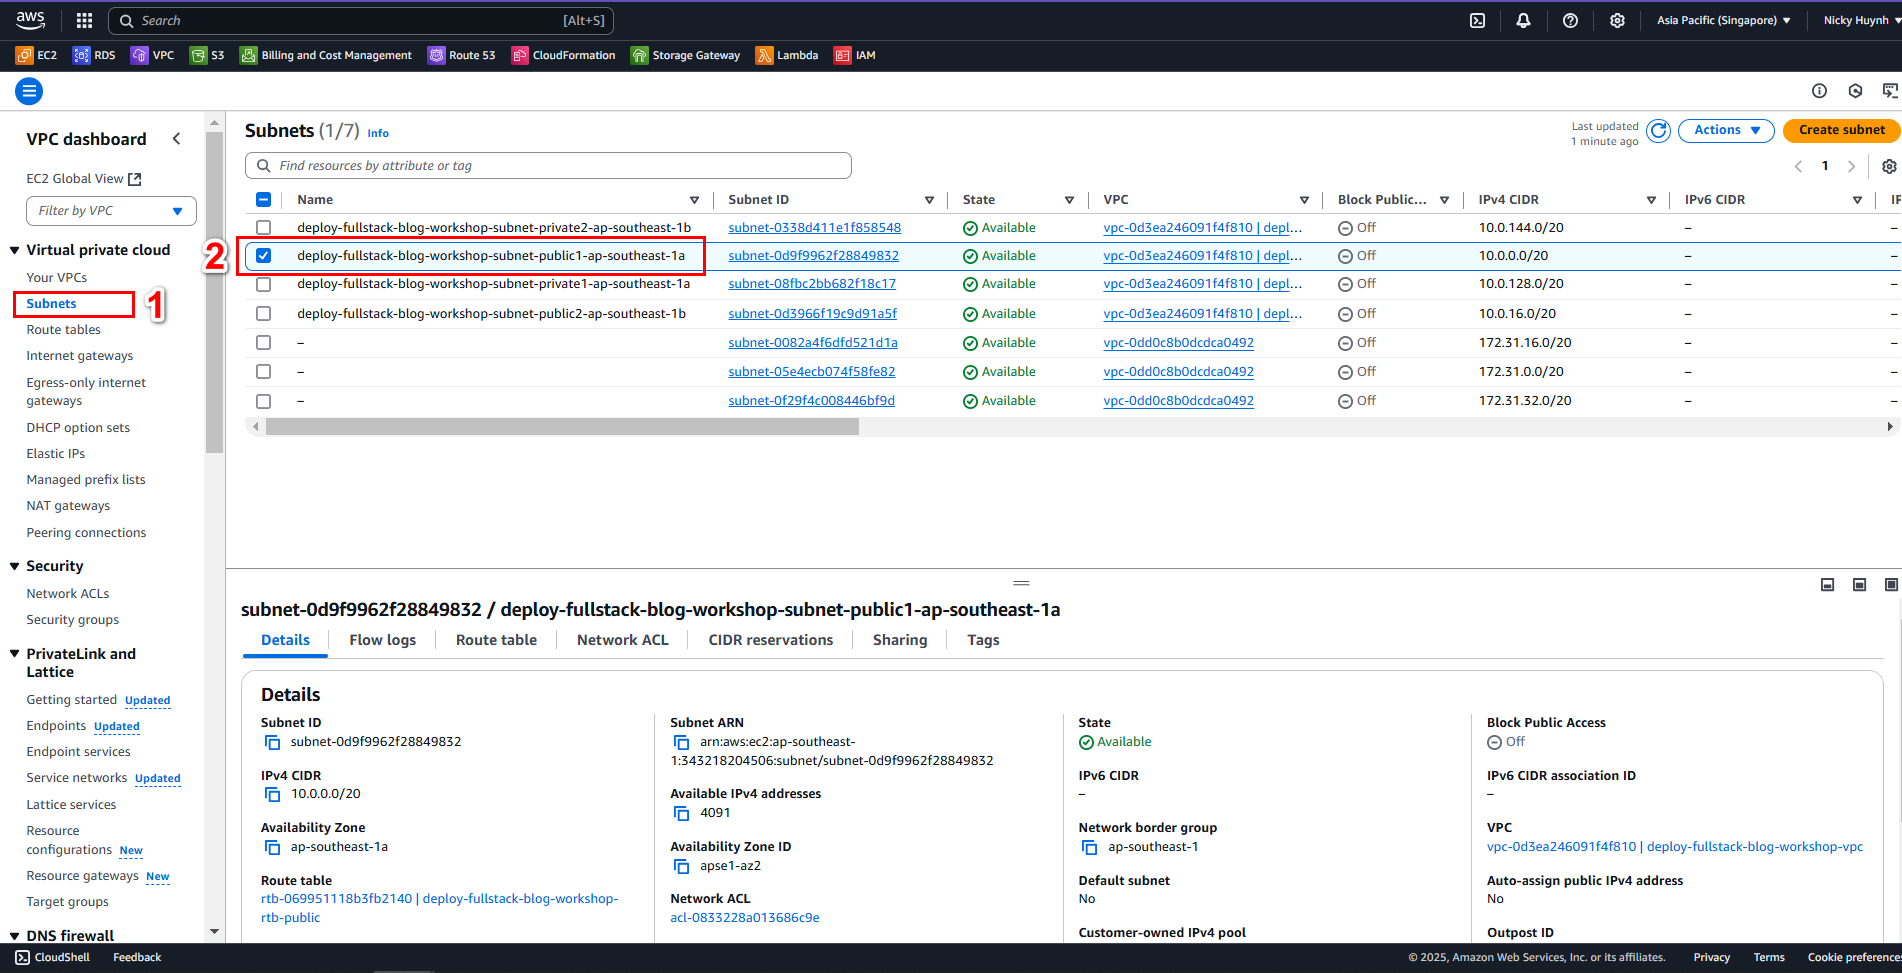
- Go to Subnets
- Select the Subnet ID of the public subnet e.g. deploy-fullstack-blog-workshop-subnet-public1-ap-southeast-1a
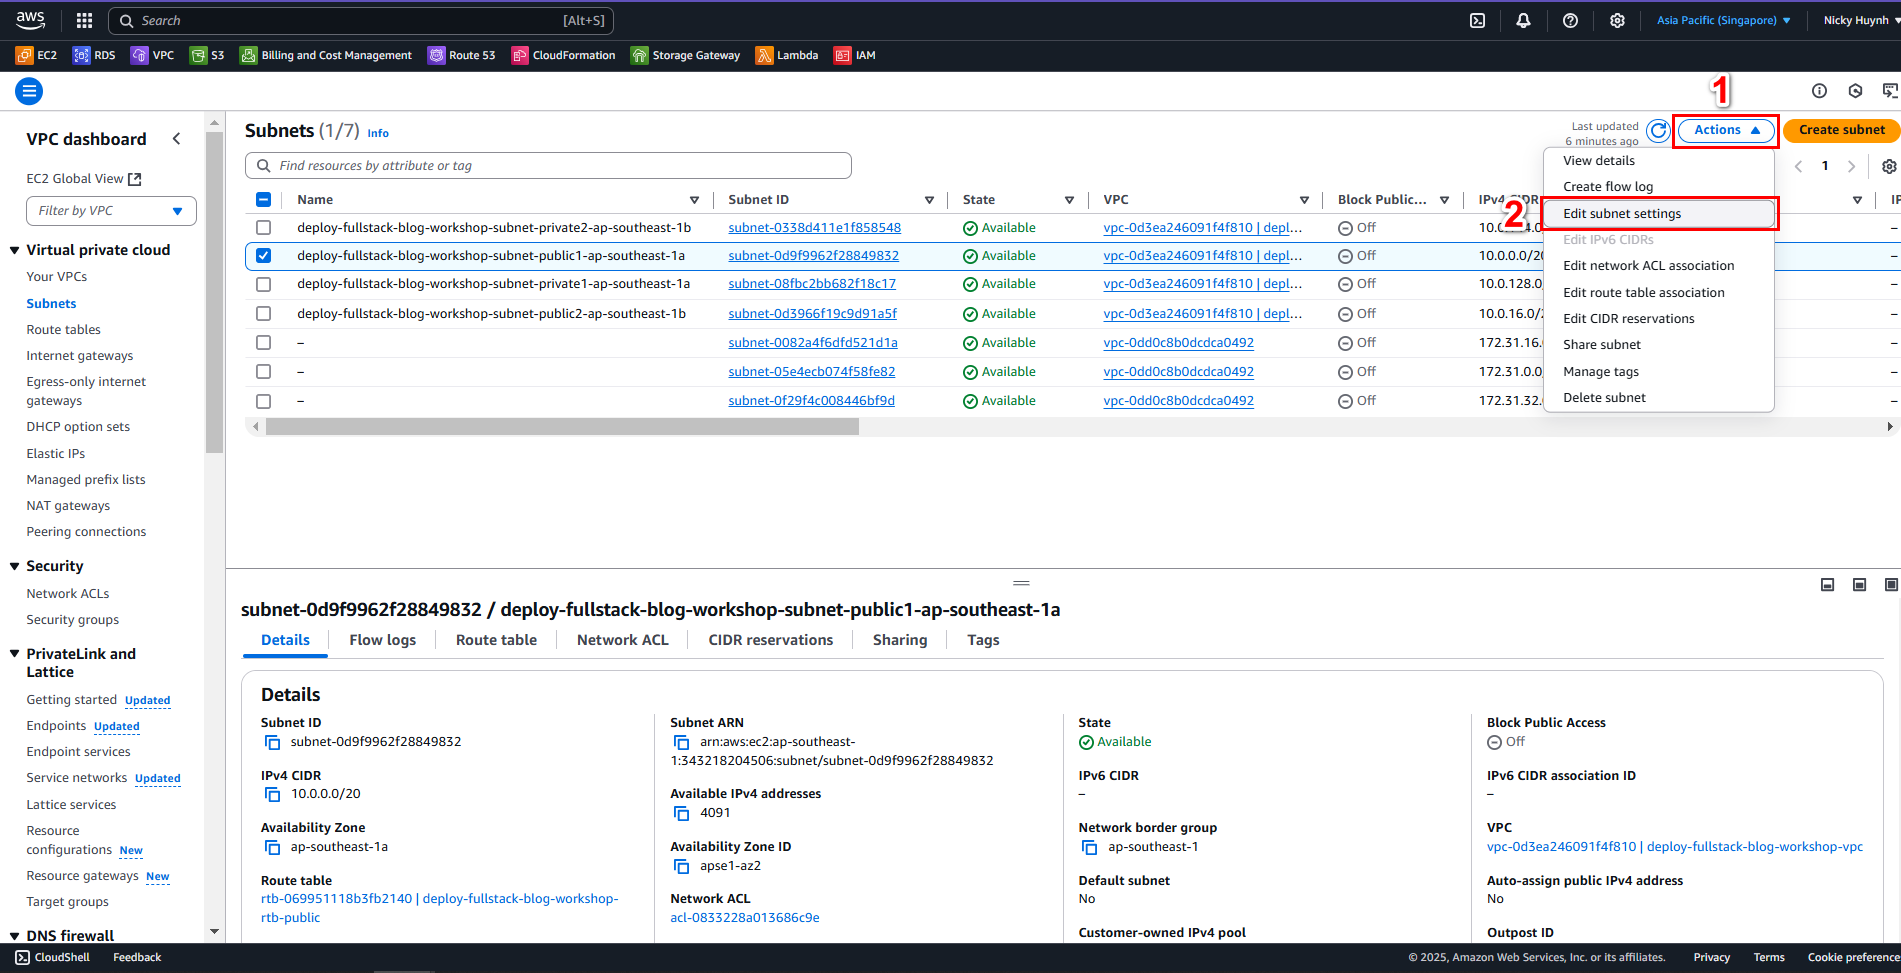
- Click the Actions dropdown, then select Edit subnet settings
- Check Enable auto-assign public IPv4 address, then Save
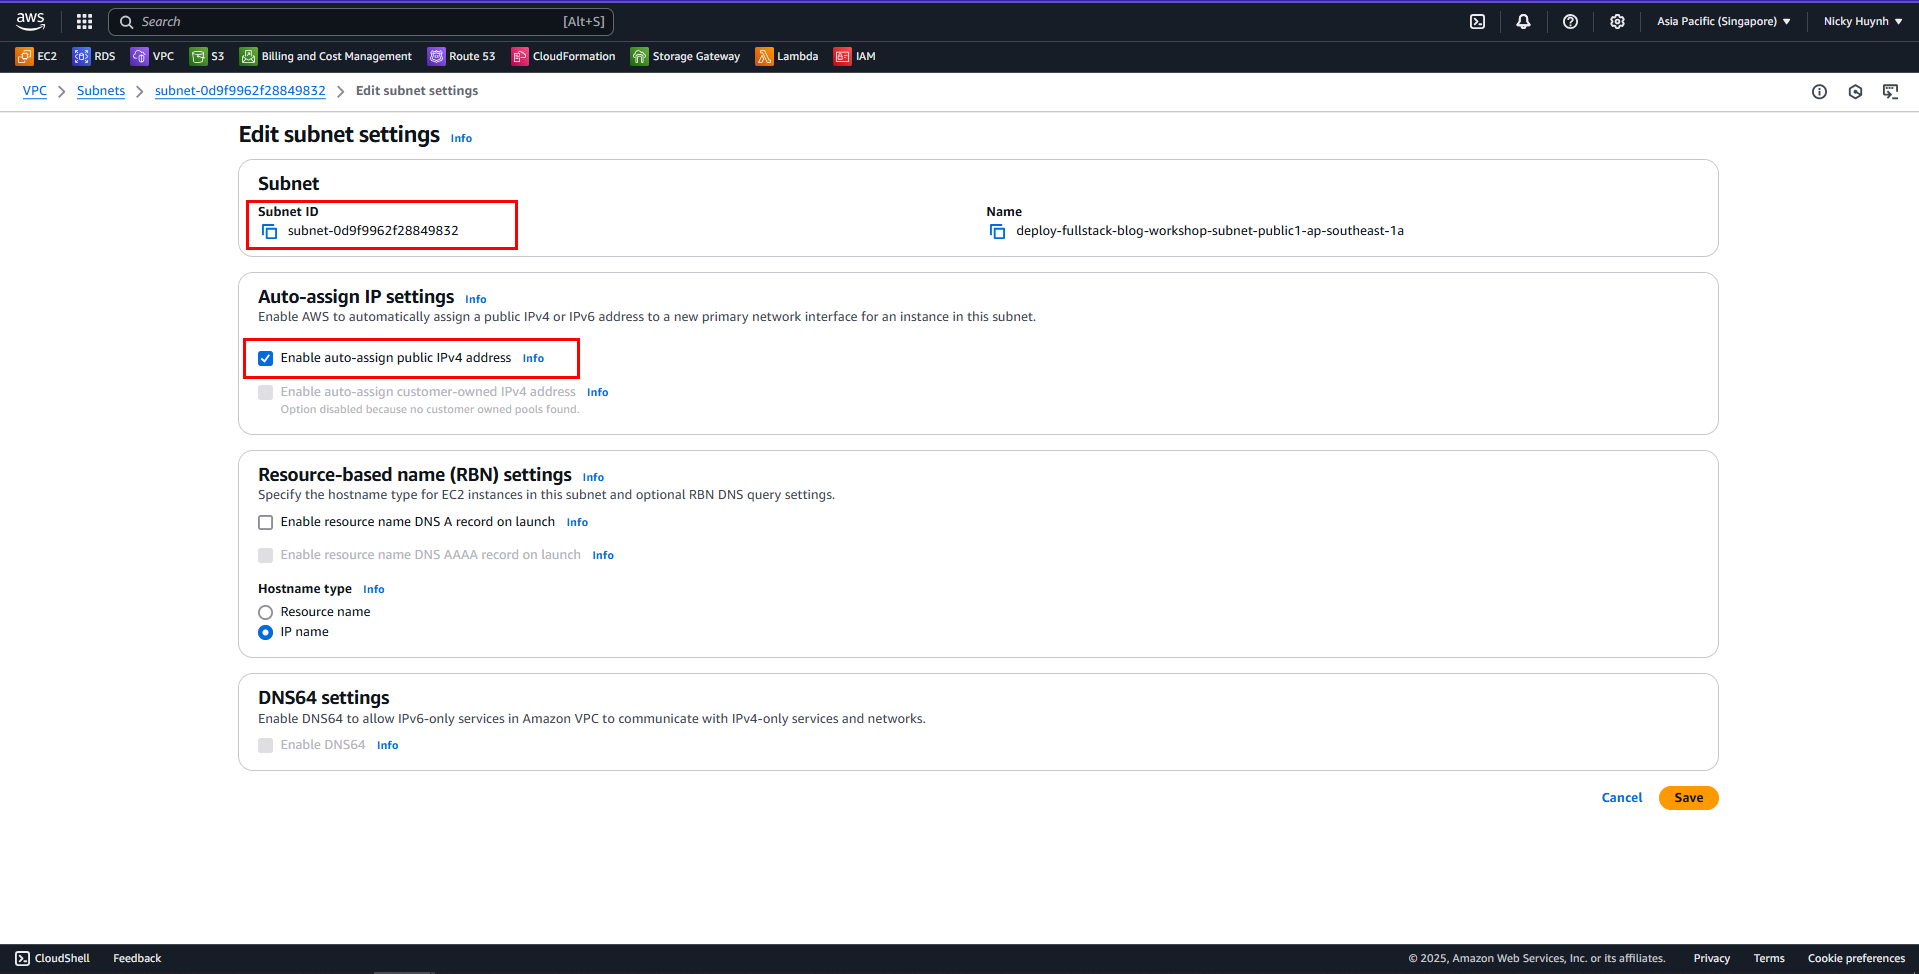
- Successfully assigned a Public IPv4 to the public subnet
deploy-fullstack-blog-workshop-subnet-public1-ap-southeast-1a