Accessing S3 Buckets and Tables using AWS Management Console
4. Accessing S3 Buckets and Tables using AWS Management Console
Creating an S3 Bucket via AWS Management Console
Access Amazon S3
Log in to the AWS Management Console and select Table Buckets from the left navigation pane.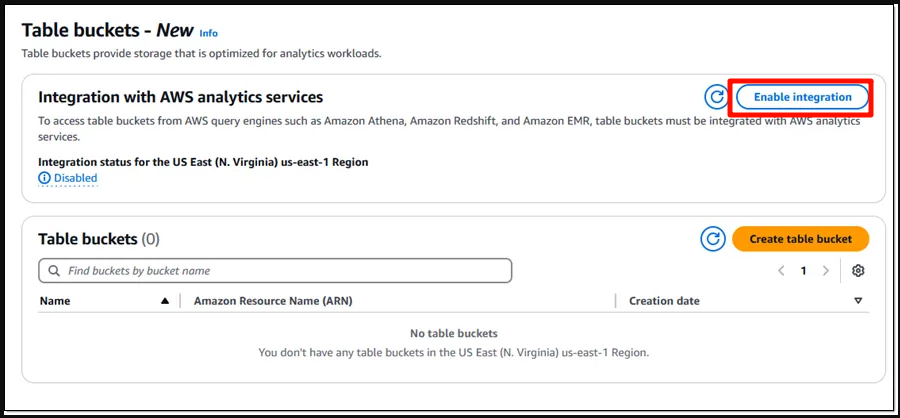
Enable Service Integration
Before creating the bucket, click Enable Integration to activate the integration of S3 Tables with AWS’s data analytics services.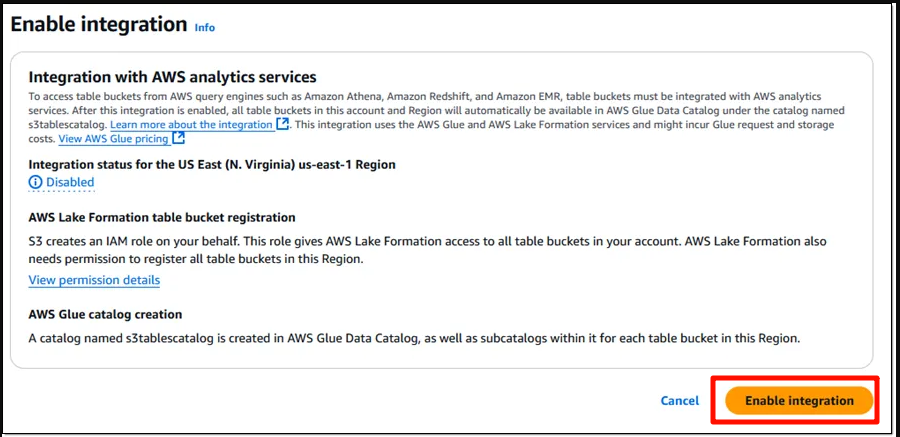
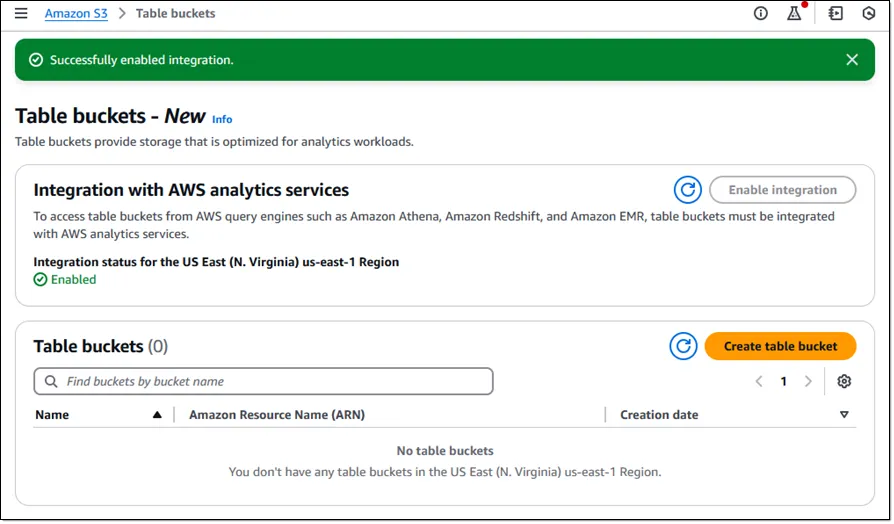
Once the integration is complete, the interface will display the status as Integration enabled.
Create a Table Bucket
Click Create Table Bucket, enter a Table Bucket Name in the configuration interface, then click Create Table to complete the creation.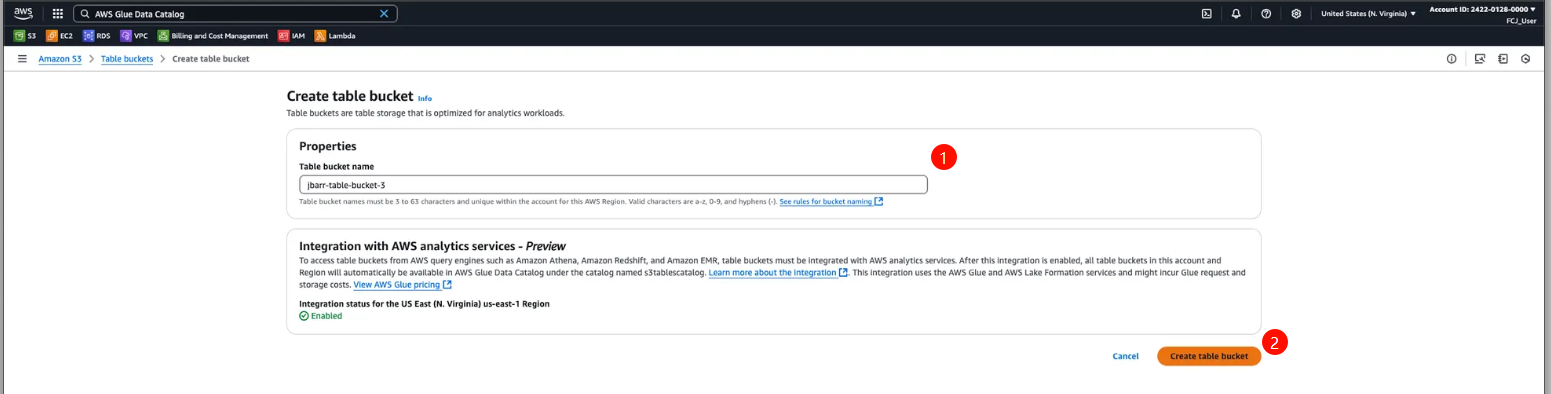
Verify the Created Bucket
Check the list of Table Buckets to confirm that your bucket was successfully created.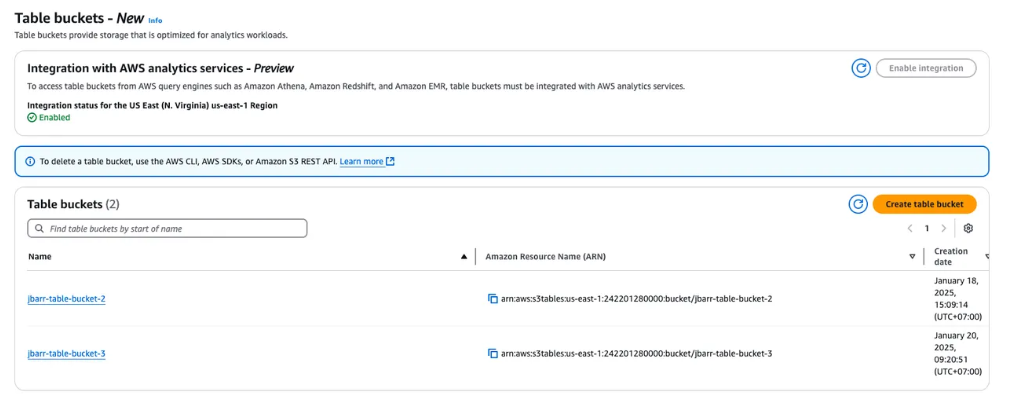
Working with the Bucket using Apache Spark
To work with the Table Bucket you created, you can use Apache Spark as outlined in Section 3. SSH into your EC2 Instance and launch Spark-Shell with the necessary packages.
Access Spark-Shell
Use the following command, replacing
<aws:s3tables:us-east-1:0123456789012:bucket/jbarr-table-bucket-3>with the ARN of your created Table Bucket:spark-shell \ --packages org.apache.iceberg:iceberg-spark-runtime-3.5_2.12:1.6.1,software.amazon.s3tables:s3-tables-catalog-for-iceberg-runtime:0.1.3,software.amazon.awssdk:s3:2.20.42,software.amazon.awssdk:sts:2.20.42,software.amazon.awssdk:kms:2.20.42,software.amazon.awssdk:glue:2.20.42,software.amazon.awssdk:dynamodb:2.20.42 \ --conf spark.sql.catalog.s3tablesbucket=org.apache.iceberg.spark.SparkCatalog \ --conf spark.sql.catalog.s3tablesbucket.catalog-impl=software.amazon.s3tables.iceberg.S3TablesCatalog \ --conf spark.sql.catalog.s3tablesbucket.warehouse=<aws:s3tables:us-east-1:0123456789012:bucket/jbarr-table-bucket-3> \ --conf spark.sql.extensions=org.apache.iceberg.spark.extensions.IcebergSparkSessionExtensions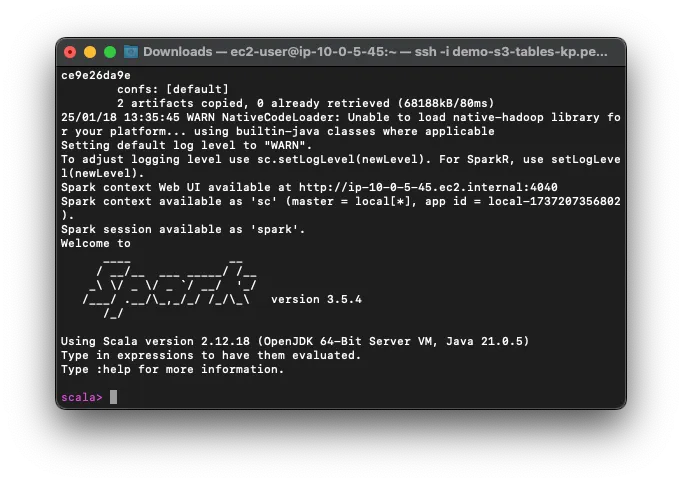
Create a Namespace
Use the following command to create a namespace (e.g.,mydata):spark.sql("""CREATE NAMESPACE IF NOT EXISTS s3tablesbucket.mydata""") spark.sql("SHOW NAMESPACES IN s3tablesbucket").show()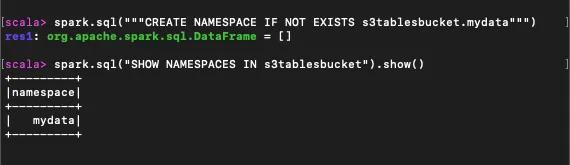
Create a Table
Create a table in the namespace you just created:spark.sql("""CREATE TABLE IF NOT EXISTS s3tablesbucket.mydata.table1 (id INT, name STRING, value INT) USING iceberg """)Insert Sample Data
Insert sample data into the table:spark.sql("""INSERT INTO s3tablesbucket.mydata.table1 VALUES (1, 'Alice', 100), (2, 'Bob', 200), (3, 'Charlie', 300) """)Query the Data
Query the data from the table to verify the insertion:spark.sql("SELECT * FROM s3tablesbucket.mydata.table1").show()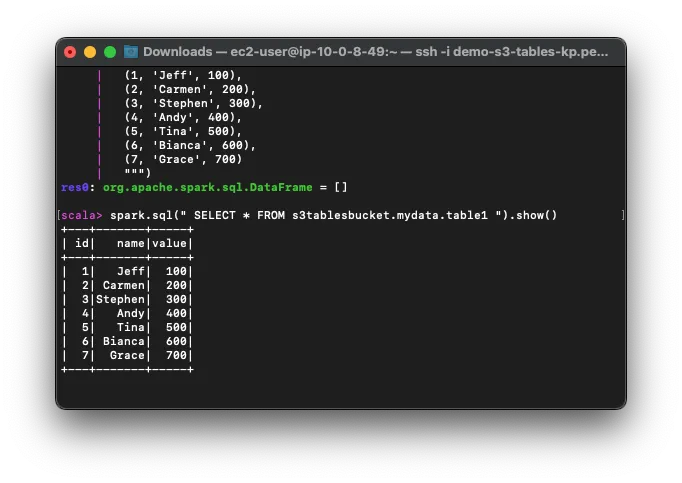
By using AWS Management Console and Apache Spark, you can easily create and manage Table Buckets on Amazon S3. This enables efficient storage, processing, and analysis of large datasets.