Accessing S3 Buckets and Tables Using Command Line
3. Accessing S3 Buckets and Tables via CLI
This guide explains how to create and manage S3 Table Buckets using AWS CLI and interact with them through Apache Spark.
Create and Manage Table Buckets
Create an S3 Table Bucket:
In your EC2 SSH session, run the following command to create a Table Bucket:
aws s3tables create-table-bucket --name jbarr-table-bucket-2 | jq .arn
"arn:aws:s3tables:us-east-2:123456789012:bucket/jbarr-table-bucket-2"
Set Environment Variable for Bucket ARN:
Save the ARN of the bucket in an environment variable:
export ARN="arn:aws:s3tables:us-east-2:123456789012:bucket/jbarr-table-bucket-2"List Table Buckets:
View all created Table Buckets:
aws s3tables list-table-buckets | jq .tableBuckets[].arn
"arn:aws:s3tables:us-east-2:123456789012:bucket/jbarr-table-bucket-2"
Setup and Use Apache Spark for Table Management
Apache Spark provides advanced tools for interacting with tables in buckets.
Install Java 17:
Install Java 17 using the following command:
sudo dnf install java-17-amazon-corretto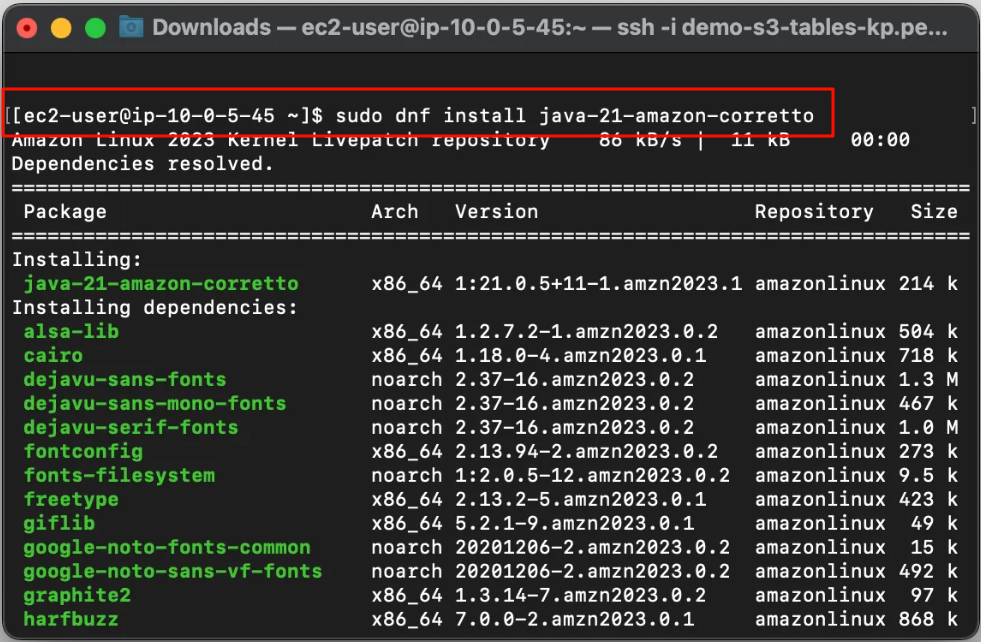
Download and Install Apache Spark:
Download the latest version of Apache Spark:
wget https://dlcdn.apache.org/spark/spark-3.5.4/spark-3.5.4-bin-hadoop3.tgz
tar -xvf spark-3.5.4-bin-hadoop3.tgz
Add Spark binaries to the
PATHenvironment variable:vi ~/.bashrcAdd this line to the end of the file:
export PATH=$PATH:/home/ec2-user/spark-3.5.4-bin-hadoop3/bin/Save and exit (
ESC>:wq). Verify Spark installation:spark-shell --version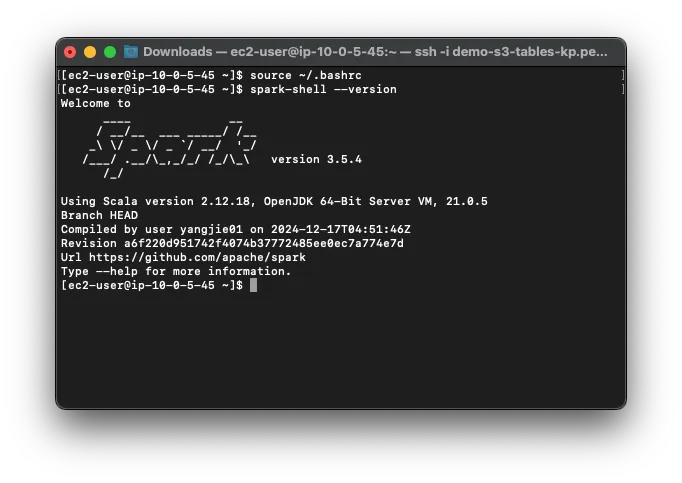
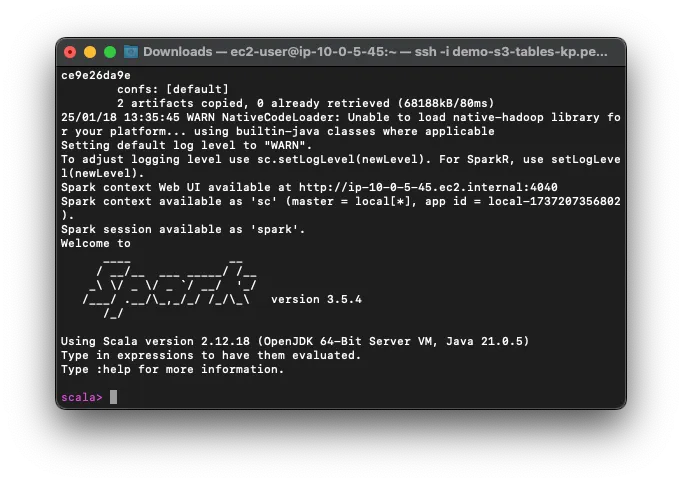
Use Spark-Shell to Manage Tables:
Launch Spark-Shell with the required configuration. Replace
<aws:s3tables:us-east-1:0123456789012:bucket/jbarr-table-bucket-3>with your Table Bucket ARN:
 spark-shell \
 --packages org.apache.iceberg:iceberg-spark-runtime-3.5_2.12:1.6.1,software.amazon.s3tables:s3-tables-catalog-for-iceberg-runtime:0.1.3,software.amazon.awssdk:s3:2.20.42,software.amazon.awssdk:sts:2.20.42,software.amazon.awssdk:kms:2.20.42,software.amazon.awssdk:glue:2.20.42,software.amazon.awssdk:dynamodb:2.20.42  \
 --conf spark.sql.catalog.s3tablesbucket=org.apache.iceberg.spark.SparkCatalog \
 --conf spark.sql.catalog.s3tablesbucket.catalog-impl=software.amazon.s3tables.iceberg.S3TablesCatalog \
 --conf spark.sql.catalog.s3tablesbucket.warehouse=<aws:s3tables:us-east-1:0123456789012:bucket/jbarr-table-bucket-3> \
 --conf spark.sql.extensions=org.apache.iceberg.spark.extensions.IcebergSparkSessionExtensions
Create Namespace and Table:
Use Spark-SQL to create a namespace and a table:
spark.sql("""CREATE NAMESPACE IF NOT EXISTS s3tablesbucket.mydata""")
spark.sql("""CREATE TABLE IF NOT EXISTS s3tablesbucket.mydata.table1
(id INT, name STRING, value INT) USING iceberg""")
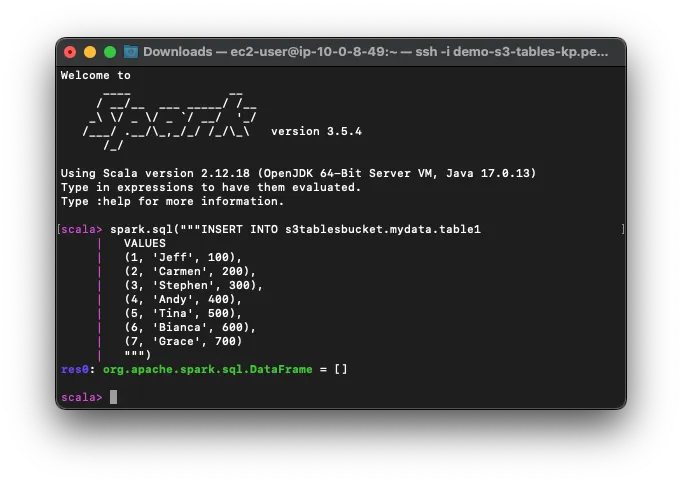
Insert and Query Data:
Insert sample data and query it to verify:
spark.sql("""INSERT INTO s3tablesbucket.mydata.table1
  VALUES
  (1, 'Jeff', 100),
  (2, 'Carmen', 200),
  (3, 'Stephen', 300)
""")
spark.sql("SELECT * FROM s3tablesbucket.mydata.table1").show()