CI/CD Configuration with GitLab
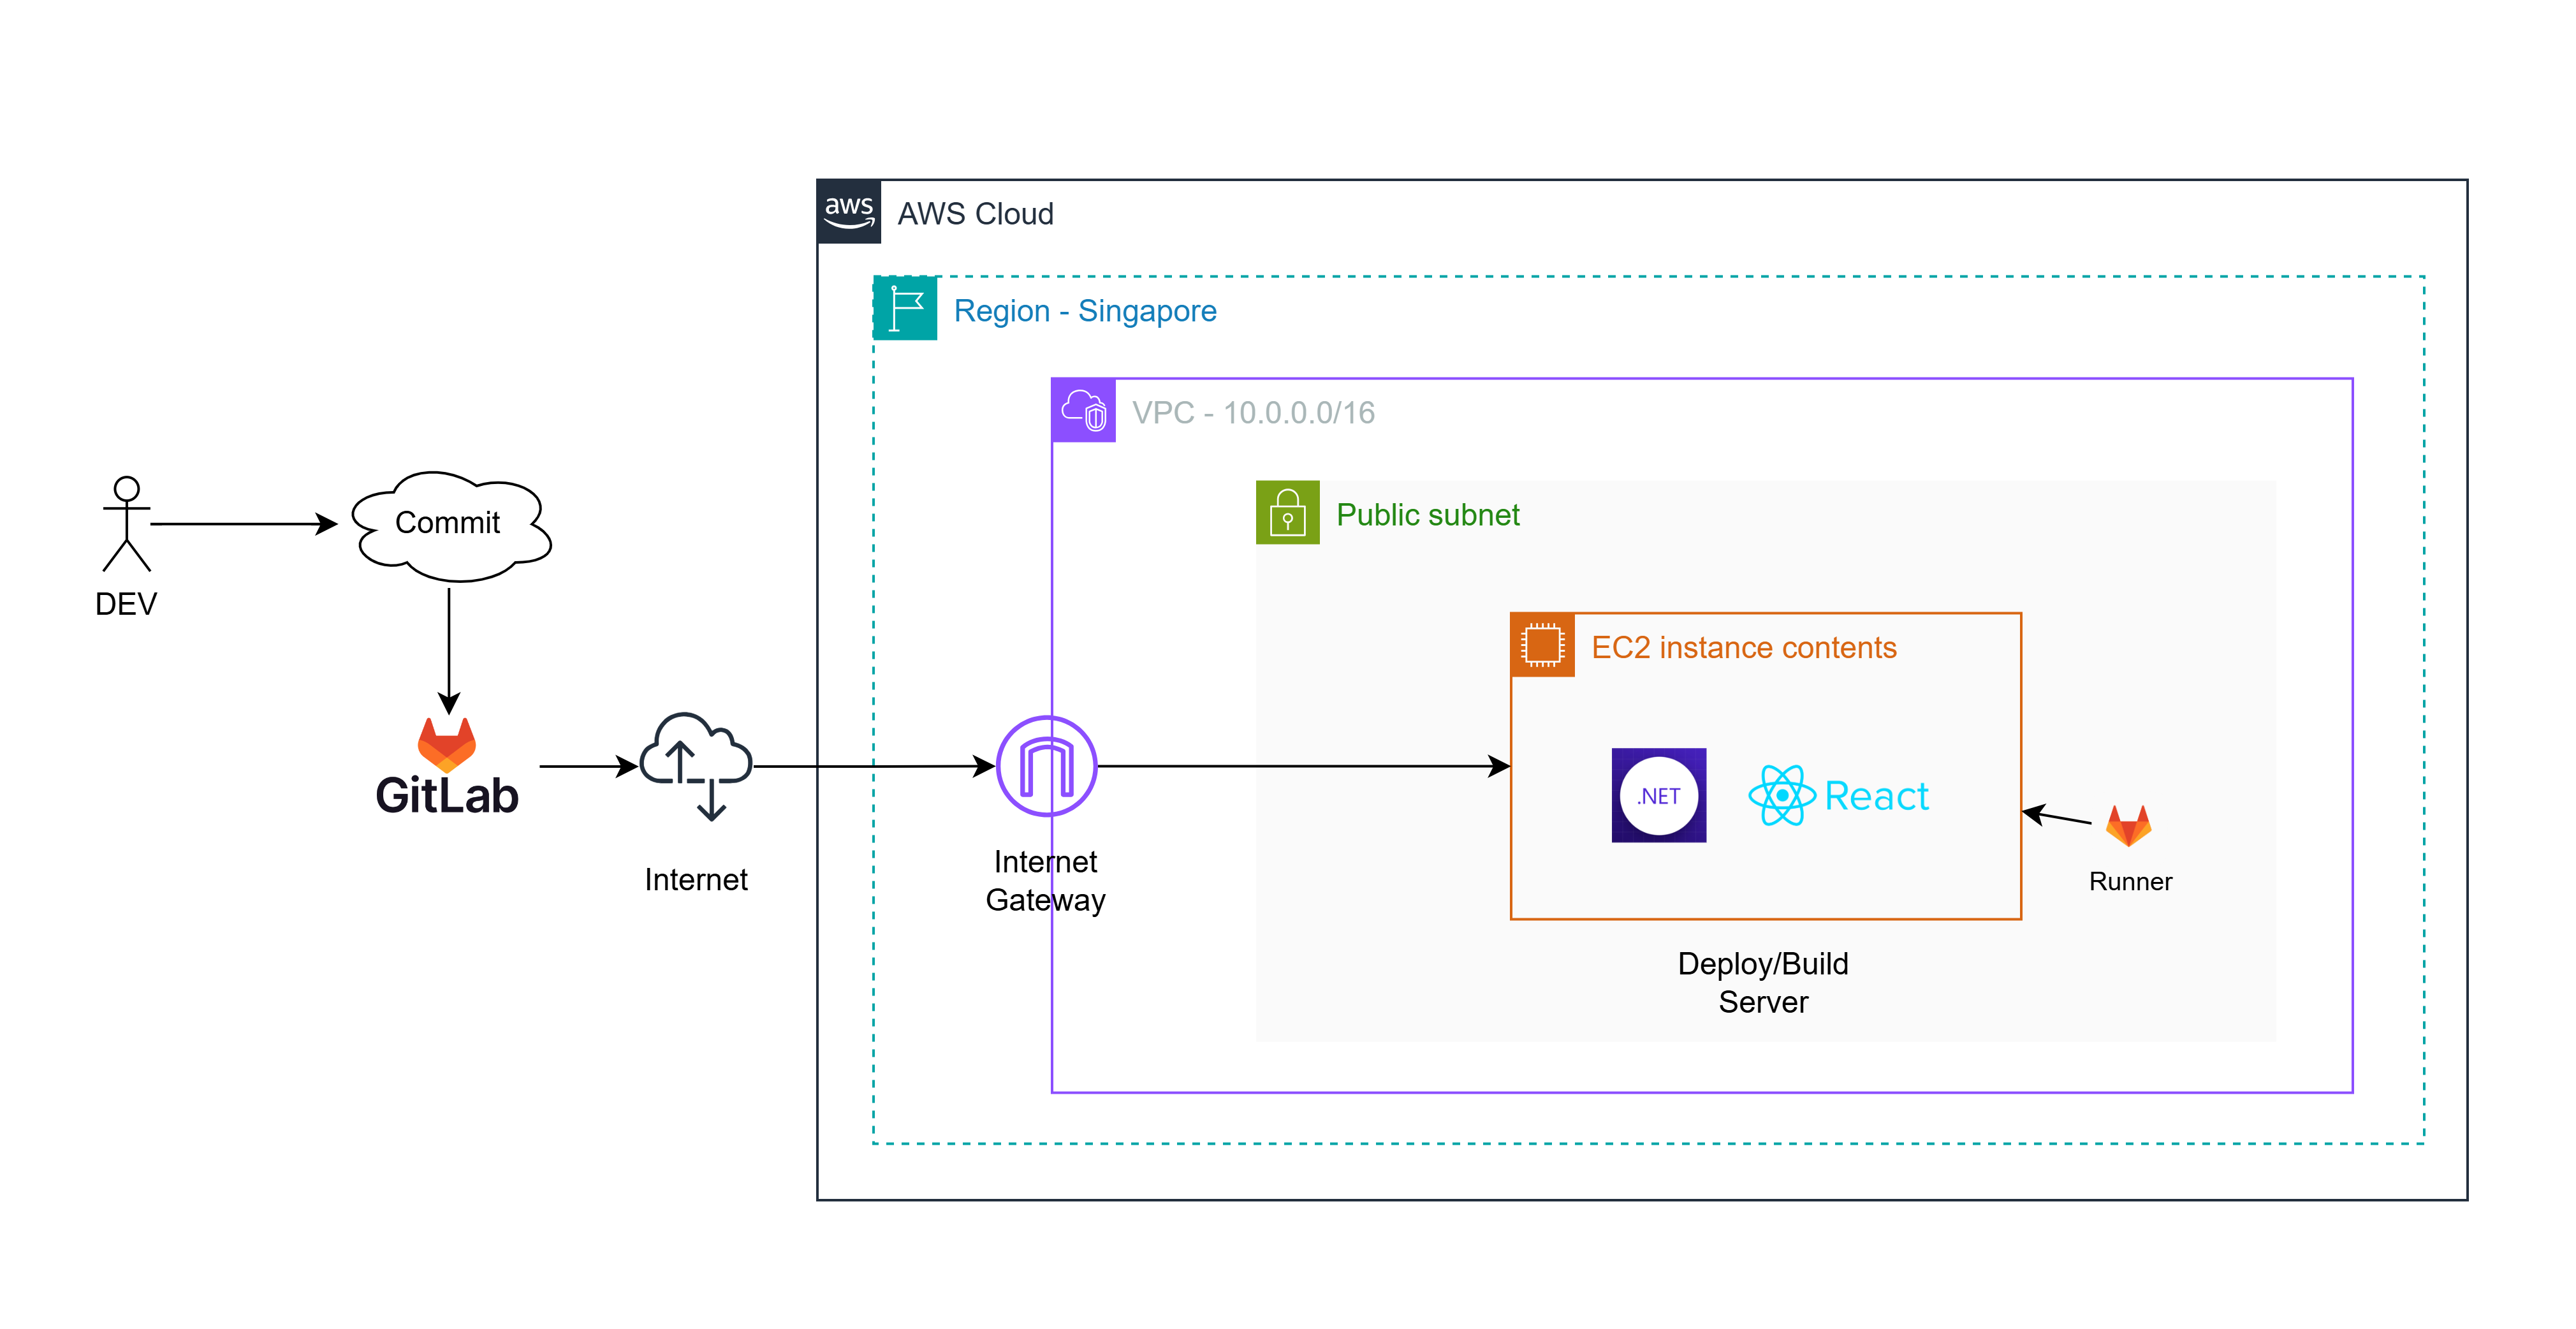
In the previous section, we registered a group runner. In this lesson, we will implement a simple CI/CD process.
1. Create User
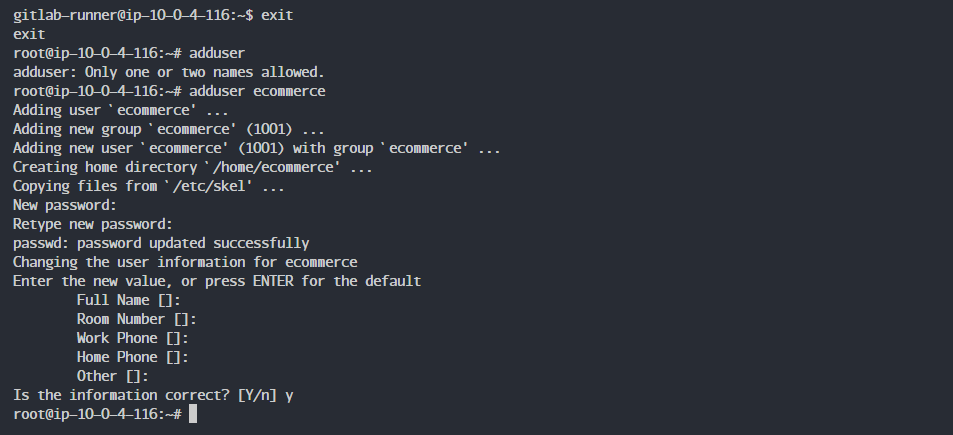
To make the shell script execution more secure, for each project group, we will create a user in the Instance with the same name and only grant execution permission to the build folder for that user. In this case, we need to create a user named ecommerce.
Run with root privileges and create the user ecommerce with the corresponding information:
exit
adduser ecommerce
2. Grant visudo Permissions
We will grant sudo privileges to both gitlab-runner and ecommerce users so that when a user uses sudo, they won’t need to enter a password.
Type visudo:
visudo
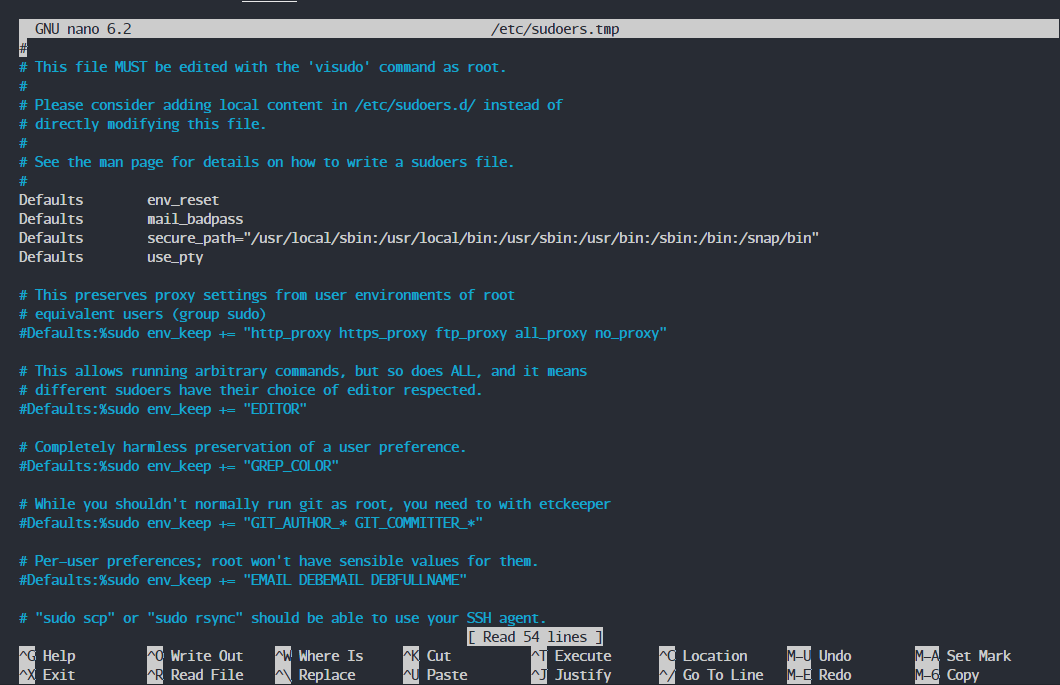
Add the following lines below root ALL=(ALL:ALL) ALL:
gitlab-runner ALL=(ALL) NOPASSWD:ALL
ecommerce ALL=(ALL) NOPASSWD:ALL
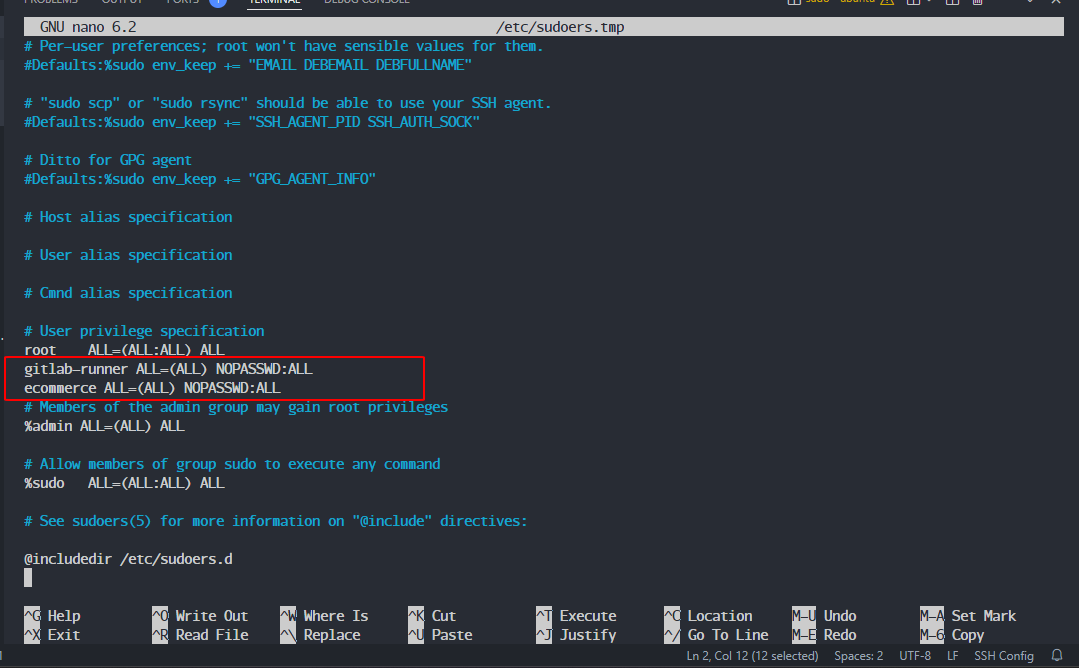
Press Ctrl+X → Y → Enter to save.
3. Install Tools
We need to install the net-tools utility.
apt install net-tools
We can verify by using the command:
netstat -tlpun
We should see two projects running on port 3000 (frontend) and port 5214 (backend).
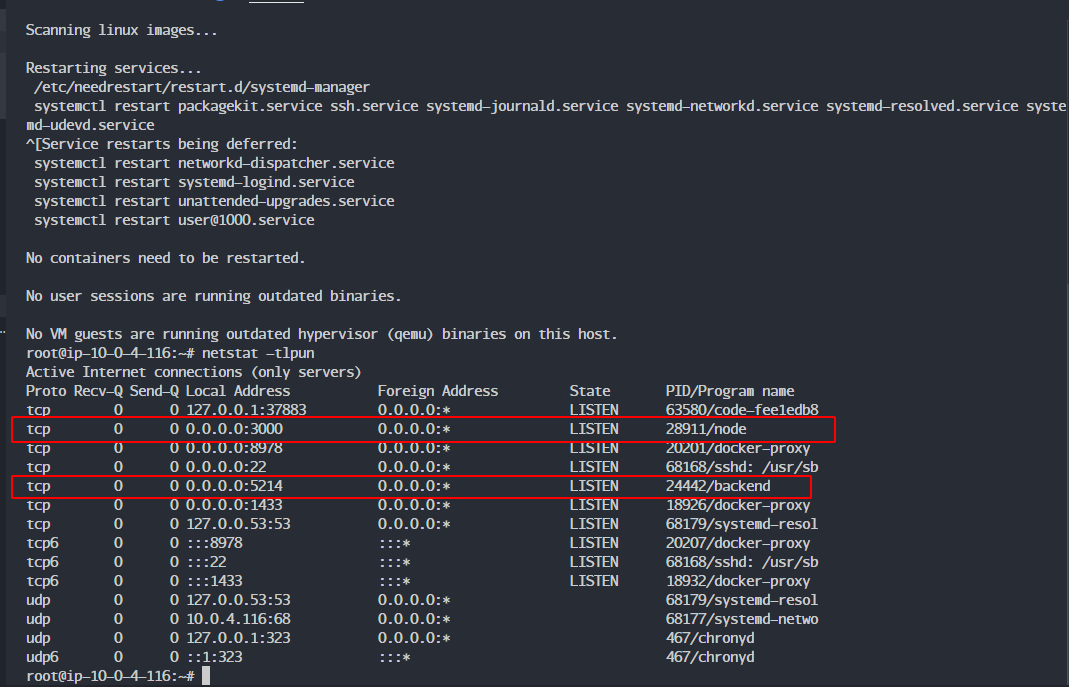
net-tools will check if a process for the backend or frontend is running and will kill it during the CI/CD process. If it’s not killed, the application won’t be able to run with the new source code!
Before running CI/CD, we need to check if the gitlab-runner user has the required tools: node, dotnet, pm2 by running:
su gitlab-runner
cd
dotnet --version
node -v
npm -v
pm2 -v
4. Create CI/CD Pipeline for Backend
In the backend project, select build → Pipelines Editor → Configure pipeline.
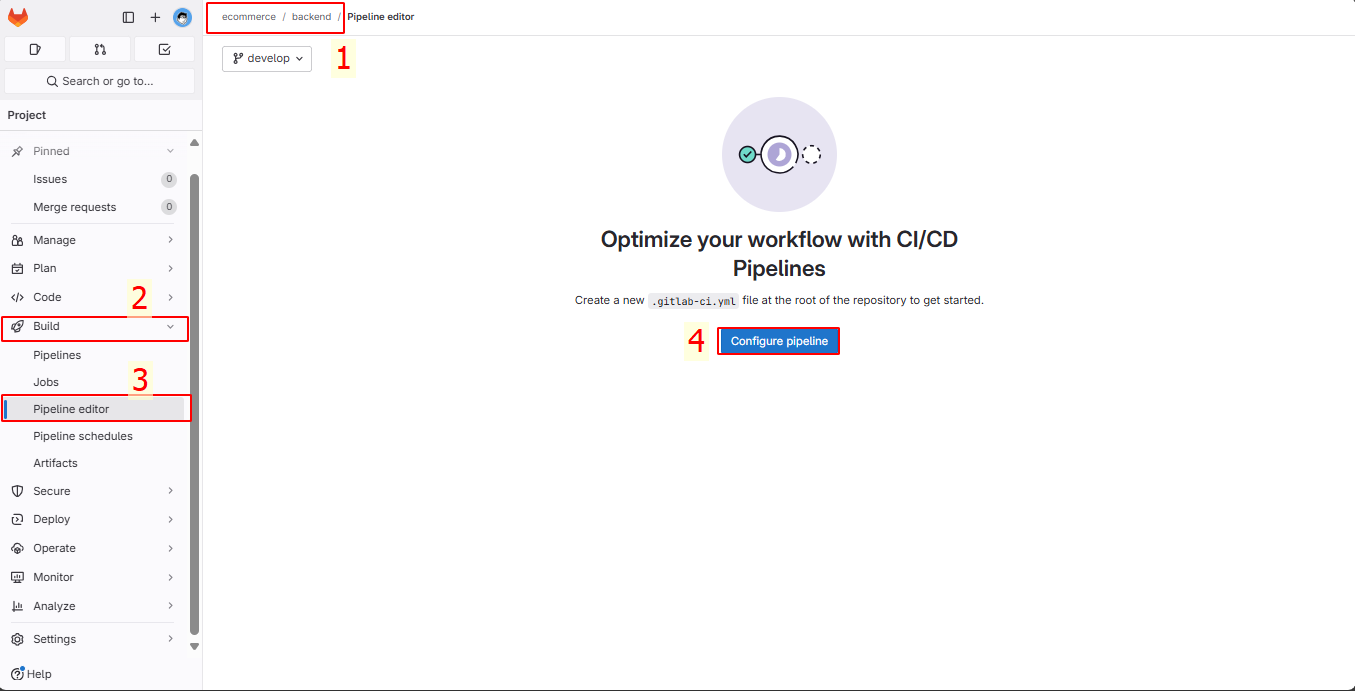
We will add the .gitlab-ci.yml file to the main branch to simulate running the CI/CD pipeline when deploying to production. You can customize it according to your strategy!
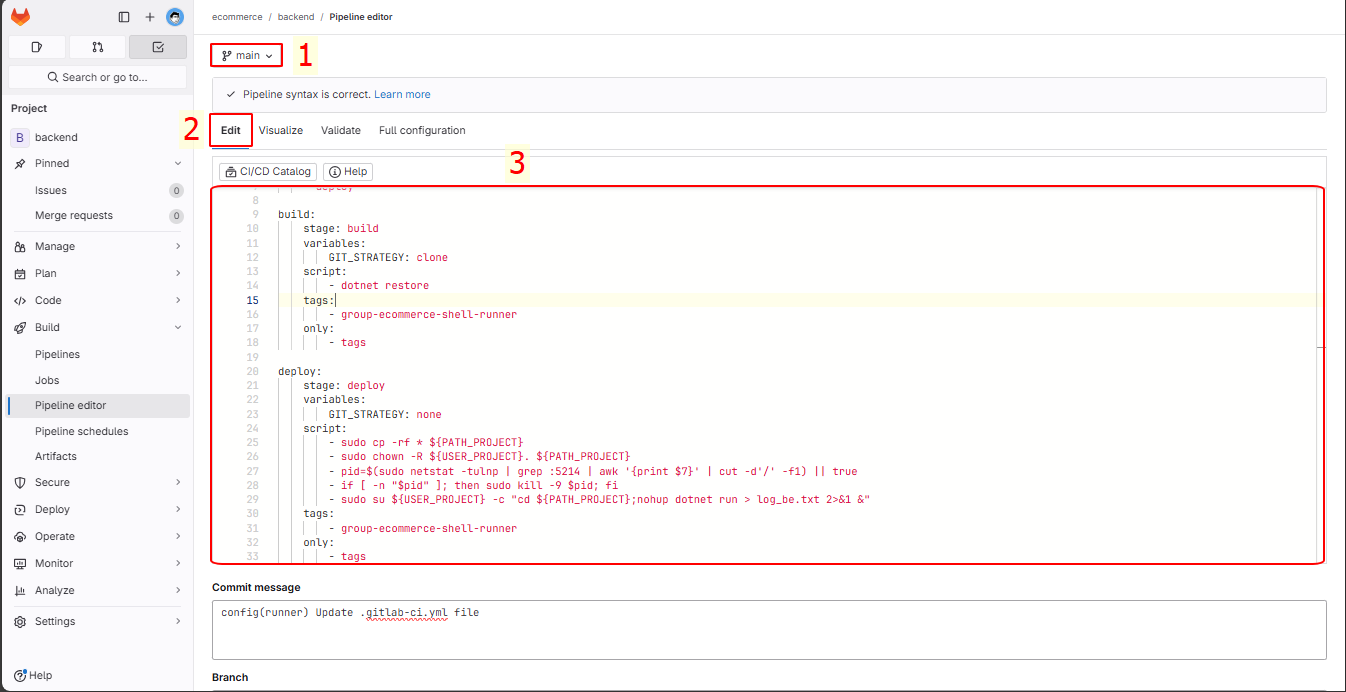
In the .gitlab-ci.yml file, we will enter the following:
variables:
    USER_PROJECT: "ecommerce"
    PATH_PROJECT: "/home/${USER_PROJECT}/${CI_PROJECT_NAME}"

stages:
    - build
    - deploy

before_script:
    - sudo mkdir -p $PATH_PROJECT

build:
    stage: build
    variables:
        GIT_STRATEGY: clone
    script:
        - dotnet restore
    tags:
        - group-ecommerce-shell-runner
    only:
        - tags

deploy:
    stage: deploy
    variables:
        GIT_STRATEGY: none
    script:
        - sudo cp -rf * ${PATH_PROJECT}
        - sudo chown -R ${USER_PROJECT}. ${PATH_PROJECT}
        - pid=$(sudo netstat -tulnp | grep :5214 | awk '{print $7}' | cut -d'/' -f1) || true
        - if [ -n "$pid" ]; then sudo kill -9 $pid; fi
        - sudo su ${USER_PROJECT} -c "cd ${PATH_PROJECT};nohup dotnet run > log_be.txt 2>&1 &"
    tags:
        - group-ecommerce-shell-runner
    only:
        - tags
Explanation of the file above:
Variables
- USER_PROJECT: “ecommerce”: Set the USER_PROJECT variable to “ecommerce”, which is used to represent the user or project name.
- PATH_PROJECT: “/home/${USER_PROJECT}/${CI_PROJECT_NAME}”: Set the PATH_PROJECT variable to the directory path containing the project. CI_PROJECT_NAME is a default variable in GitLab CI/CD representing the current project’s name.
Before Running Stages
- before_script: sudo mkdir -p $PATH_PROJECT ⇒ This means creating the working directory. If the directory already exists, running the script again won’t cause errors.
Stages
- build Stage:
- stage: build: Indicates that this is the build stage of the pipeline.
- variables: GIT_STRATEGY: clone: Specifies how to retrieve the source code from Git.
clonemeans the source code will be cloned from the repository. - script:: Commands that will be executed during the build stage.
- dotnet restore: Restore the necessary NuGet packages for the .NET project.
- tags: group-ecommerce-shell-runner: Specifies which runner will execute this step. This could be a group of pre-configured runners.
- only: tags: This stage will only run when a tag is pushed to the repository.
- deploy Stage:
- stage: deploy: Indicates that this is the deploy stage of the pipeline.
- variables: GIT_STRATEGY: none: There’s no need to retrieve the source code from Git in the deploy stage.
- script:: Commands that will be executed during the deploy stage.
- sudo cp -rf * ${PATH_PROJECT}: Copy all files and directories from the current working directory to ${PATH_PROJECT}.
- sudo chown -R ${USER_PROJECT}. ${PATH_PROJECT}: Change ownership of all files and directories in ${PATH_PROJECT} to the user ${USER_PROJECT}.
- pid=$(sudo netstat -tulnp | grep :5214 | awk ‘{print $7}’ | cut -d’/’ -f1) || true: Find the ID of the process listening on port 5214 and store it in the
pidvariable. If not found,pidwill be empty (true prevents an error from occurring). - if [ -n “$pid” ]; then sudo kill -9 $pid; fi: If the
pidvariable is not empty (i.e., there’s a process listening on port 5214), that process will be forcefully terminated using thekill -9command. - sudo su ${USER_PROJECT} -c “cd ${PATH_PROJECT};nohup dotnet run > log_be.txt 2>&1 &”: Log in as the ${USER_PROJECT} user, navigate to the ${PATH_PROJECT} directory, and run the .NET application in the background using
nohup. The output will be logged tolog_be.txt.
- tags: group-ecommerce-shell-runner: Specifies which runner will execute this step.
- only: tags: This stage will only run when a tag is pushed to the repository.
In the Visualize tab, we can see two stages: build and deploy, with two jobs: build backend and deploy backend.

Commit the changes.
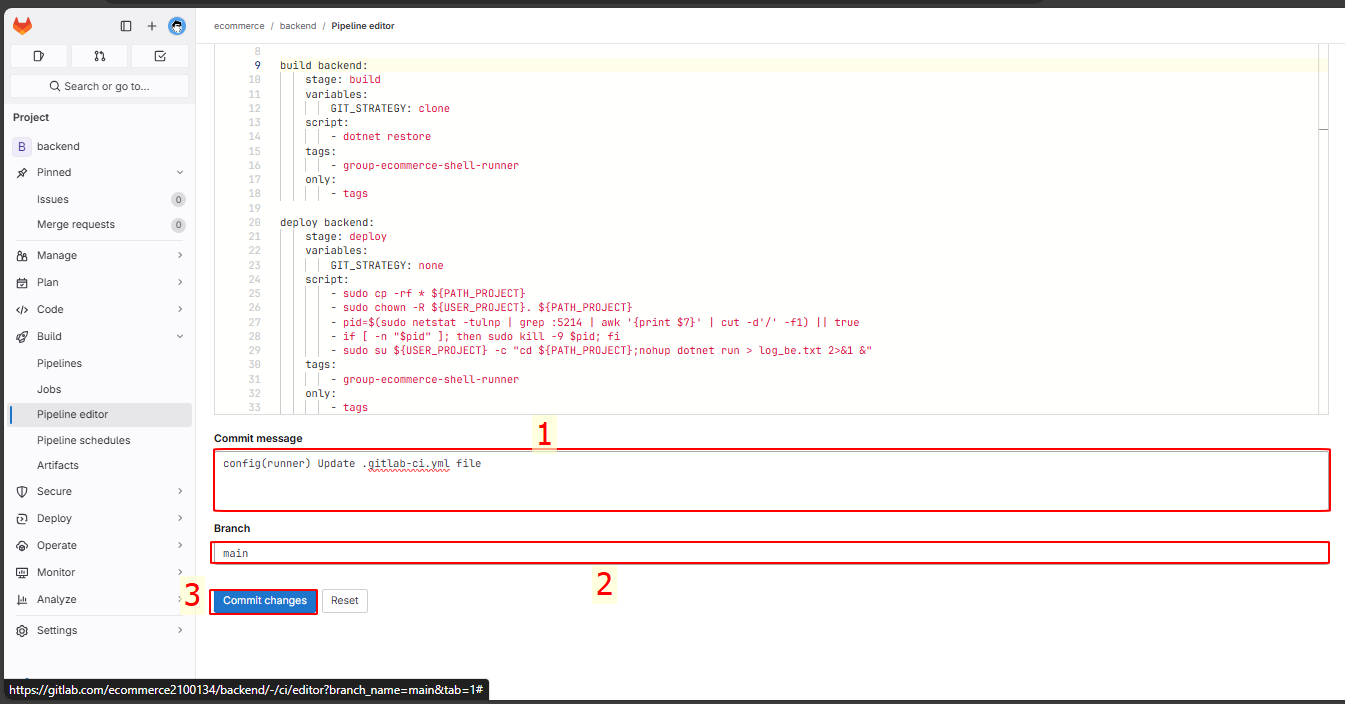
We will see the pipeline has failed.
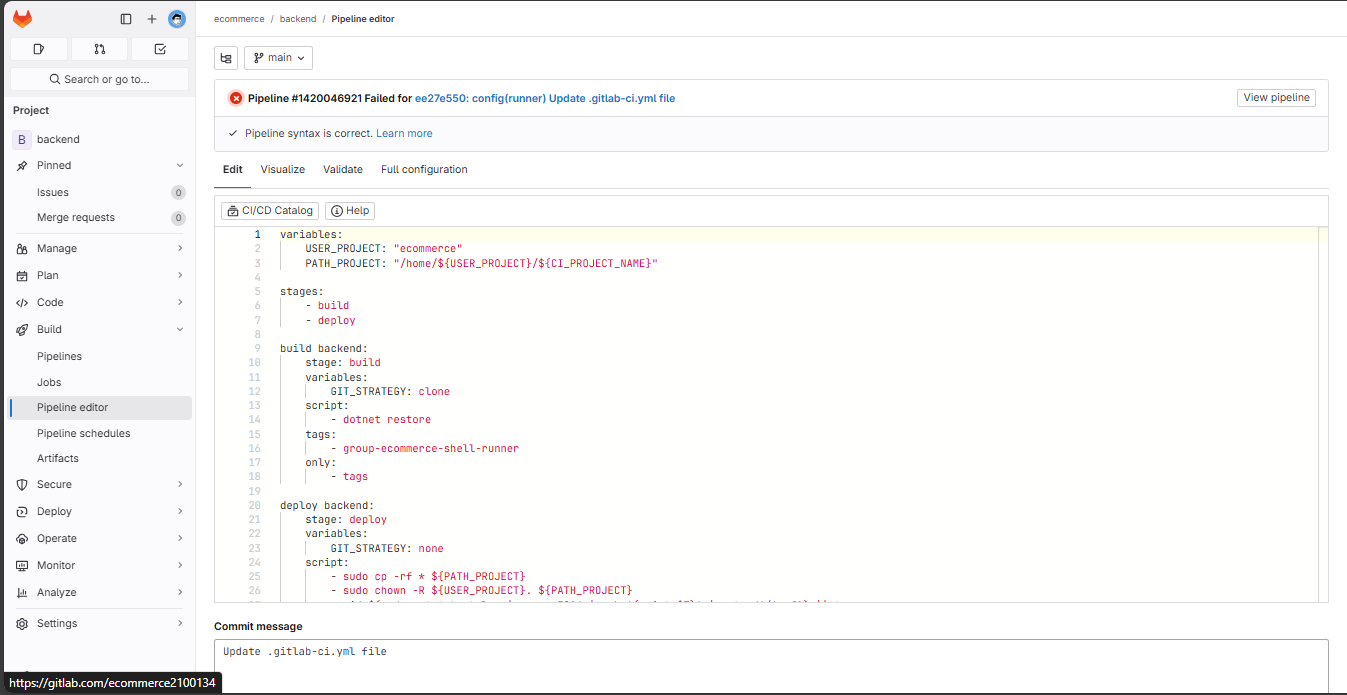
Click view pipeline.

You see that it says 0 jobs, meaning that when it read the .gitlab-ci.yml file, no jobs were executed. This is because we have an only: tags attribute in the script. It means that jobs will only run when a tag is created.
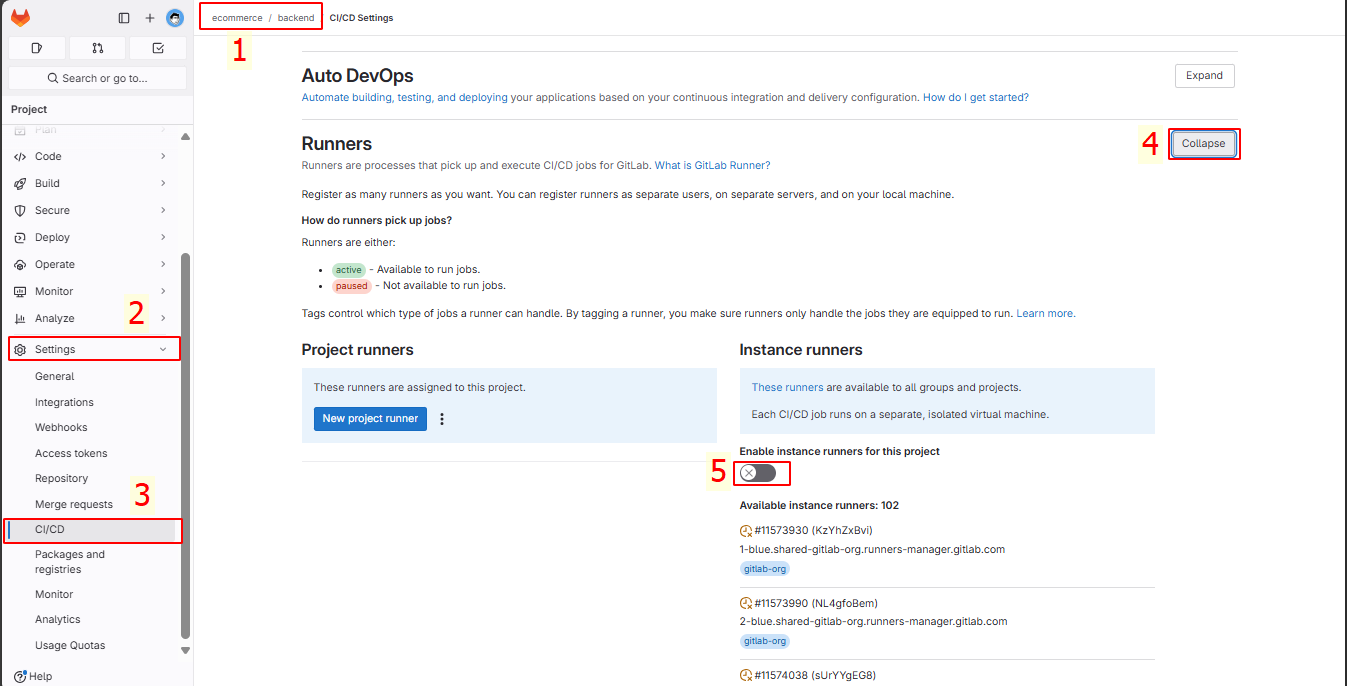
Now, I want to ensure that when committing to the main branch, no pipeline is executed unless a tag is created. Go to Settings → CI/CD → Runners → Expand → Disable Instance Runner.
Let’s enter the Pipeline Editor and add a line to check, then commit the changes.
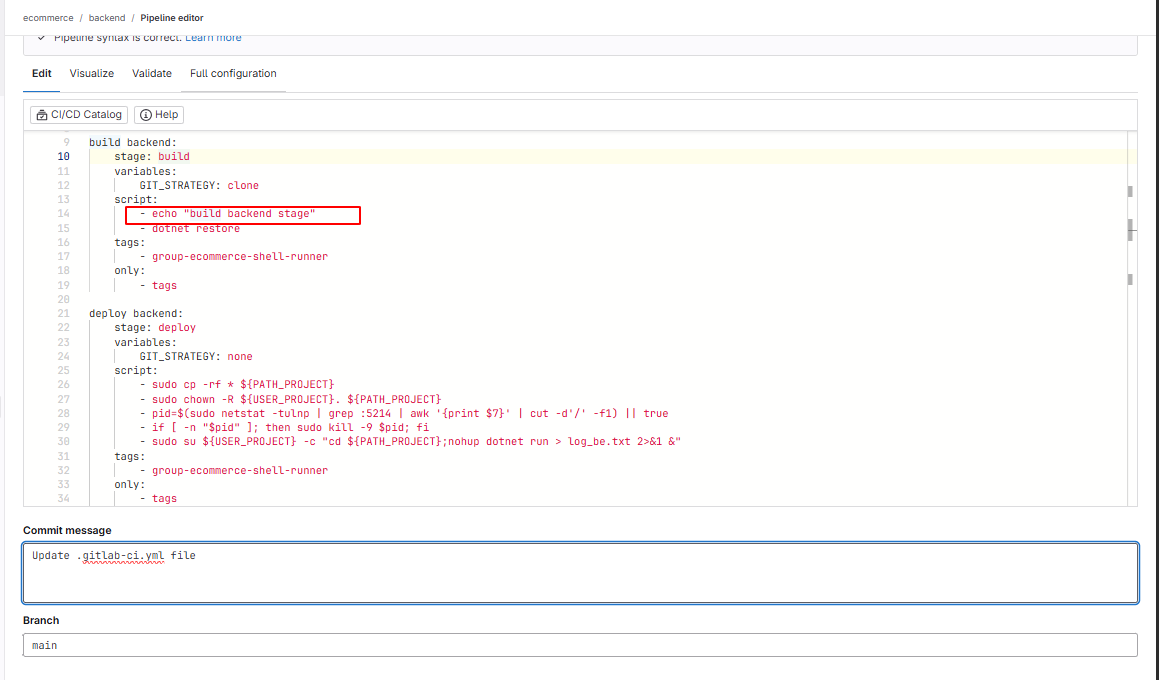
There is nothing added beyond the initial pipeline.
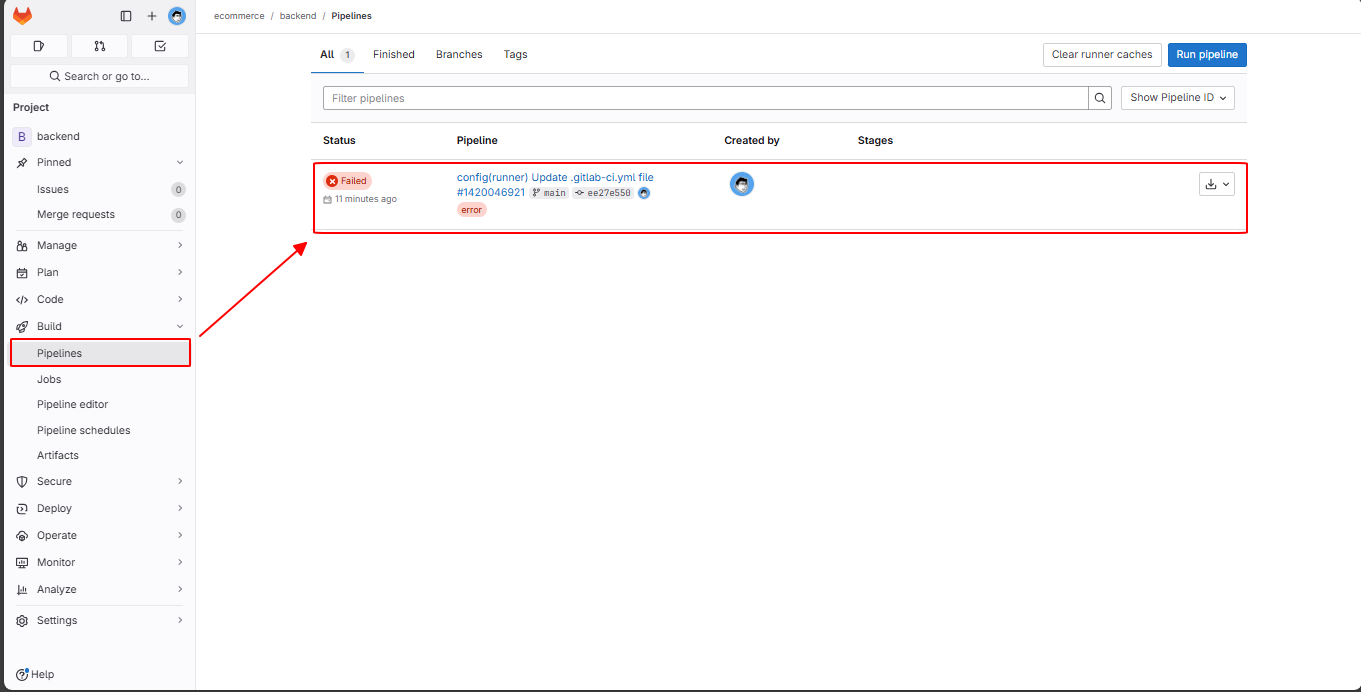
Now let’s test the CI/CD pipeline by creating tags.
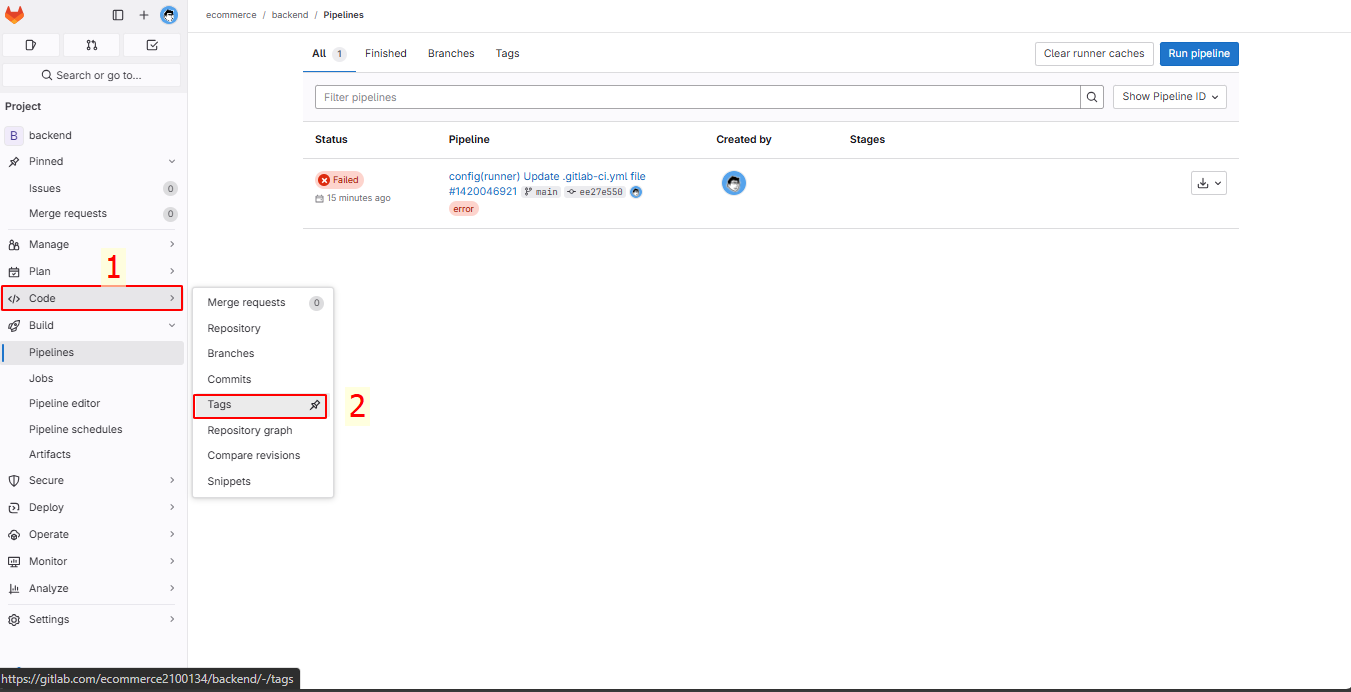
Select Code → Tags.
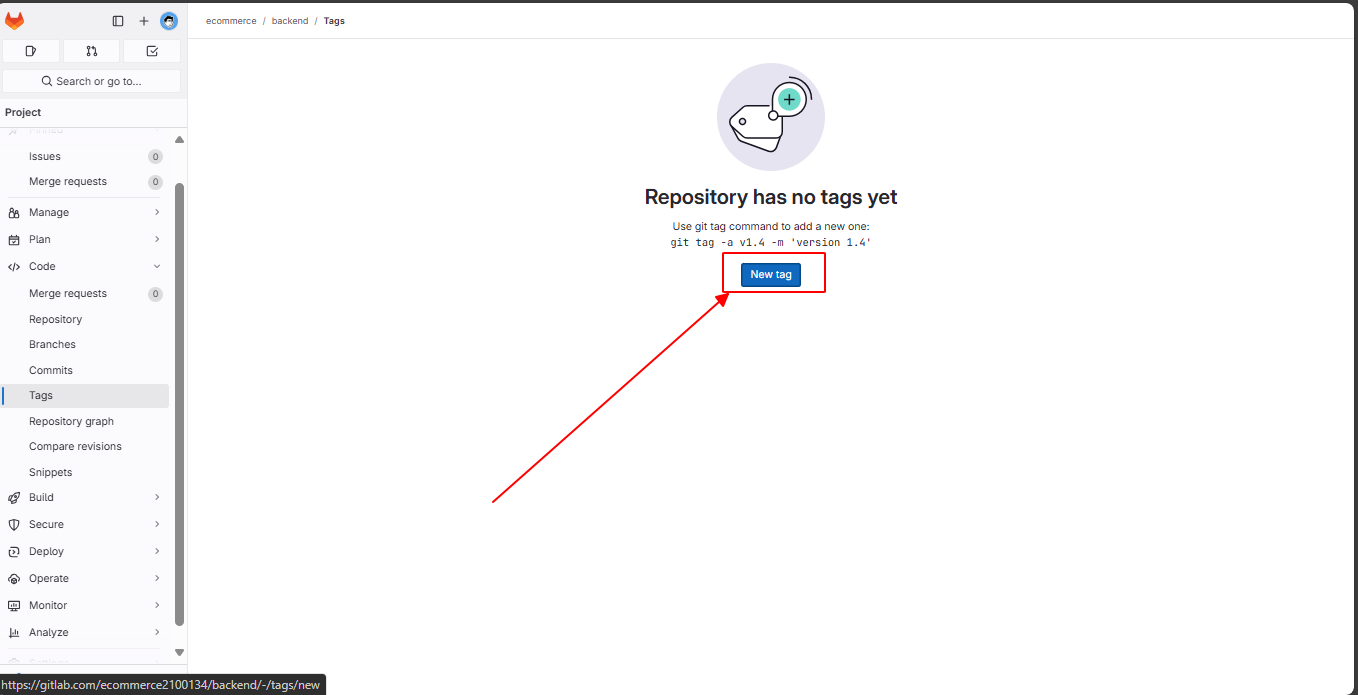
Create a new tag.
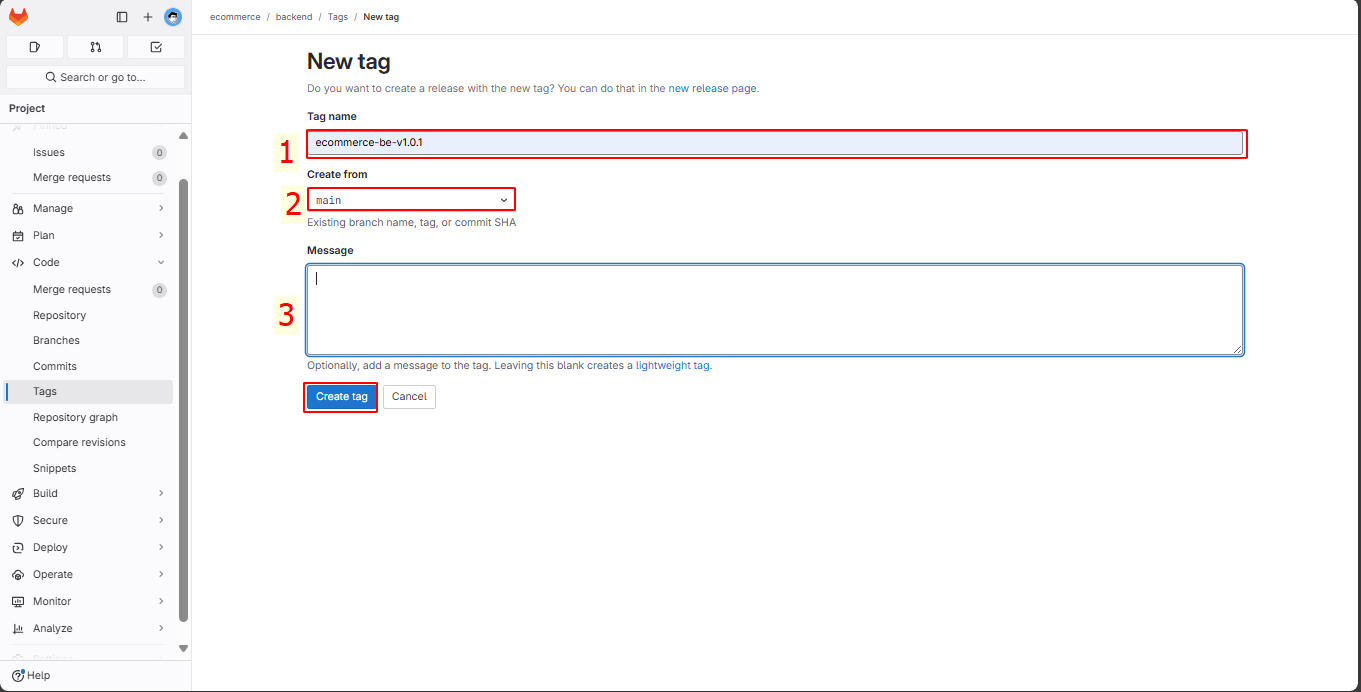
Enter the name, create from main, and click Create Tag.
Check the pipeline, and you’ll see a new pipeline running. Click to view details.
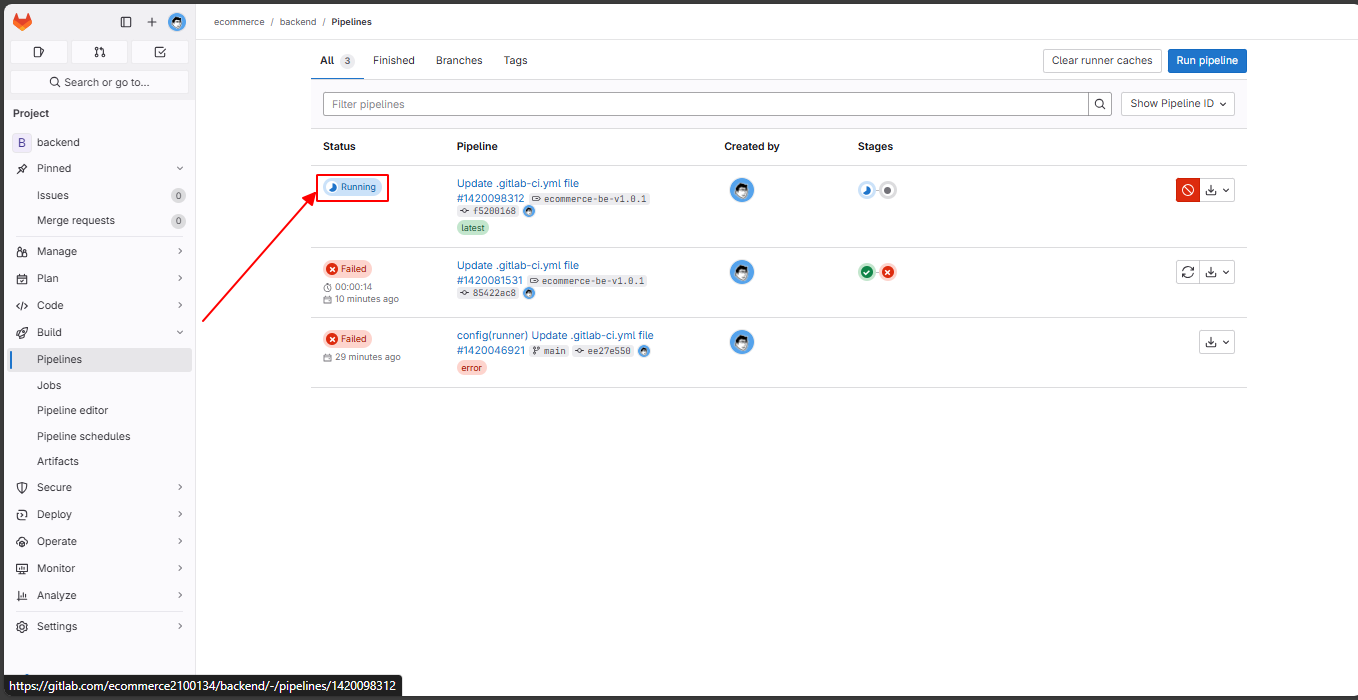
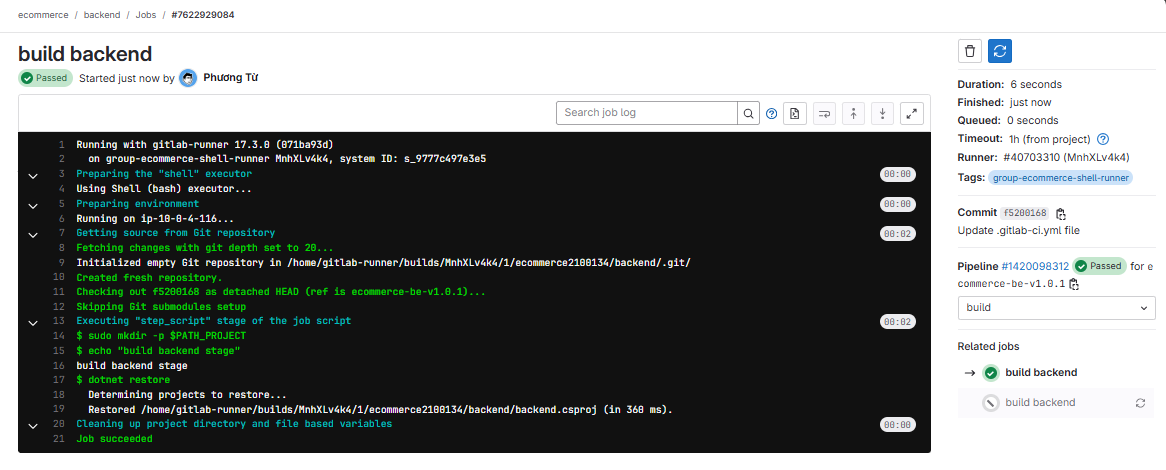
To see the detailed logs of each command, click on the corresponding stage.

Click on the build backend job.
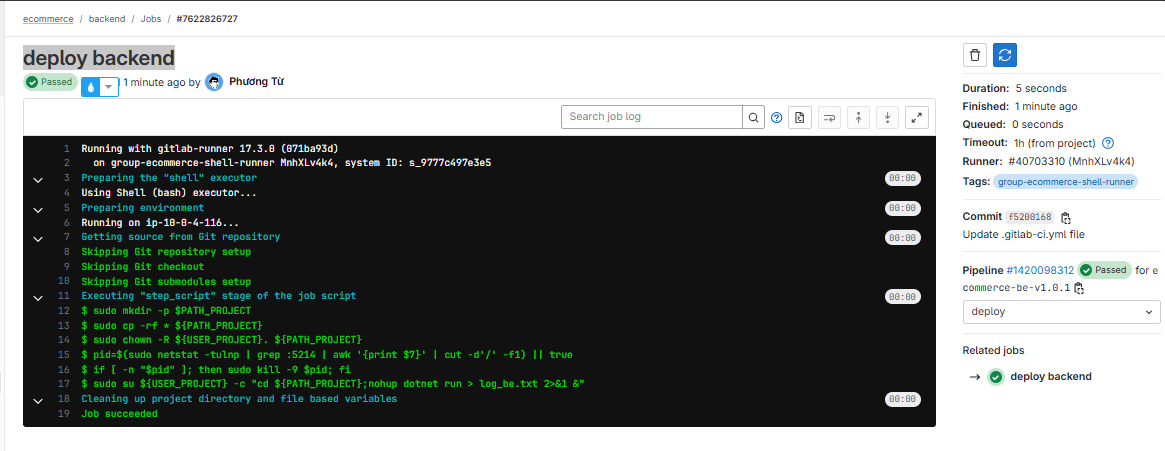
Then click on the deploy backend job.
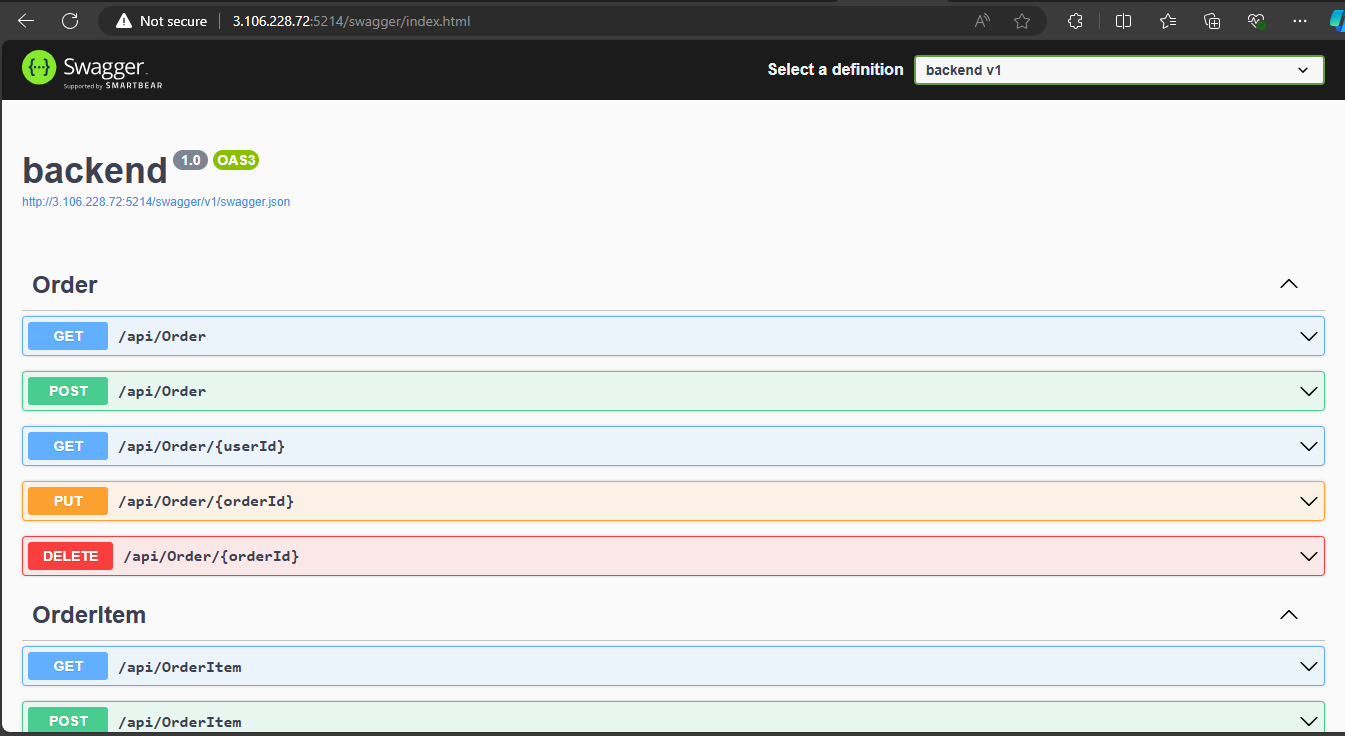
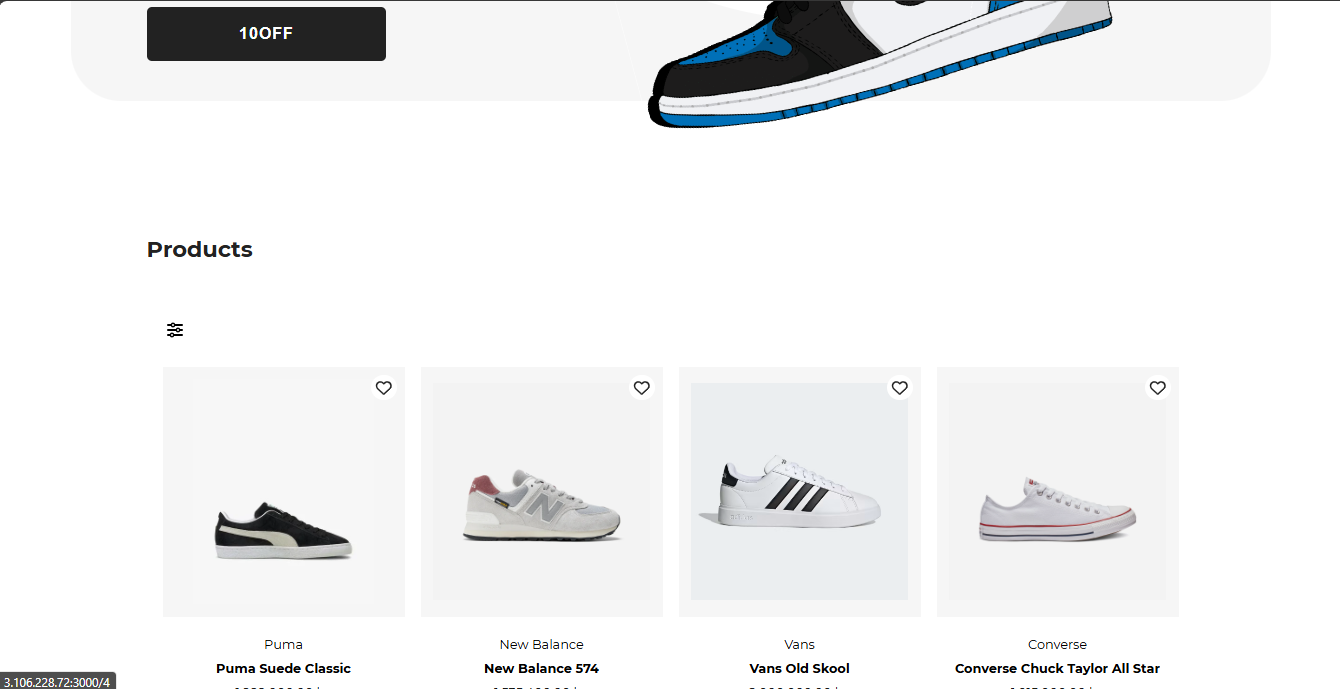
Check if the website is still running normally.
The website is still running smoothly.
5. Create CI/CD Pipeline for Backend
Go to Pipelines → Pipeline editor → Main → Enter the file → Commit Changes.
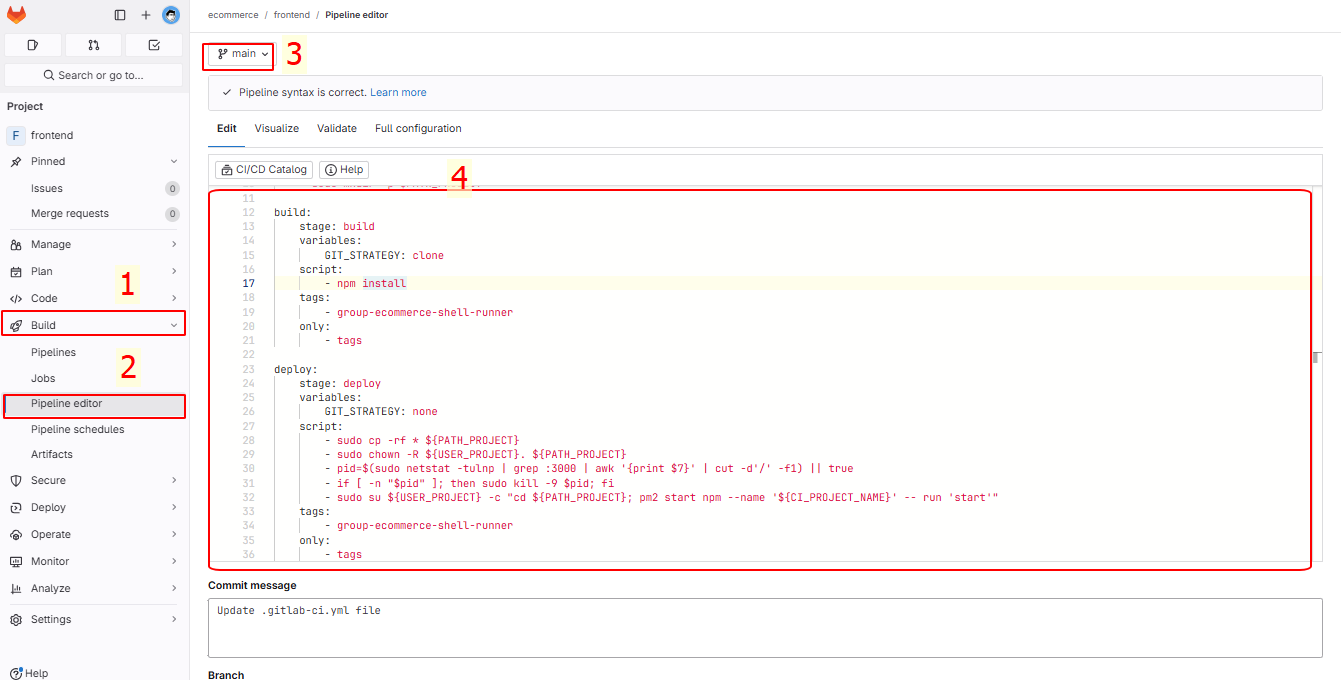
In the .gitlab-ci.yml file, enter the following line:
variables:
    USER_PROJECT: "ecommerce"
    PATH_PROJECT: "/home/${USER_PROJECT}/${CI_PROJECT_NAME}"

stages:
    - build
    - deploy

before_script:
    - sudo mkdir -p $PATH_PROJECT

build:
    stage: build
    variables:
        GIT_STRATEGY: clone
    script:
        - npm install
    tags:
        - group-ecommerce-shell-runner
    only:
        - tags

deploy:
    stage: deploy
    variables:
        GIT_STRATEGY: none
    script:
        - sudo cp -rf * ${PATH_PROJECT}
        - sudo chown -R ${USER_PROJECT}. ${PATH_PROJECT}
        - pid=$(sudo netstat -tulnp | grep :3000 | awk '{print $7}' | cut -d'/' -f1) || true
        - if [ -n "$pid" ]; then sudo kill -9 $pid; fi
        - sudo su ${USER_PROJECT} -c "cd ${PATH_PROJECT}; pm2 start npm --name '${CI_PROJECT_NAME}' -- run 'start'"
    tags:
        - group-ecommerce-shell-runner
    only:
        - tags
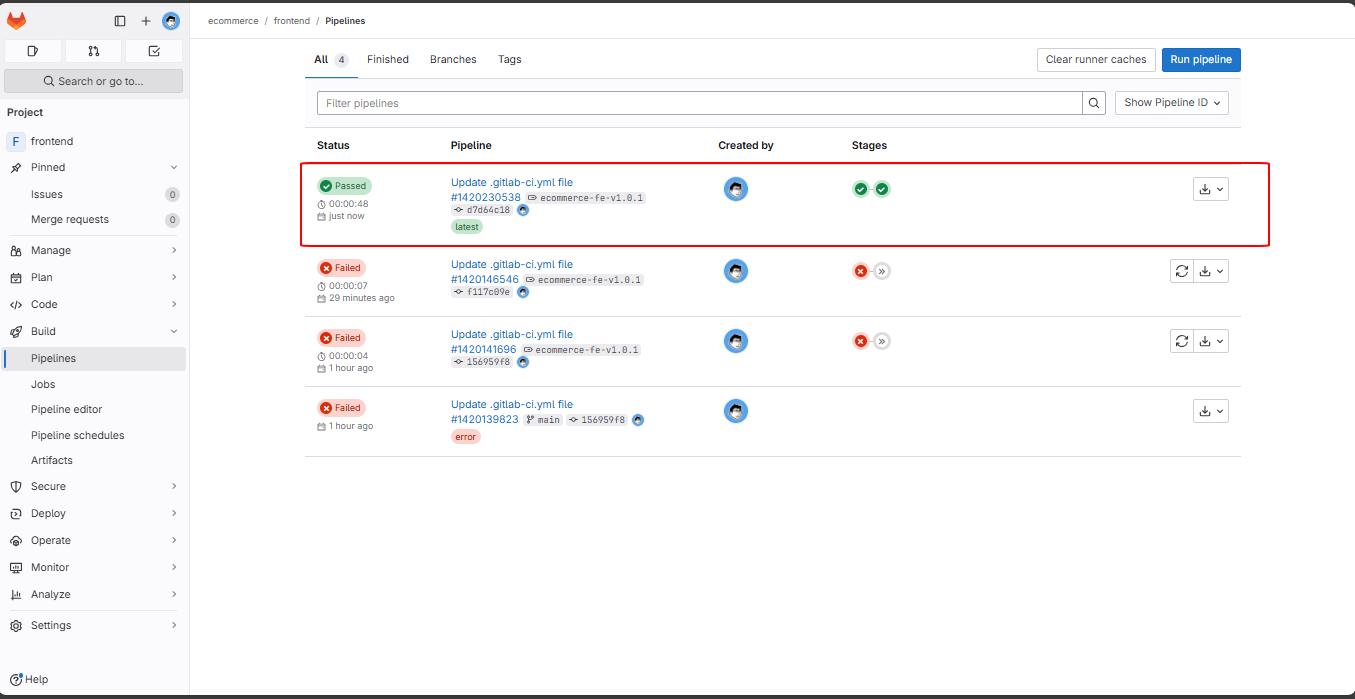
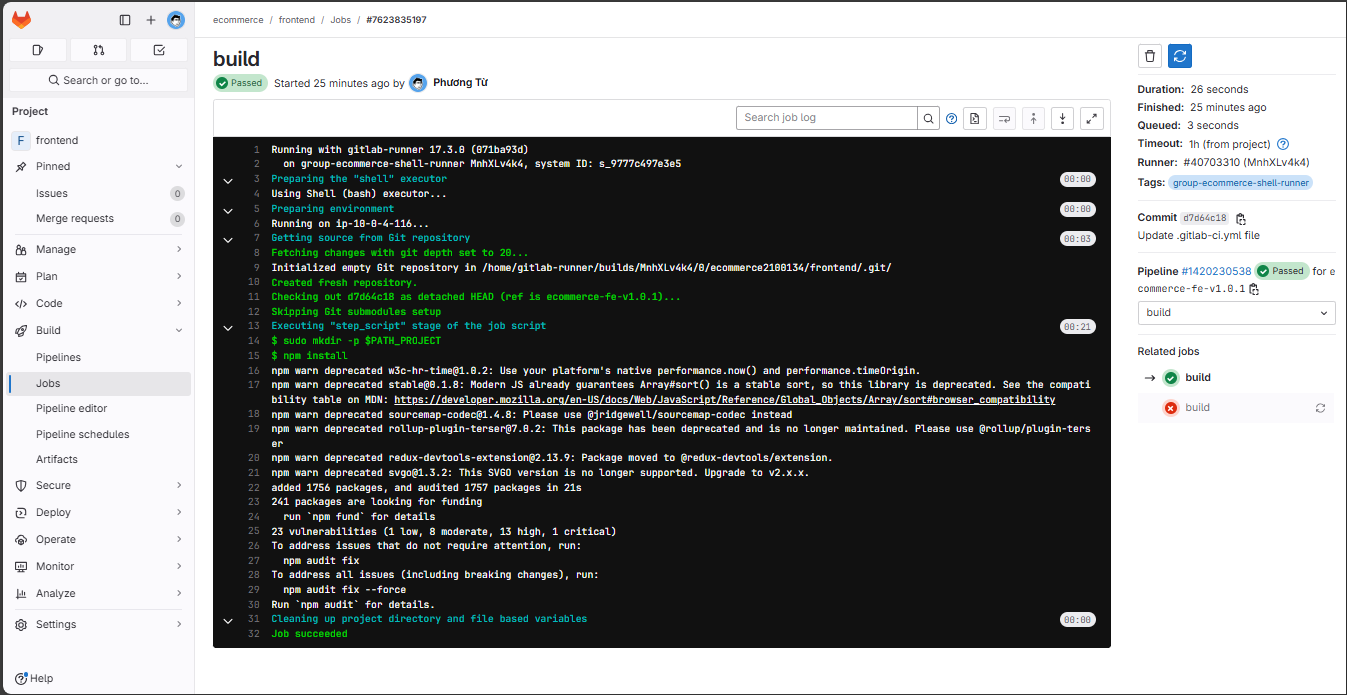
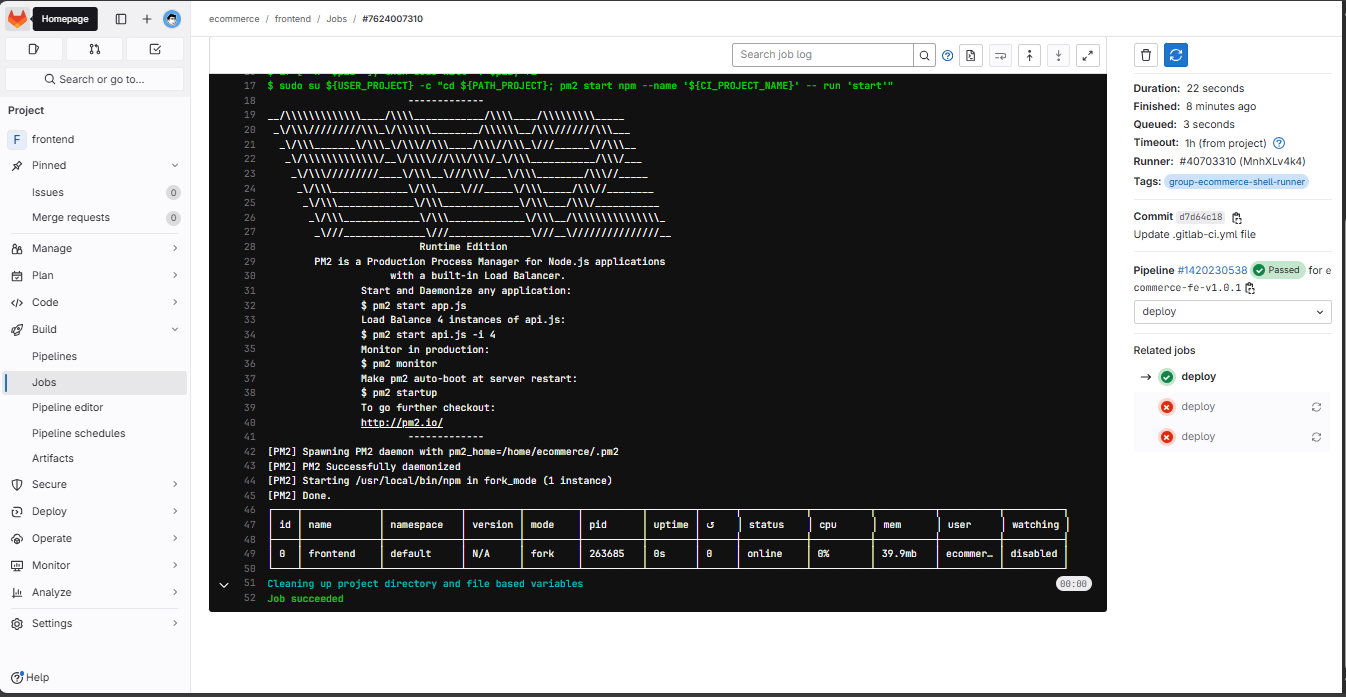
Then create tags and see the pipeline run successfully.
Then check if the backend is still running normally.
