Register Runner with Shell Executor
1. GitLab Runner Deployment Strategies
1.1 Instance Runner
- Instance Runners are deployed at the system-wide level and can be used by all projects within that GitLab instance.
- Suitable for organizations with multiple projects that need to share the same runner resources. This approach saves resources and makes management easier if all projects use the same type of runner with similar configurations.
- On GitLab.com, you cannot override the timeout for Instance Runners, so the timeout defined at the project level must be used.
1.2 Group Runner
- Group Runners are linked to a specific group, and all projects within that group can use the runner.
- Suitable when a group of related projects needs to share a runner with specific requirements for that group. Group Runners allow for more efficient resource management among projects within the same group without being affected by other projects in the system.
3. Project Runner
- Project Runners are directly attached to a single project.
- Ideal for projects with special requirements for the environment or resources that cannot be shared with other projects. This provides the highest level of control over how the runner operates and allows for optimization specific to each project.
- You can override the timeout directly at the project level without affecting other projects.
2. Register Runner with Shell Executor
We will deploy GitLab Runner on the same instance, so we should choose the Group Runner strategy.
The Group Runner will serve all projects in the ecommerce group, including both frontend and backend. This helps us manage and share resources more efficiently among related projects within the same group.
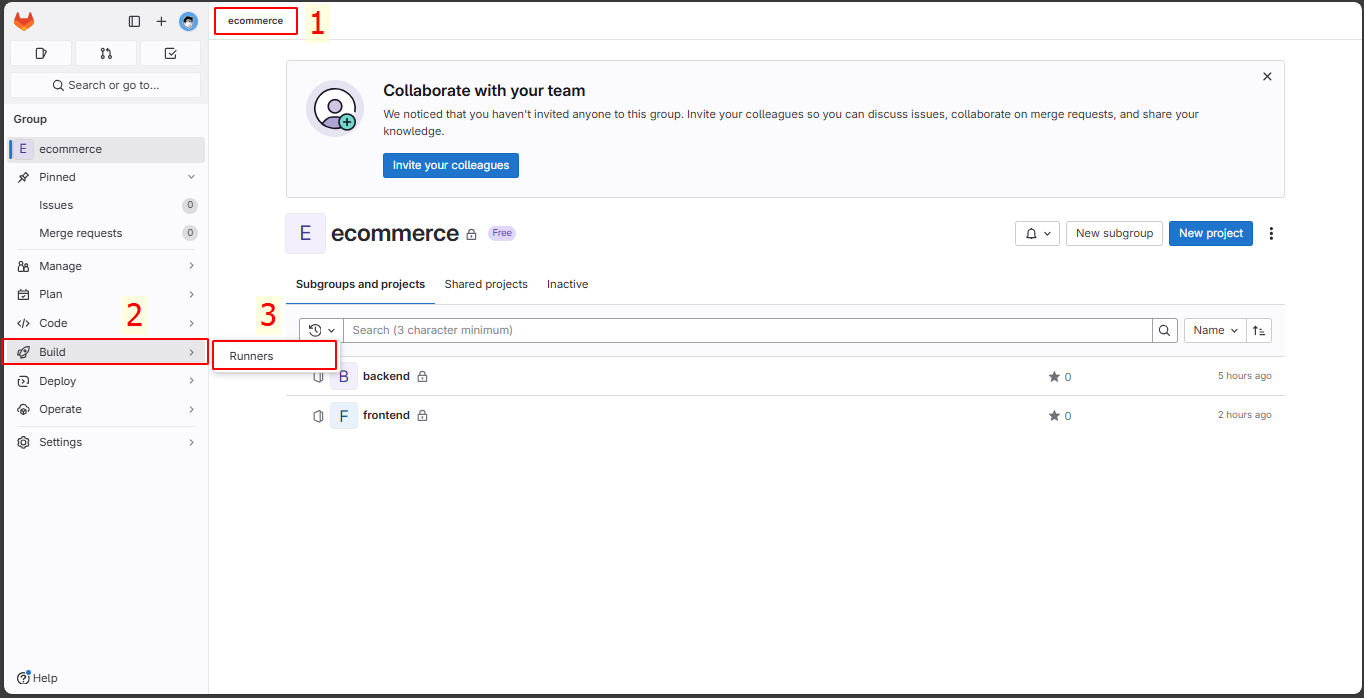
First, go to the ecommerce → Build → Runners group.
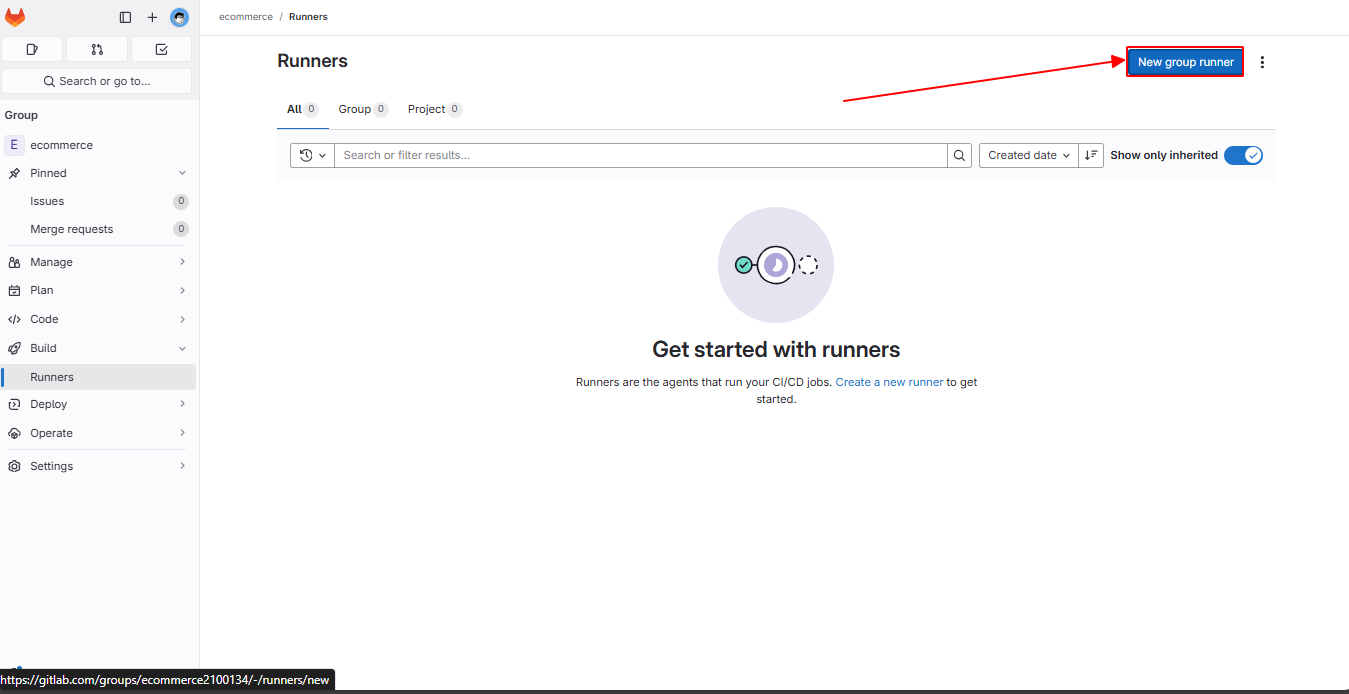
Click on New group runner to create one.
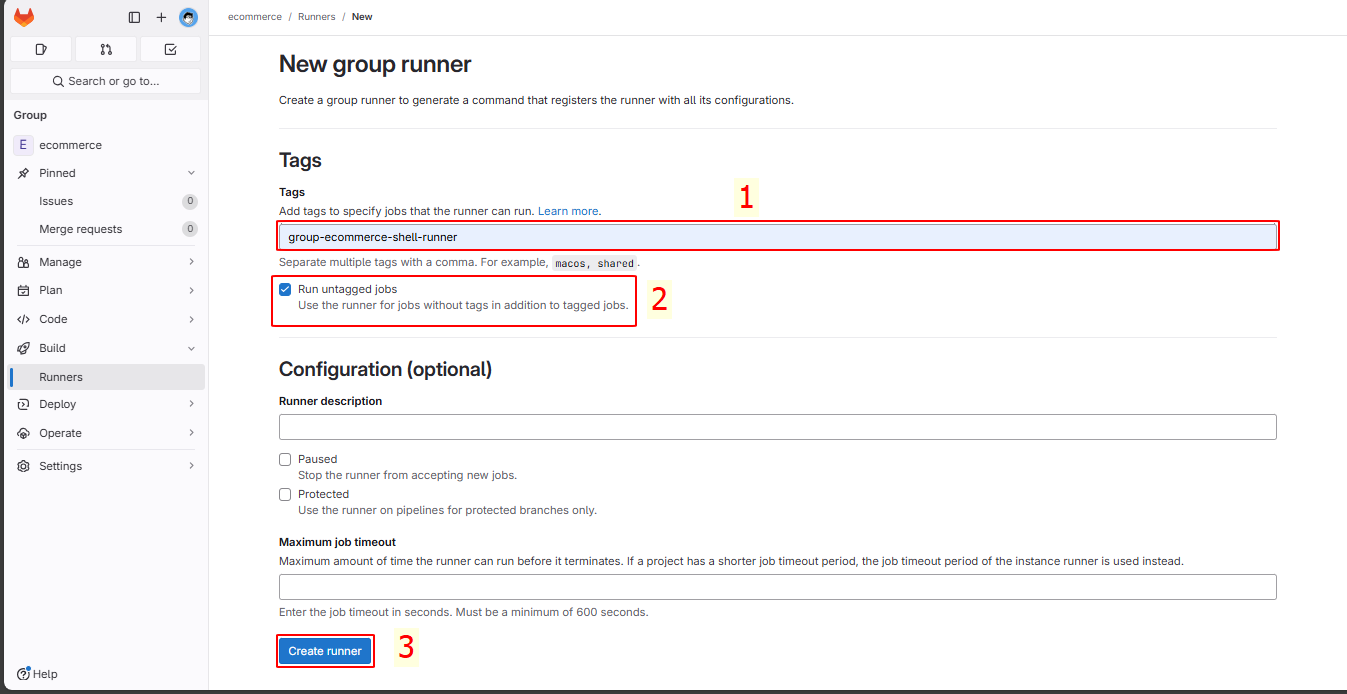
Create a new runner:
- Tags: group-ecommerce-shell-runner
- Enable: Run untagged jobs
- Click the Create Runner button to create it.
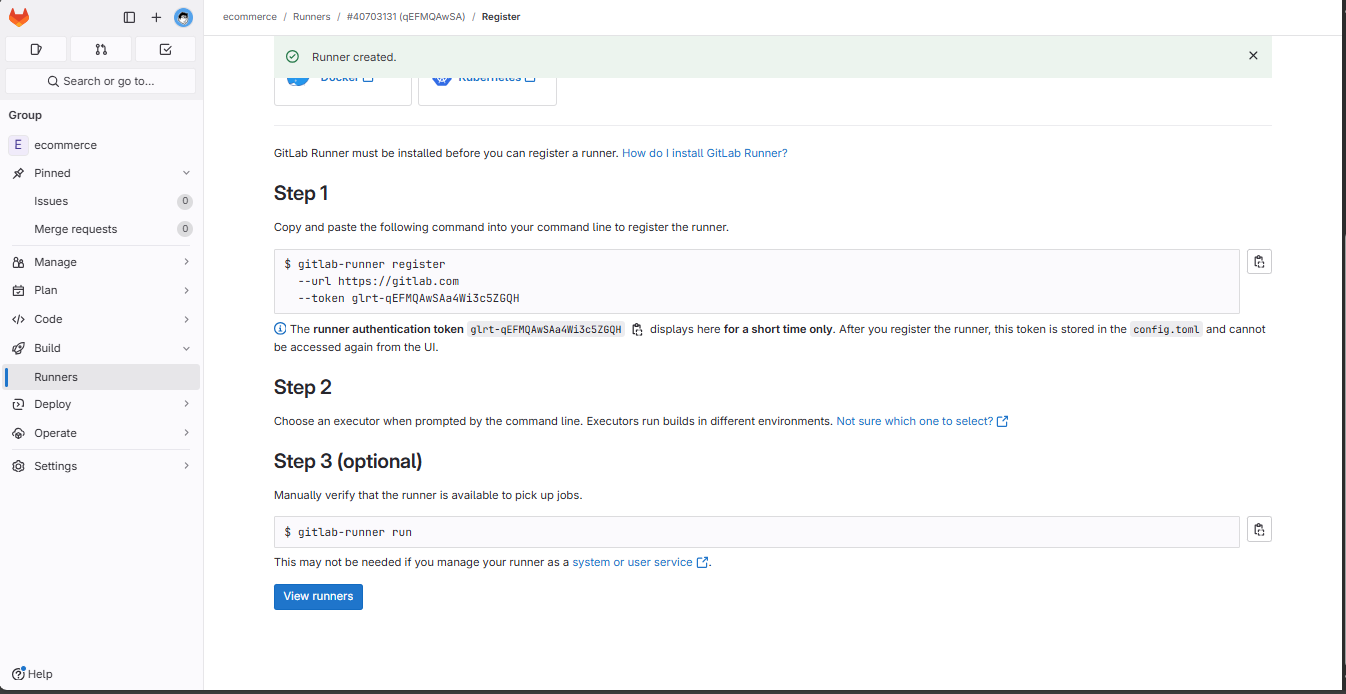
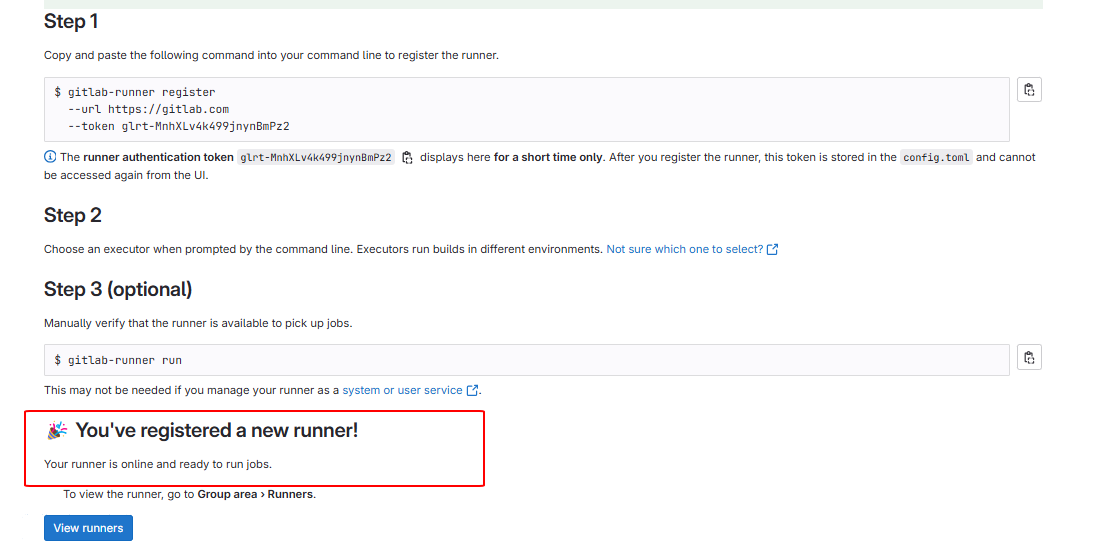
After creating it, you will see the steps to register the runner.
First, we must switch to the gitlab-runner user to ensure the runner can run correctly.
su gitlab-runner
cd

In steps 1 and 2, copy and run the commands, then fill in the information as shown below:
- URL: https://gitlab.com
- Runner name: group-ecommerce-shell-runner-build
- Executor: shell
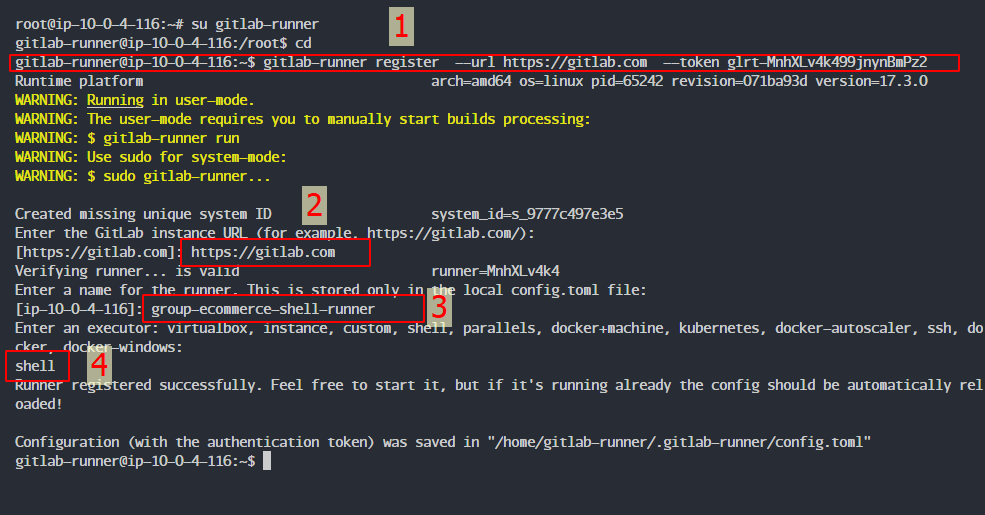
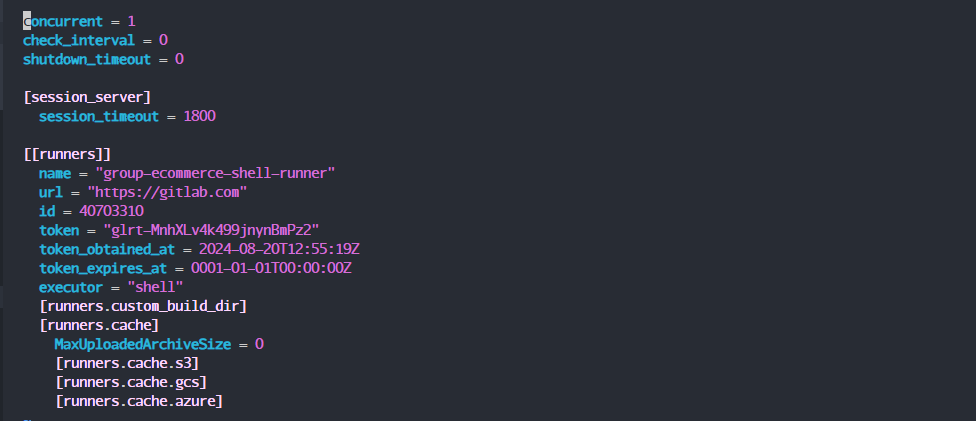
The configuration file will be saved at /home/gitlab-runner/.gitlab-runner/config.toml.
vi /etc/gitlab-runner/config.toml
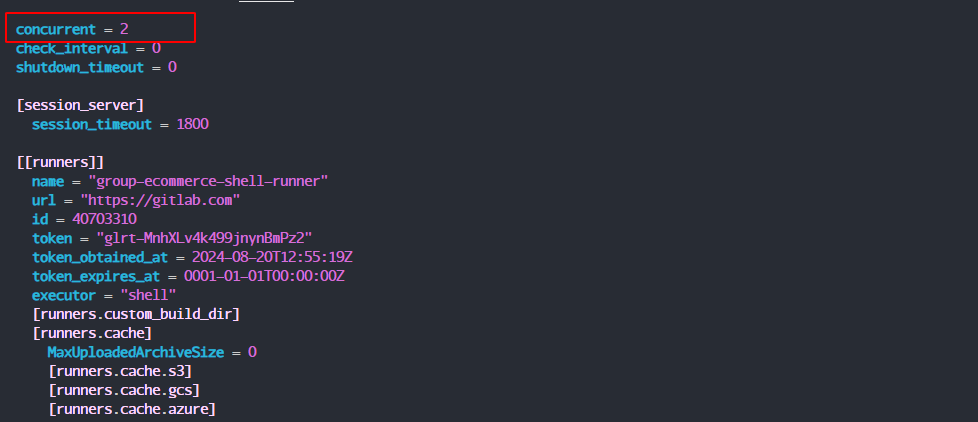
We proceed to edit concurrent = 2 so that the group runner can simultaneously run both the backend and frontend, then press Esc + :x to save the changes.
In step 3, we run:
gitlab-runner run

You will see that the GitLab interface shows that the connection has been established.
🡇 Content 🡇
The connection has been successfully established, but sometimes, when you exit the command using Ctrl + C, the instance will not receive triggers from the .gitlab-ci.yml file. The best practice is to let it run in the background by running:
nohup gitlab-runner run > start-gitlab-runner.txt 2>&1 &

🡅 Content 🡅
That’s it! We have completed the registration process!