Basic Gitflow Implementation on GitLab
In this section, we will implement a basic Gitflow on GitLab. If you haven’t seen or fully grasped the workflow, please refer back to 1.2 Introduction to Gitflow.
We already have the frontend code from the previous section. Here, we will implement a simple Gitflow.
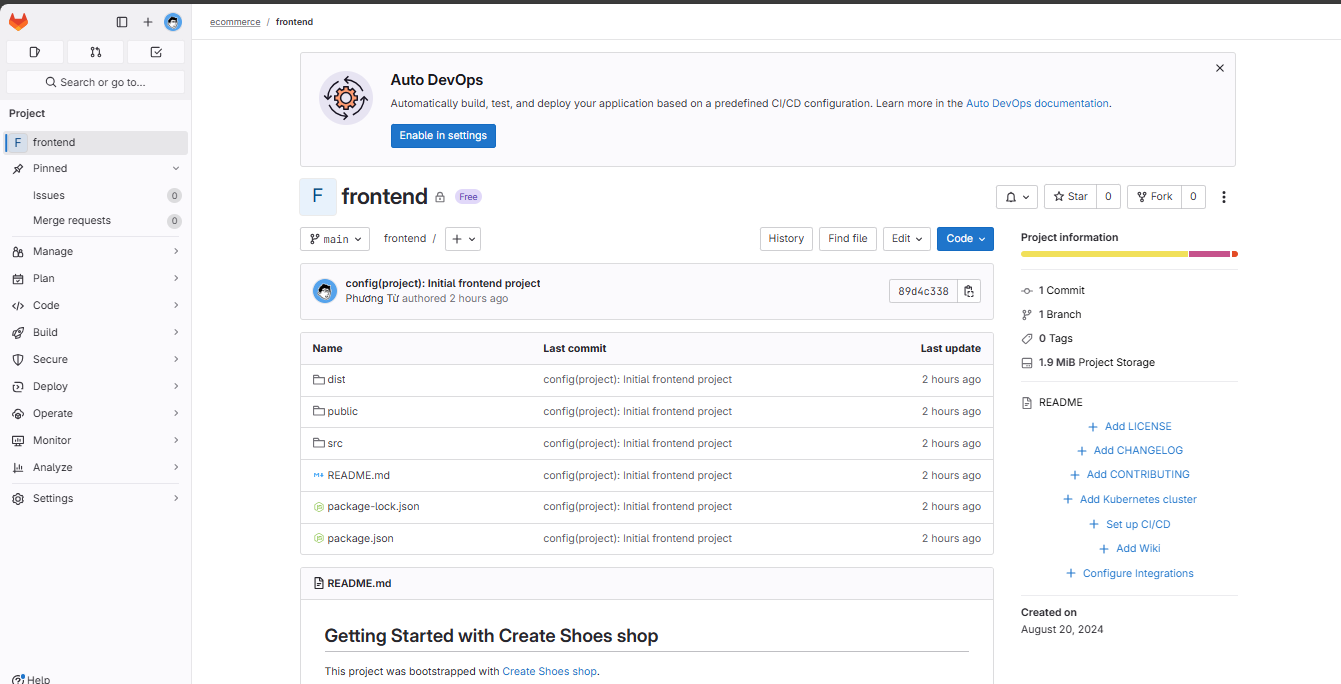
Before starting to develop a new feature, we should create an Issue.
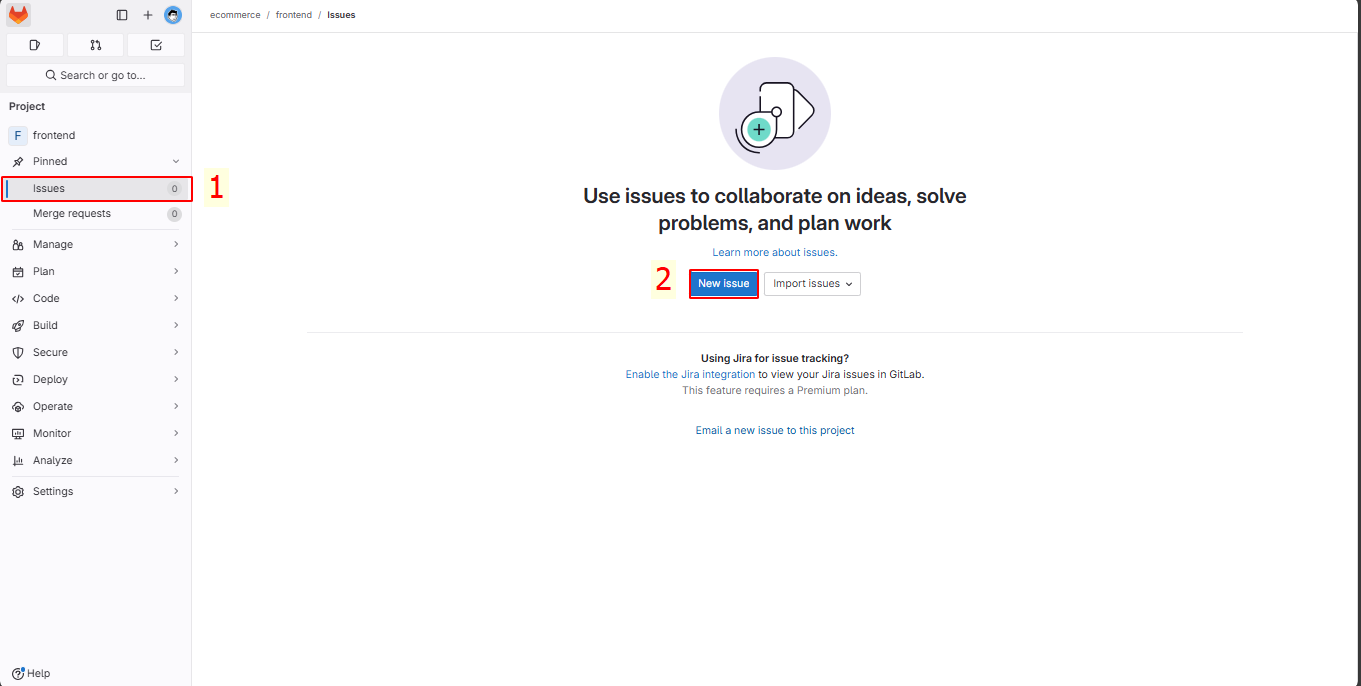 )
)
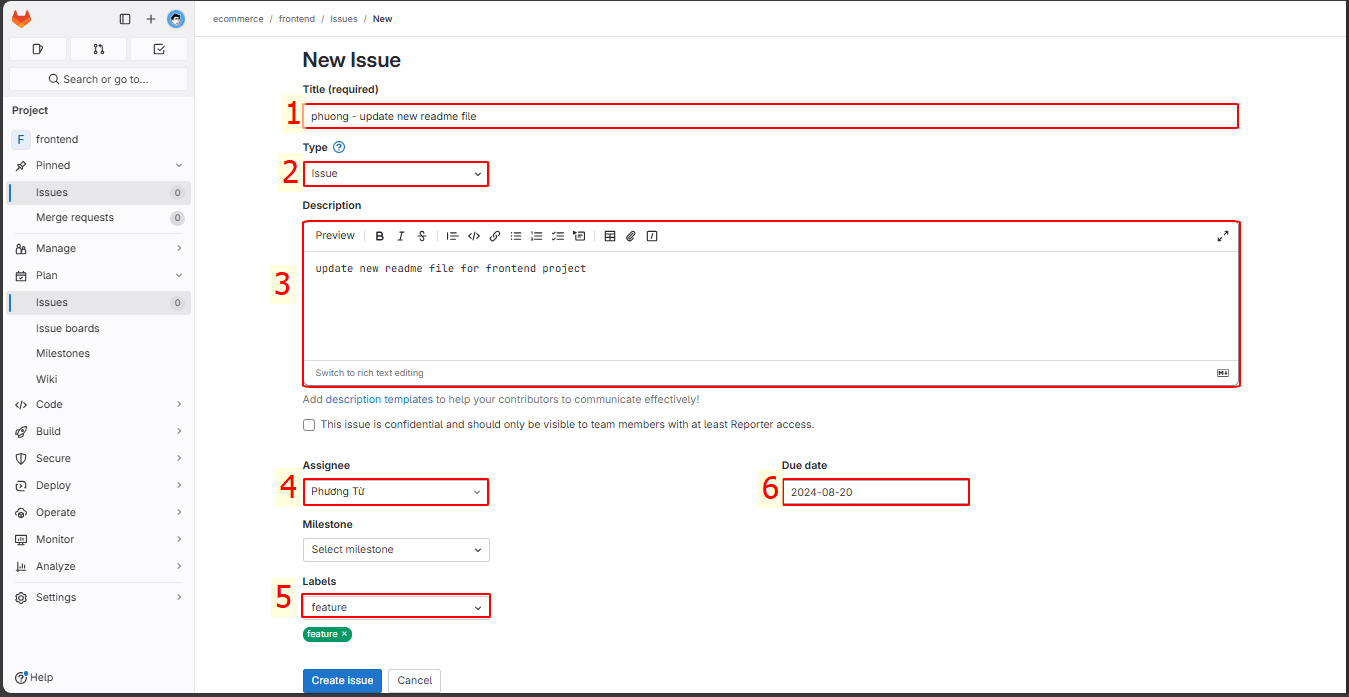
In New Issue:
- Title: “name - title”
- Type: Issue
- Description: update new readme file for frontend project
- Assignee: Assign to me
- Labels: feature
Now we will apply this model to the project. First, we create a new branch.
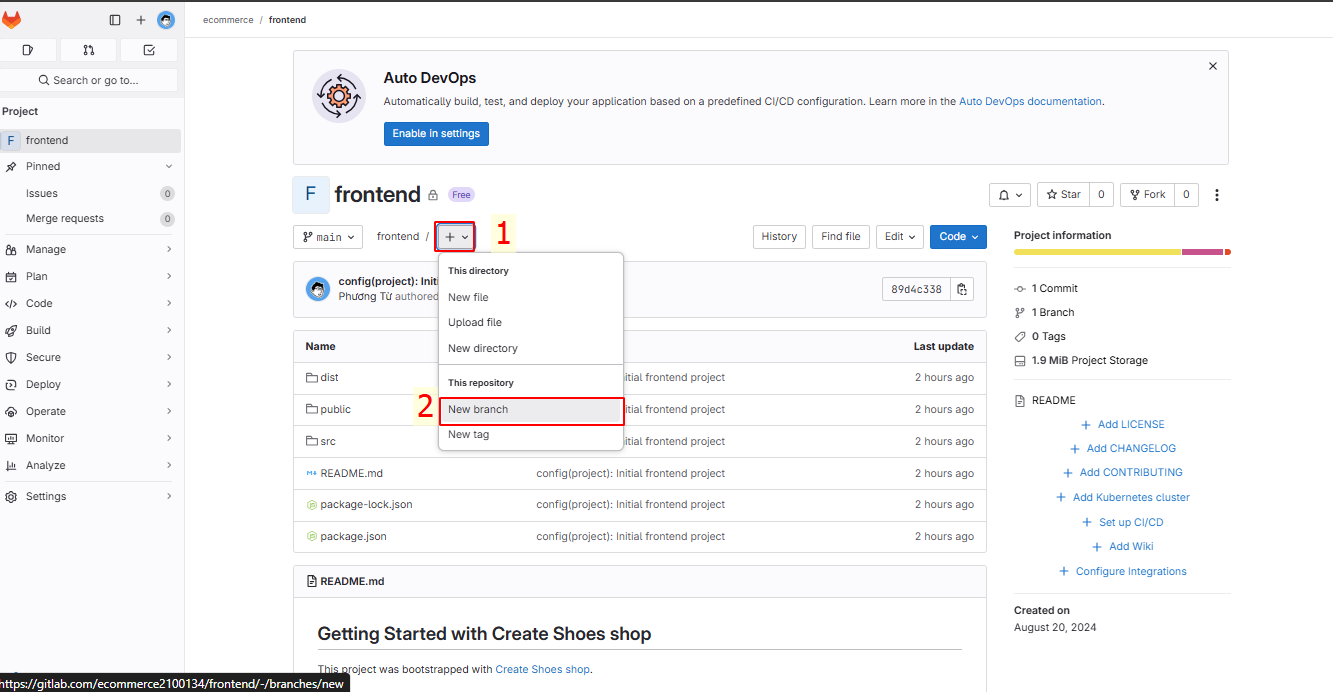
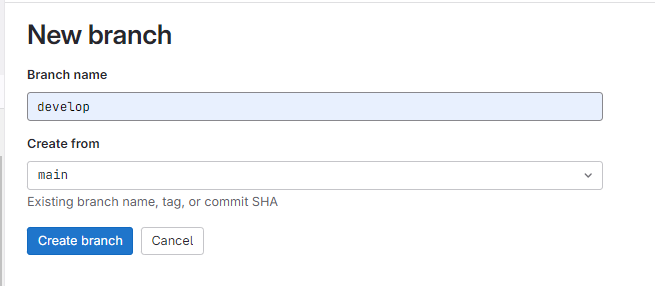
Name the new branch develop from the main branch.
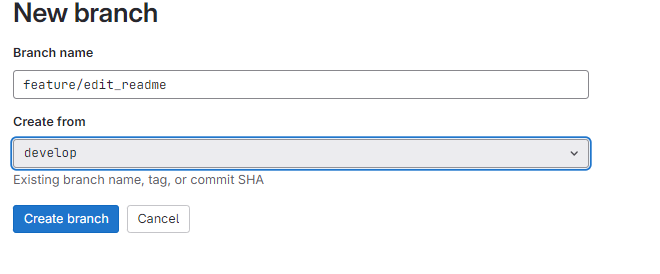
Next, create a feature branch feature/edit_readme from the develop branch. Here, we simulate the development of a specific feature.
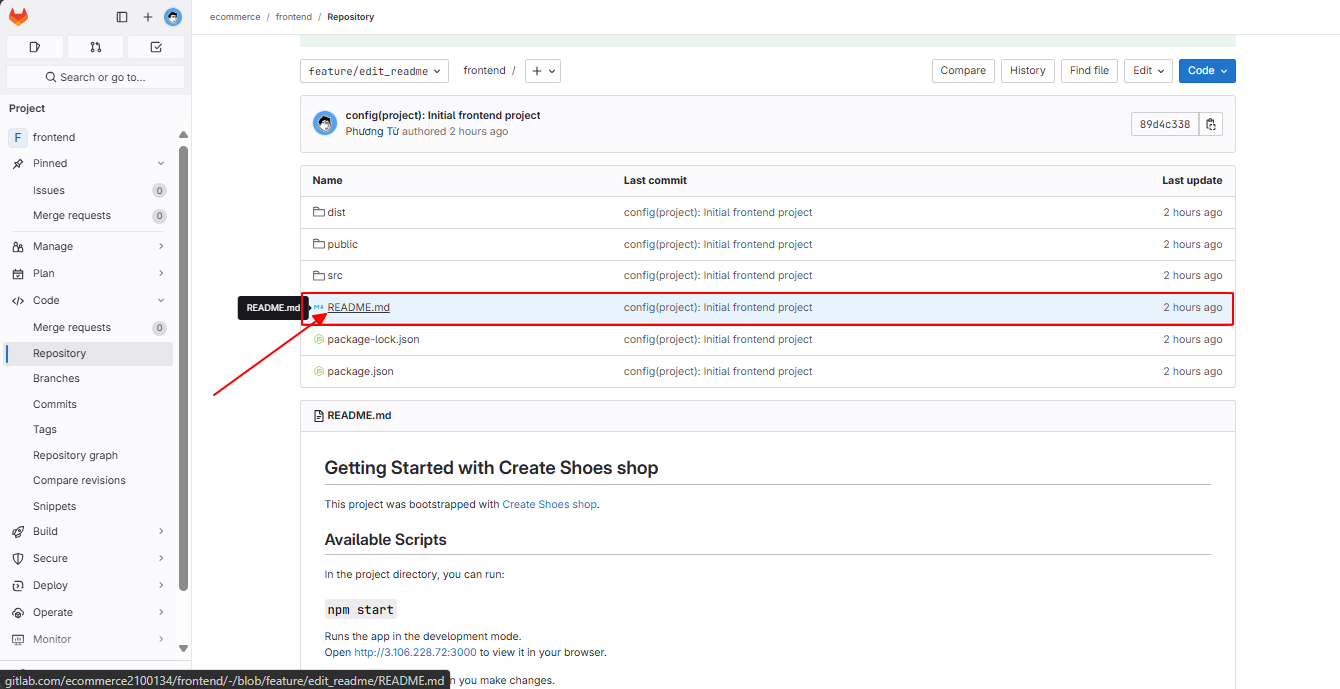
Click on the README.md file in the feature/edit_readme branch.
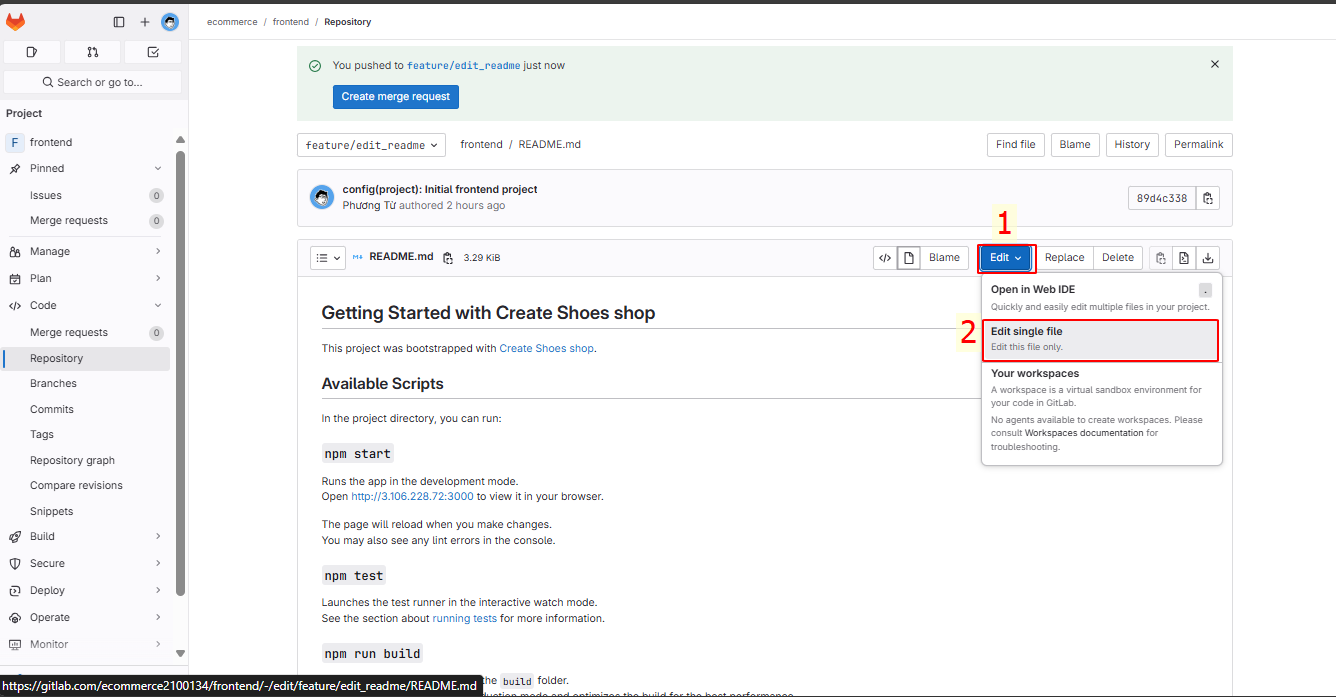
Select Edit → Edit Single File
Here, in edit_readme, we edit the README.md file in the feature/edit_readme branch and commit the changes.
Ecommerce - Getting Started
============================

Welcome to the Ecommerce project! This repository contains the source code for an online shoe store built using React. This guide will help you get started with setting up, running, and deploying the project.

Prerequisites
-------------

Before you start, ensure you have the following installed on your machine:

*   [Node.js](https://nodejs.org/) (v12.x or later)
*   [npm](https://www.npmjs.com/) (v6.x or later)

Project Setup
-------------

This project was bootstrapped with [Create React App](https://github.com/facebook/create-react-app).

### Available Scripts

In the project directory, you can run the following scripts:

#### `npm start`

*   Launches the app in development mode.
*   Open [http://3.106.228.72:3000](http://3.106.228.72:3000) to view it in the browser.
*   The page will automatically reload if you make edits.
*   Any lint errors will be displayed in the console.

#### `npm test`

*   Starts the test runner in interactive watch mode.
*   Refer to the running tests section for more details.

#### `npm run build`

*   Builds the app for production, outputting the result to the `build` folder.
*   React is bundled in production mode and optimized for the best performance.
*   The build is minified, and filenames include hashes for efficient caching.
*   Your app will be ready for deployment. See the [deployment guide](https://facebook.github.io/create-react-app/docs/deployment) for more information.

#### `npm run eject`

*   **Note:** This is a one-way operation. Once you eject, you cannot revert this action.
*   Ejecting allows you to take full control of the build configurations (webpack, Babel, ESLint, etc.).
*   You should only use eject if you need more customization than what Create React App provides.

Learn More
----------

*   Create React App Documentation - Detailed documentation for using and configuring Create React App.
*   React Documentation - Comprehensive guide to learning and using React.

### Additional Resources

*   **Code Splitting:** [Guide](https://facebook.github.io/create-react-app/docs/code-splitting) on how to split your code into smaller bundles.
*   **Bundle Size Analysis:** [Guide](https://facebook.github.io/create-react-app/docs/analyzing-the-bundle-size) for analyzing the size of your bundles.
*   **Progressive Web App (PWA):** [Guide](https://facebook.github.io/create-react-app/docs/making-a-progressive-web-app) on making your app a PWA.
*   **Advanced Configuration:** [Guide](https://facebook.github.io/create-react-app/docs/advanced-configuration) for advanced customization.
*   **Deployment:** [Guide](https://facebook.github.io/create-react-app/docs/deployment) on how to deploy your app to different hosting platforms.

### Troubleshooting

*   **Build Fails to Minify:** [Guide](https://facebook.github.io/create-react-app/docs/troubleshooting#npm-run-build-fails-to-minify) to troubleshoot issues with the build process.
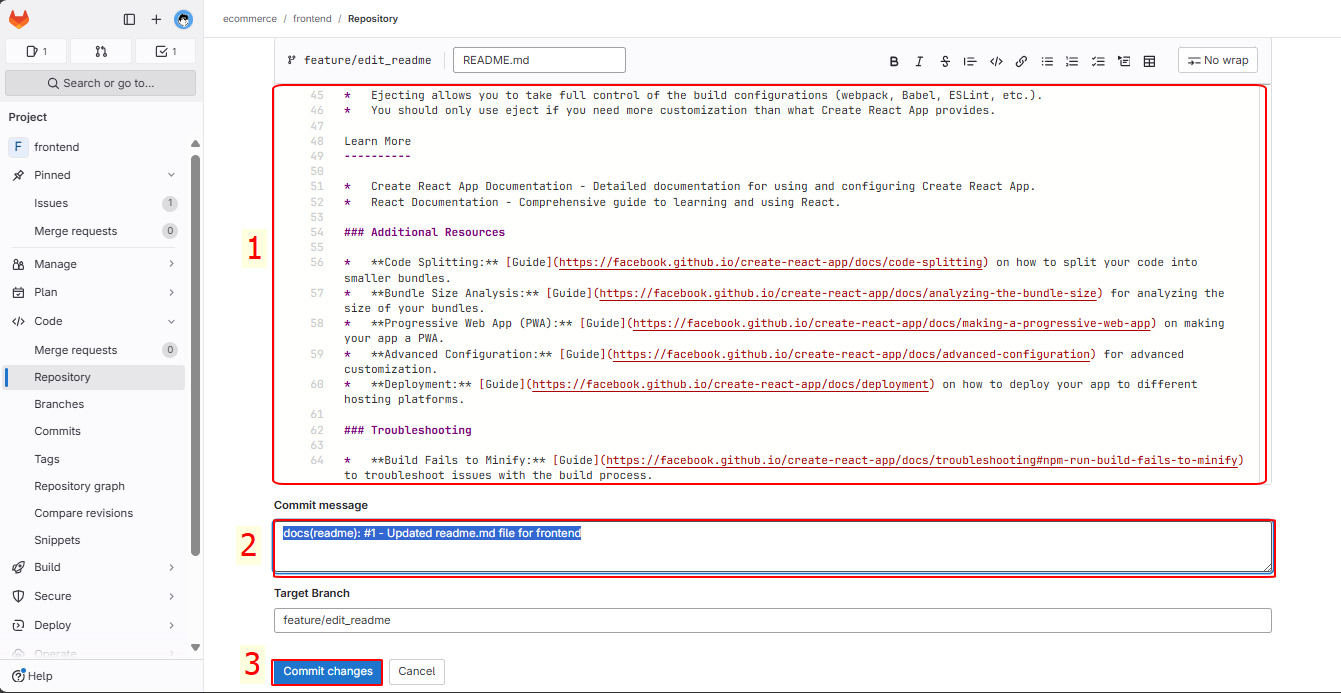
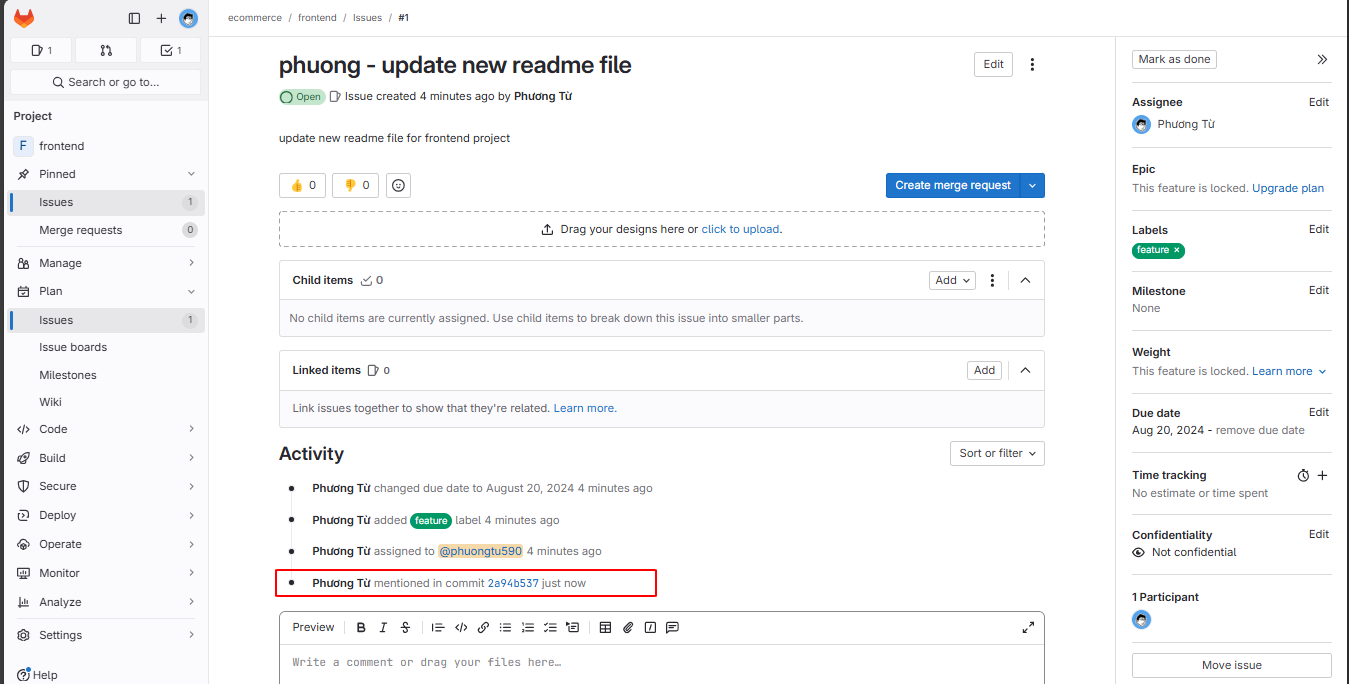
Note #1: This is the ID of the Issue we created earlier. Immediately, the Issue will show the activity of this commit.
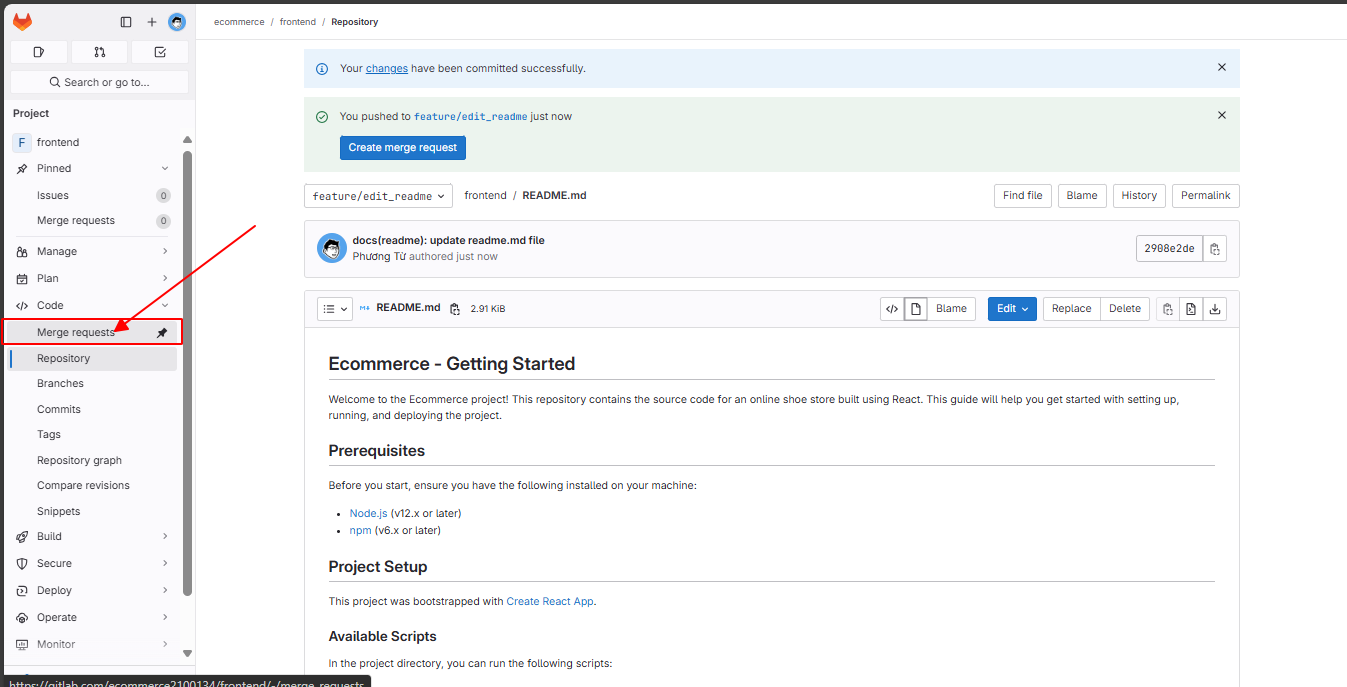
After developing the new feature, in this case, changing the README.md file in the feature/edit_readme branch, we merge the code back into the develop branch.
We will create a new Merge Request.
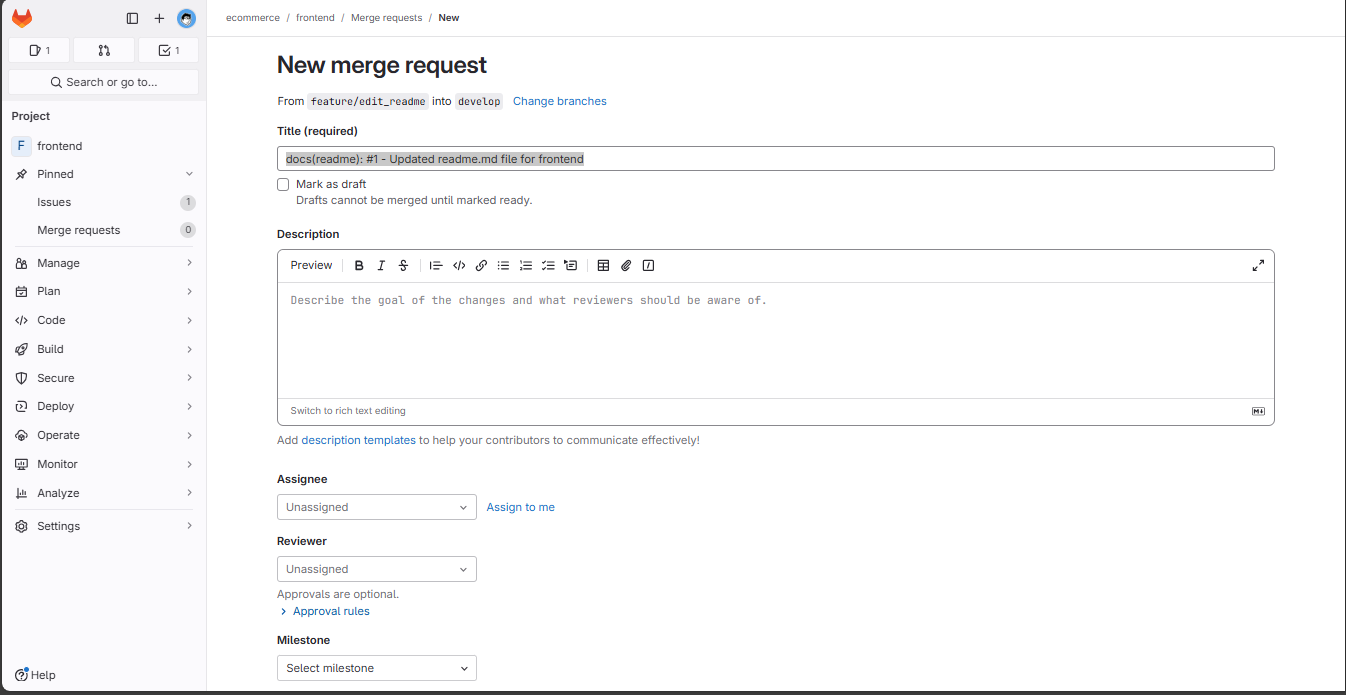
Choose the source branch as feature/edit_readme and the target branch as develop. Then click Compare branches and continue.

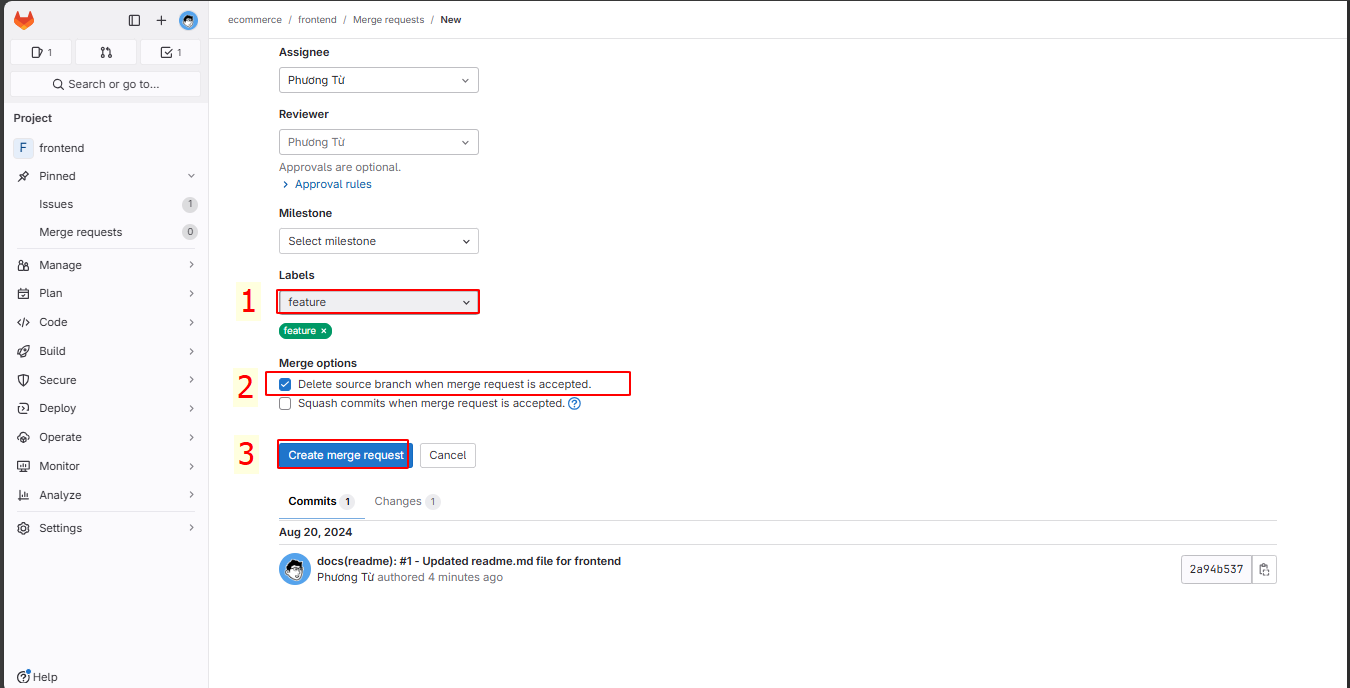
On the New merge request interface, you can set Title, Description, Assignee, Reviewer.
Scroll down, add the label feature, enable “Delete source branch when merge request is accepted.” → create merge request.
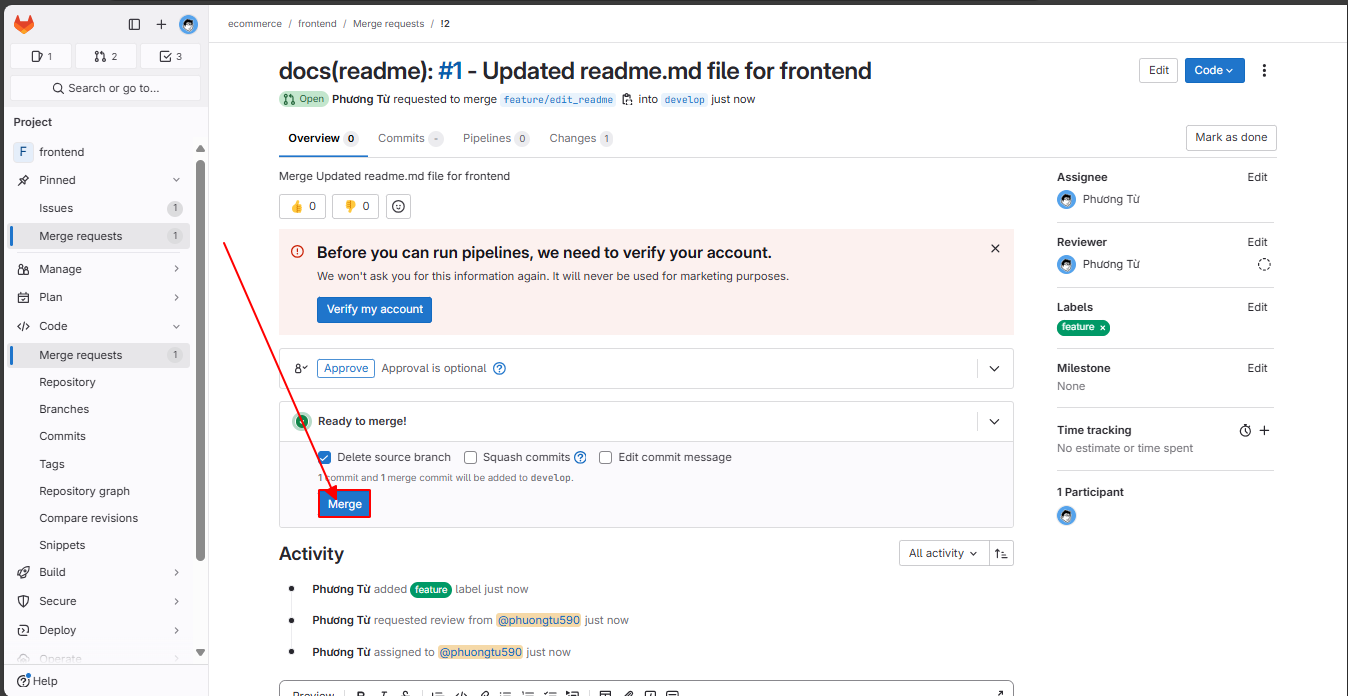
On the merge request interface, click Merge.
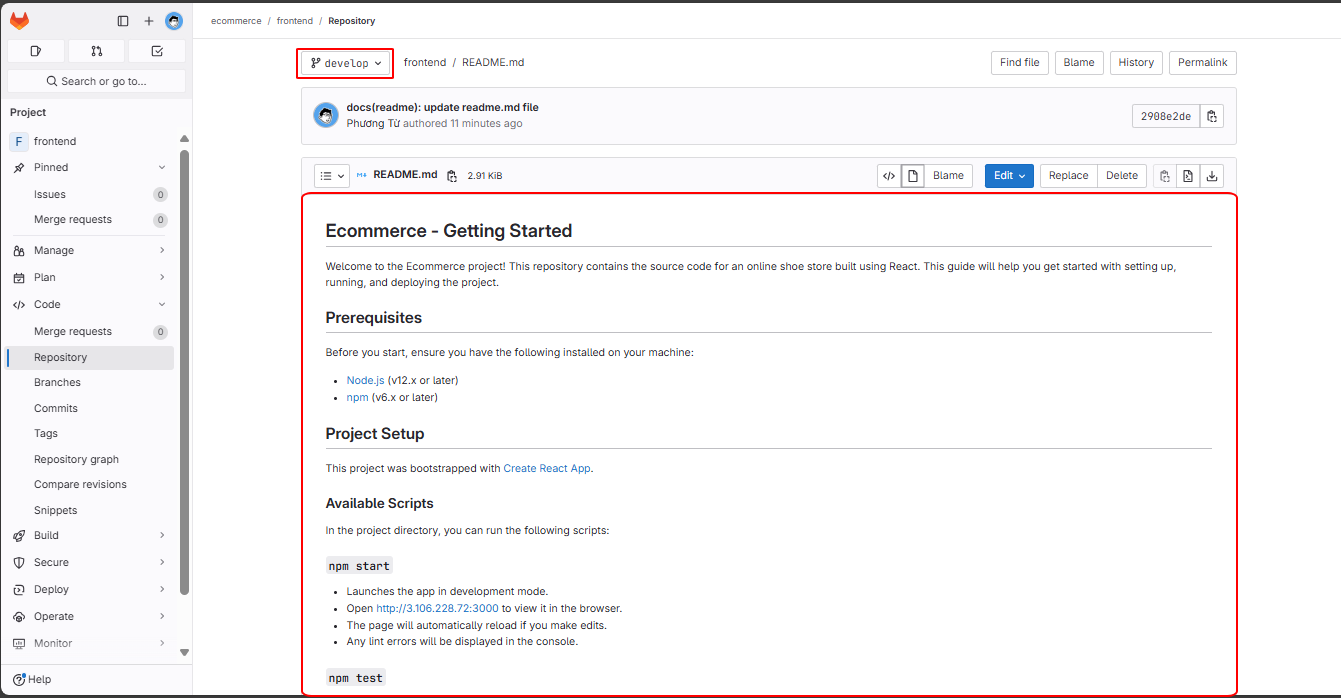
The merge is successful! Now the README.md file in develop has been updated.
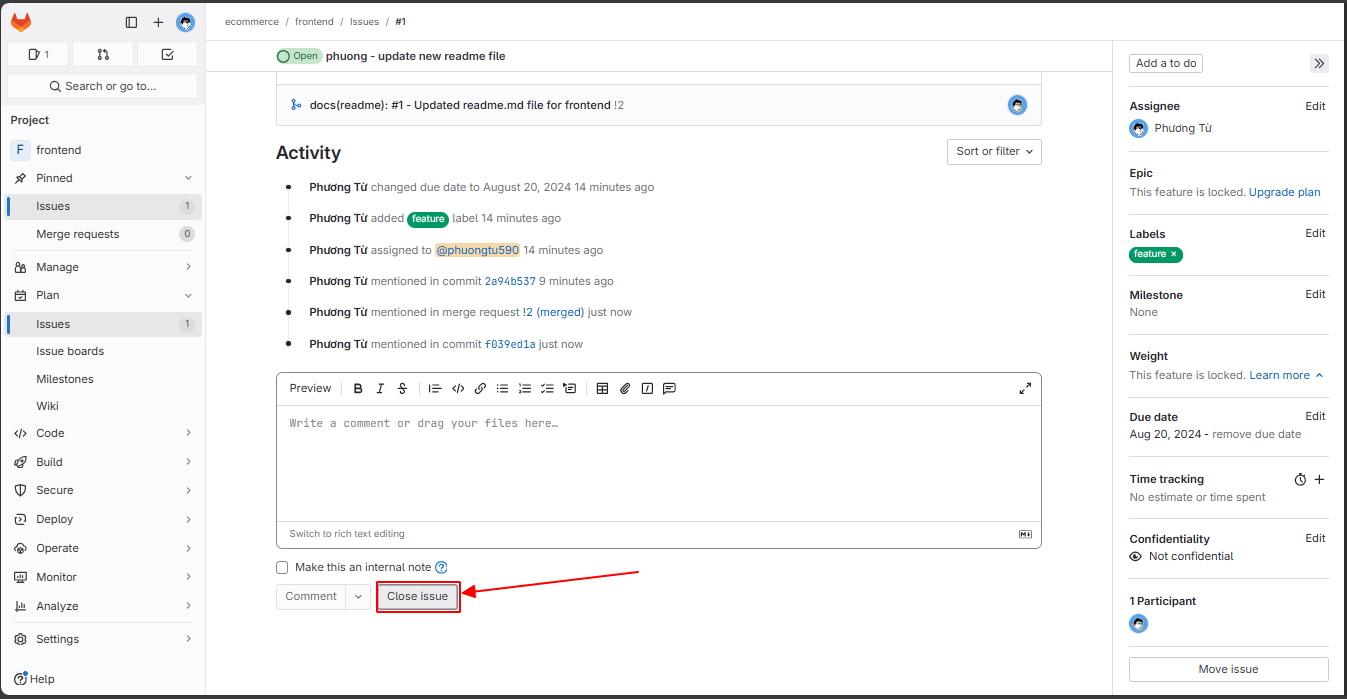
On the Issue, after merging into the develop branch, we will Close the Issue.
To continue developing a new feature, create a new issue, a new branch from develop, and continue the cycle.
For the backend project, you will also do the same!
If you’re curious about more advanced steps, refer to the following link: