Create project and push source code to Github
1. Creating a Project
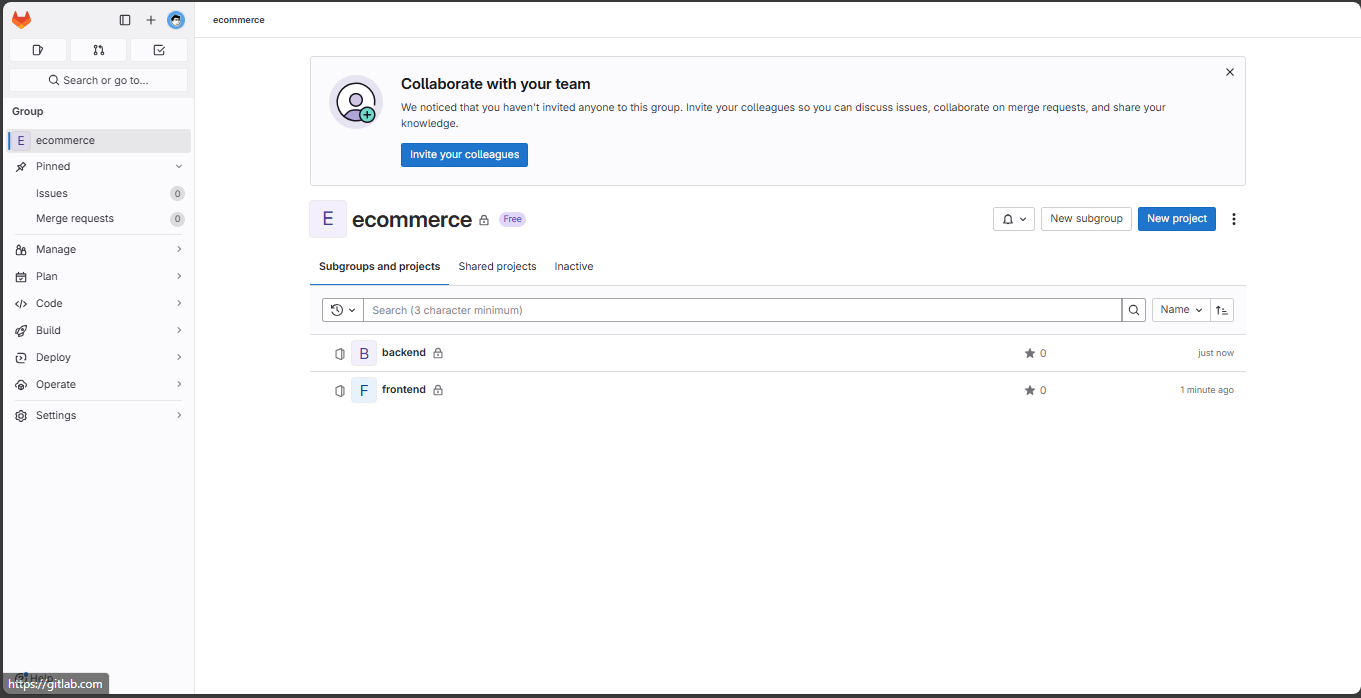
We already have a group named ecommerce and a project called frontend from the previous section.
If you haven’t created them yet, please proceed to create the ecommerce group and a new project named frontend within that group.
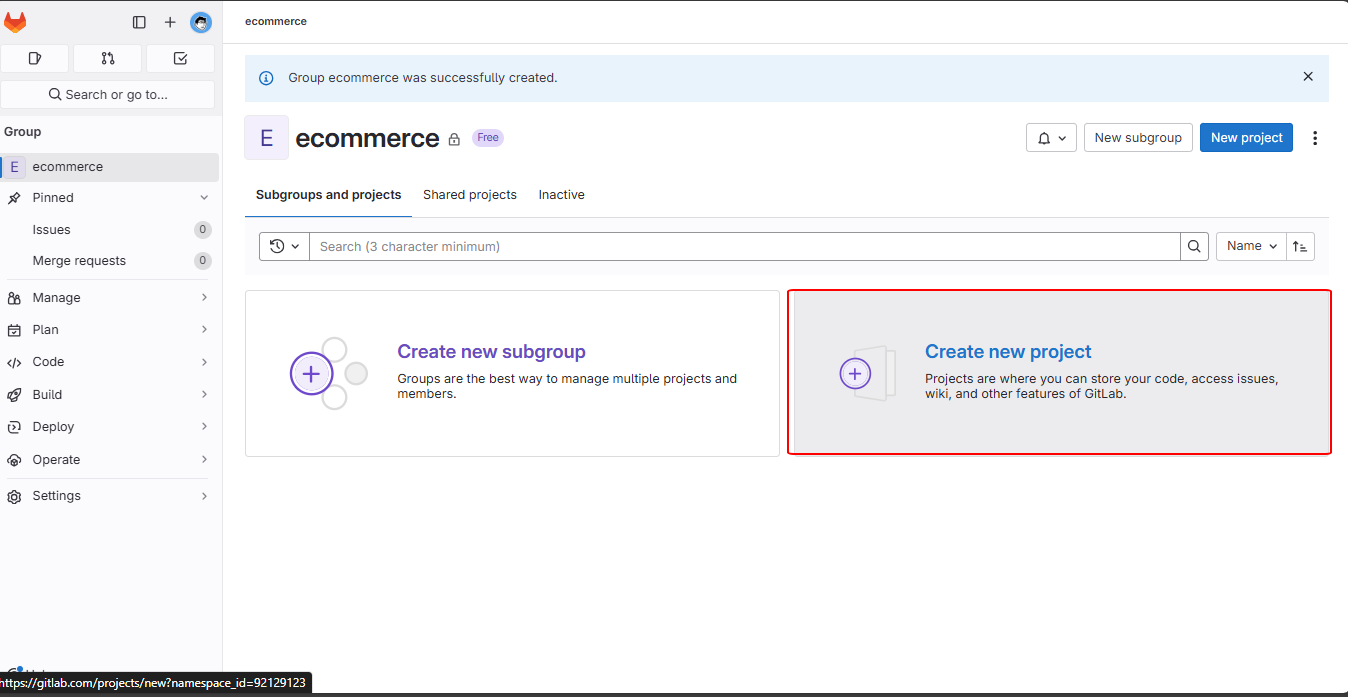
In the ecommerce group, select “Create new project”.
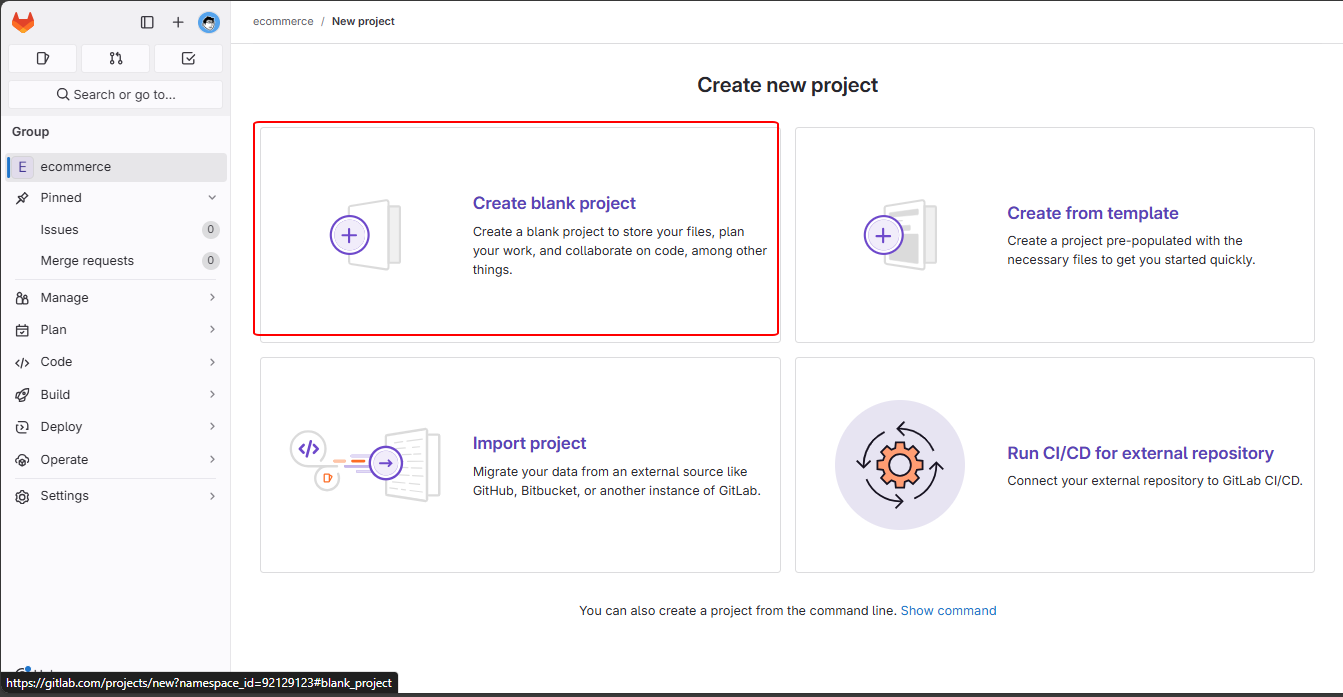
In “Create new project,” choose “Create blank project”.
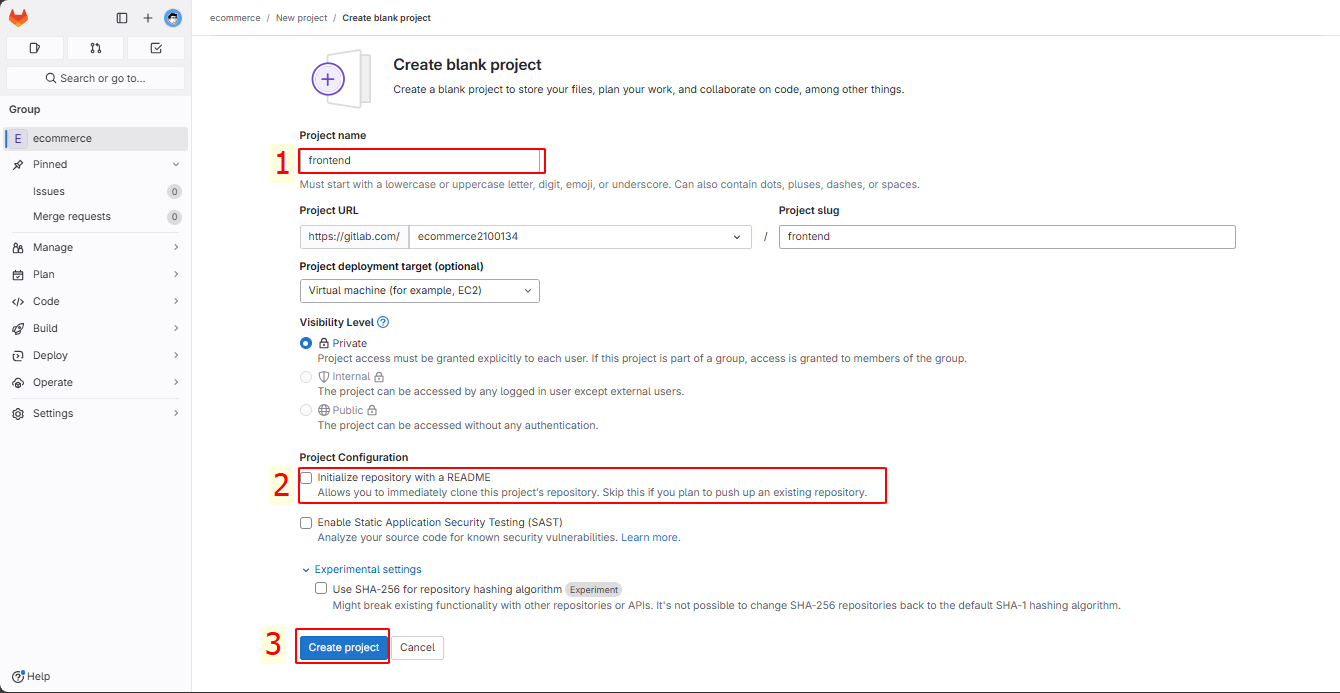
Fill out the required information and click “Create Project”.
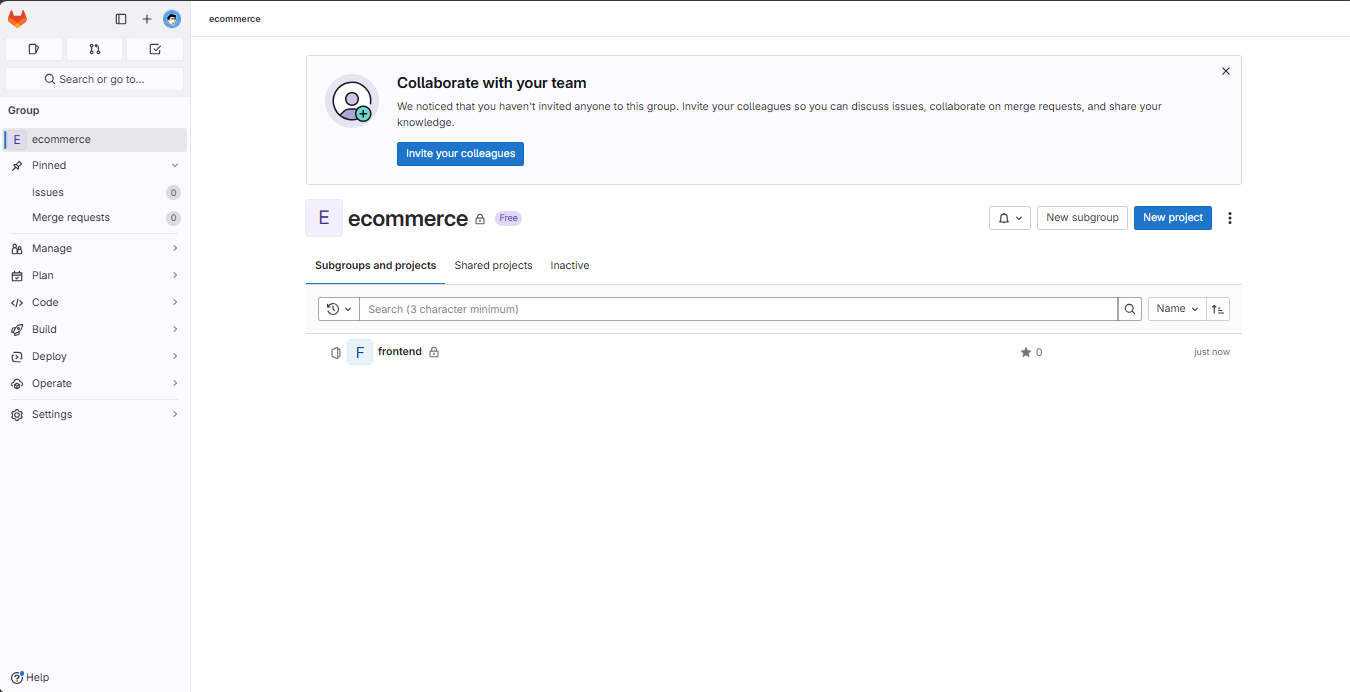
We now have the frontend project.
Next, create a new project named backend in the ecommerce group using the same steps as above.
2. Pushing Code to GitLab
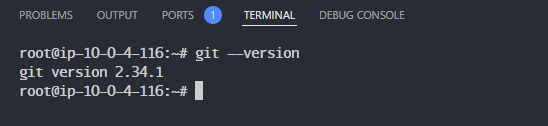
First, let’s check if Git is installed on your machine.
git --version
Next, create a projects directory for work.
mkdir /root/projects && cd /root/projects

Proceed to clone the repository as instructed in the GitLab console.
Then create a new directory and navigate into it:
mkdir -p ecommerce/ && cd ecommerce/
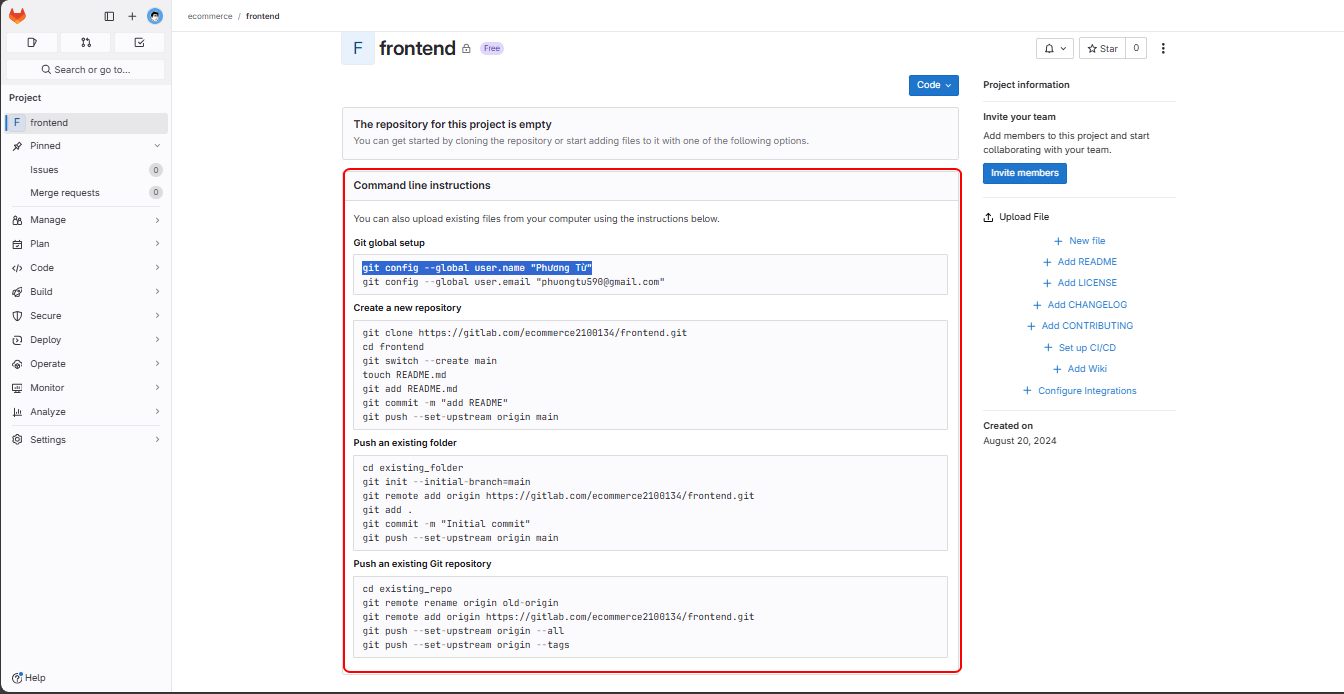
When you access the frontend project on GitLab, you will see the setup instructions.
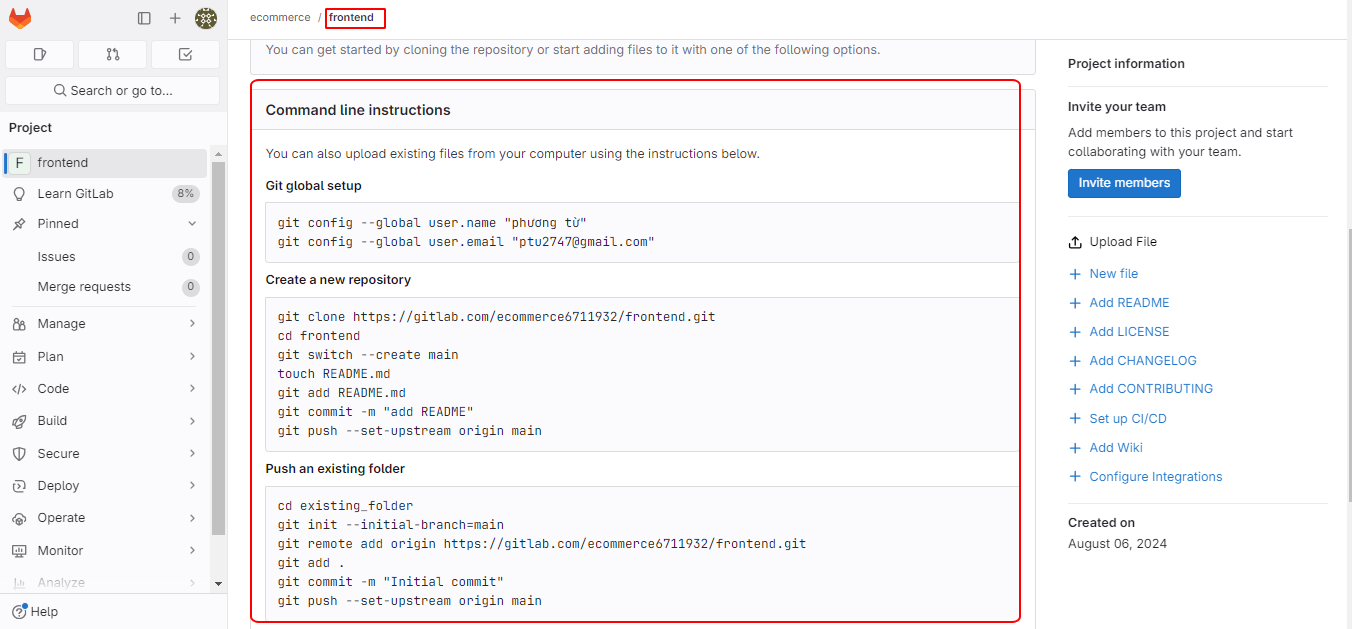
Configure your global settings accordingly.

Next, clone the frontend project. When cloning, you’ll need your email and password.
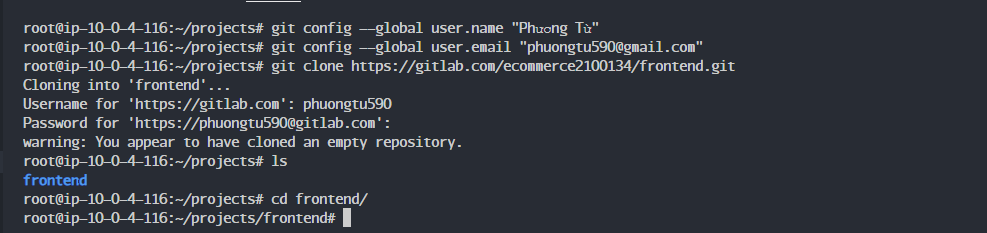
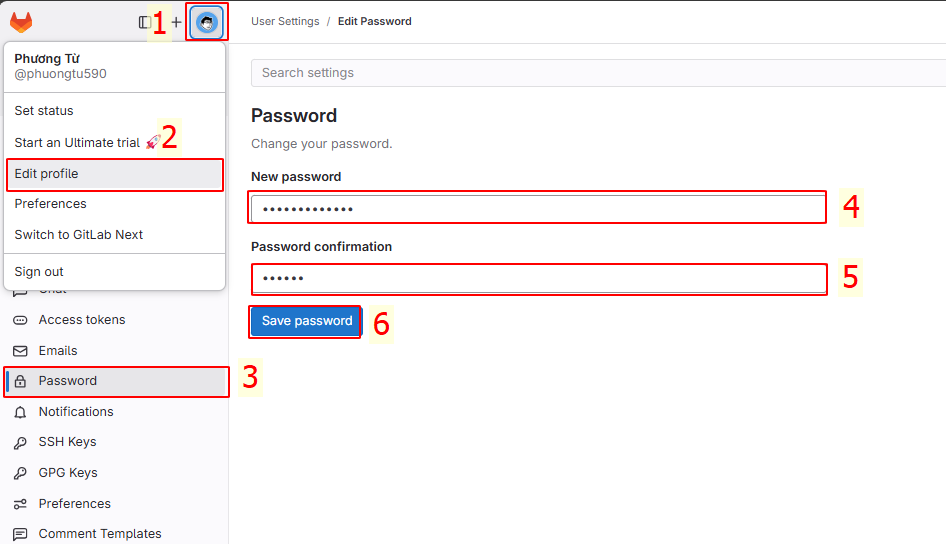
If you log in using a Google or GitHub account, you should set a password.
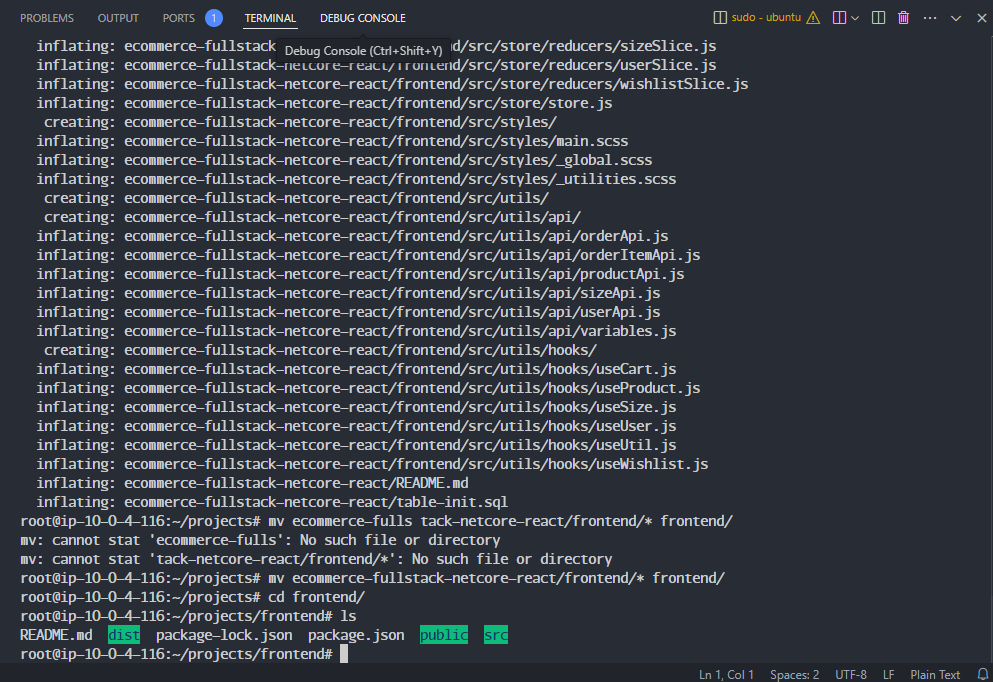
After cloning, copy all files from the react-ecommerce-template folder to the newly cloned frontend folder.
cd ..
unzip /home/ubuntu/ecommerce-fullstack-netcore-react.zip
cp -rf ecommerce-fullstack-netcore-react/frontend/* frontend/
In /projects/frontend, push the code to GitLab as follows:
git checkout -b main
git add .
git commit -m "config(project): Initial frontend project"
git push -f origin main
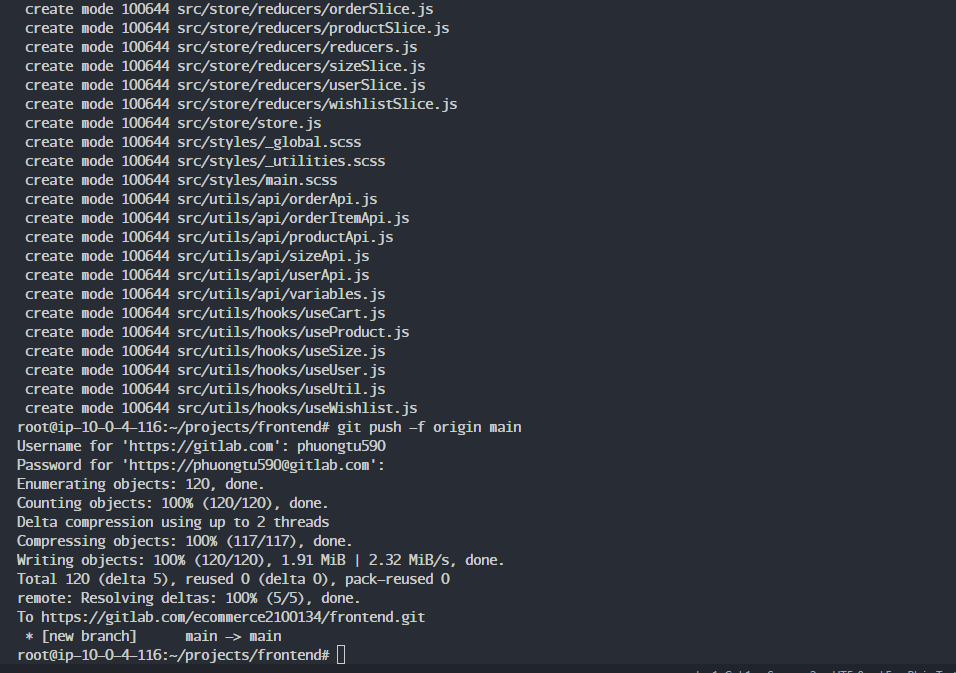
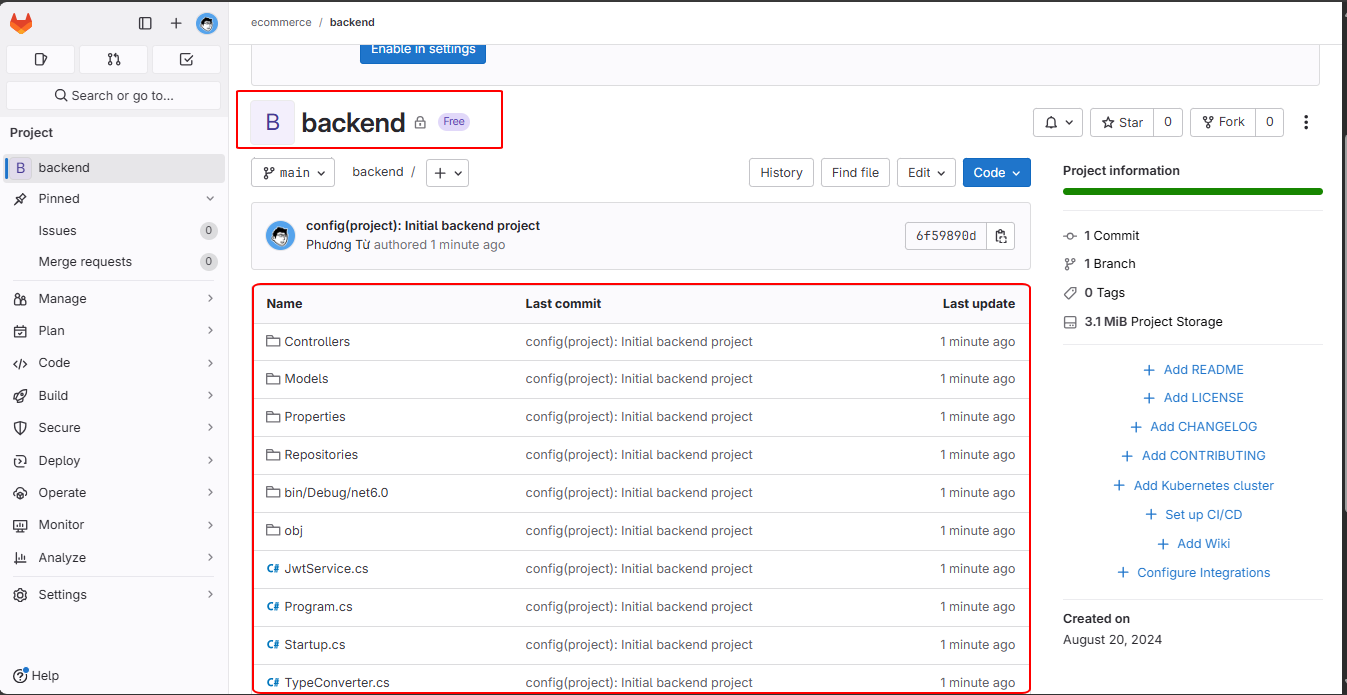
After pushing the code, you will see the files in the frontend project.

For the backend project, follow similar steps:
cd /root/projects
git clone your_backend_project
cp -rf ecommerce-fullstack-netcore-react/backend/* backend/
cd backend
git checkout -b main
git add .
git commit -m "config(project): Initial backend project"
git push -f origin main
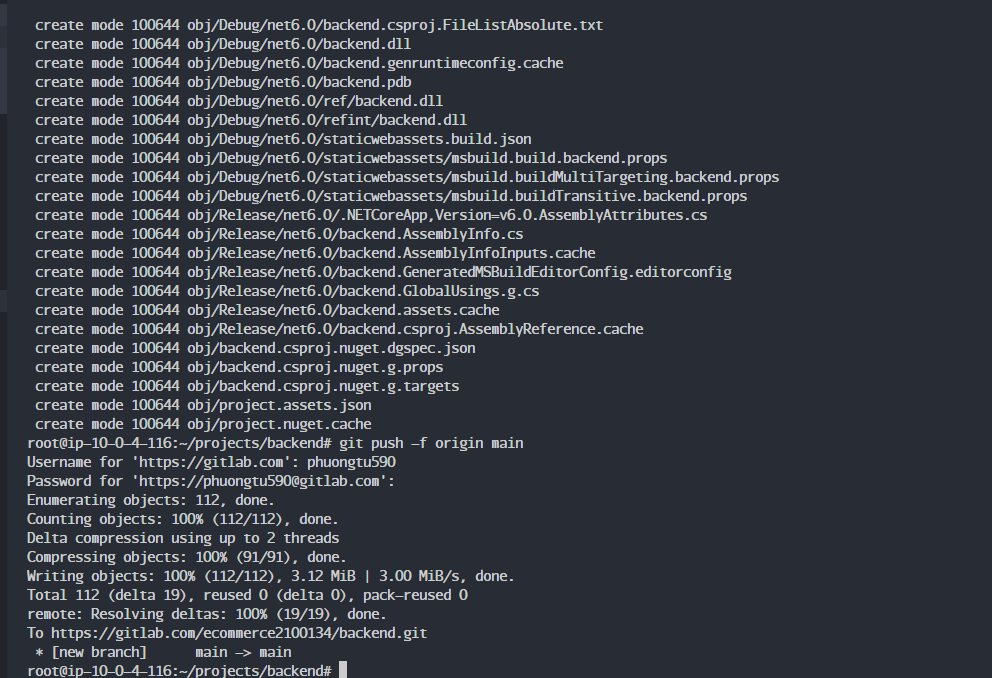
The source code will now be available in the backend project.
🡇 Content 🡇
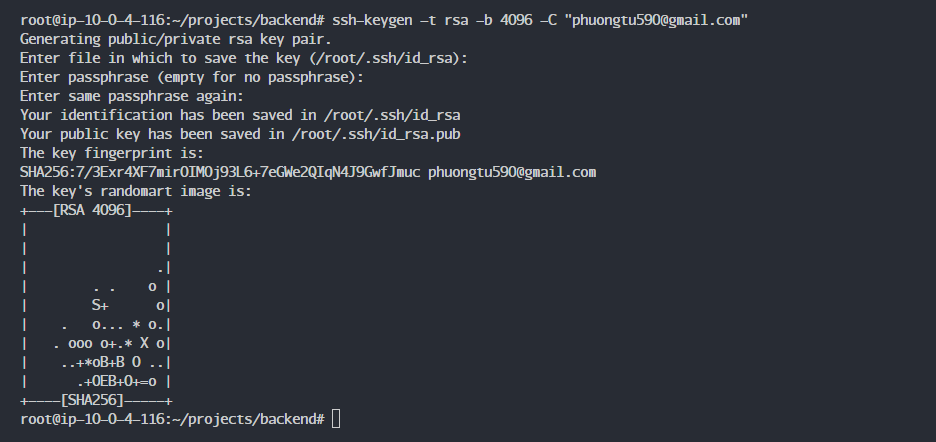
Each time you clone, you will need to log in when pushing or cloning code, which is time-consuming and not secure. Therefore, you can set up an SSH key for the project:
Create a new SSH key.
ssh-keygen -t rsa -b 4096 -C "your_email@example.com"
Press Enter to accept the defaults, or you can fill in all the details.
Start the SSH agent.
eval $(ssh-agent -s)

Add the SSH key to the SSH agent.
ssh-add ~/.ssh/id_rsa

Check the SSH keys added.
ssh-add -l

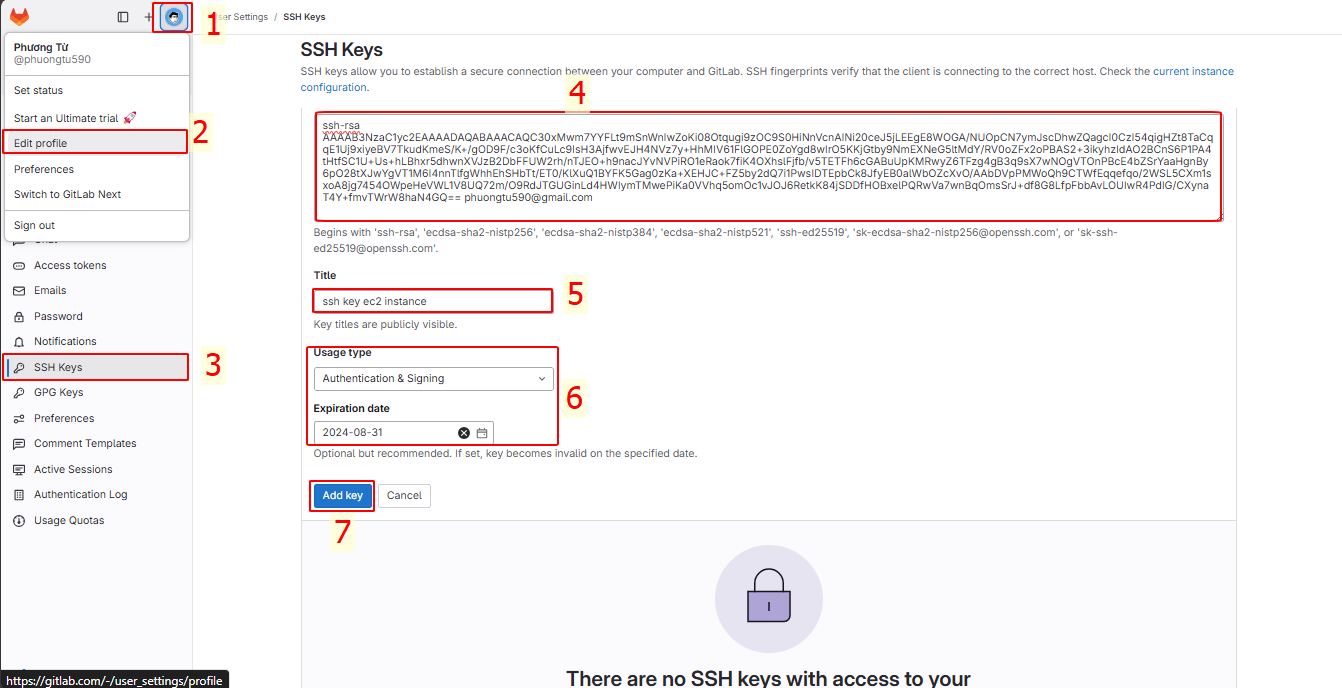
Copy the key using the following command.
cat ~/.ssh/id_rsa.pub

Go to User Settings and add a new SSH Key.
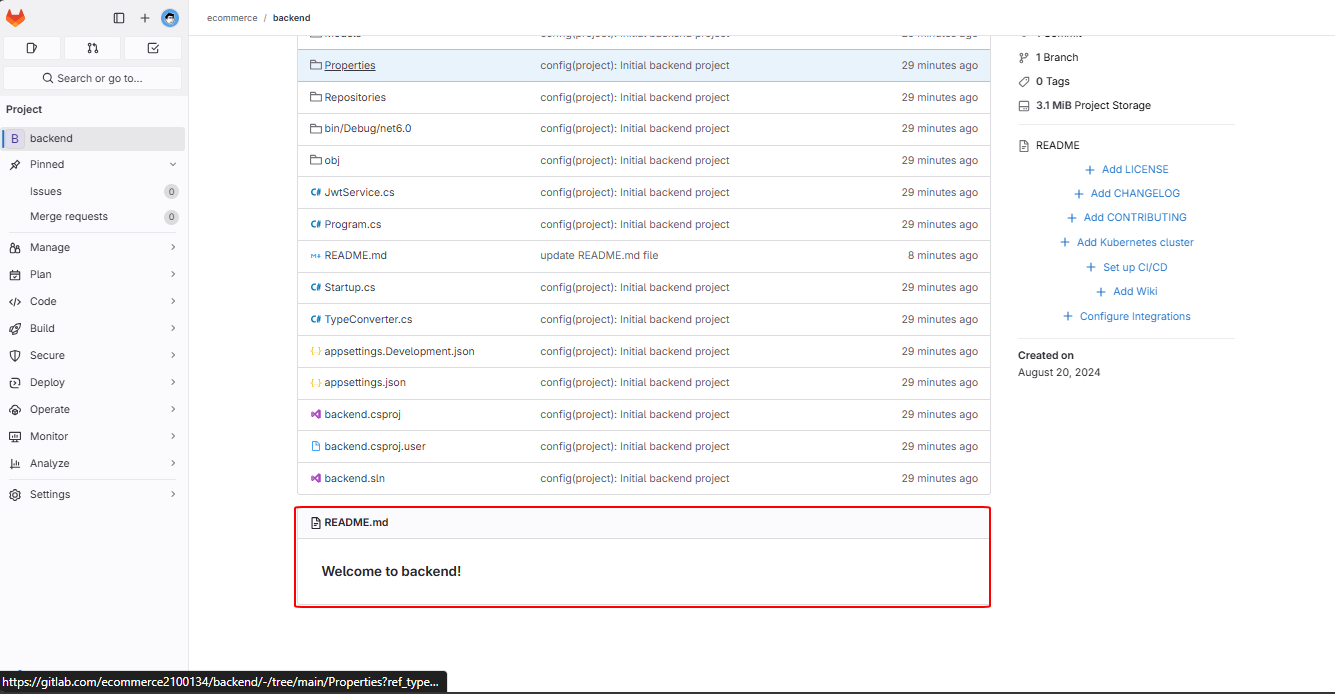
Test with the backend project by creating a README.md file.

Add a new line.

You should change the remote from HTTPS to SSH. You can get the SSH remote URL from the project.
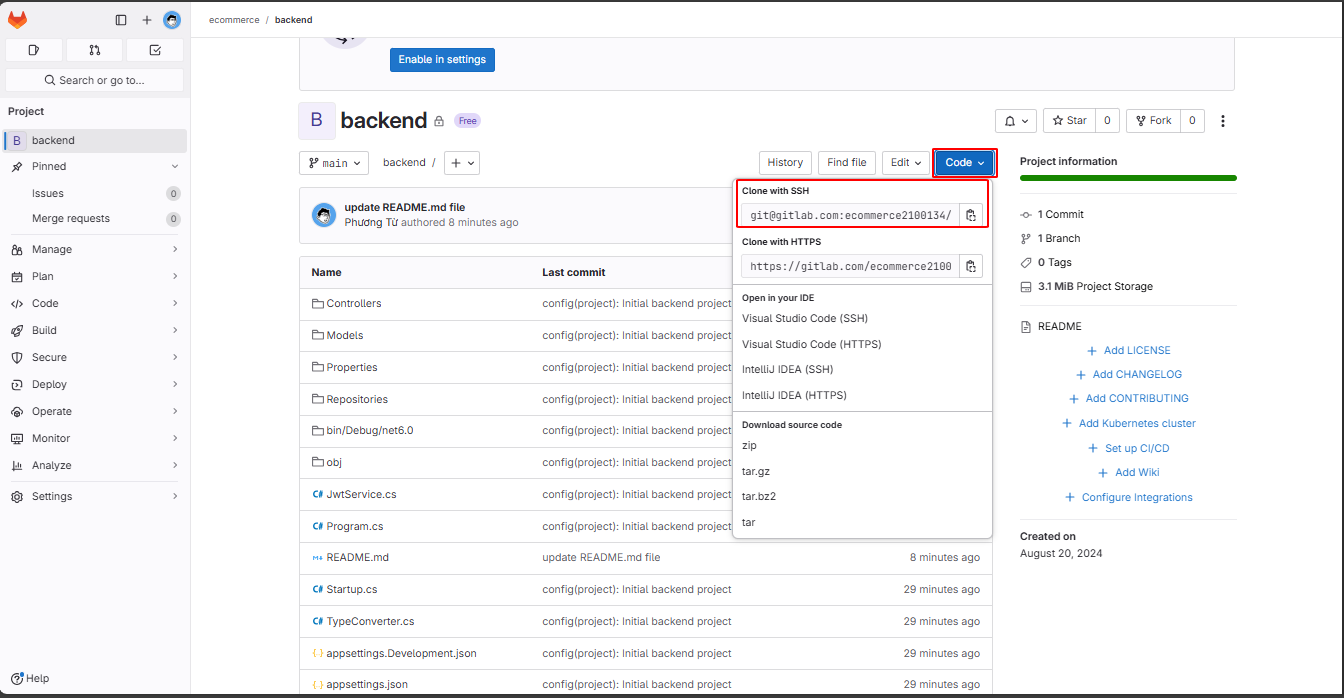
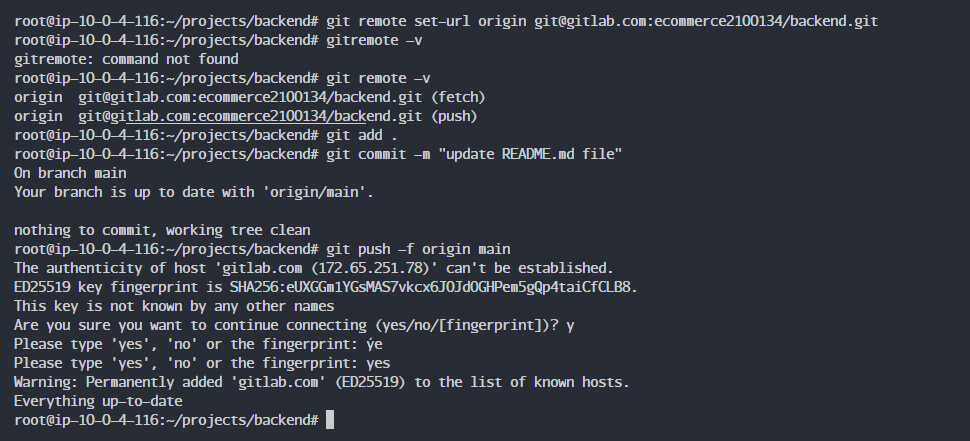
Change the remote URL.
git remote set-url origin git@gitlab.com:ecommerce2100134/backend.git
Push the code.
git add .
git commit -m "update README.md file"
git push -f origin main
As a result, you no longer need a password to push code.
Finally, the README.md file has been successfully updated!
Reference: Use SSH keys to communicate with GitLab | GitLab
🡅 Content 🡅