6.2. Setup and configure EC2
In the previous section, we successfully ran the application locally. Now, we will prepare an EC2 server to deploy the application to the cloud environment.
Create IAM role
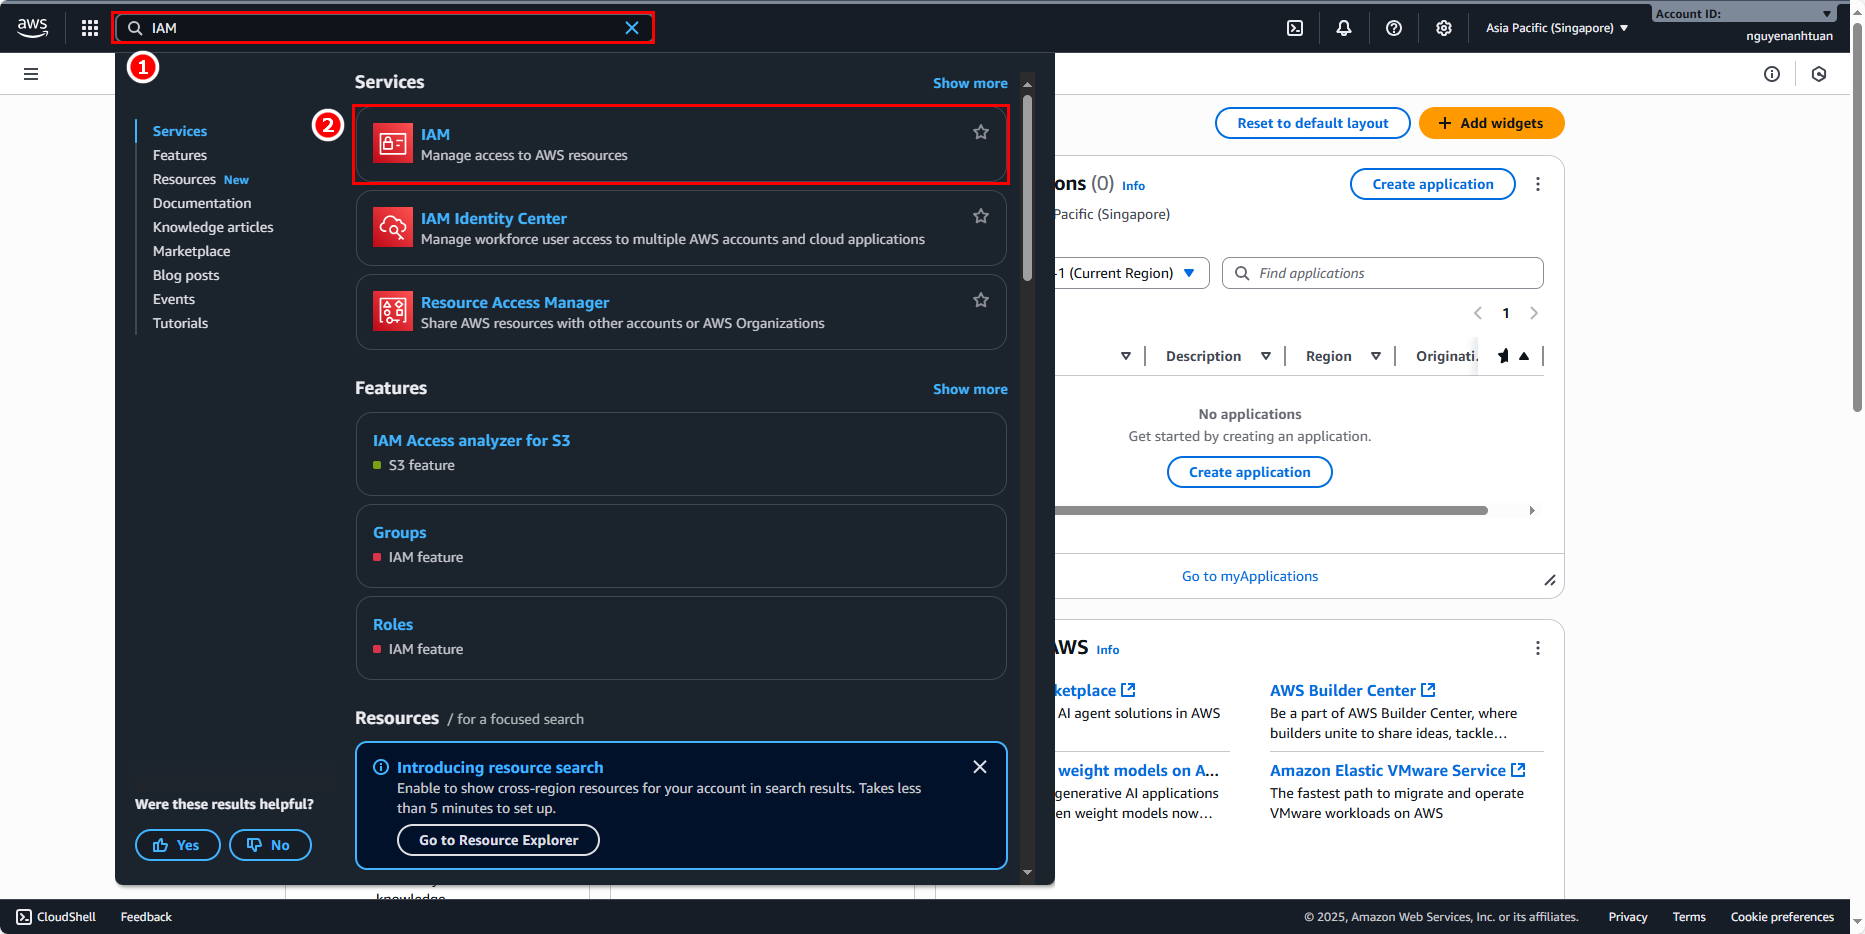
Search for the IAM service in the console.
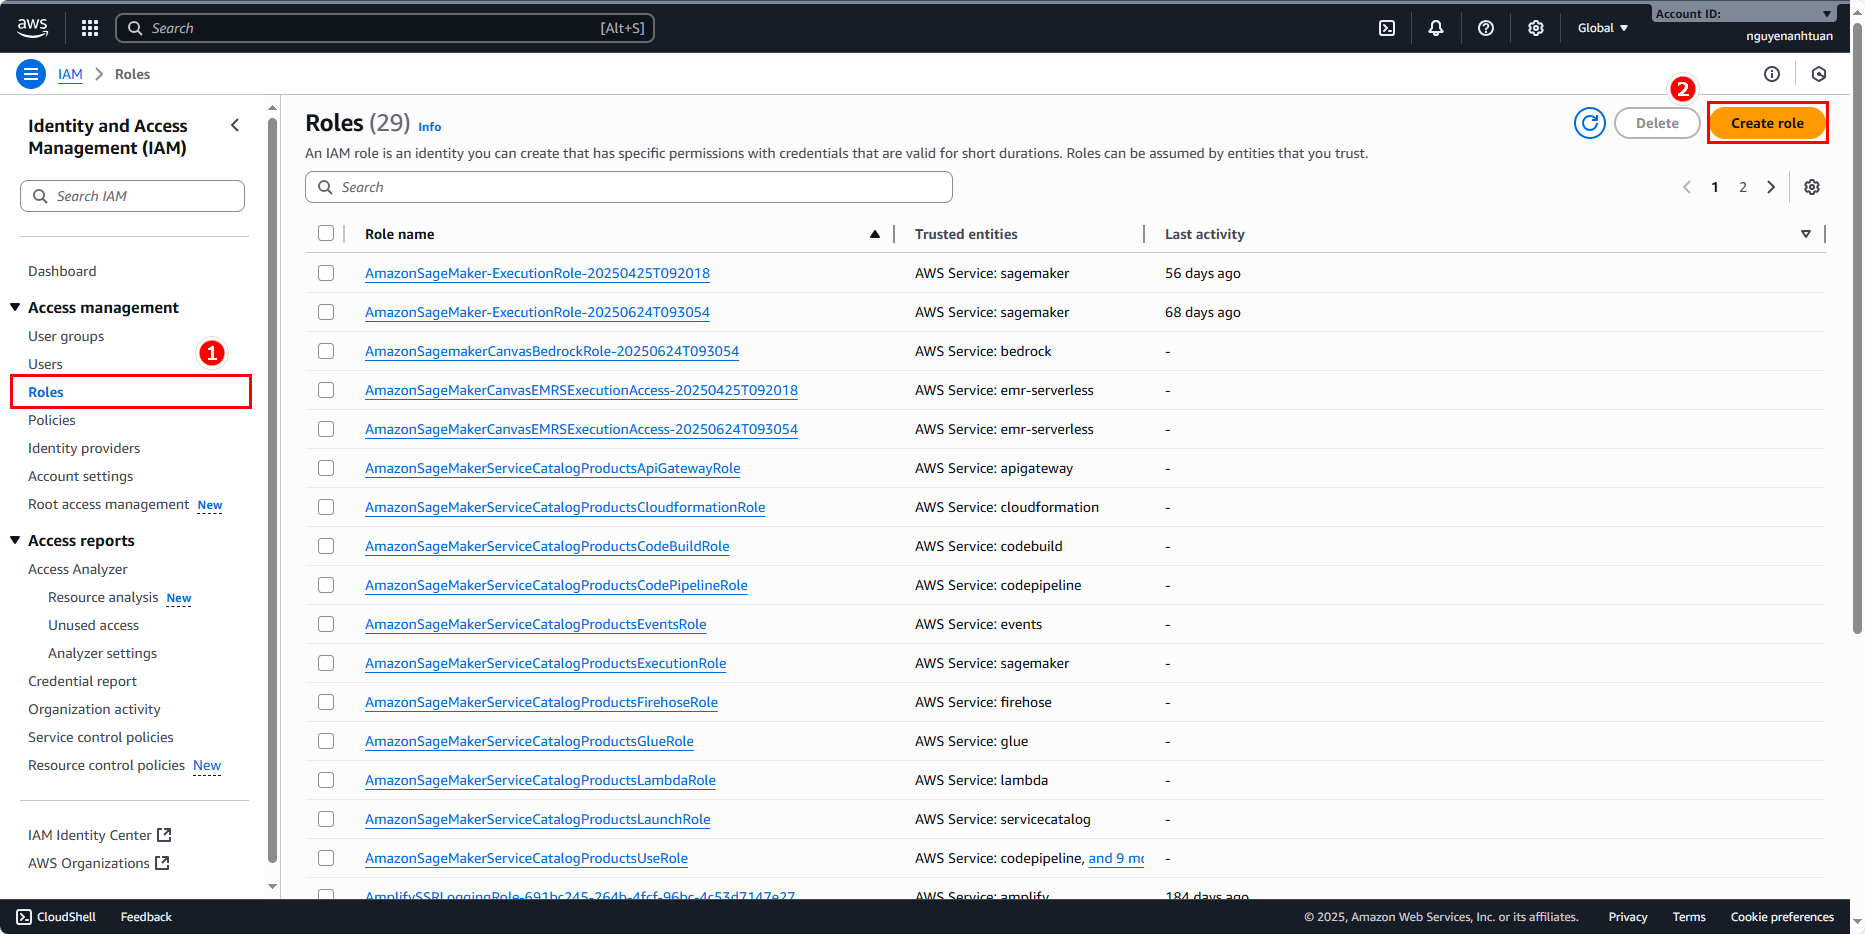
Select Roles and click Create role.
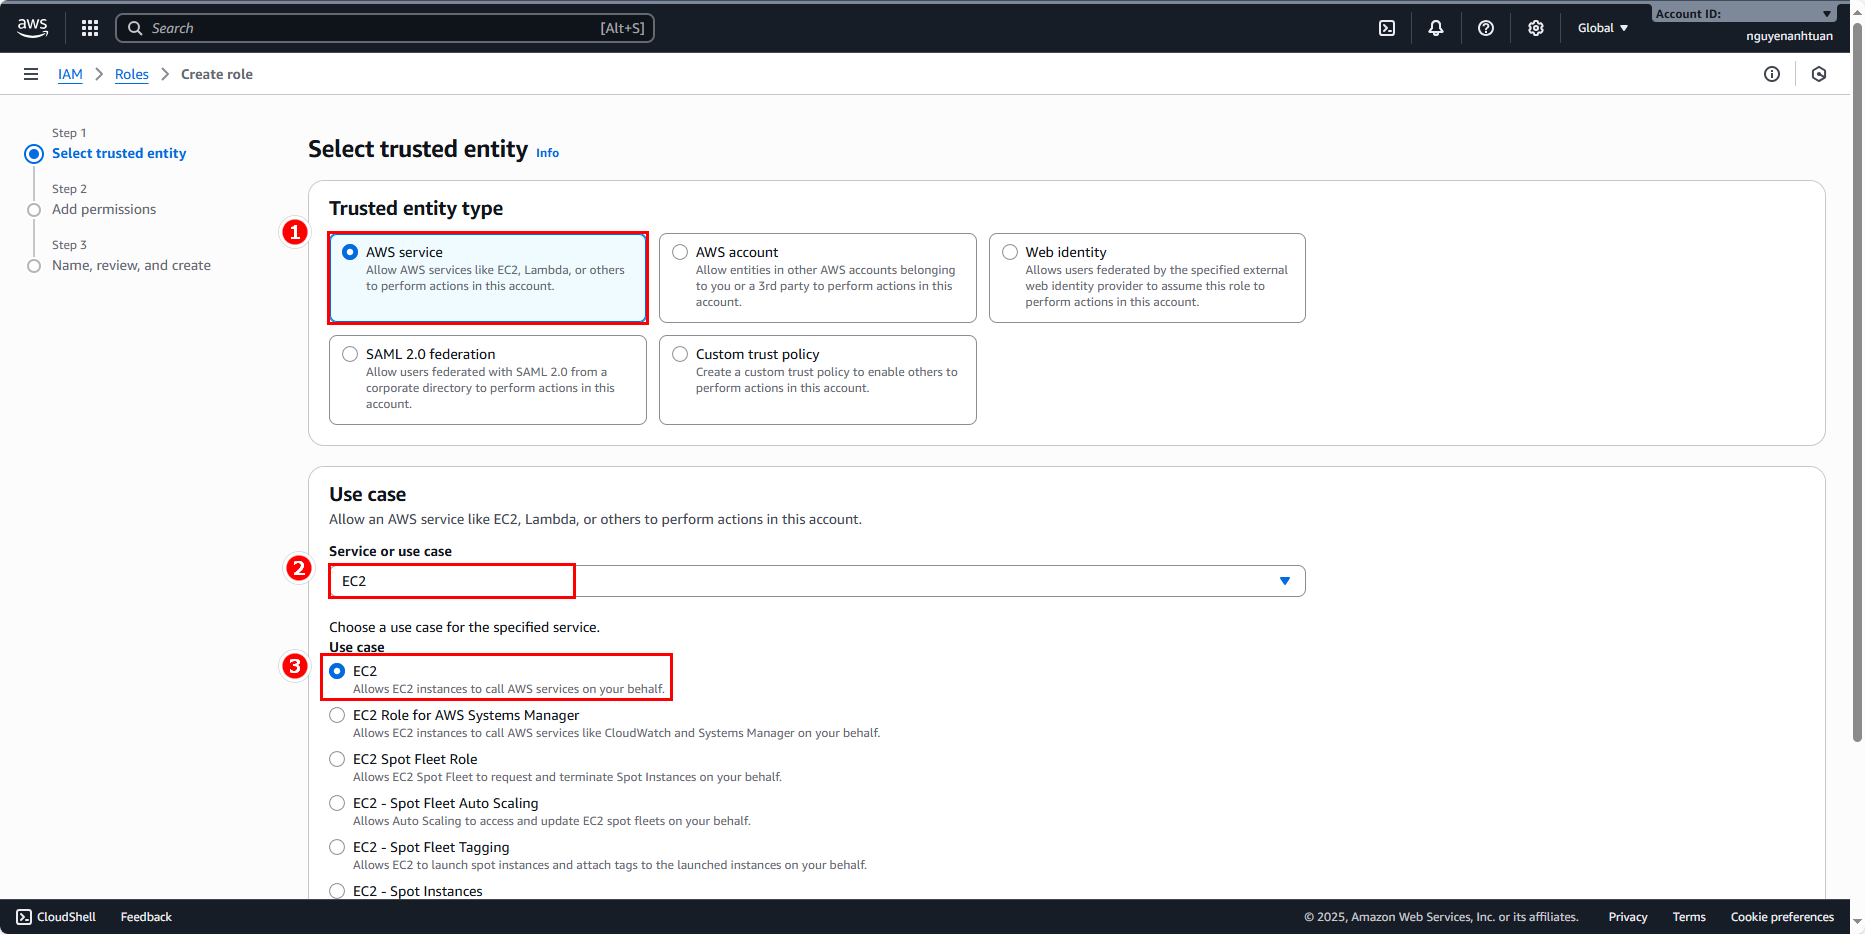
When creating the role in the console:
- Trusted entity type: select AWS service.
- Use case: EC2, then select EC2.
- Scroll down and click Next.
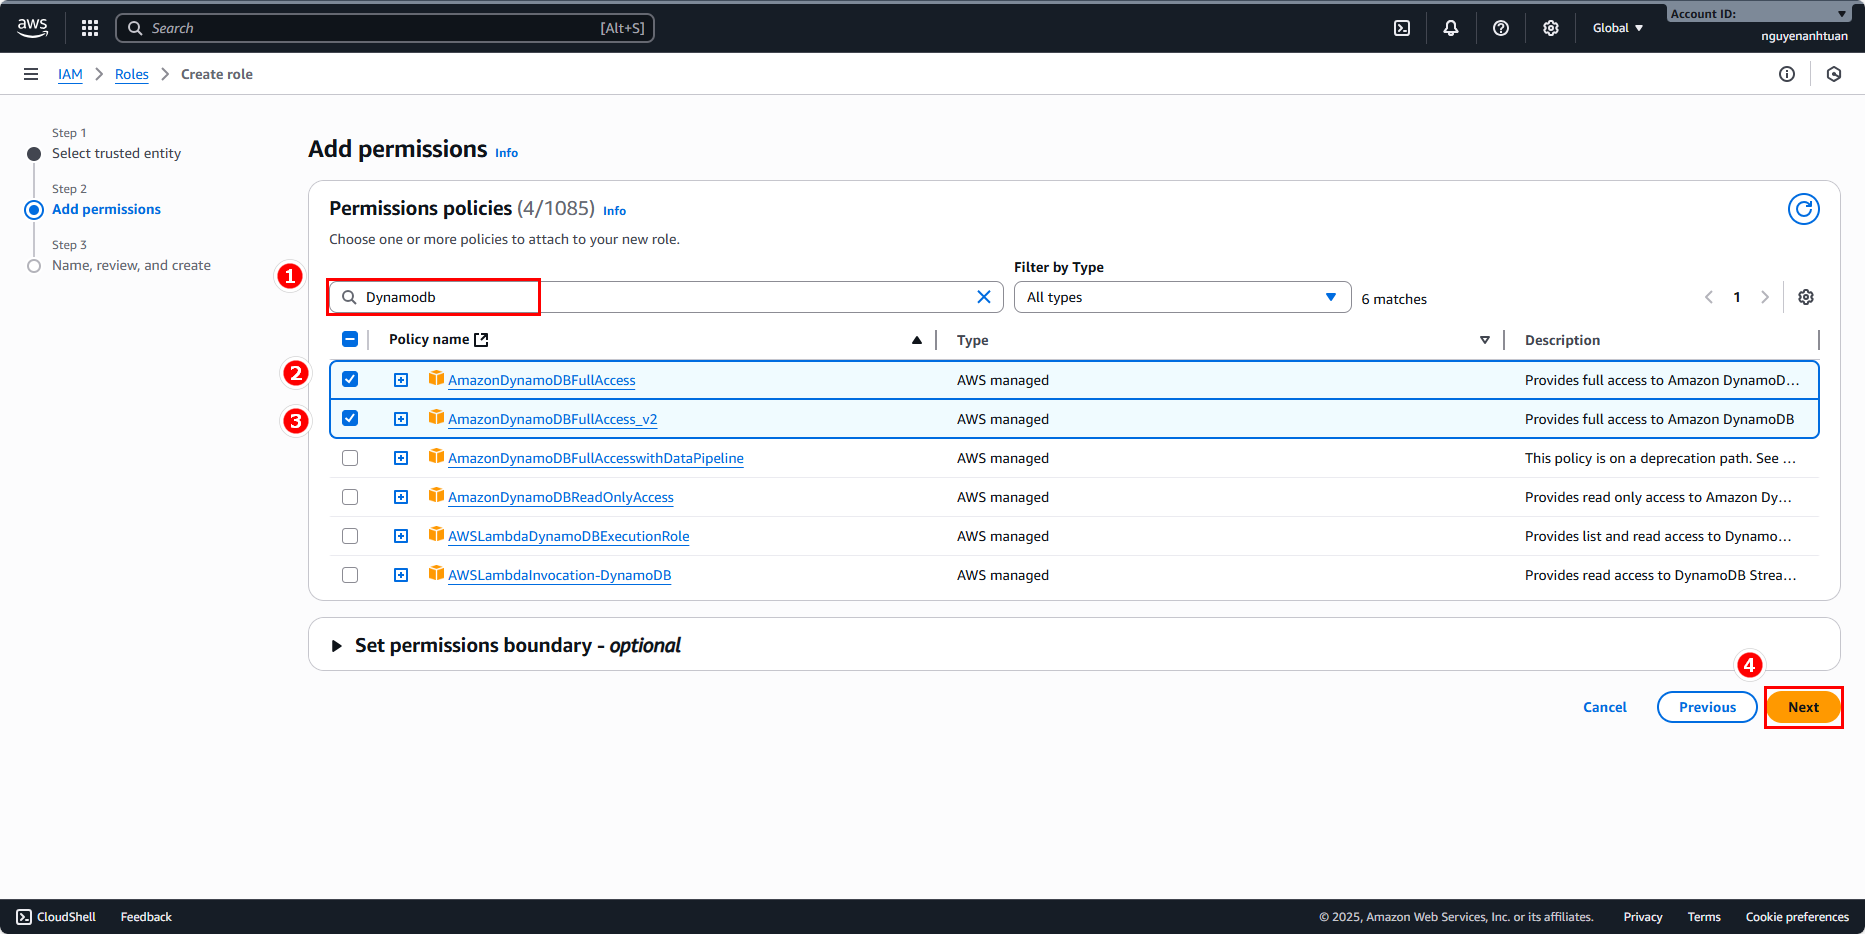
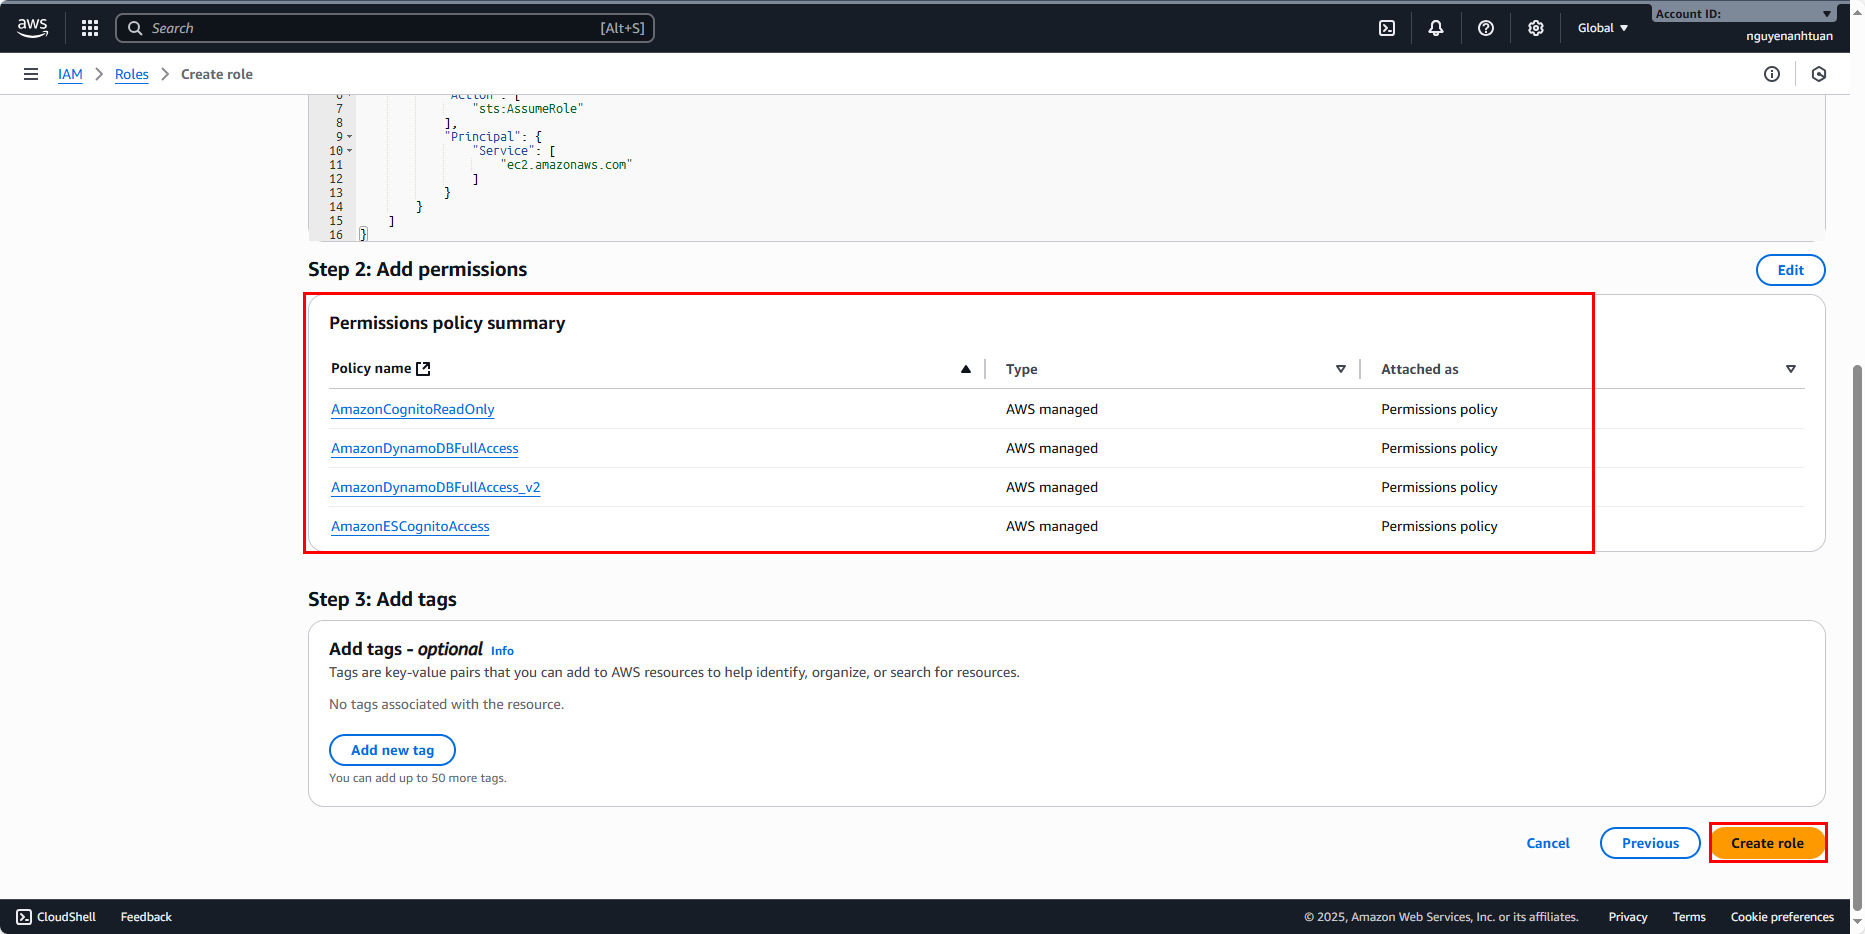
For the policy selection, choose the following:
- For Cognito, search
Cognitoand select AmazonESCognitoAccess and AmazonCognitoReadOnly. - For DynamoDB, search
Dynamodband select AmazonDynamoDBFullAccess and AmazonDynamoDBFullAccess_v2.

Click Next after selecting the policies.
Name the role aws-role-cognito-workshop and verify that all selected policies are correct.
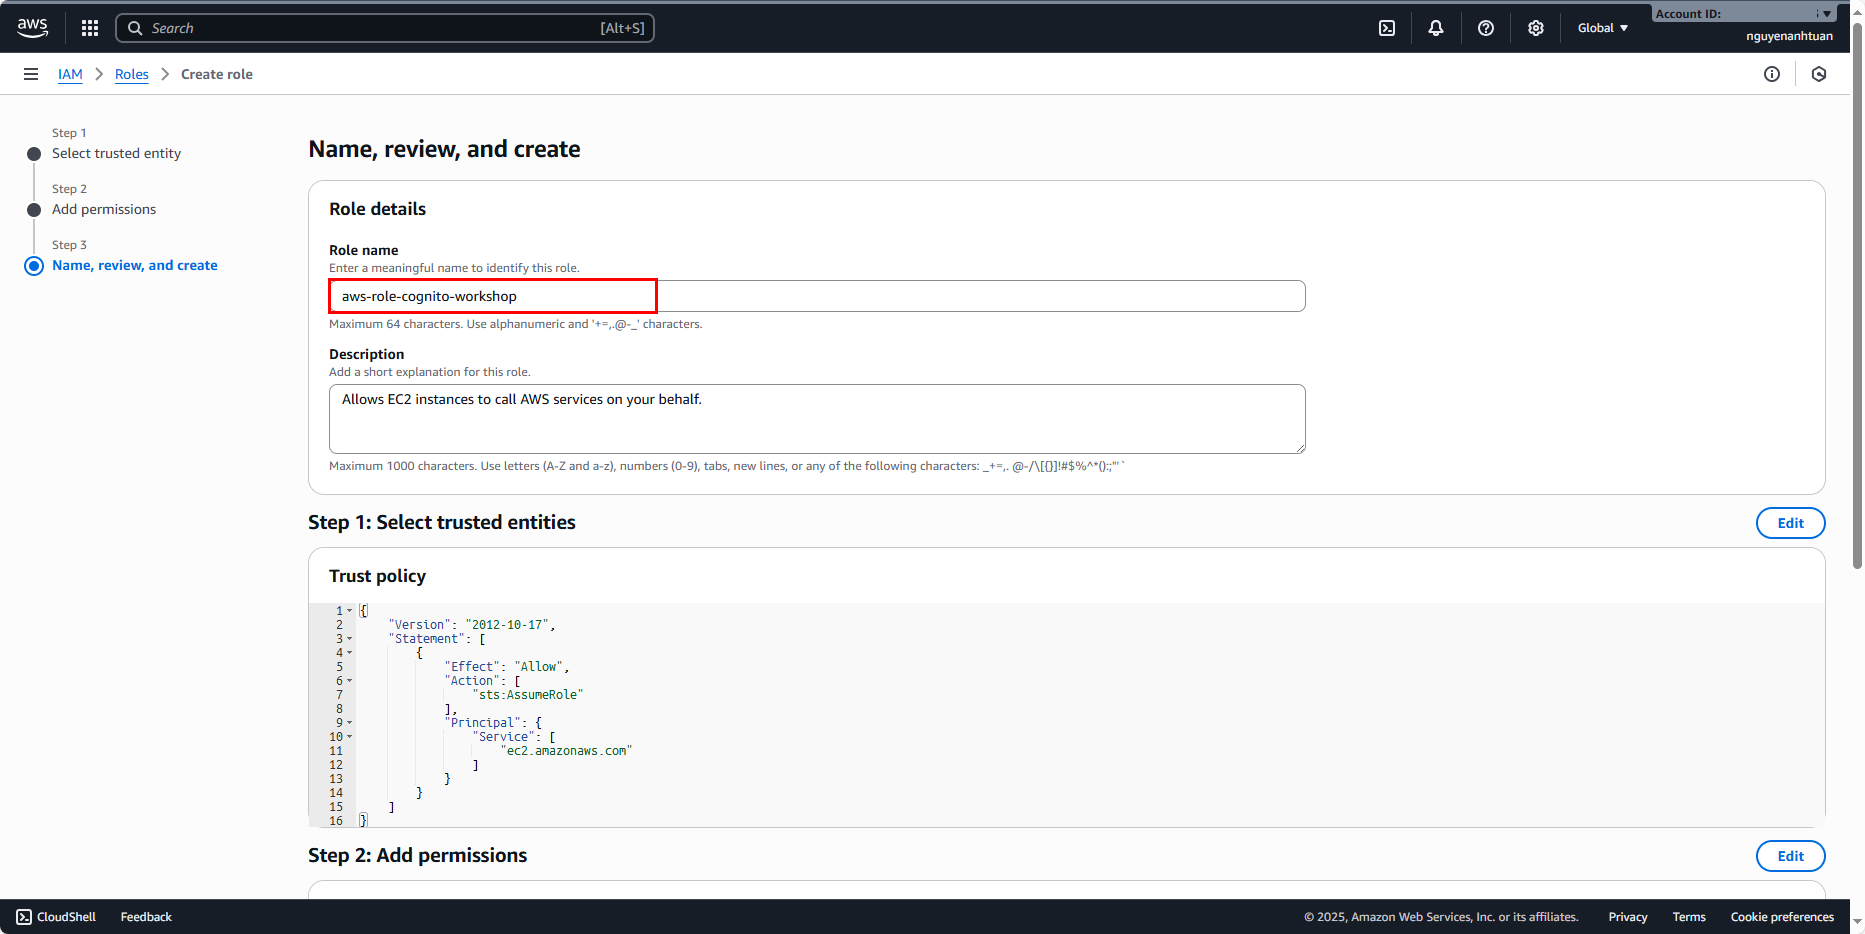
Once everything is set, click Create role.

Setup & run EC2 instance
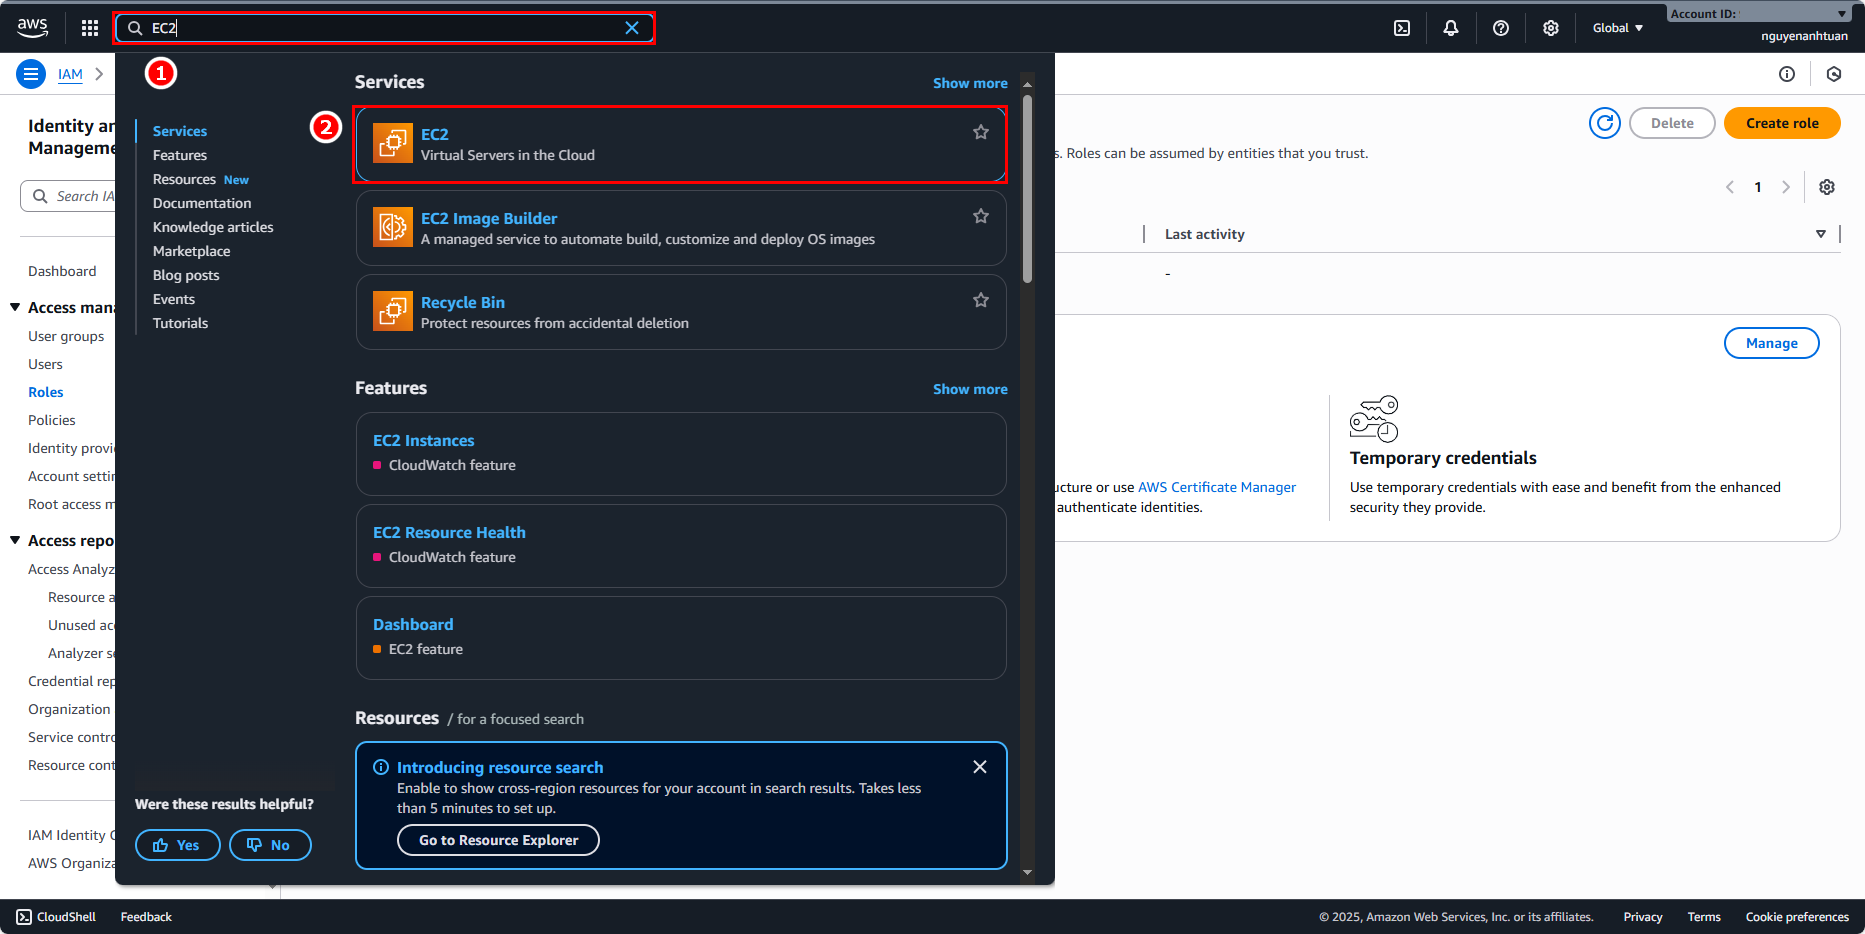
Search for and select the EC2 service.
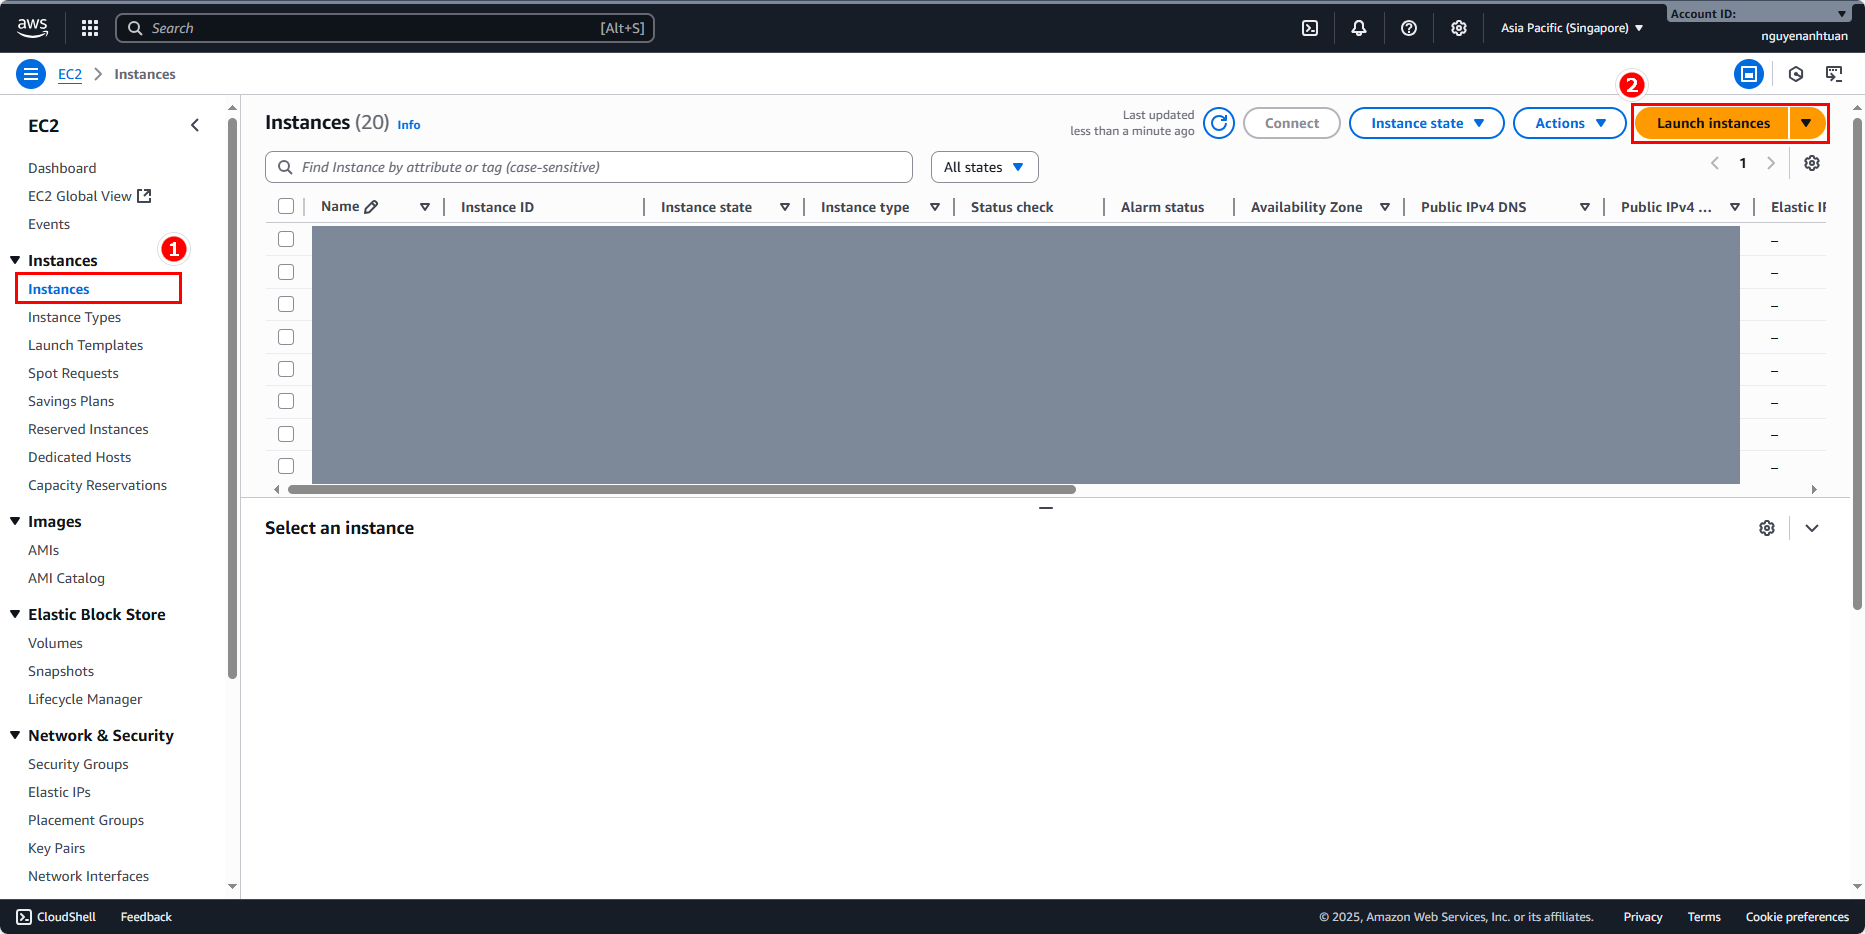
Go to Instances and click Launch instances.
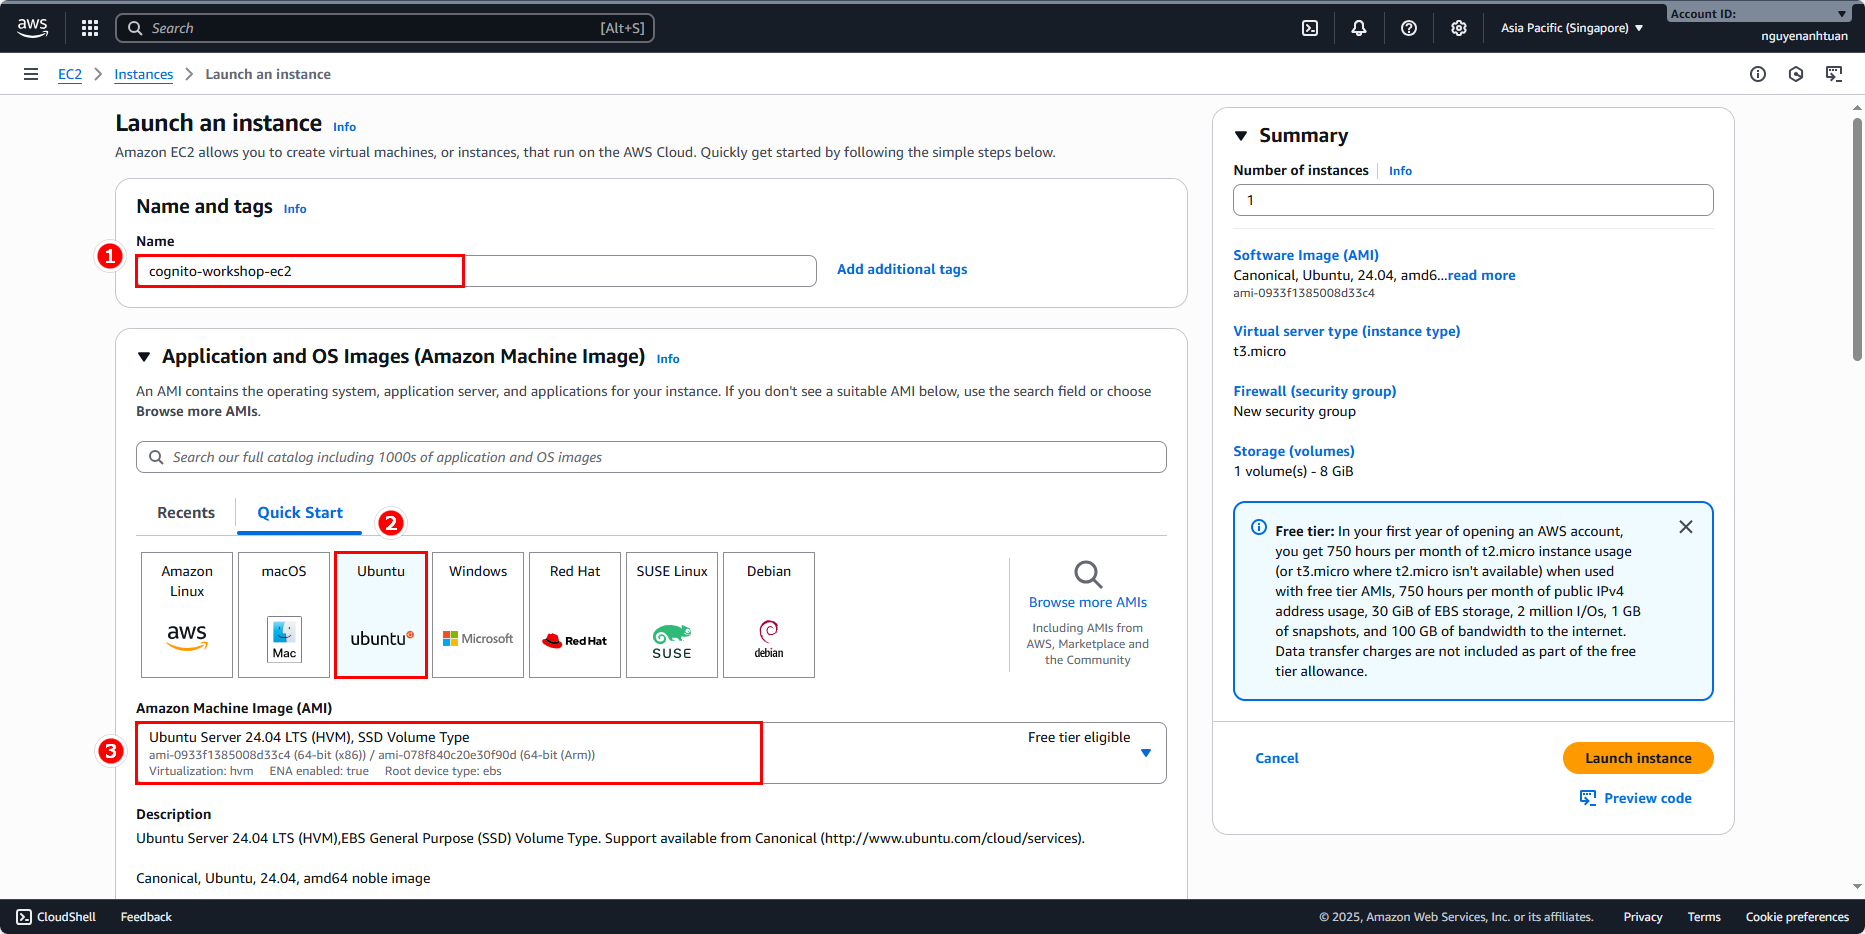
Create an EC2 instance with the following details:
- Name:
cognito-workshop-ec2. - AMI: select Ubuntu, Ubuntu Server 24.04 LTS (HVM), SSH Volume Type.
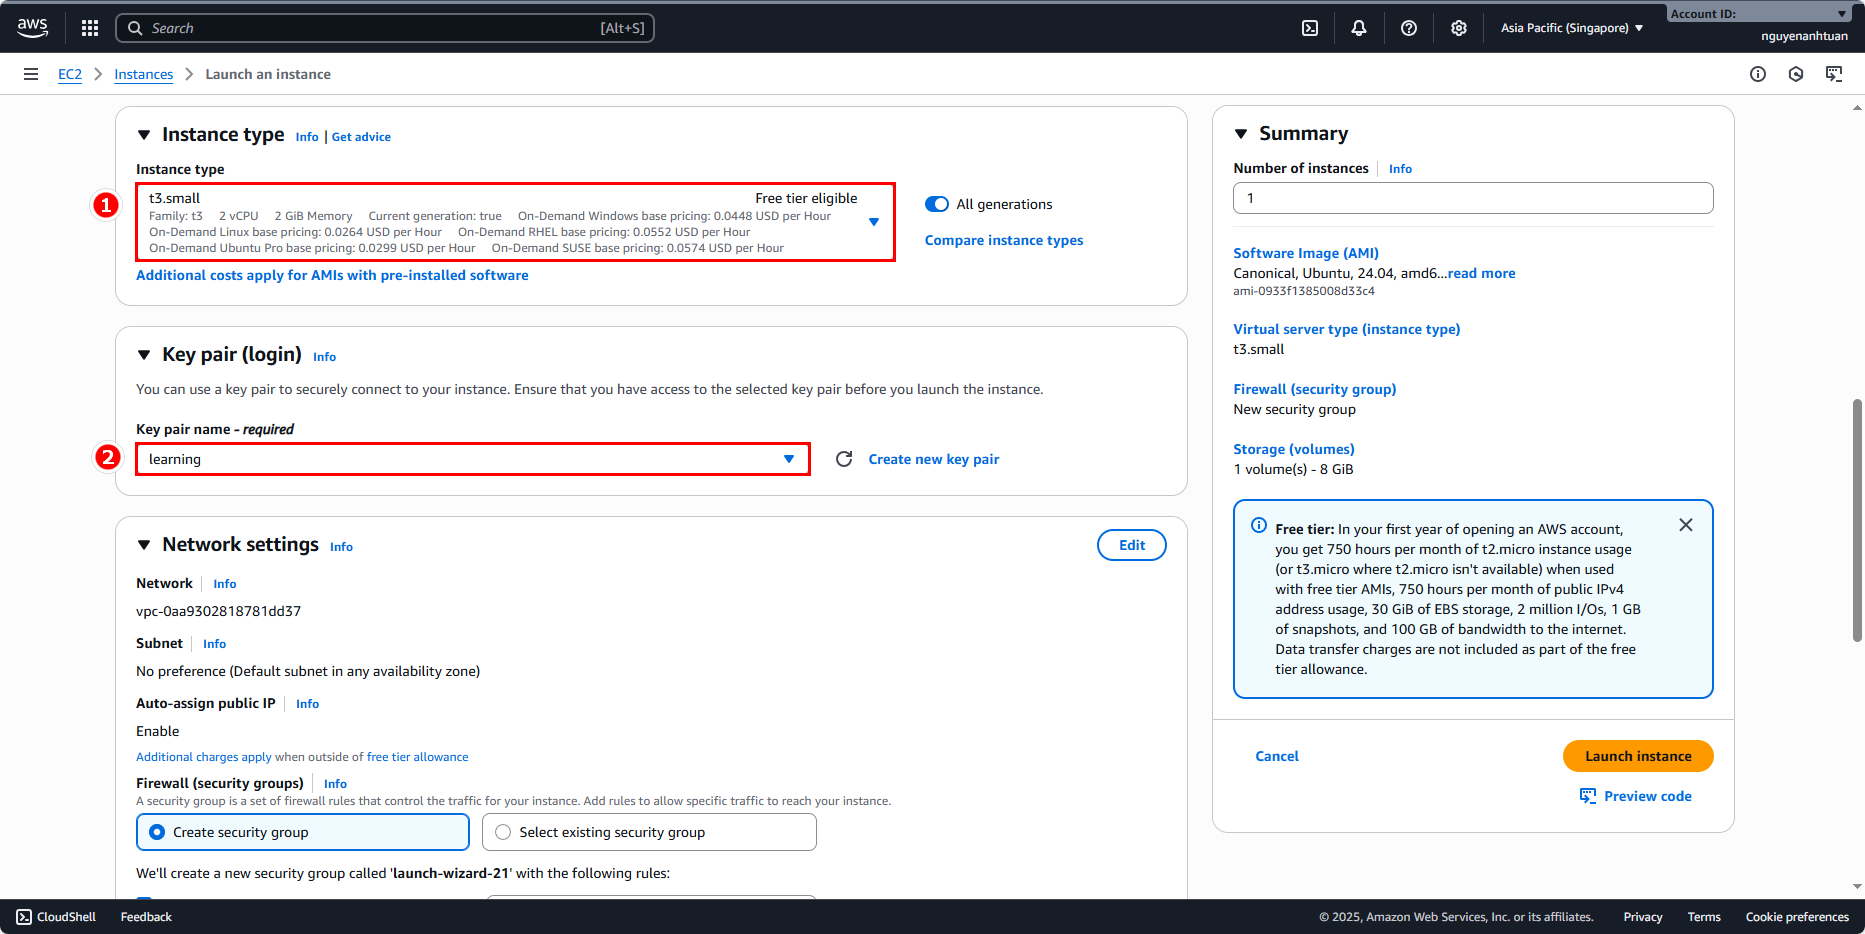
Next, choose the instance type t3.small and select a key pair (create one if needed) to SSH into the server.
In Network settings, place the EC2 in a public subnet under the default VPC. Use the default Security Group. Note: for production deployments, review security carefully; here we keep it simple for the lab.
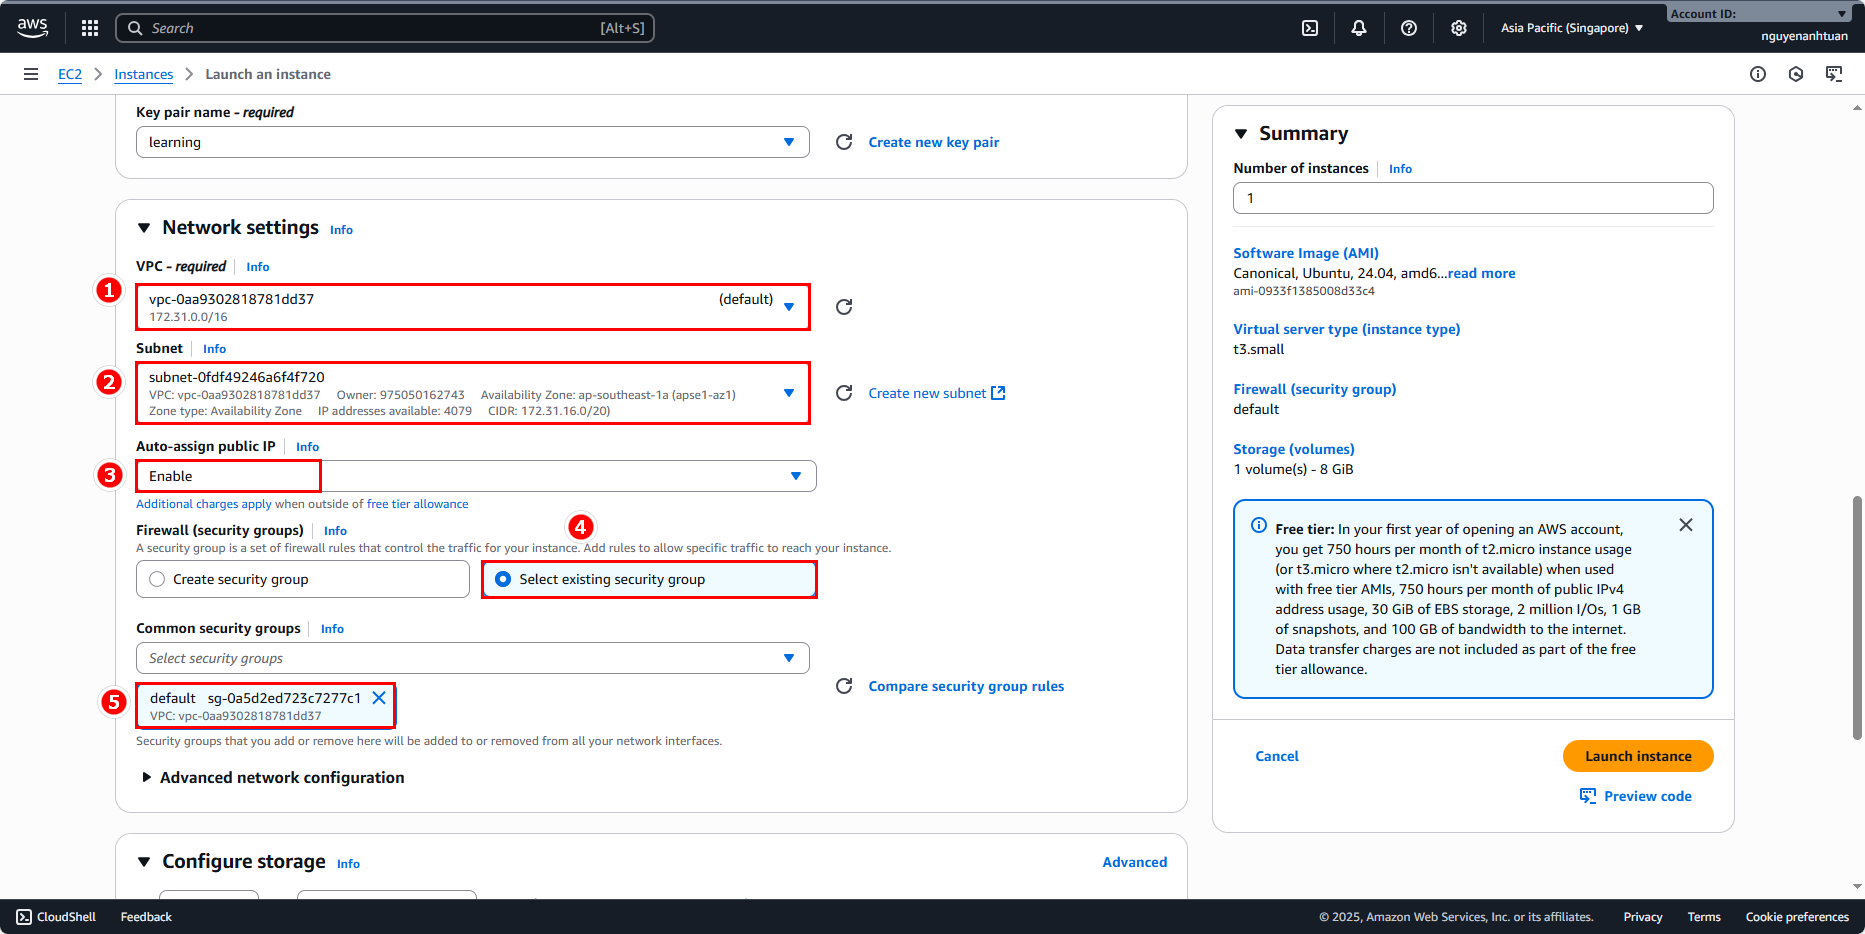
After setting everything up, click Launch instance and wait for it to be ready.

Attach IAM role to EC2 instance
Once the EC2 instance is running, attach the IAM role we created earlier. Why? Locally, we used an Access Key with admin privileges. In the cloud, using an IAM role is safer and serves as a good example.
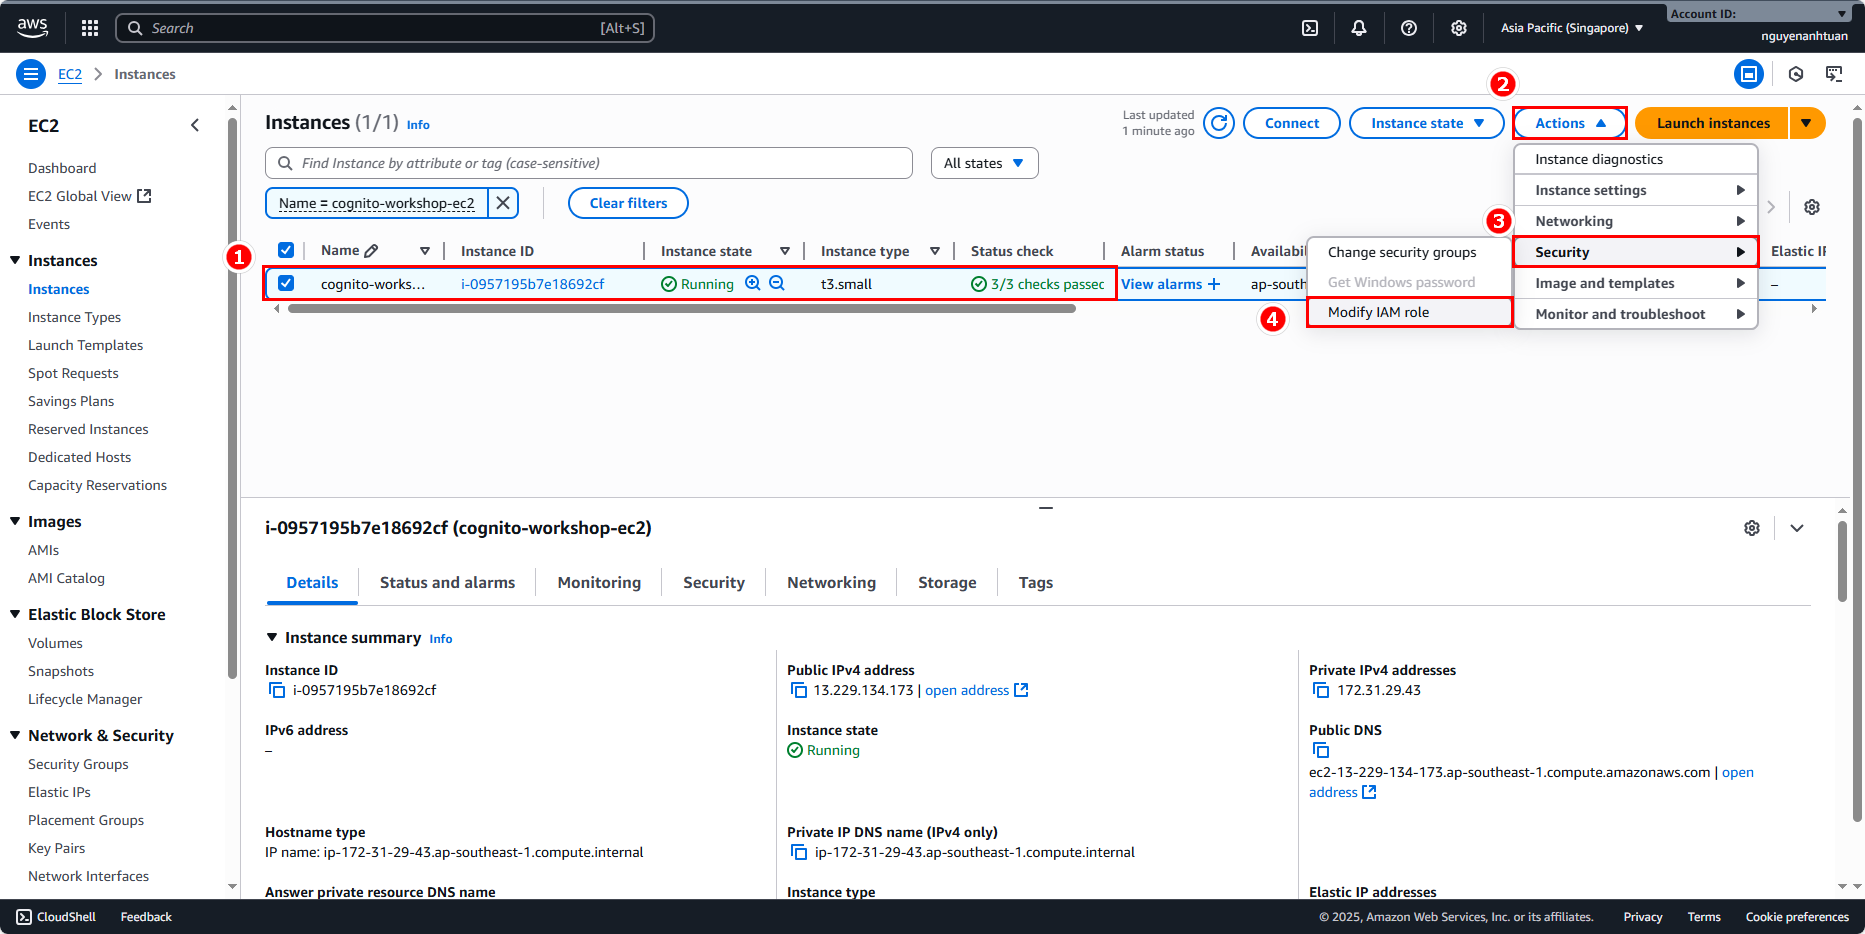
Select the newly created EC2 instance.
- Open Actions.
- Select Instance settings.
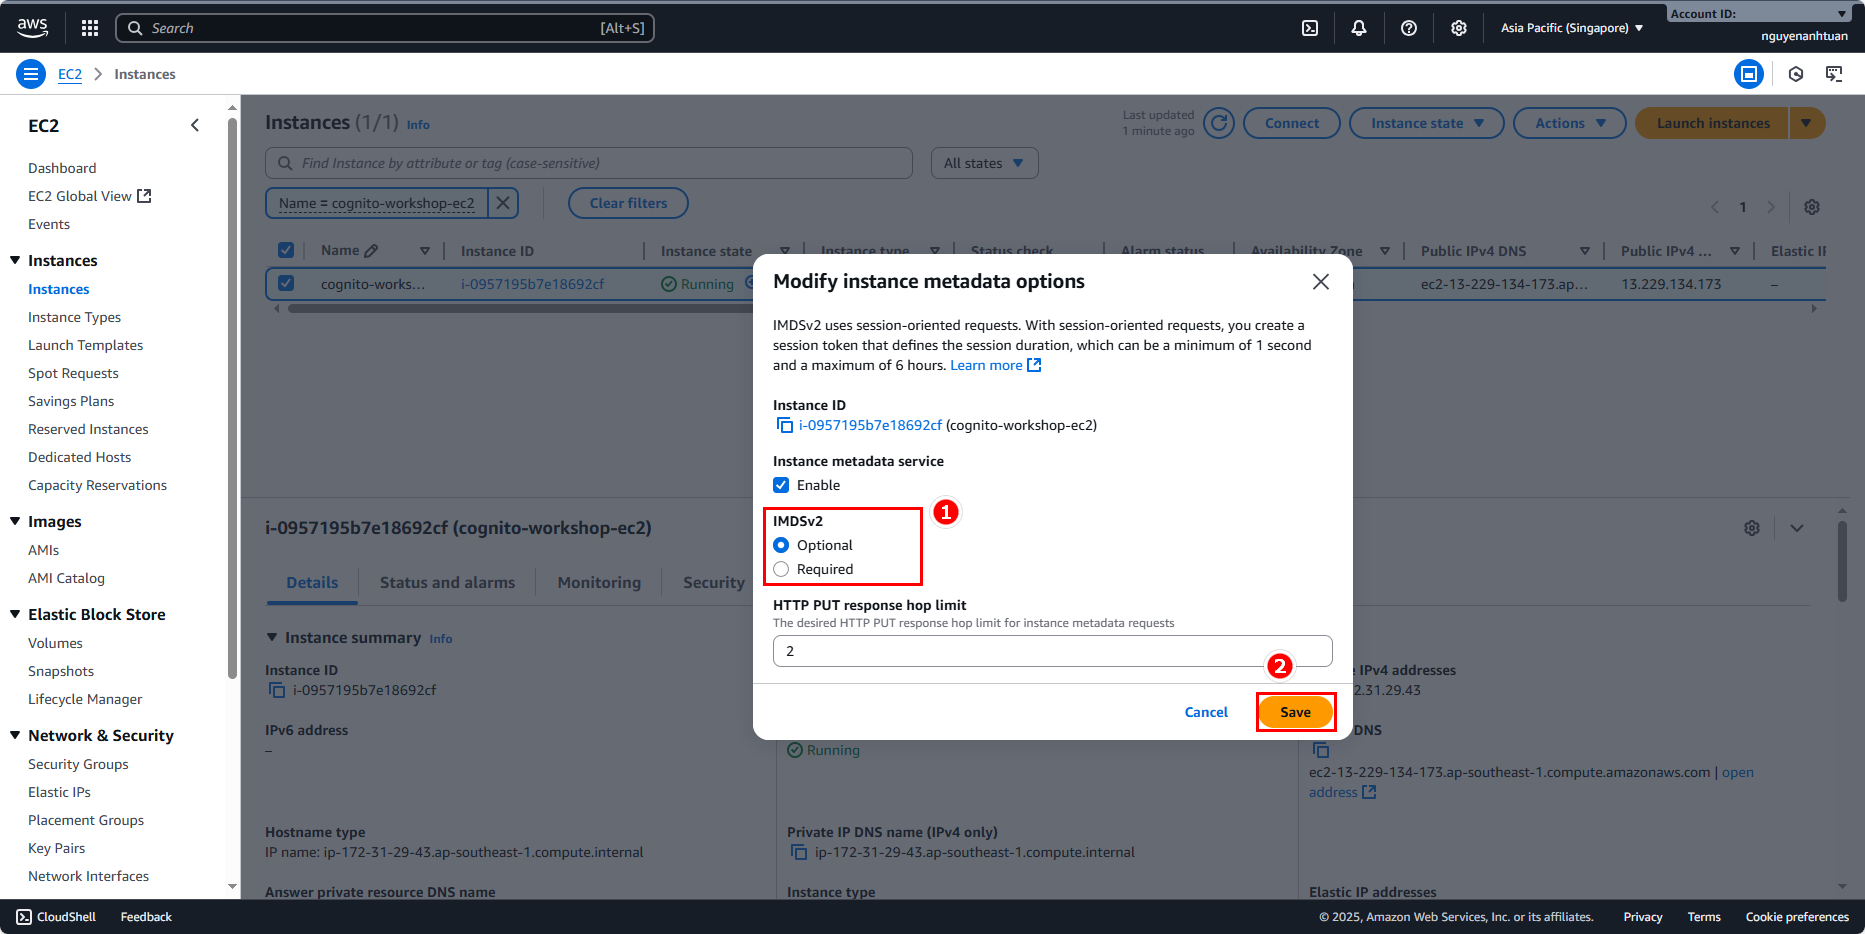
- Click Modify instance metadata options.
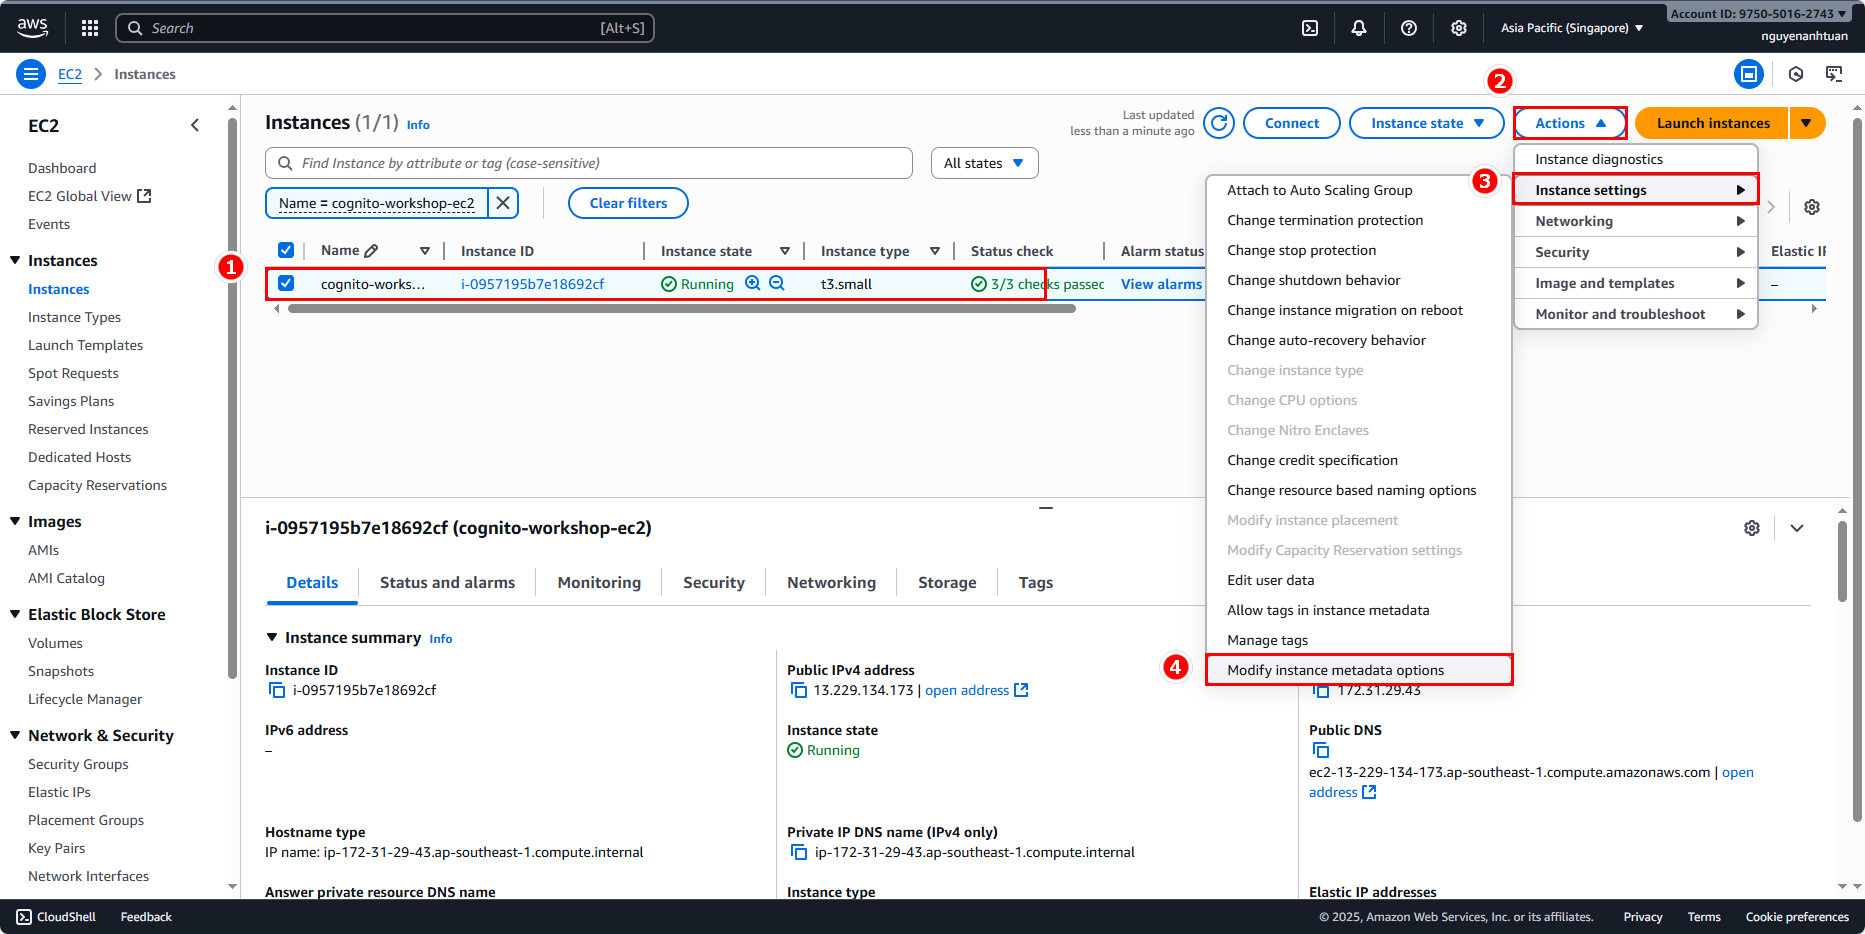
Set IMDSv2 to Optional and click Save.

Next, select the EC2 instance again.
Attach the previously created IAM role and click Update IAM role.

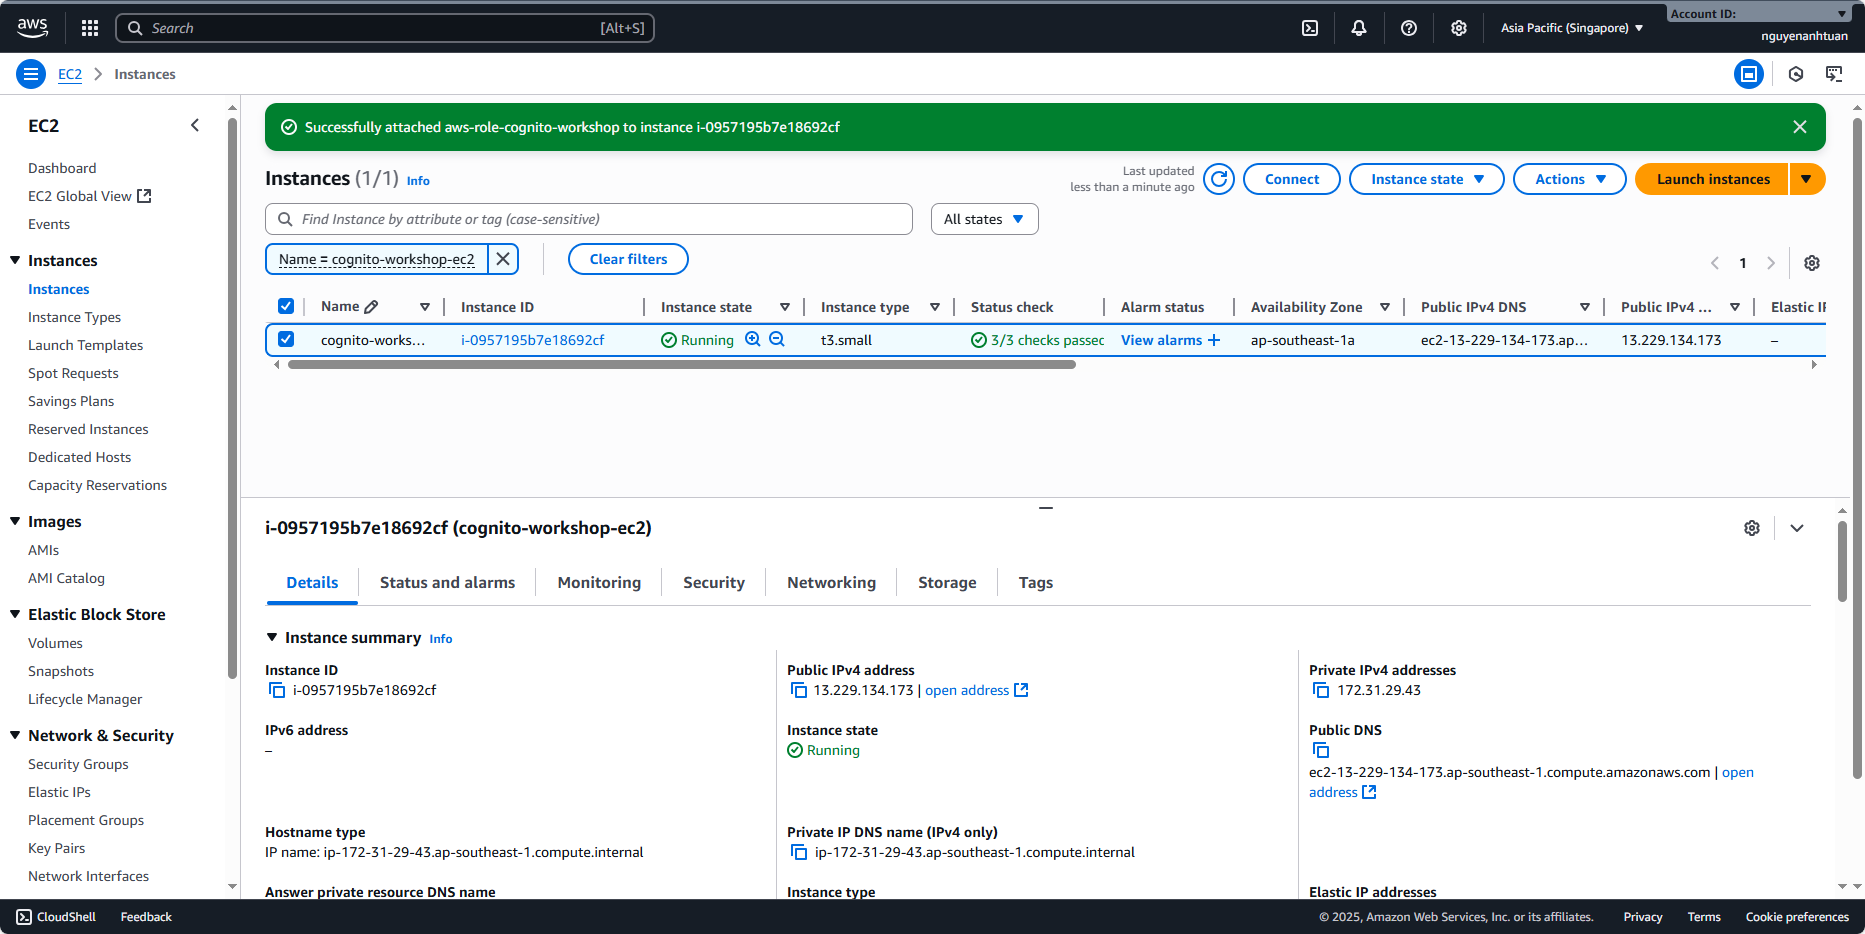
The EC2 instance is now ready for deployment.