Deploying Amazon Bedrock Agent
1. Creating IAM Policies
Before deploying Amazon Bedrock Agent, we need to create IAM Policies to grant the agent permissions to invoke the Bedrock model.
Step 1: Create IAM Policies
The following IAM policy allows the agent to invoke a specific Bedrock model in the specified region.
import json

# Create IAM Policy for Agent
bedrock_agent_bedrock_allow_policy_statement = {
    "Version": "2012-10-17",
    "Statement": [
        {
            "Sid": "AmazonBedrockAgentBedrockFoundationModelPolicy",
            "Effect": "Allow",
            "Action": "bedrock:InvokeModel",
            "Resource": [
                f"arn:aws:bedrock:{region}::foundation-model/{agent_foundation_model}"
            ]
        }
    ]
}

bedrock_policy_json = json.dumps(bedrock_agent_bedrock_allow_policy_statement)

agent_bedrock_policy = iam_client.create_policy(
    PolicyName=agent_bedrock_allow_policy_name,
    PolicyDocument=bedrock_policy_json
)
2. Creating IAM Role
The IAM Role will be assigned the policy created above and grant permissions for Amazon Bedrock to use the agent.
Step 2: Create IAM Role and Attach Policies
import time

# Define Assume Role Policy
assume_role_policy_document = {
    "Version": "2012-10-17",
    "Statement": [{
        "Effect": "Allow",
        "Principal": {
            "Service": "bedrock.amazonaws.com"
        },
        "Action": "sts:AssumeRole"
    }]
}

assume_role_policy_document_json = json.dumps(assume_role_policy_document)

# Create IAM Role
agent_role = iam_client.create_role(
    RoleName=agent_role_name,
    AssumeRolePolicyDocument=assume_role_policy_document_json
)

# Wait to ensure the role is created before attaching policies
time.sleep(10)

# Attach Policy to IAM Role
iam_client.attach_role_policy(
    RoleName=agent_role_name,
    PolicyArn=agent_bedrock_policy['Policy']['Arn']
)

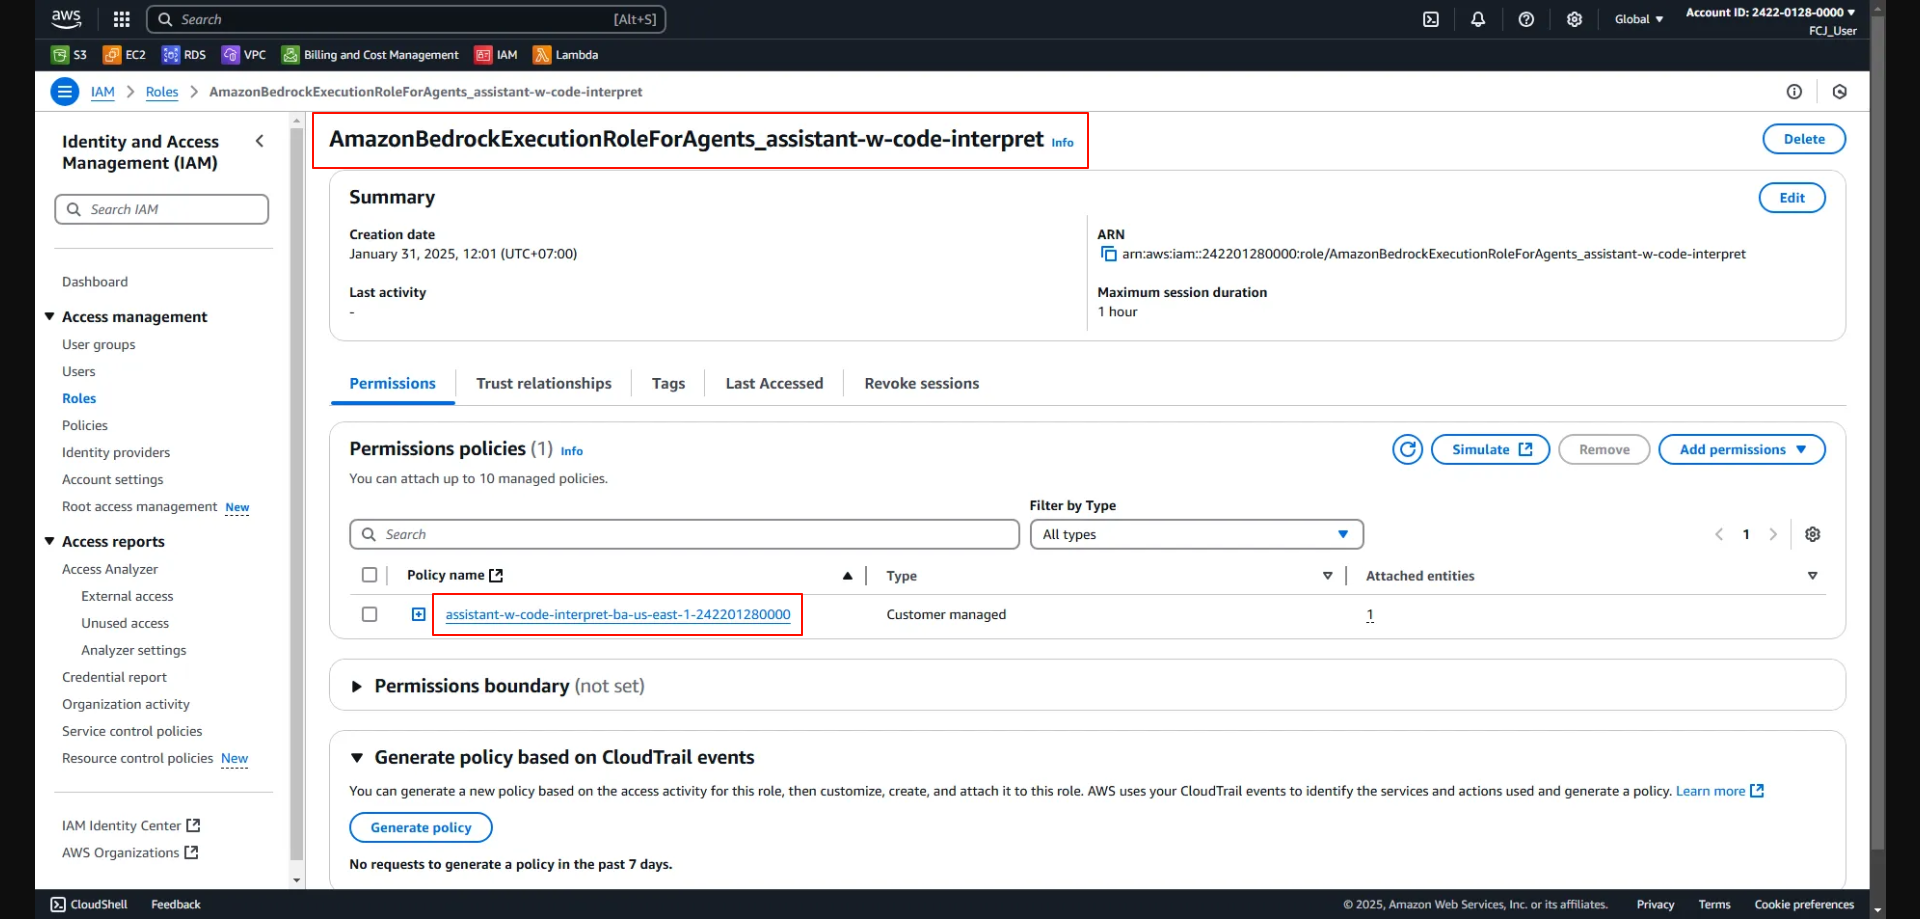
Result displayed in the Amazon Management Console:
3. Creating the Bedrock Agent
After creating the IAM Role, we can use the Bedrock Agent Client to initialize the agent.
Step 3: Create Bedrock Agent
# Create Bedrock Agent
response = bedrock_agent_client.create_agent(
    agentName=agent_name,
    agentResourceRoleArn=agent_role['Role']['Arn'],
    description=agent_description,
    idleSessionTTLInSeconds=1800,
    foundationModel=agent_foundation_model,
    instruction=agent_instruction
)


# Save the agent ID for use in subsequent steps
agent_id = response['agent']['agentId']
agent_id
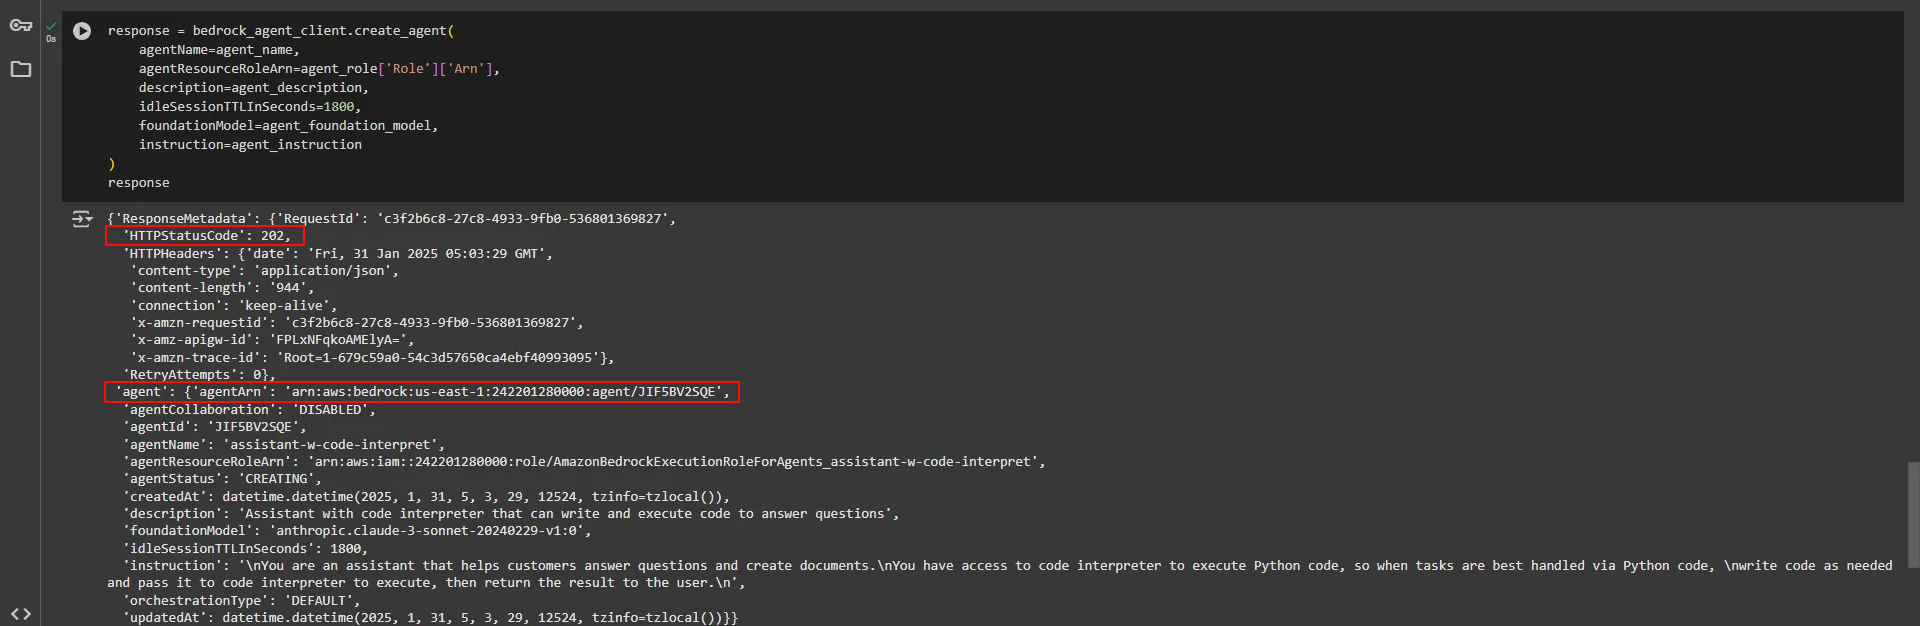
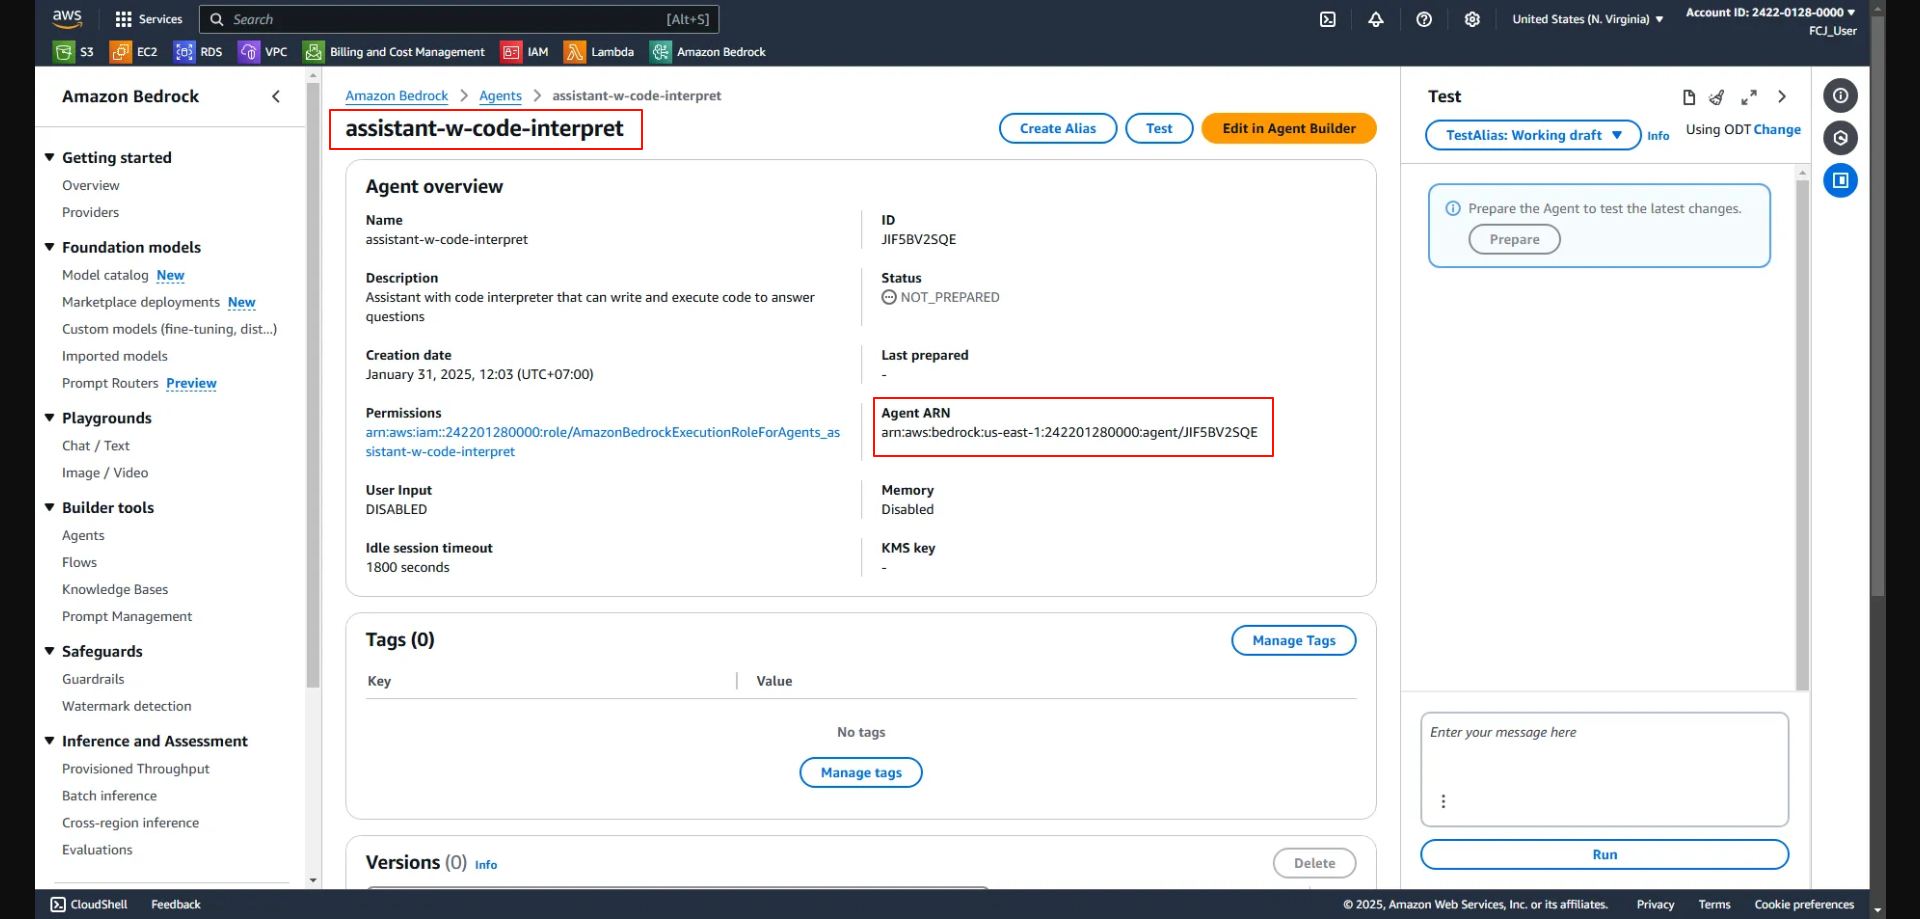
Result displayed in the Amazon Management Console:
4. Creating Action Group for the Agent
In Amazon Bedrock, Action Groups define the tools the agent can use. Here, we will create an Action Group for Code Interpreter, allowing the agent to run Python code to process data and generate files.
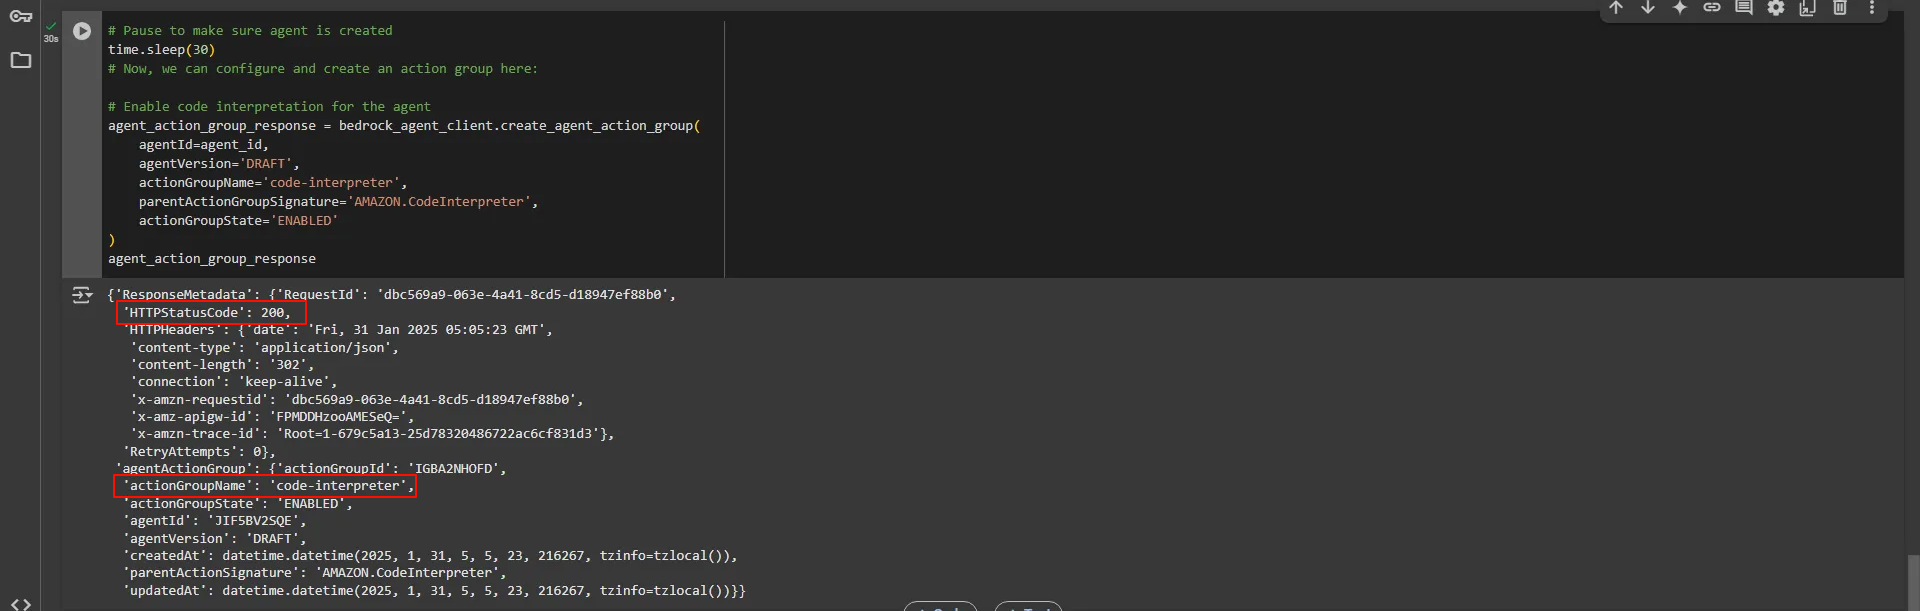
Step 4: Create Agent Action Group (Code Interpreter)
# Wait to ensure the agent is initialized
time.sleep(30)

# Configure Action Group for Code Interpreter
agent_action_group_response = bedrock_agent_client.create_agent_action_group(
    agentId=agent_id,
    agentVersion='DRAFT',
    actionGroupName='code-interpreter',
    parentActionGroupSignature='AMAZON.CodeInterpreter',
    actionGroupState='ENABLED'
)

agent_action_group_response
Created Agent Action Group successfully: