Create Pipeline
Create Pipeline
Setting up AWS Secrets Manager
We will need to add GitHub Personal Access Token to AWS’s AWS Secrets Manager to take advantage of AWS CodePipeline and GitHub as our pipeline will take advantage of webhook to run successfully.
You can refer to more about how to create GitHub Personal Access Token
After creating GitHub Personal Access Token
- We return to VSCode Terminal
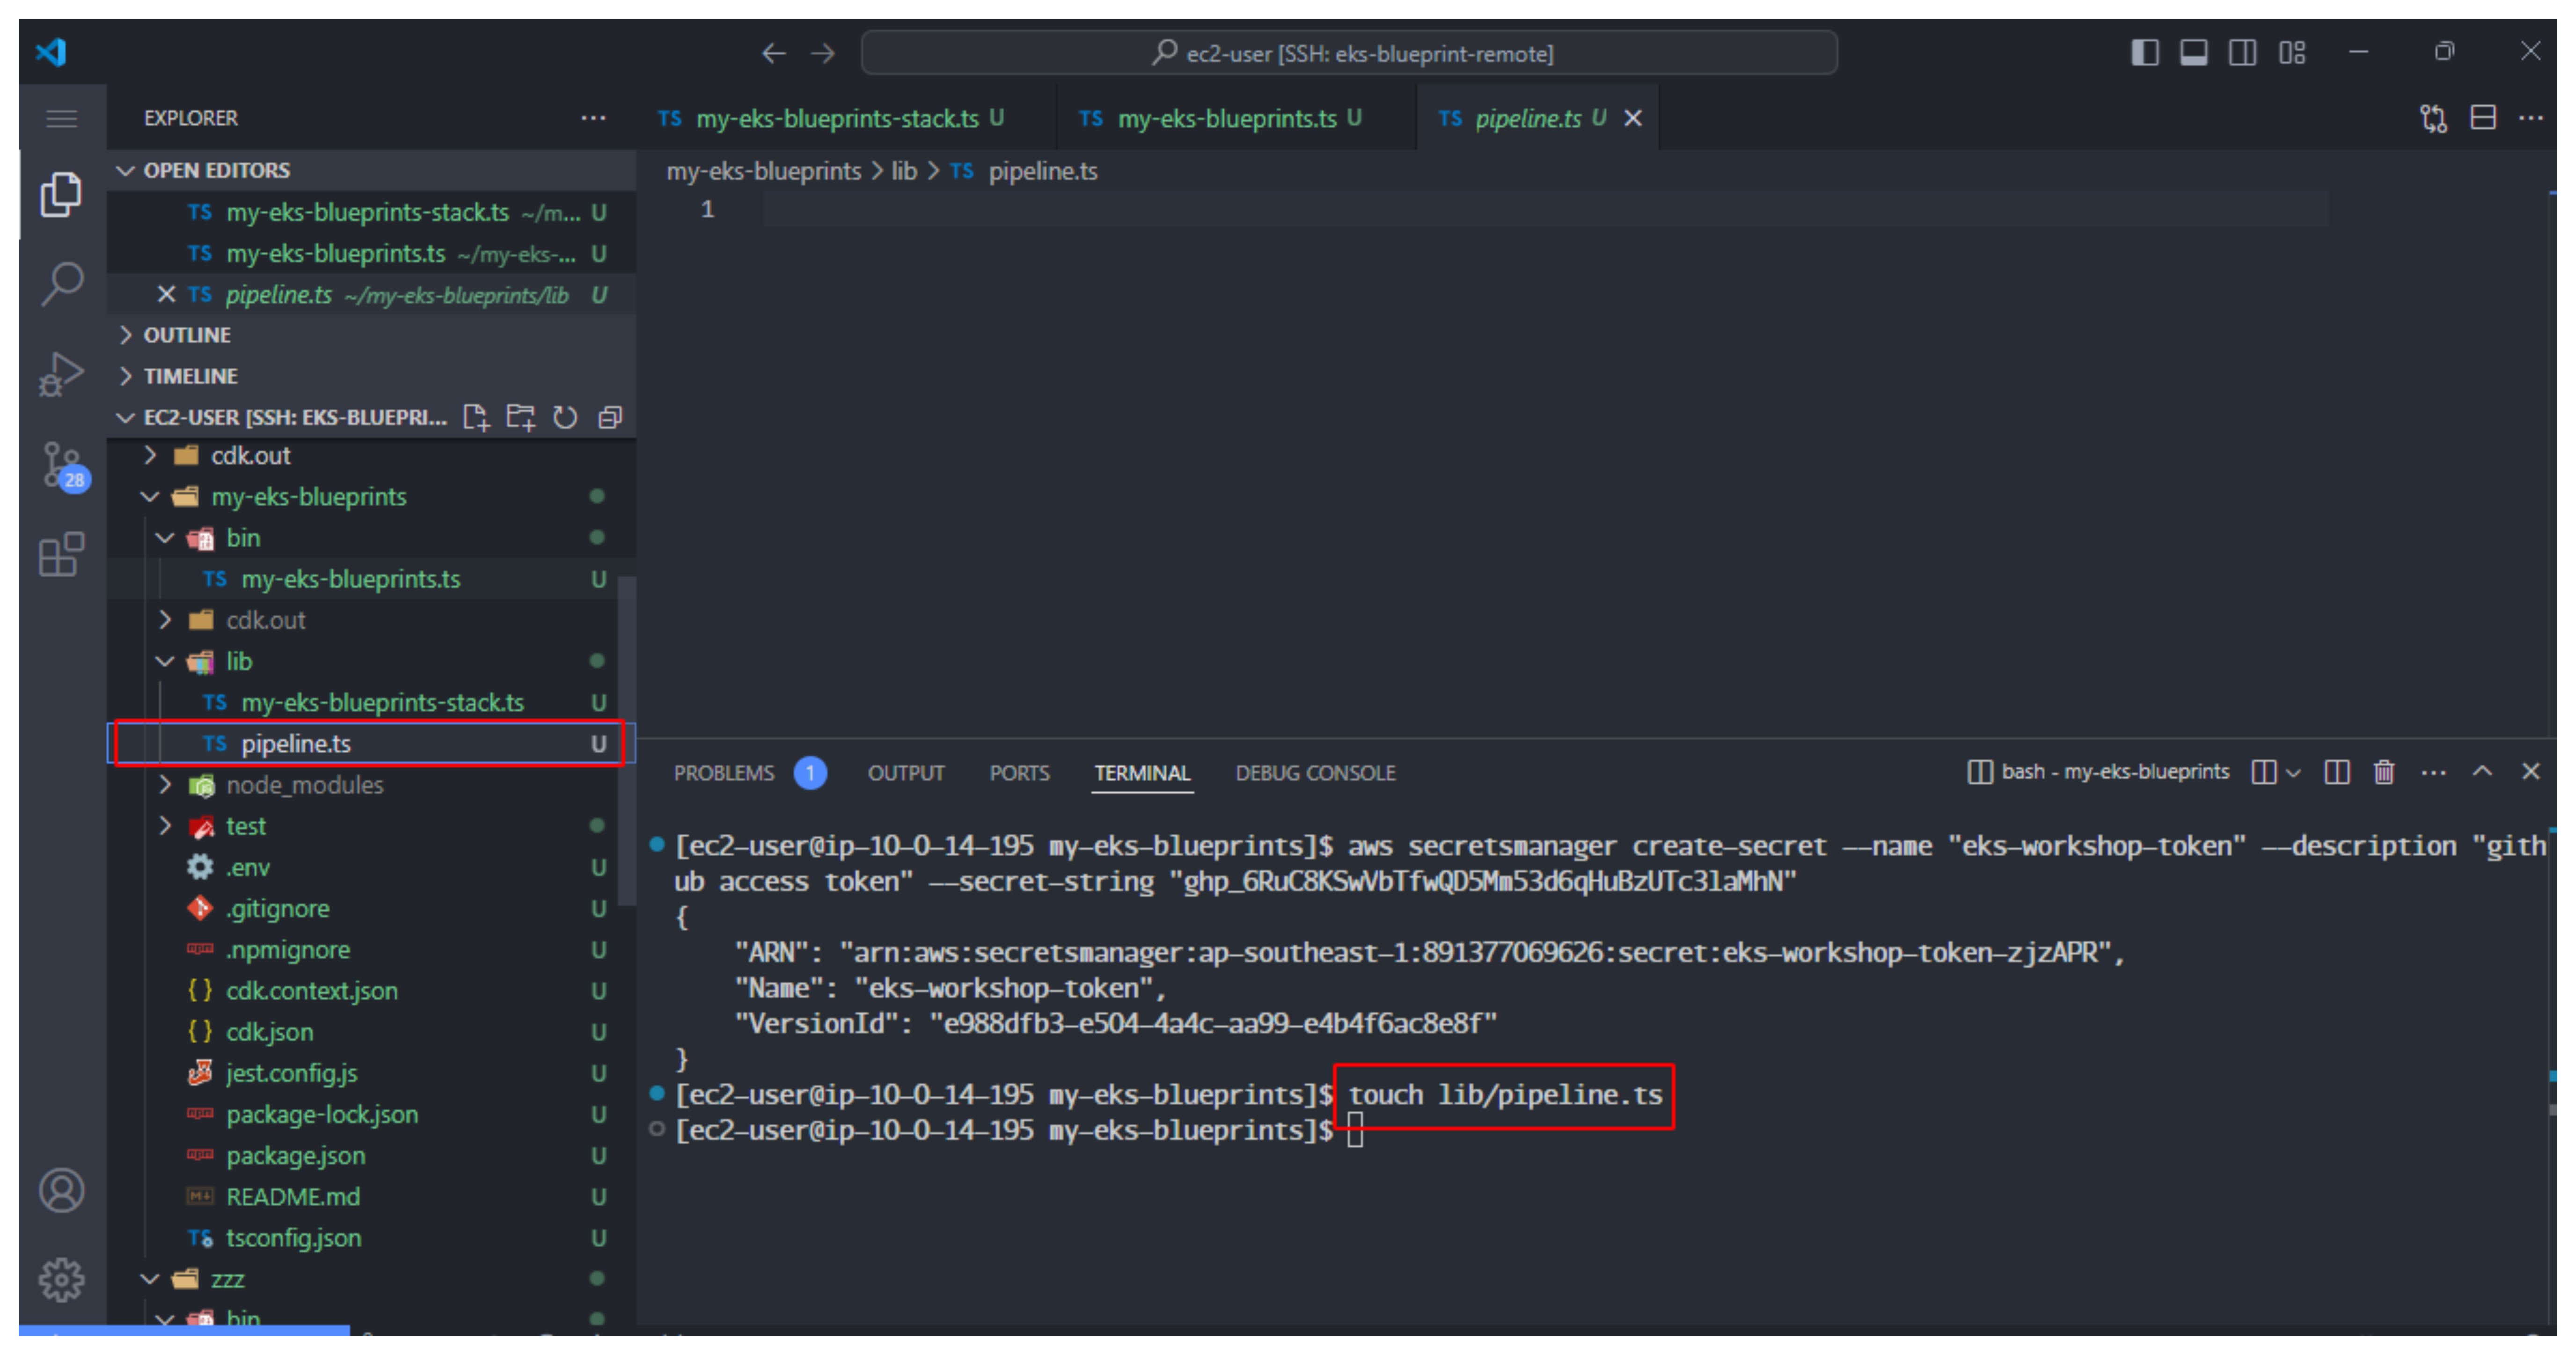
- Create Secret in Secrets Manager with the name eks-workshop-token
aws secretsmanager create-secret --name "eks-workshop-token" --description "github access token" --secret-string "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"
Note: remember to replace your secret-string with the token you created.

We can create a new CodePipelineStack resource by creating a new CDK Construct in the lib/ directory, then importing Construct into the main entry point file.
- Create new construct file.
touch lib/pipeline.ts
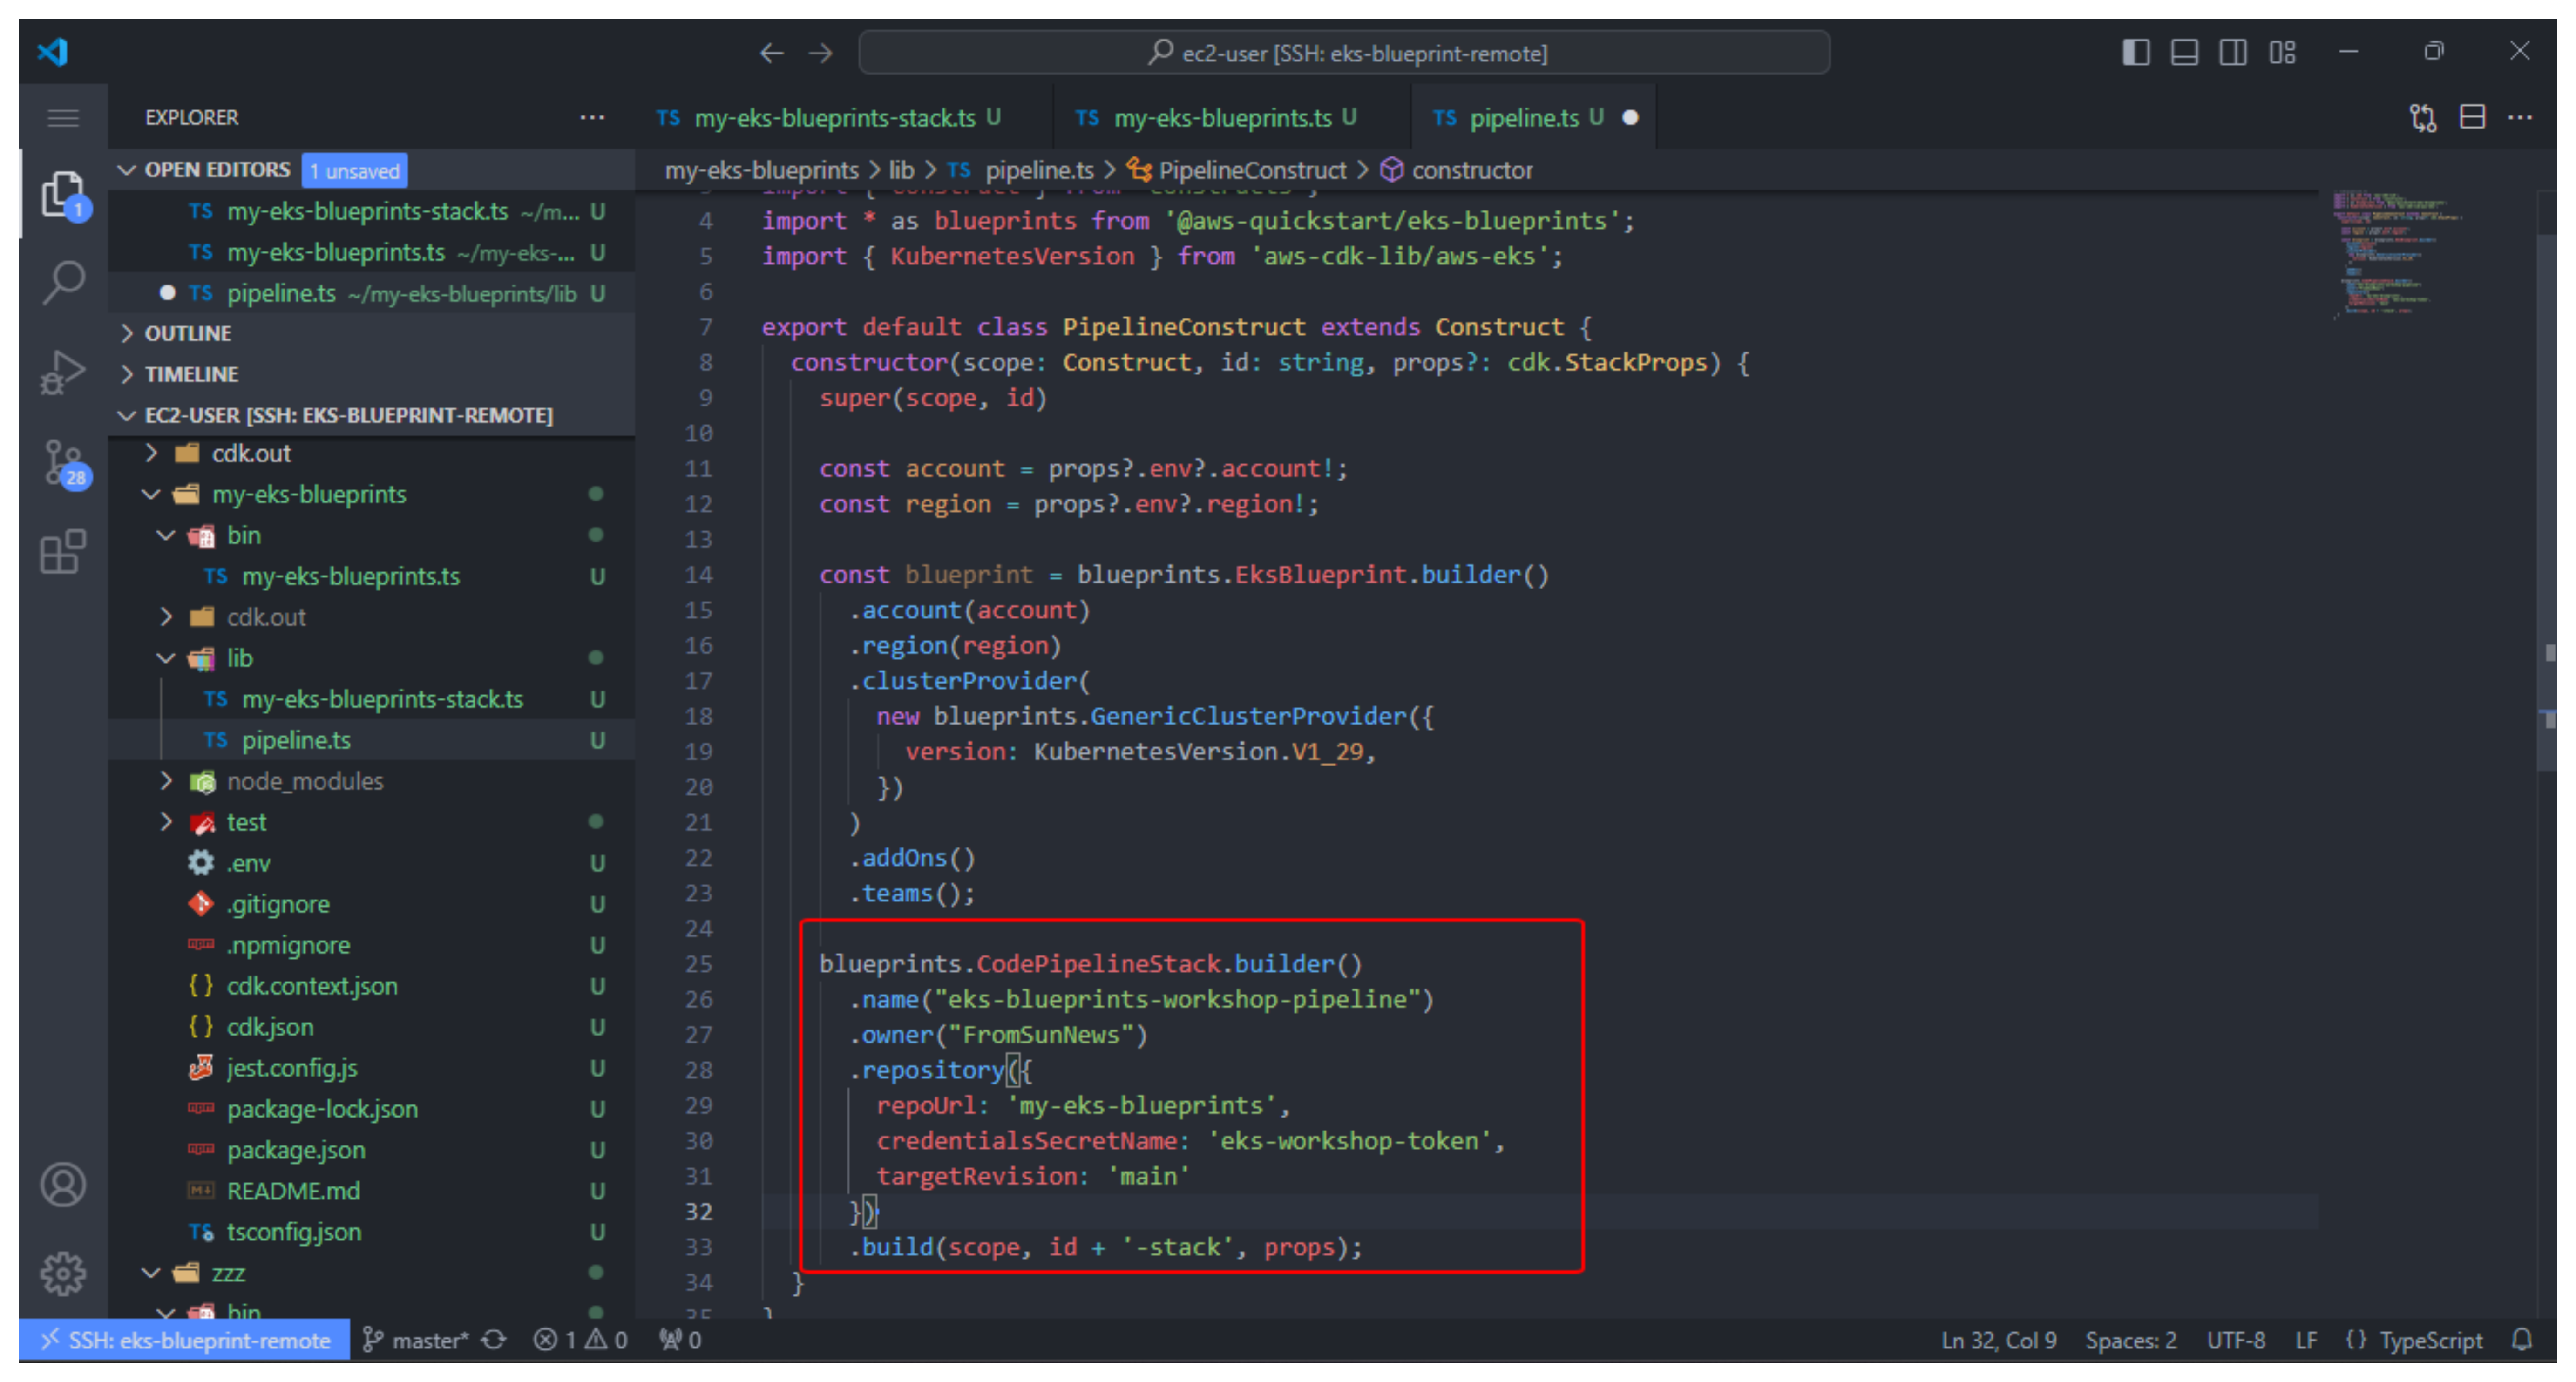
- Once the file is created, open the file and add the following code to create pipeline construct
// lib/pipeline.ts
import * as cdk from 'aws-cdk-lib';
import { Construct } from 'constructs';
import * as blueprints from '@aws-quickstart/eks-blueprints';
import { KubernetesVersion } from 'aws-cdk-lib/aws-eks';

export default class PipelineConstruct extends Construct {
  constructor(scope: Construct, id: string, props?: cdk.StackProps) {
    super(scope, id)

    const account = props?.env?.account!;
    const region = props?.env?.region!;

    const blueprint = blueprints.EksBlueprint.builder()
      .account(account)
      .region(region)
      .clusterProvider(
        new blueprints.GenericClusterProvider({
          version: 'auto'
        })
      )
      .addOns()
      .teams();

    blueprints.CodePipelineStack.builder()
      .name("eks-blueprints-workshop-pipeline")
      .owner("your-github-username")
      .repository({
          repoUrl: 'your-repo-name',
          credentialsSecretName: 'github-token',
          targetRevision: 'main'
      })
      .build(scope, id+'-stack', props);
  }
}
Make configuration:
- name, we enter eks-blueprints-workshop-pipeline or the name pipeline you want.
- owner, enter your github name. (in the lab, enter AWS-First-Cloud-Journey)
- repoUrl, enter the name of the repo. (In the lab, enter my-eks-blueprints)
- credentialsSecretName, enter your secret (In the lab, enter eks-workshop-token)
- targetRevision, enter revision main
To make sure we can access Construct, we need to import and initialize a new construct.
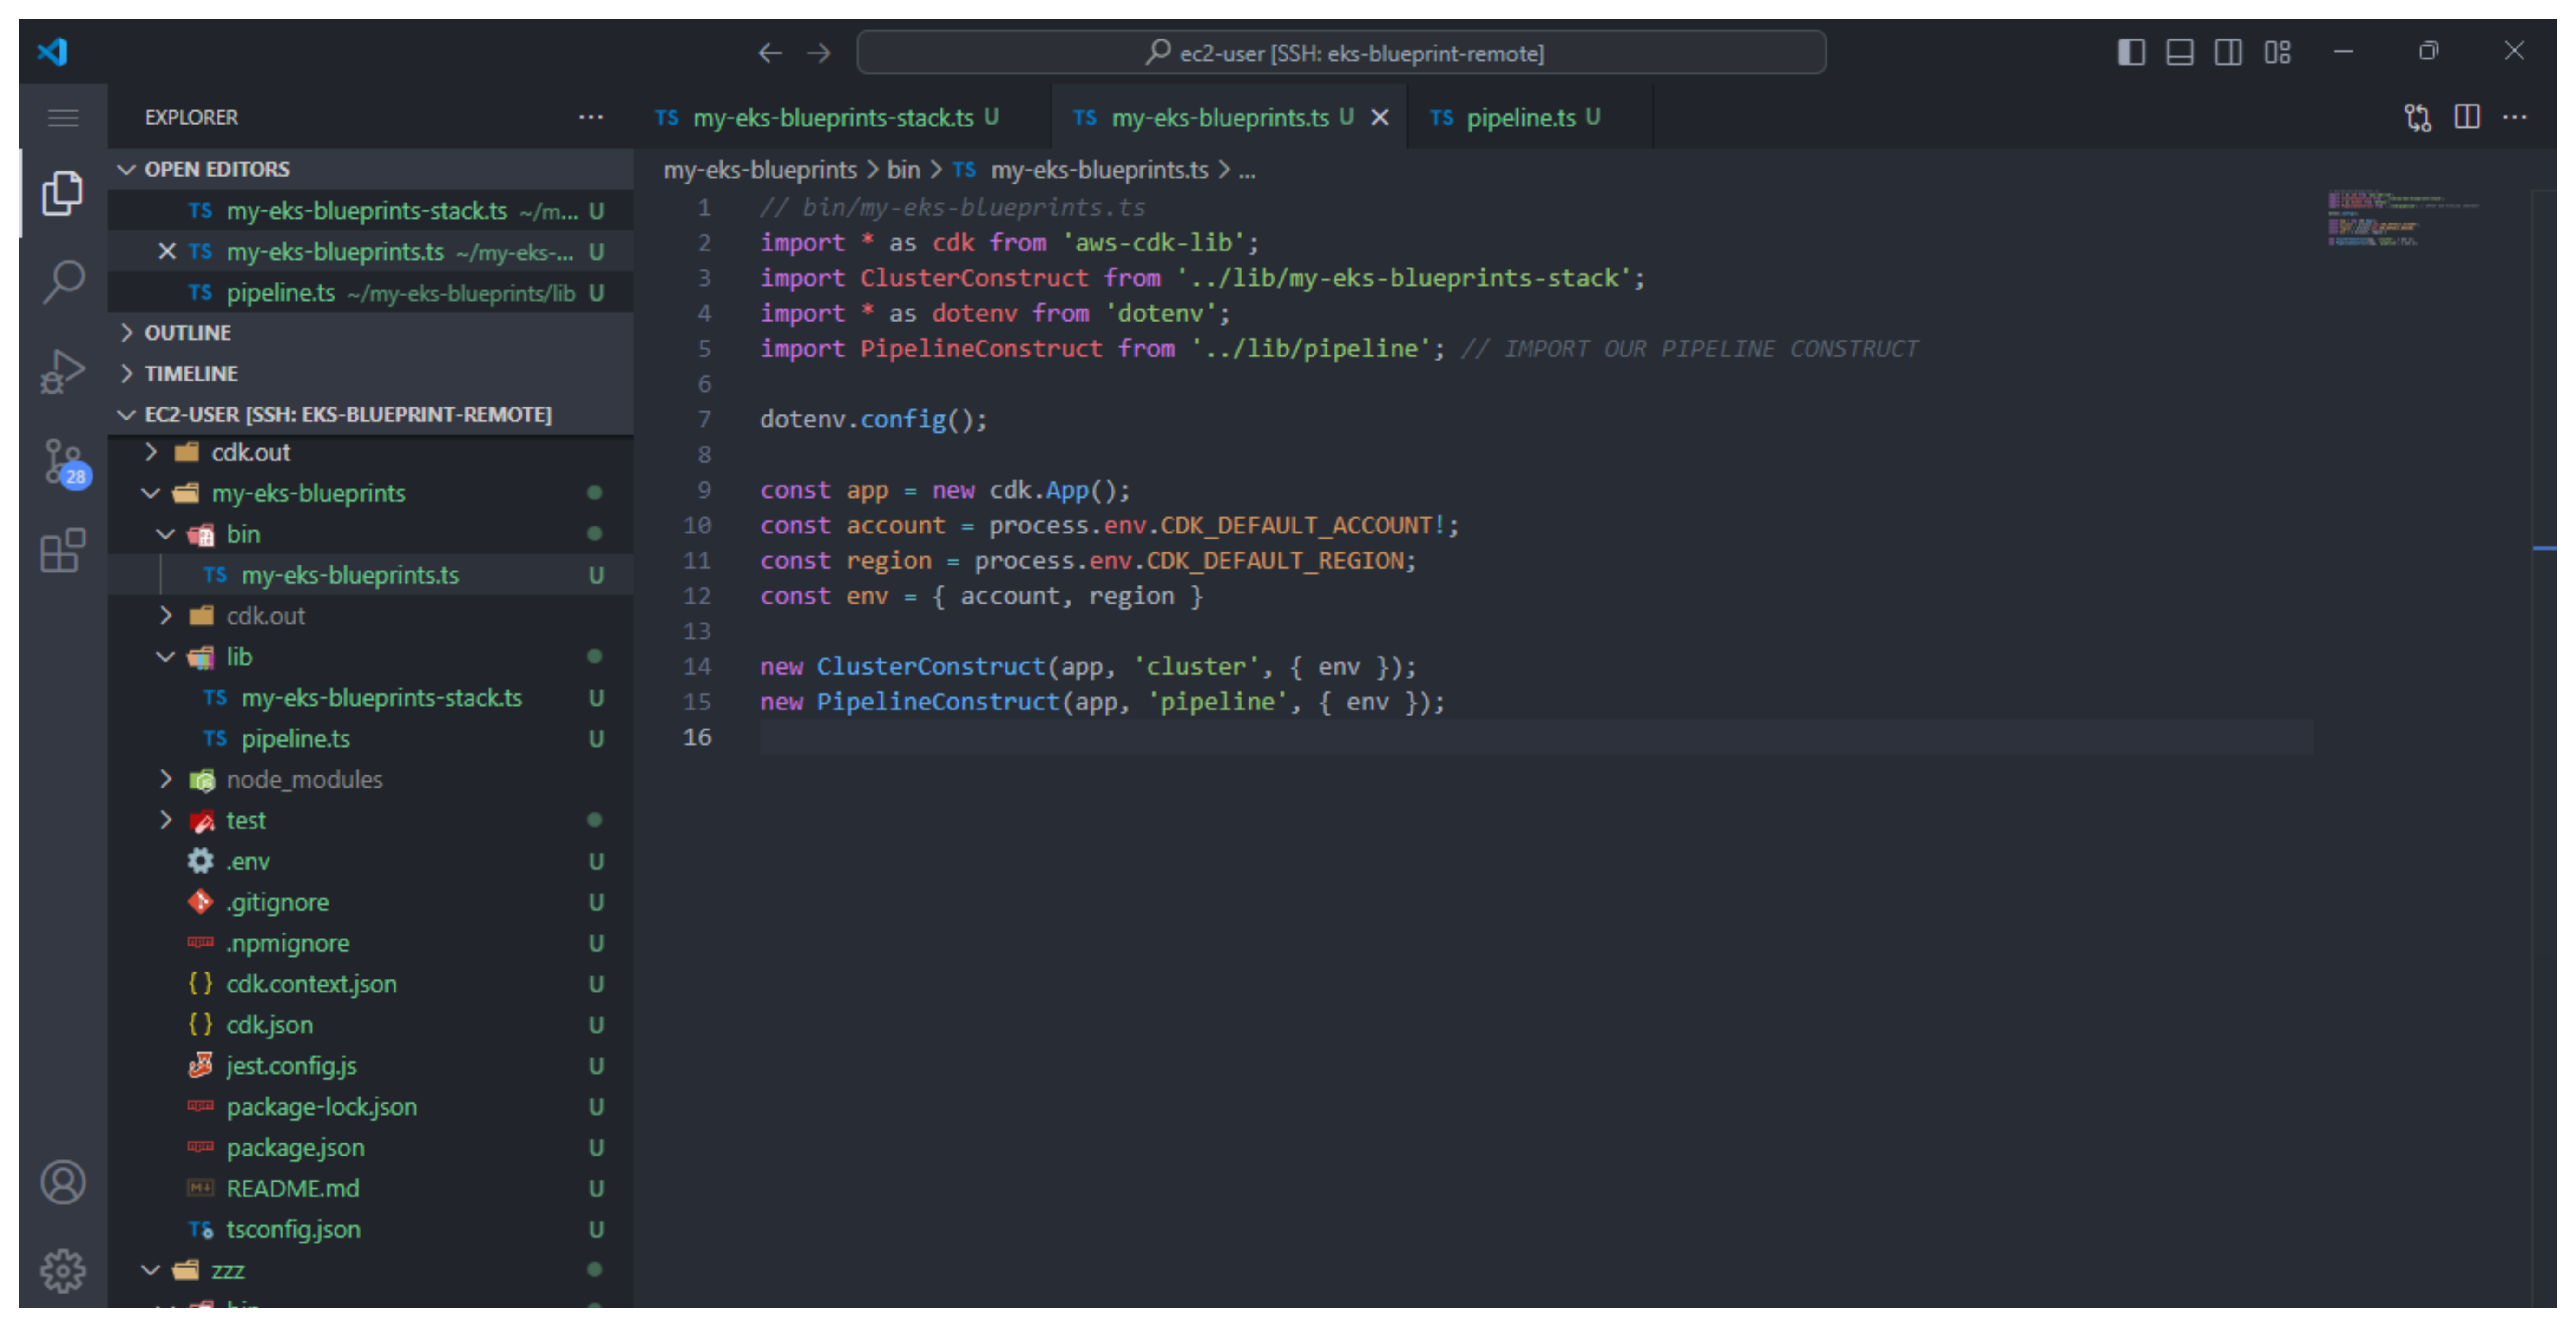
- Change the content of the file bin/my-eks-blueprints.ts
// bin/my-eks-blueprints.ts
// bin/my-eks-blueprints.ts
import * as cdk from 'aws-cdk-lib';
import ClusterConstruct from '../lib/my-eks-blueprints-stack';
import * as dotenv from 'dotenv';
import PipelineConstruct from '../lib/pipeline'; // IMPORT OUR PIPELINE CONSTRUCT

dotenv.config();

const app = new cdk.App();
const account = process.env.CDK_DEFAULT_ACCOUNT!;
const region = process.env.CDK_DEFAULT_REGION;
const env = { account, region }

new ClusterConstruct(app, 'cluster', { env });
new PipelineConstruct(app, 'pipeline', { env });
- Do a list check pipeline
cdk list

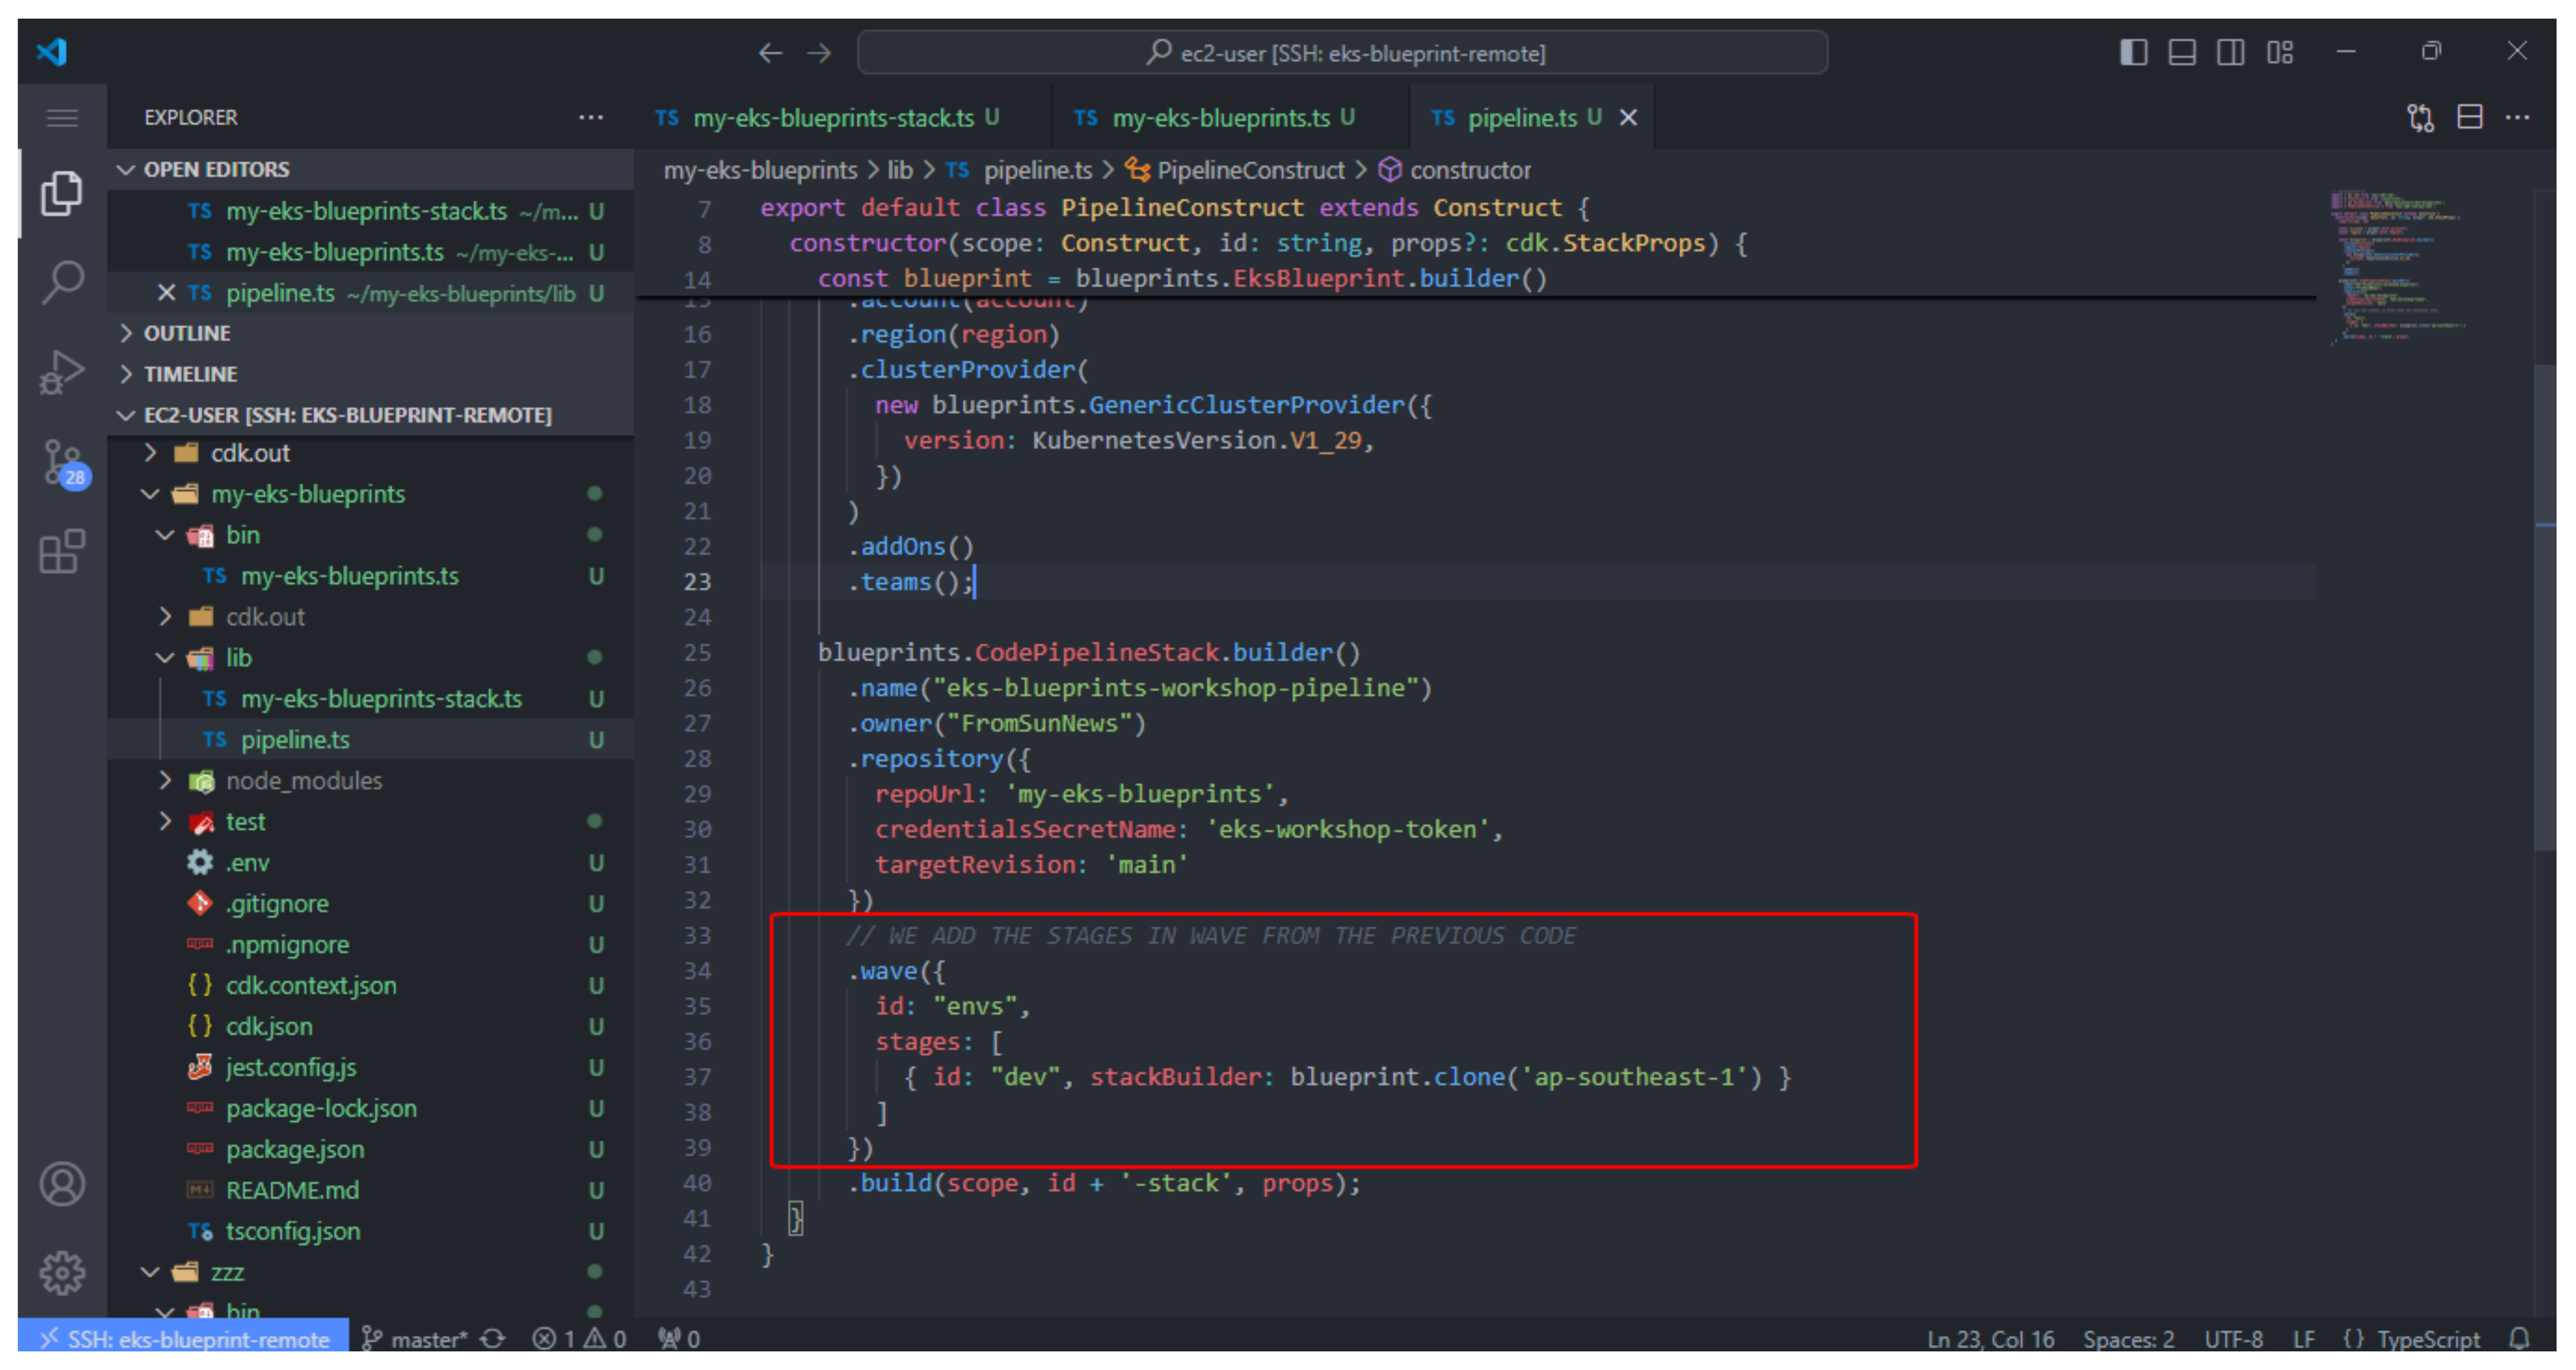
- Do more Stage. In this step, we add stages to the pipeline (in the lab using the dev stage, you can deploy more stages for test and production in regions. other)
// lib/pipeline.ts
import * as cdk from 'aws-cdk-lib';
import { Construct } from 'constructs';
import * as blueprints from '@aws-quickstart/eks-blueprints';
import { KubernetesVersion } from 'aws-cdk-lib/aws-eks';

export default class PipelineConstruct extends Construct {
  constructor(scope: Construct, id: string, props?: cdk.StackProps) {
    super(scope, id)

    const account = props?.env?.account!;
    const region = props?.env?.region!;

    const blueprint = blueprints.EksBlueprint.builder()
      .account(account)
      .region(region)
      .clusterProvider(
        new blueprints.GenericClusterProvider({
          version: 'auto'
        })
      )
      .addOns()
      .teams();

    blueprints.CodePipelineStack.builder()
      .name("eks-blueprints-workshop-pipeline")
      .owner("your-github-username")
      .repository({
          repoUrl: 'your-repo-name',
          credentialsSecretName: 'github-token',
          targetRevision: 'main'
      })
      // WE ADD THE STAGES IN WAVE FROM THE PREVIOUS CODE
      .wave({
        id: "envs",
        stages: [
          { id: "dev", stackBuilder: blueprint.clone('ap-southeast-1') }
        ]
      })
      .build(scope, id + '-stack', props);
  }
}
Use class blueprints.StackStage build support to define our stages using .stage
Use .wave support for parallel deployment.
In the lab, we are deploying a cluster.
If you’re deploying multiple clusters, for mitigation we’ll simply add .wave to the list of stages to include how you want to structure your different deployment stages in the pipeline. (ie different add-ons, region deployment, etc.).
Our stack will deploy the following clusters: EKS in the dev environment. CodePipeline deploys to the region: ap-southeast-1.
- Perform pipeline list recheck
cdk list
The following results:
cluster-stack
pipeline-stack
pipeline-stack/dev/dev-blueprint