Push image to ECR
Push the Image to ECR
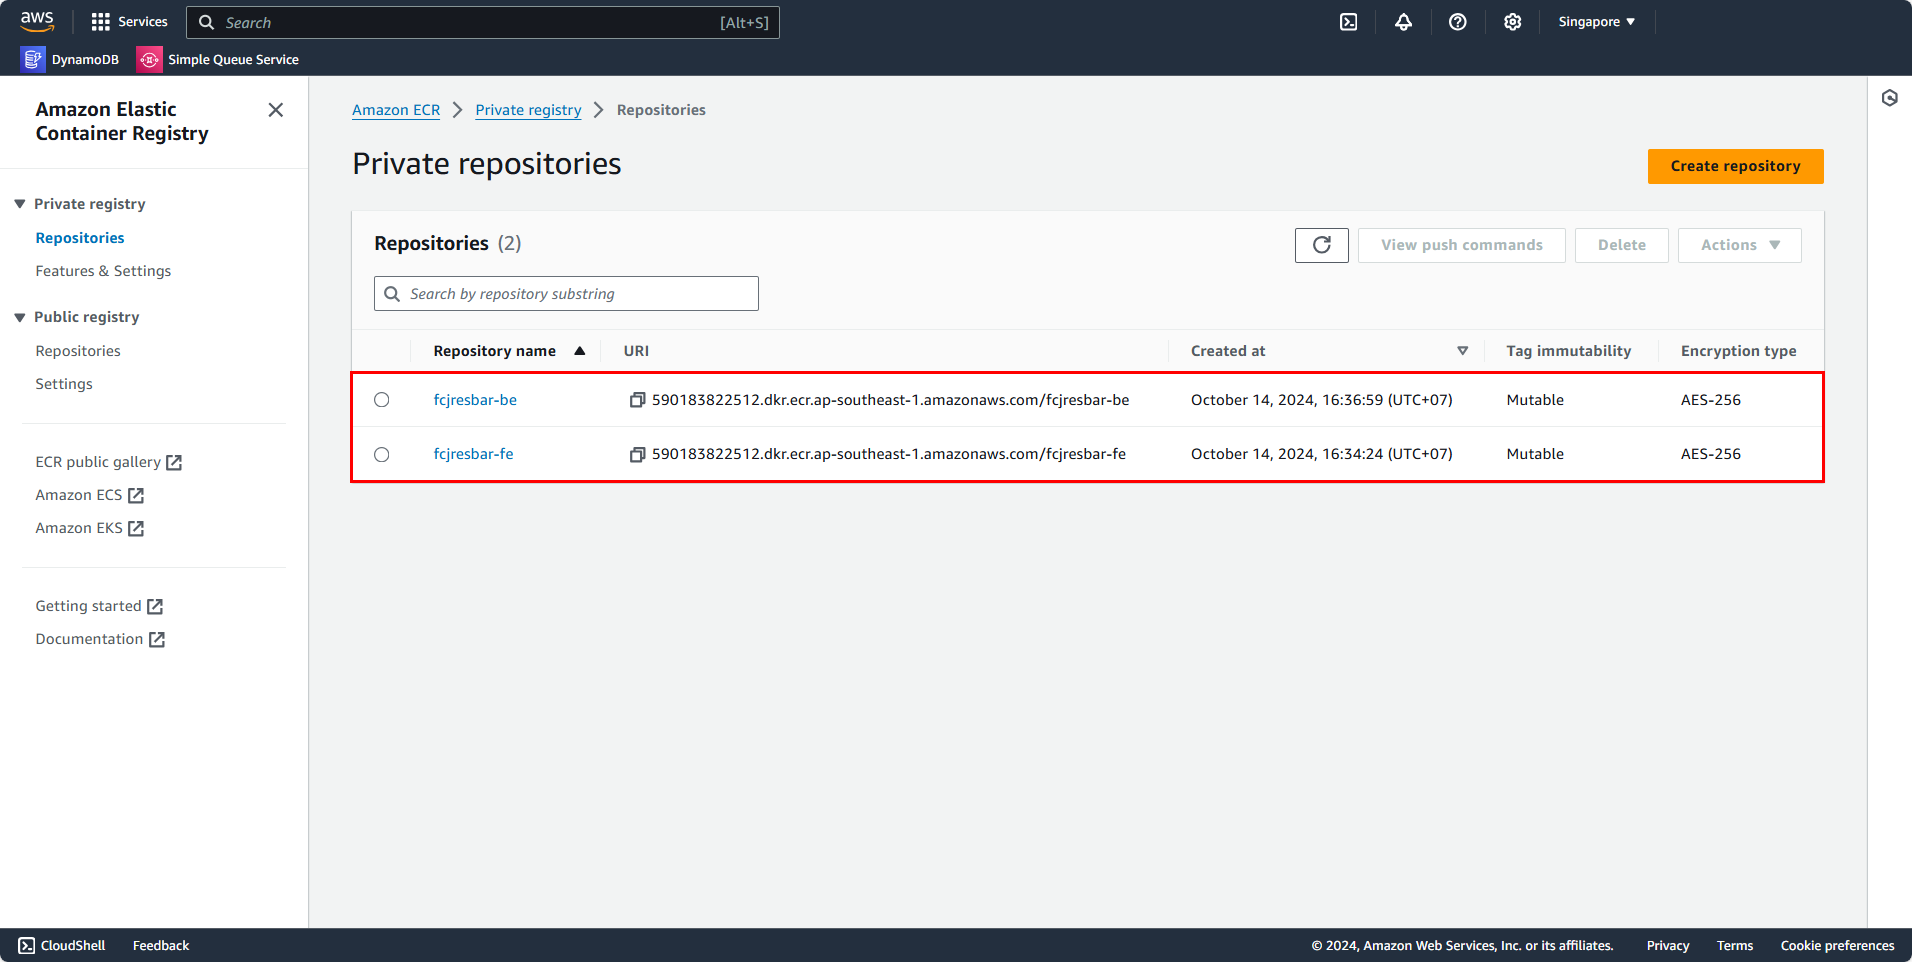
First, go to the ECR Console interface
- Select the Frontend image
- Copy URI

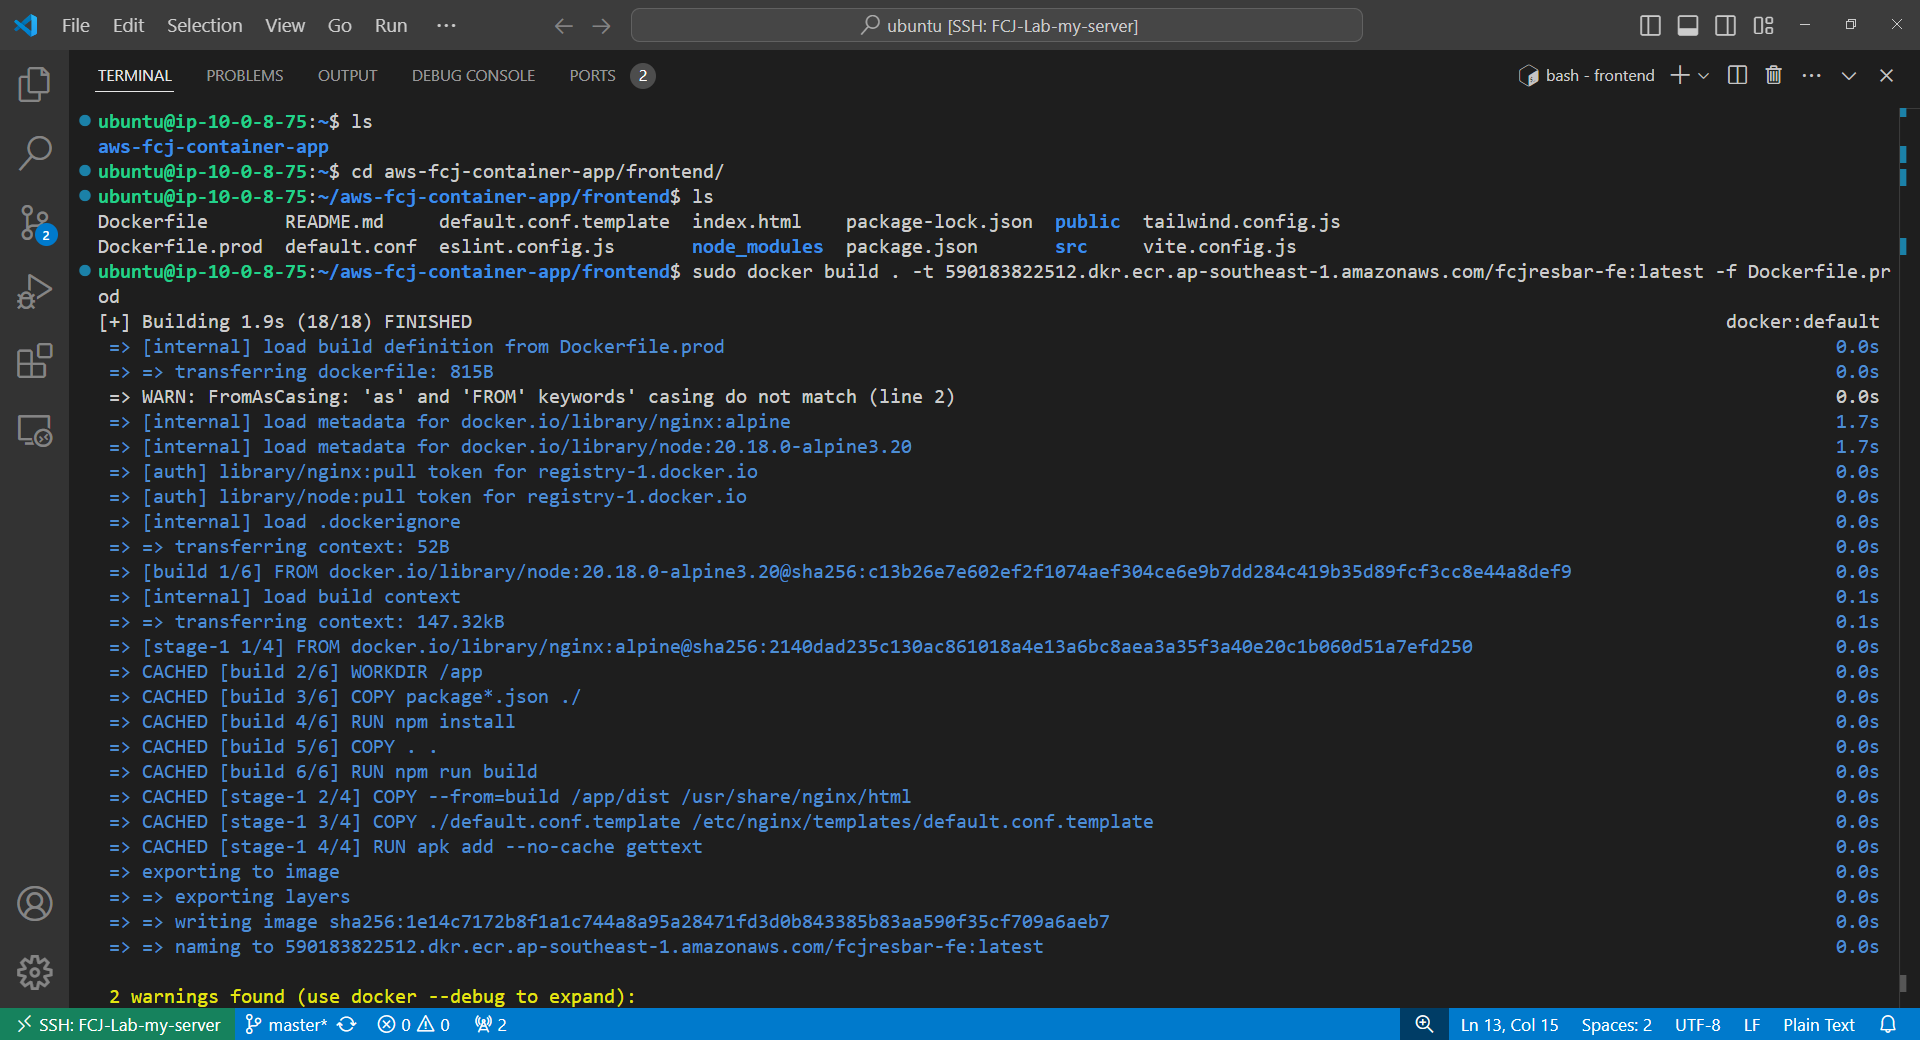
Go back to the EC2 instance that we configured earlier
- Navigate to the project directory.
- Enter the frontend folder.
- Use the following command and replace “image-uri” with your corresponding image URI.
sudo docker build . -t "image-uri":latest -f Dockerfile.prod

In this frontend directory, you’ll notice there are two Docker files: Dockerfile and Dockerfile.prod, as well as two nginx config files: default.conf and default.conf.template. The difference with Dockerfile.prod is that Docker will copy the default.conf.template file to the /etc/nginx/templates directory so that during the build process, the envsubst command can be used to replace the ${BACKEND_HOST} and ${BACKEND_PORT} parameters in the default.conf.template file. Once these parameters are replaced, the template file will be used by nginx for configuration. I will explain these two parameters more clearly when configuring them later.
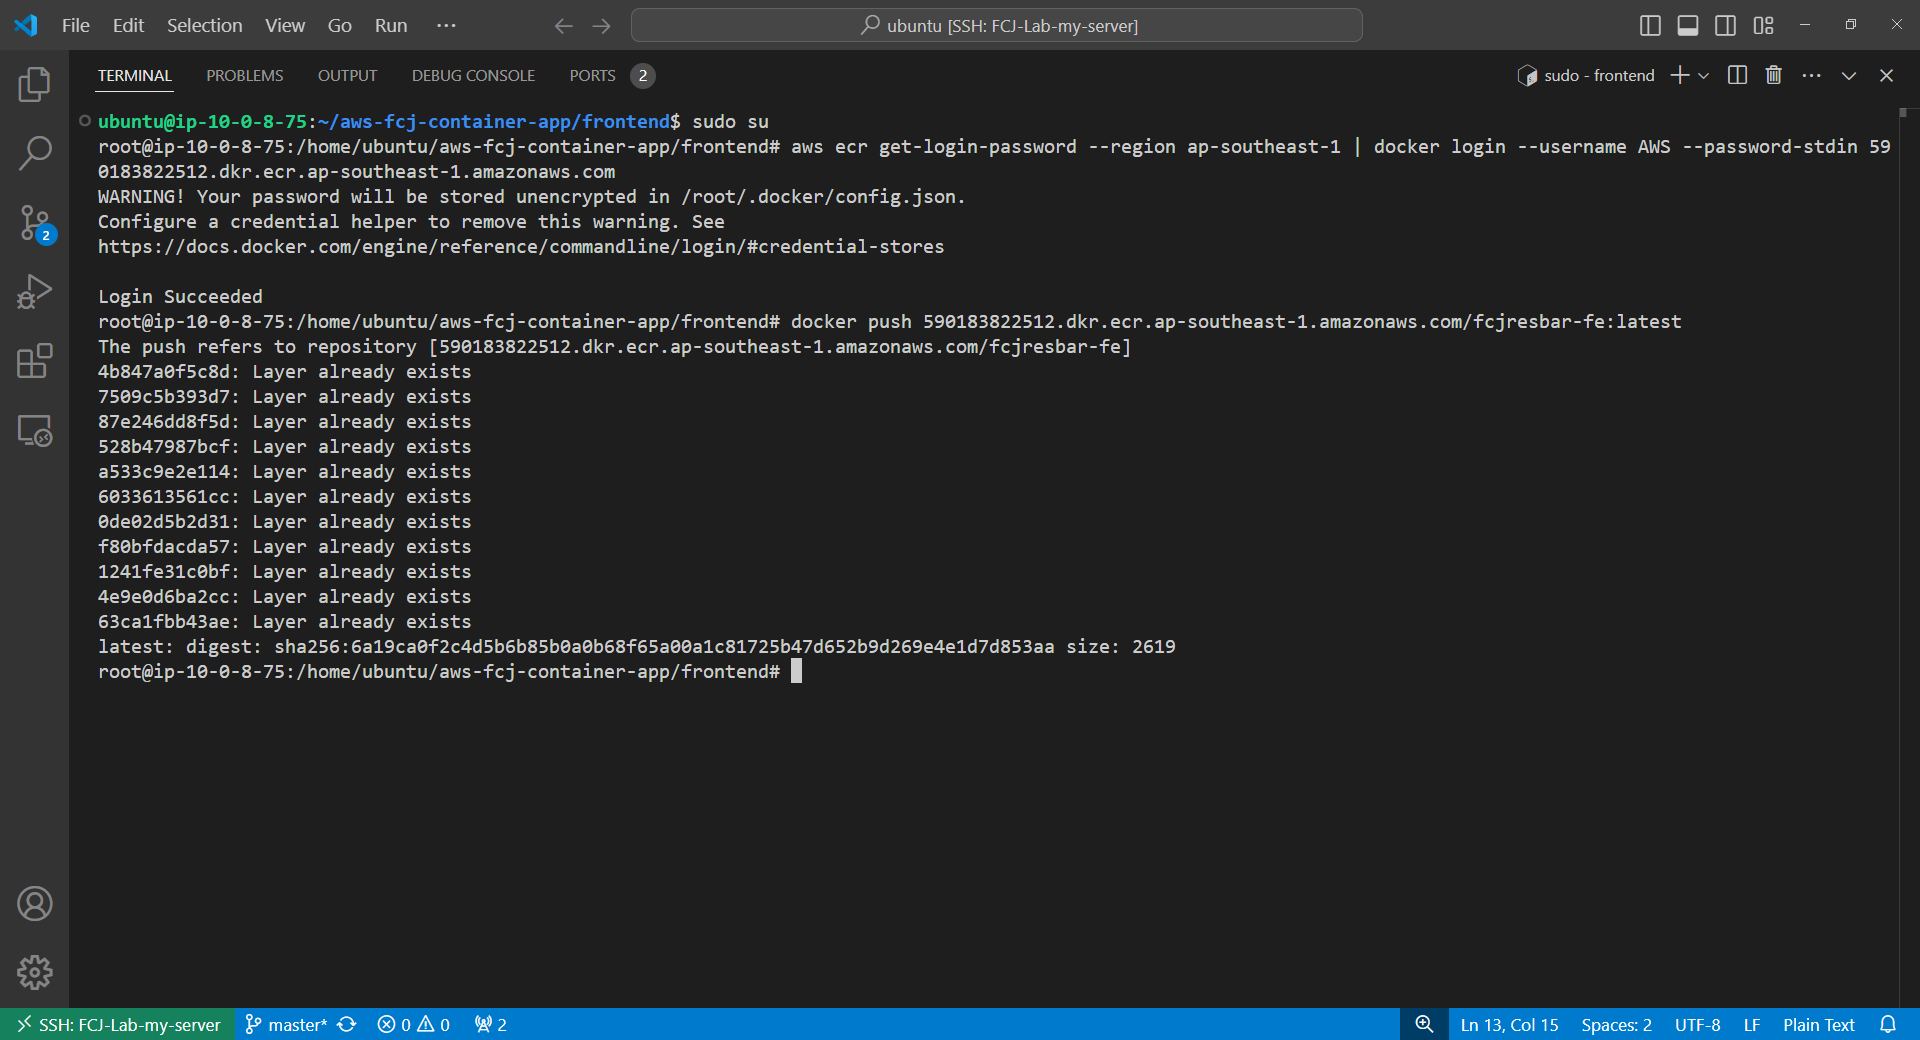
After building the image, switch to Root User to push the image to ECR.
docker push "image-uri":latest

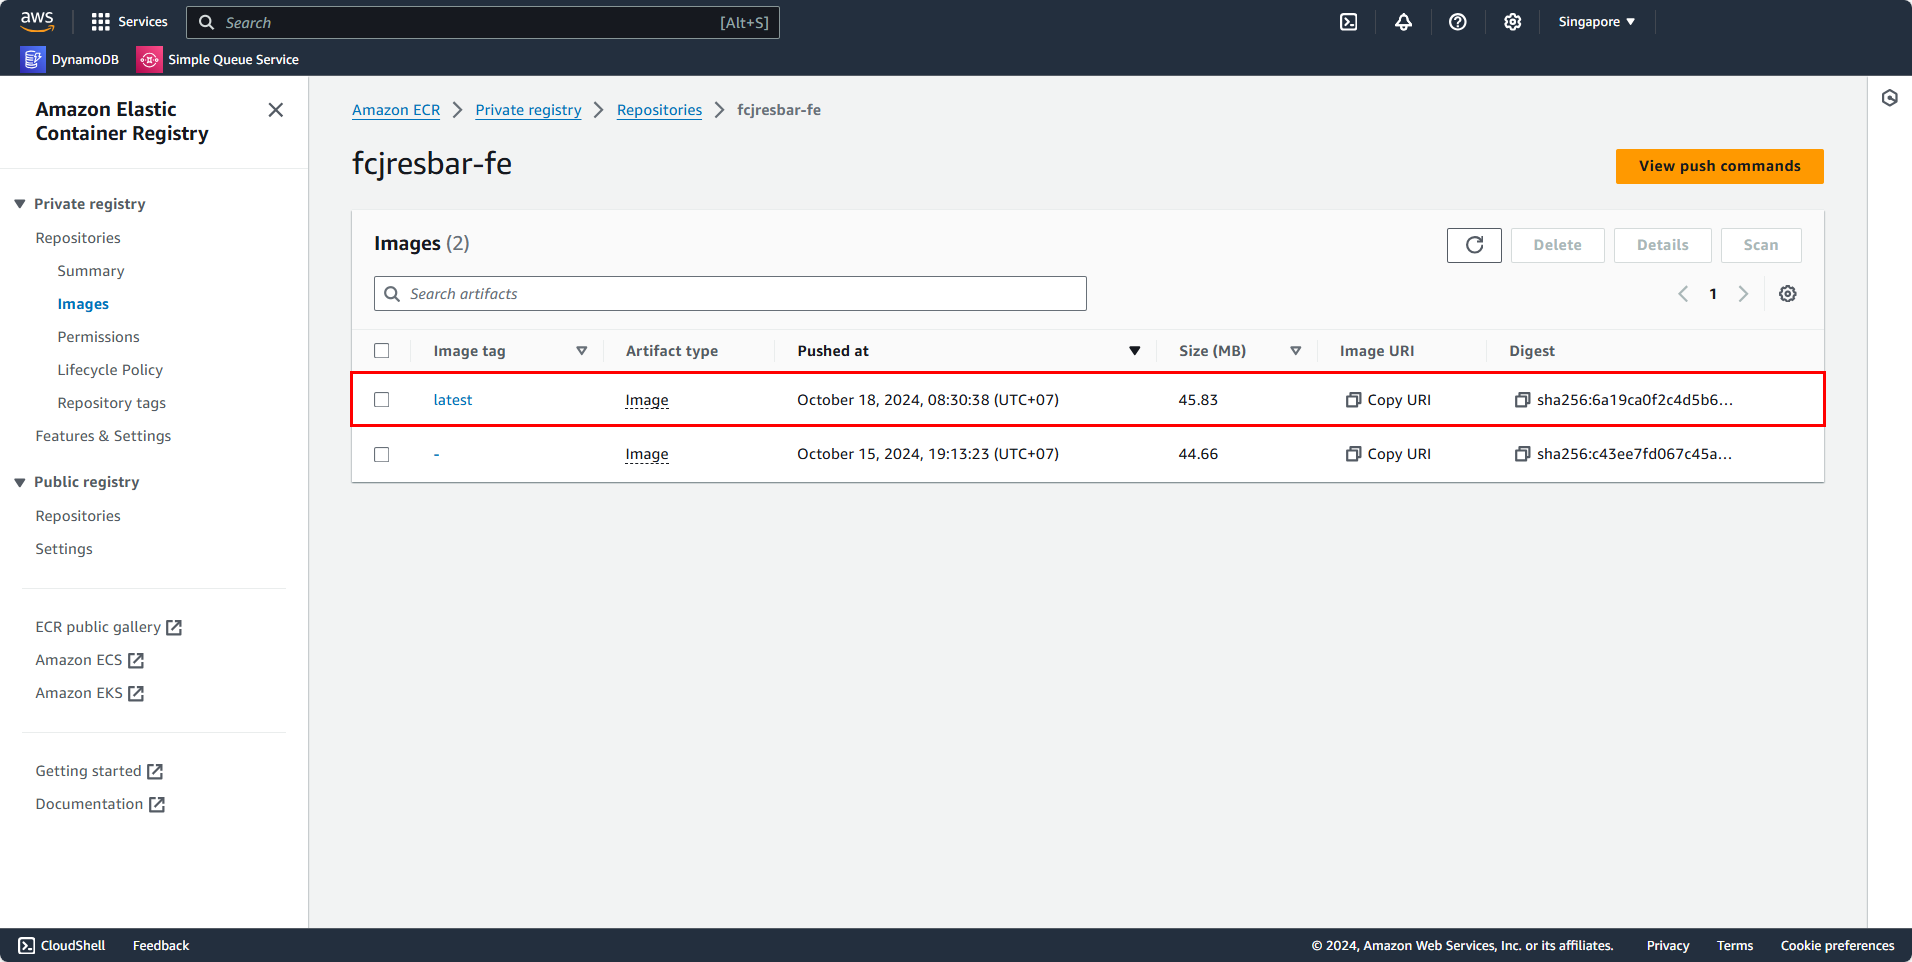
Now, go back to the ECR Console
- Go to the frontend repository (Named
fcjresbar-fe)

Ok, now we’ve successfully pushed the new image to ECR. In this tutorial, I’ll use latest to tag the Docker image, but you should ideally version each tag you change to manage versions more effectively. You can learn more here: https://semver.org/