Configure Route Table
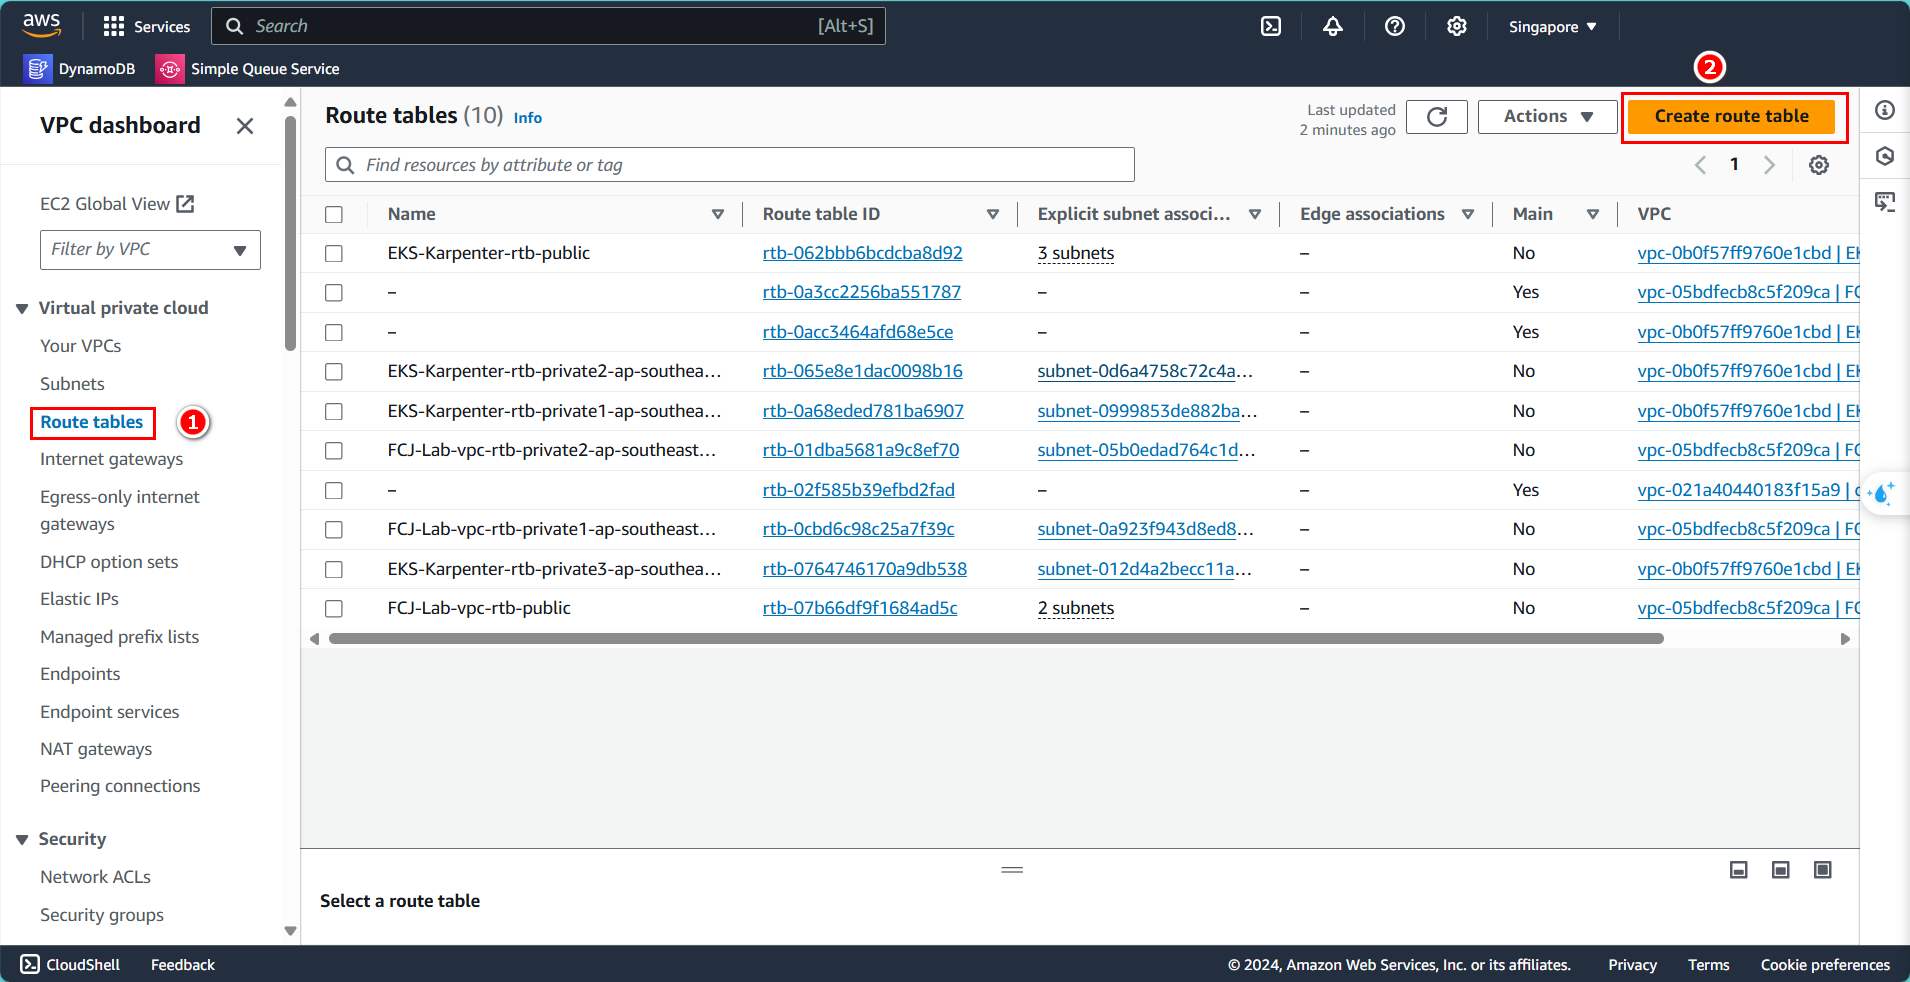
Create Route Table
In the VPC management interface, from the left menu:
- Select Route tables
- Click on Create route table
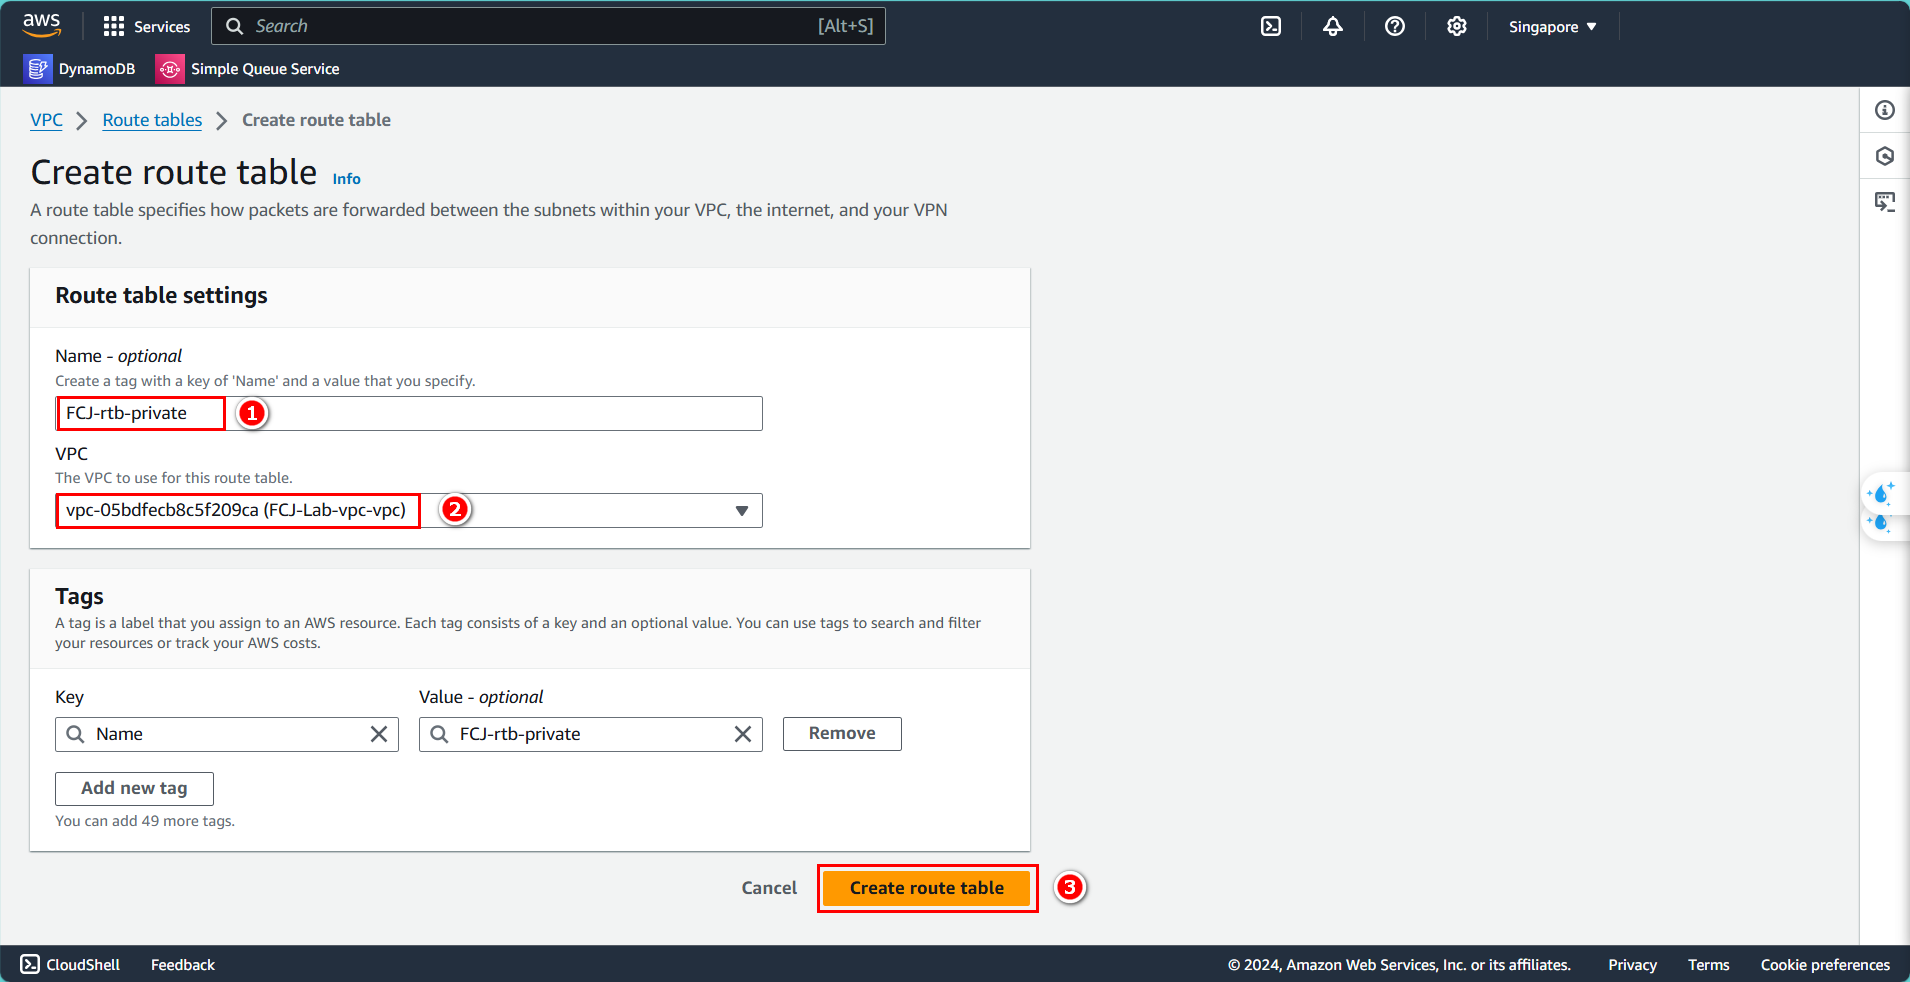
Configure the Route Table:
- Name:
FCJ-rtb-private - Choose VPC: FCJ-Lab-vpc
- Click Create route table
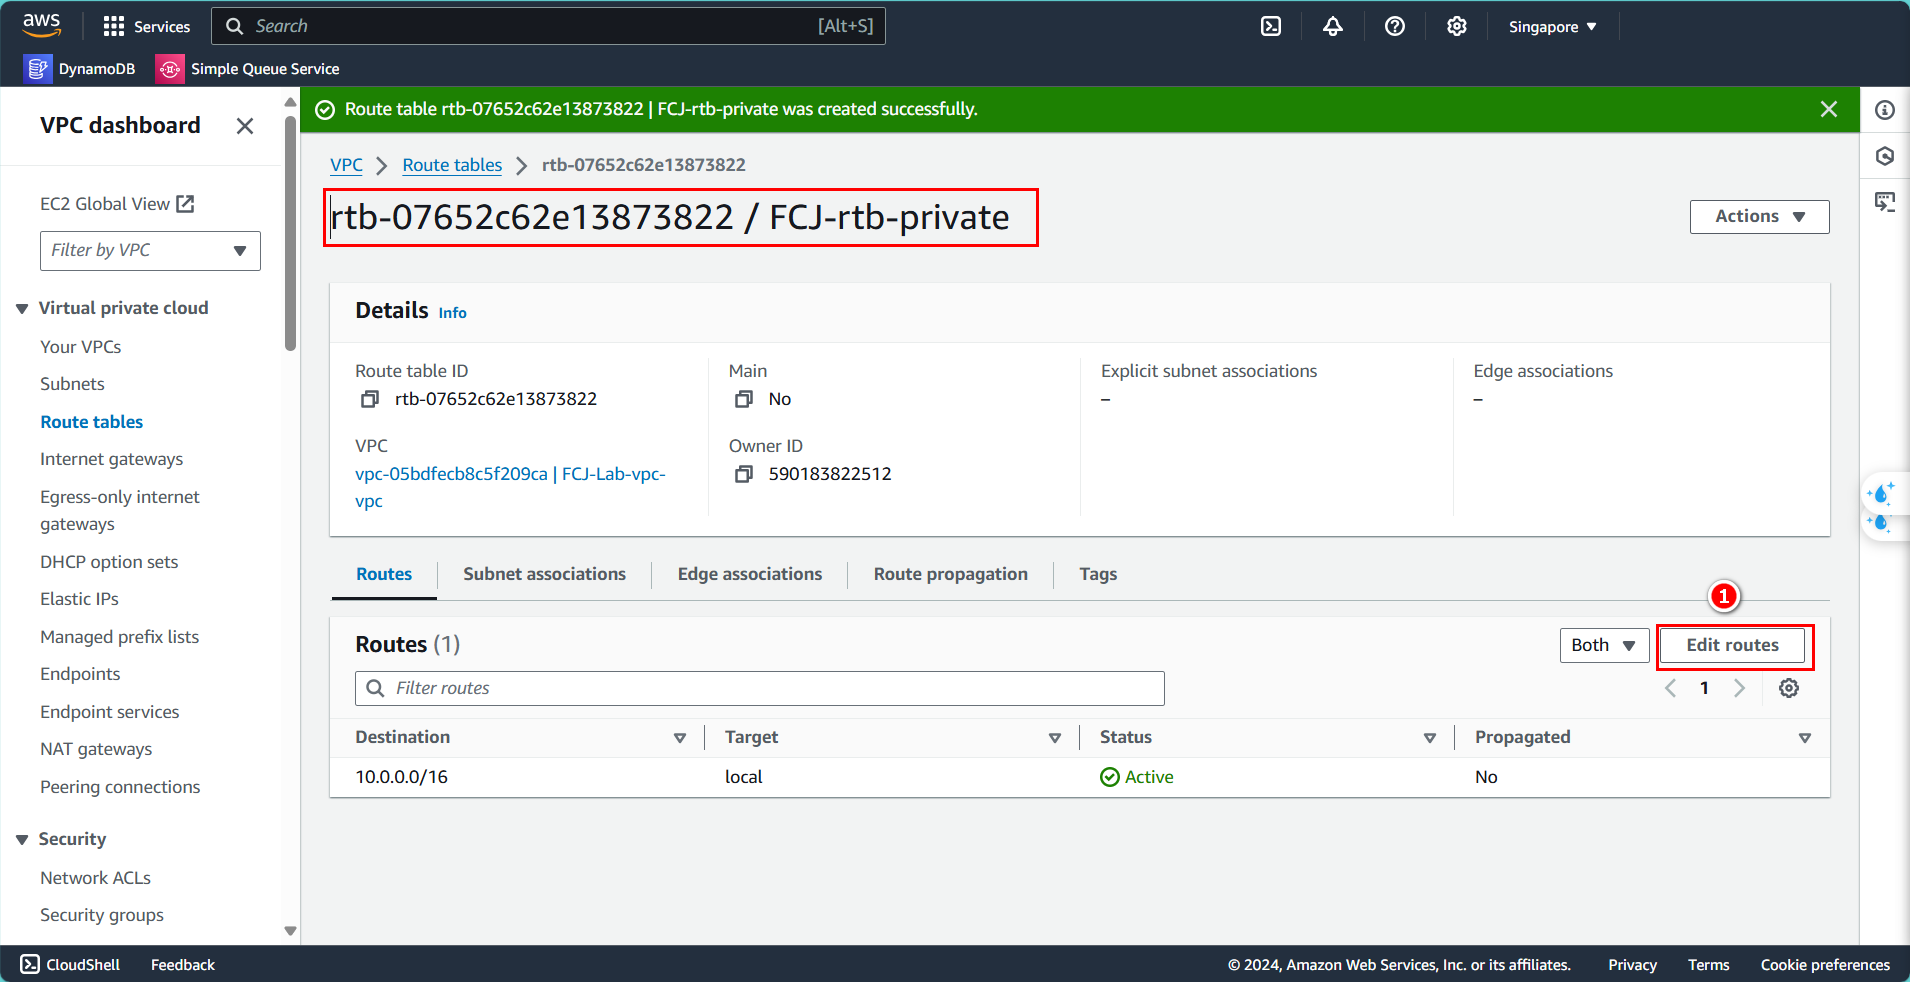
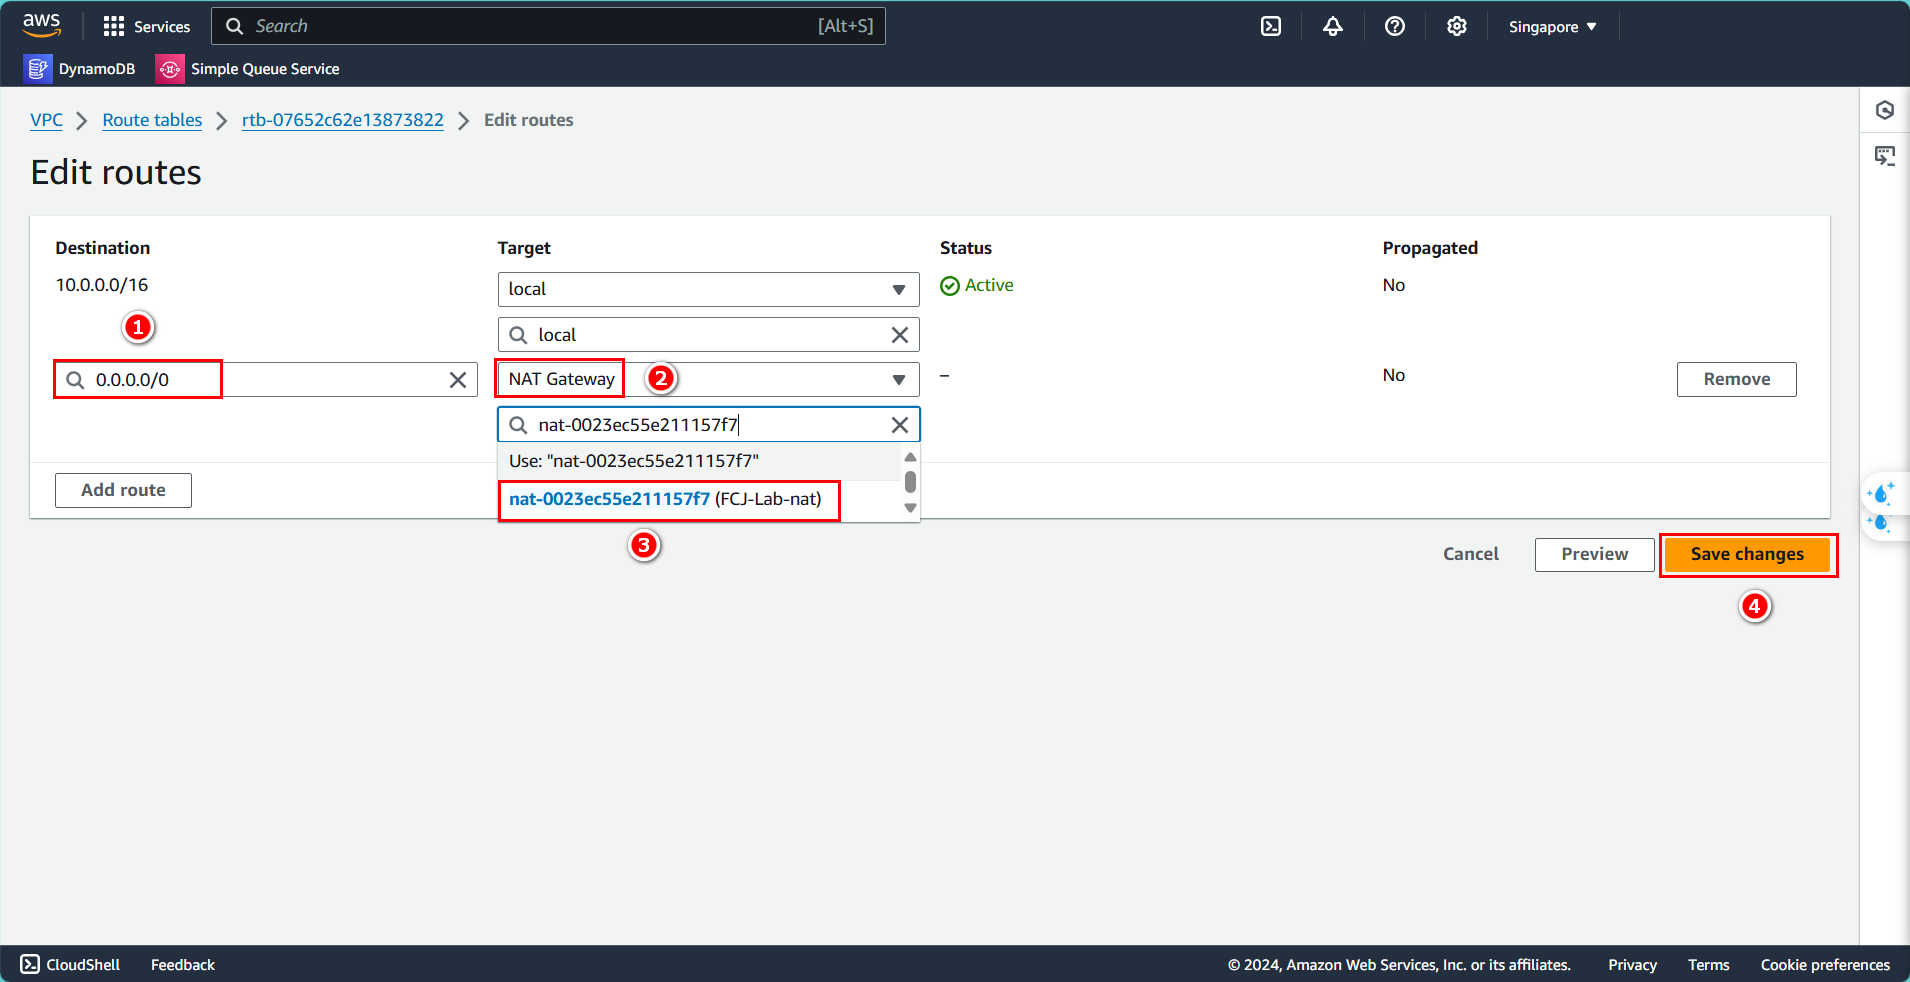
Link the NAT Gateway with the Route Table:
- Select the route table you just created
- Click Edit routes
- Click Add route
- Destination: 0.0.0.0/0
- Target: NAT Gateway
- Select the NAT Gateway FCJ-Lab-nat you just created
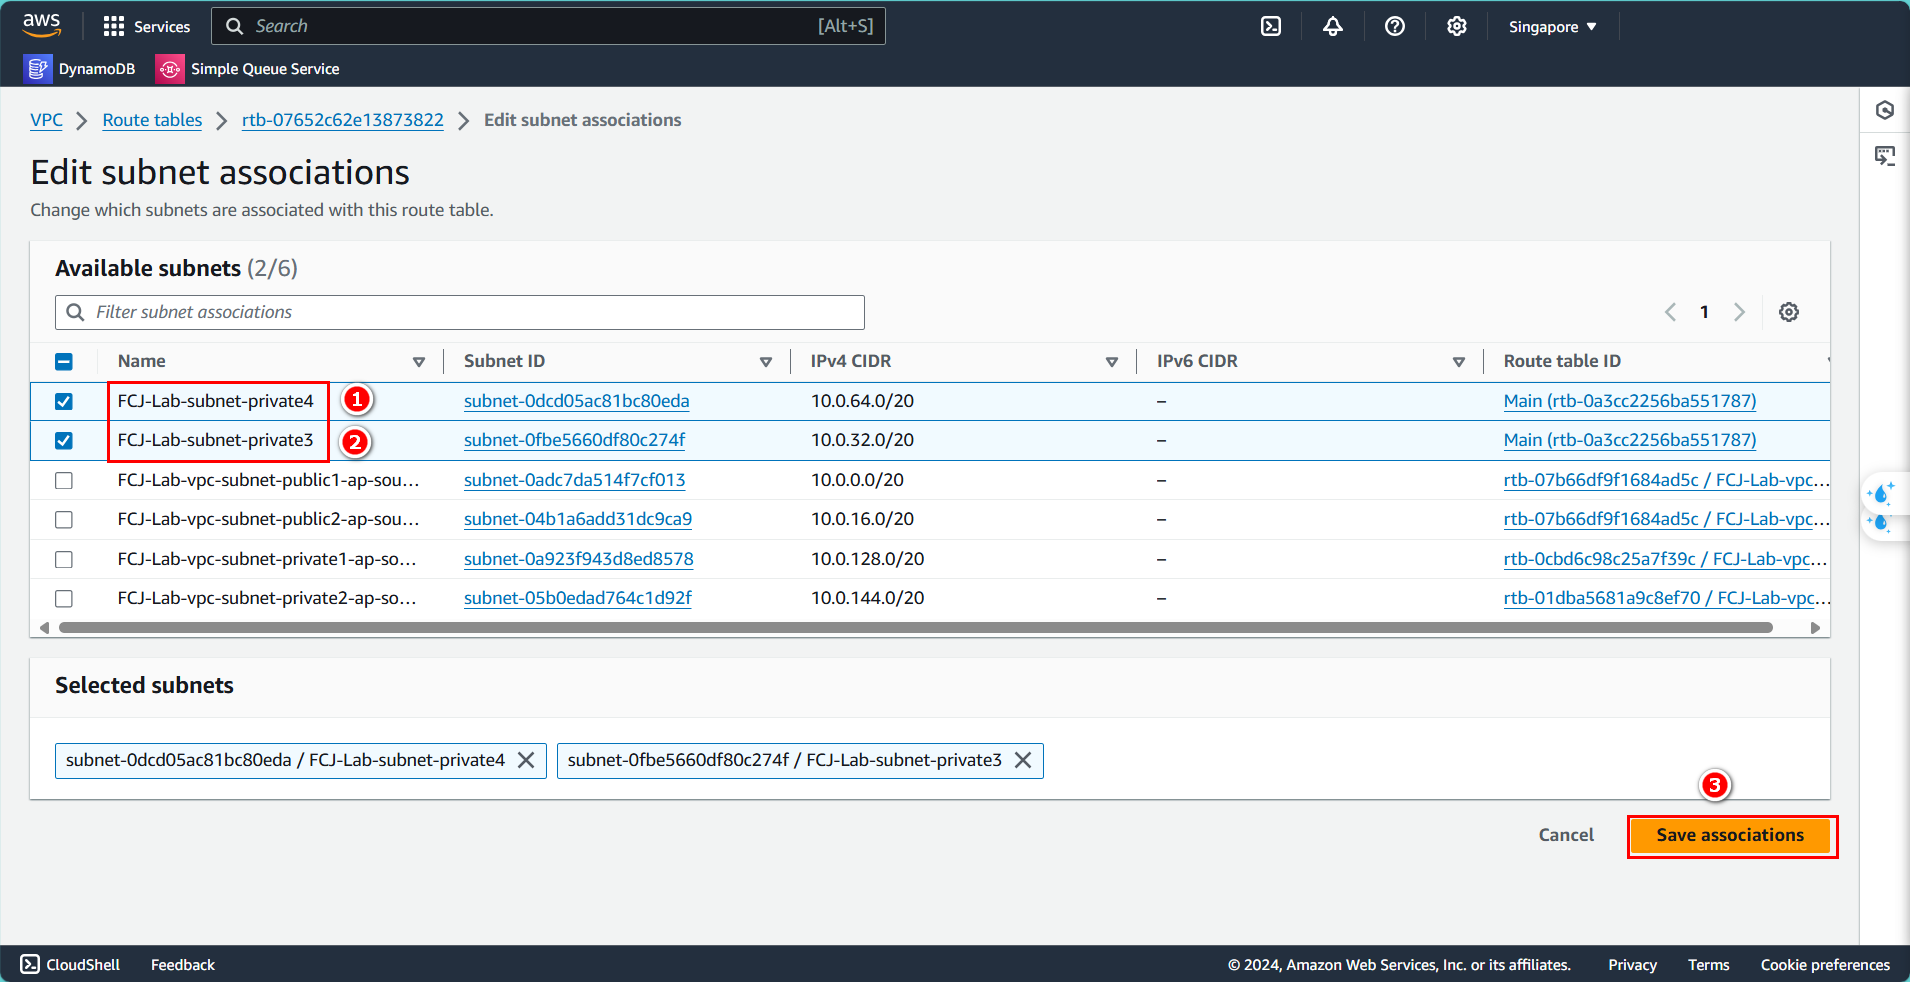
Associate the private subnets with the Route Table:
- In the Route Table details, select Subnet associations
- Click Edit subnet associations
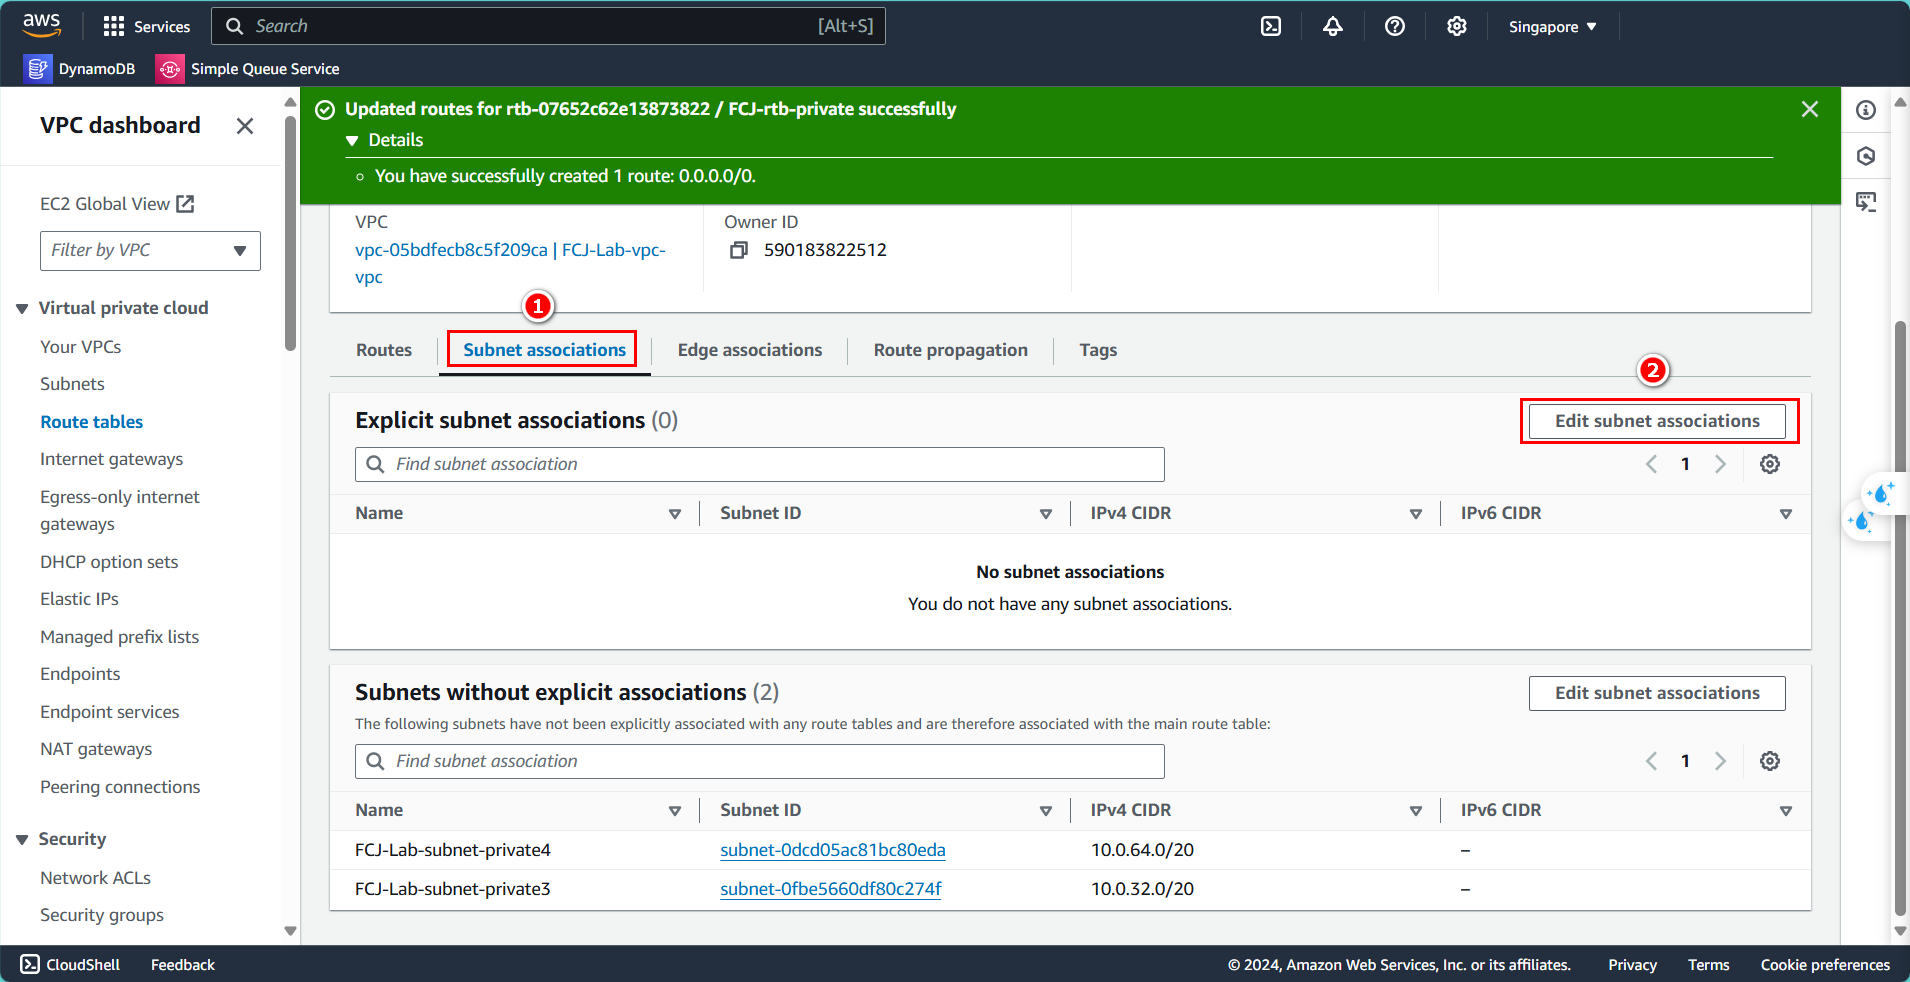
- Select the two private subnets you just created