Configure NAT Gateway
Create NAT Gateway
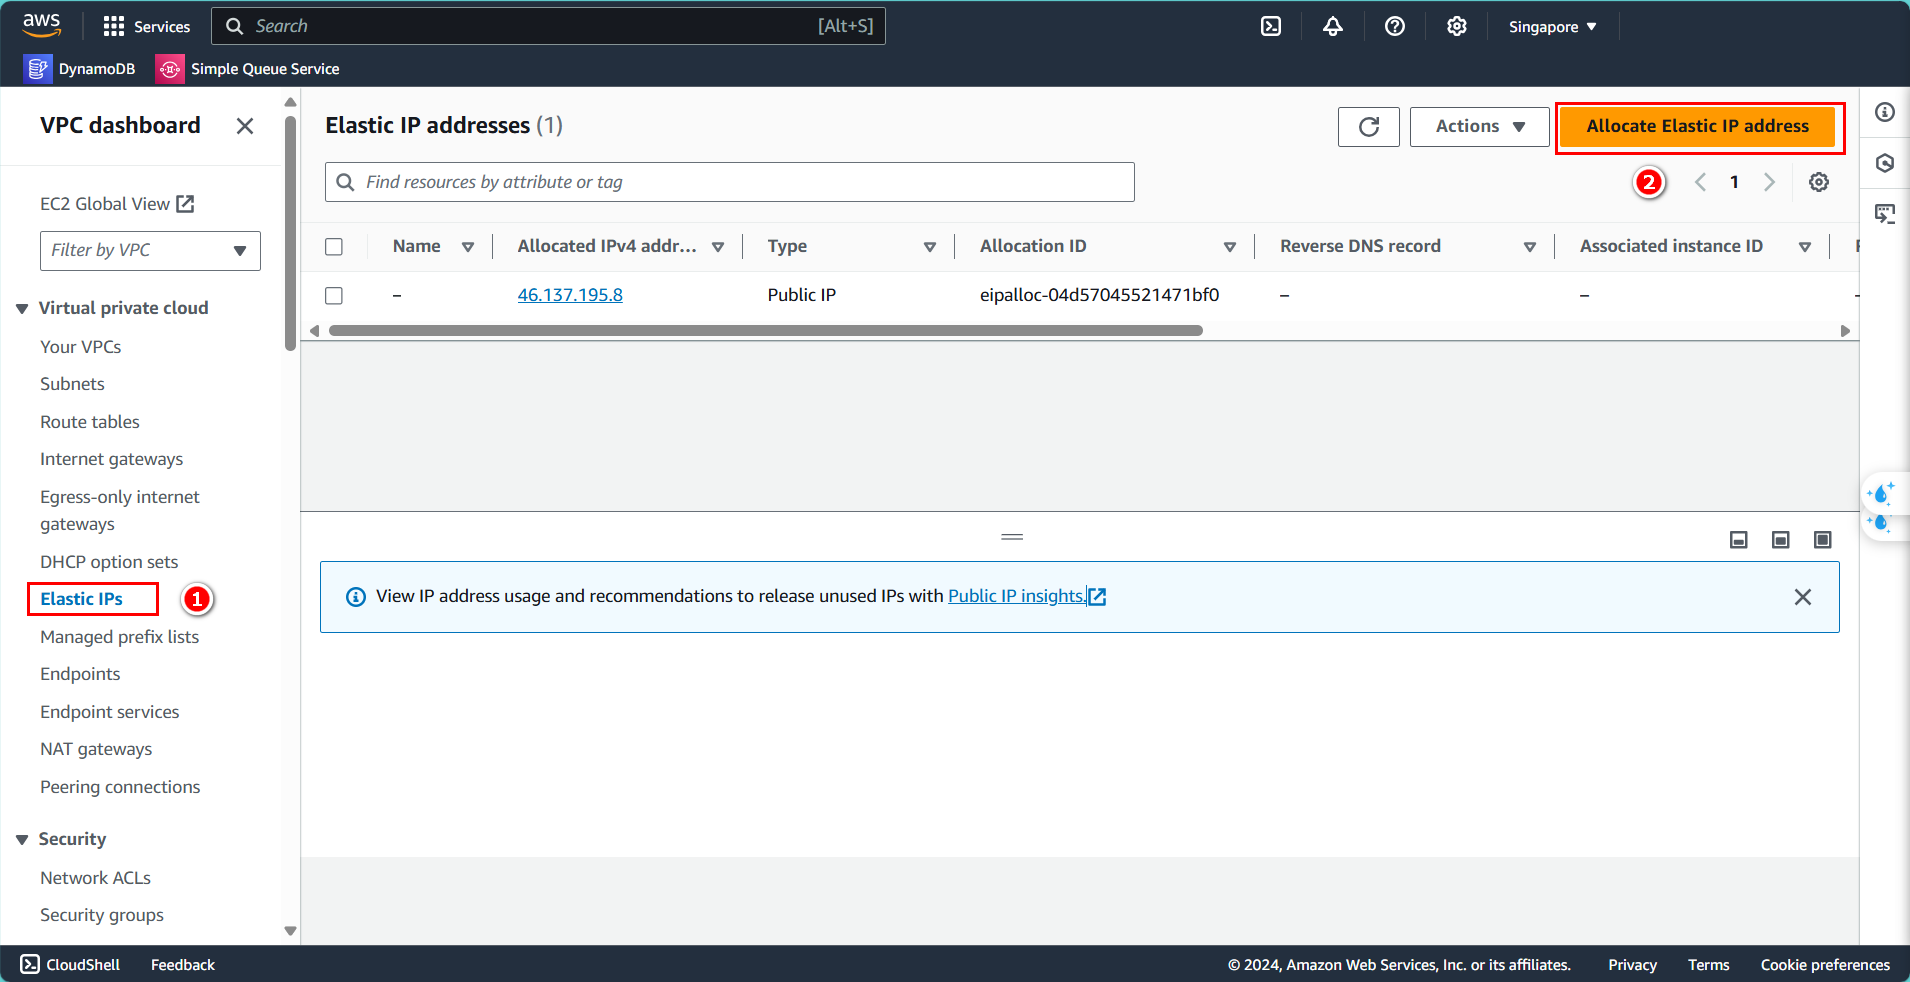
First, you need to create an Elastic IP to associate with the NAT Gateway. From the left menu:
- Select Elastic IPs
- Click on Allocate Elastic IP address
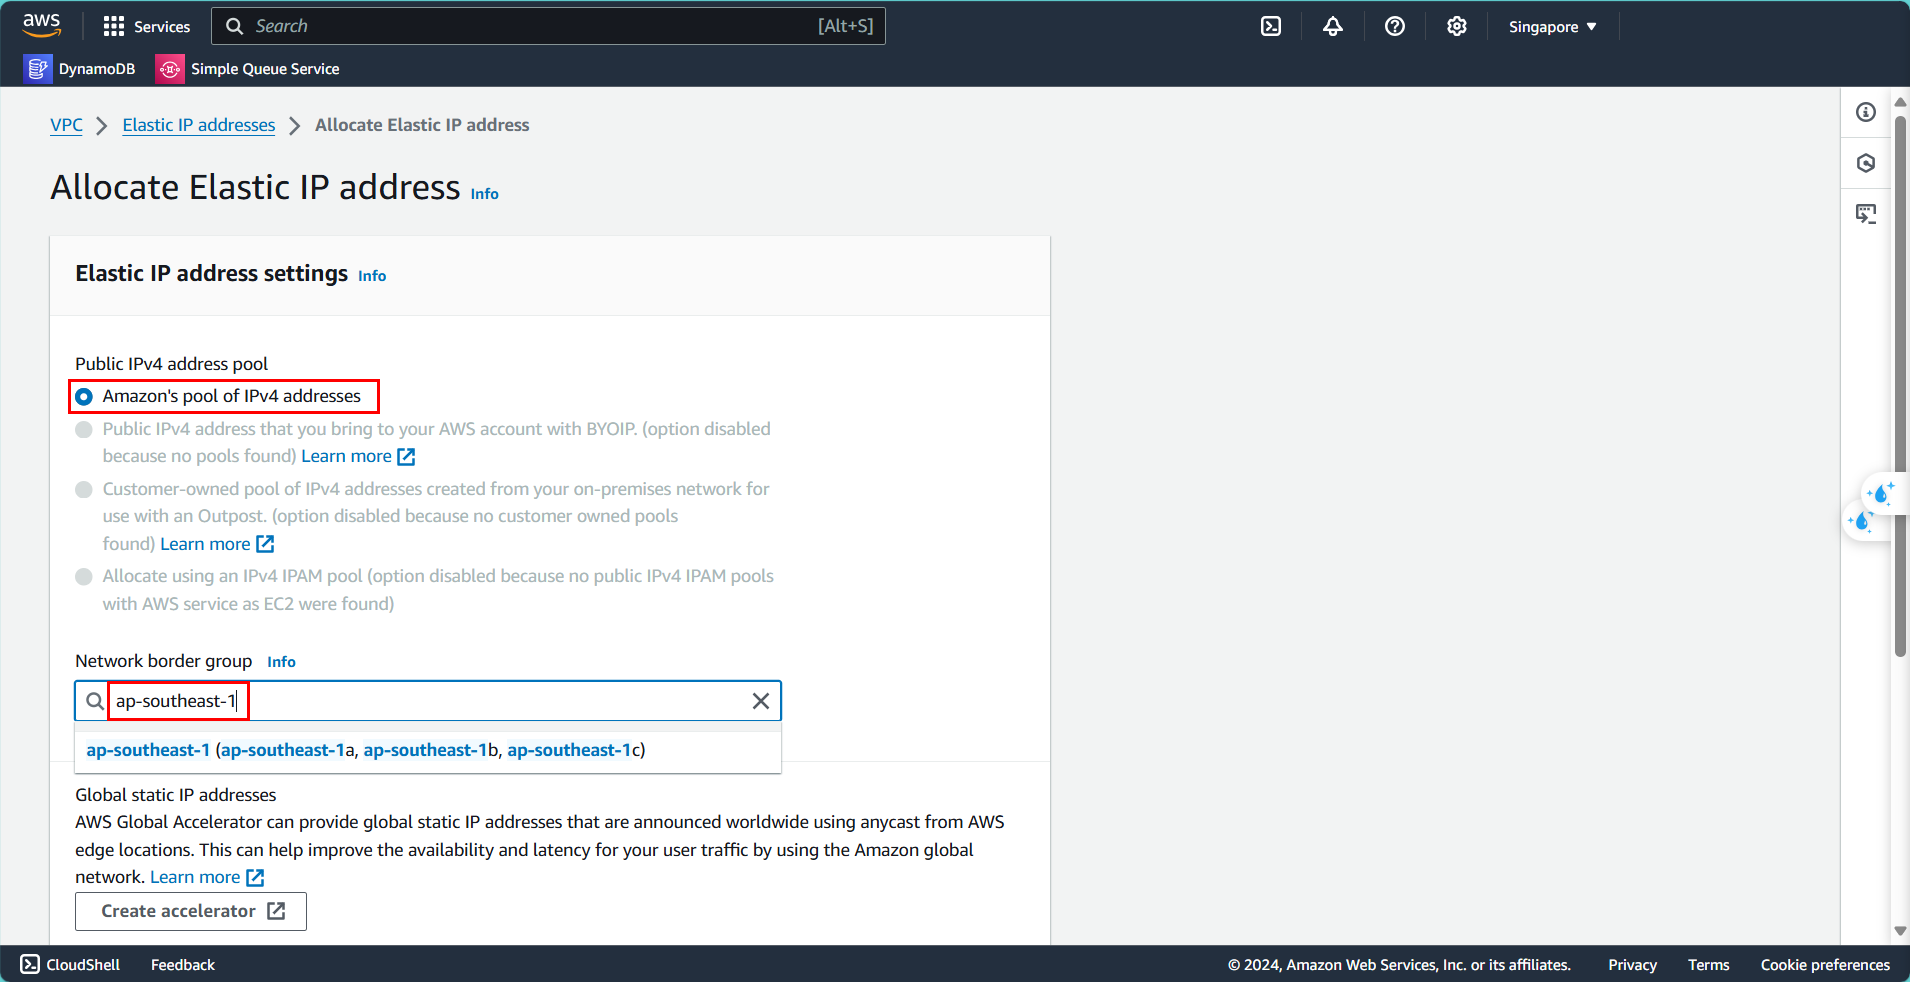
Configure the Elastic IP:
- Public IPv4 address pool: Amazon’s pool of IPv4 address
- Network border group: ap-southeast-1 (if you are using the same region)
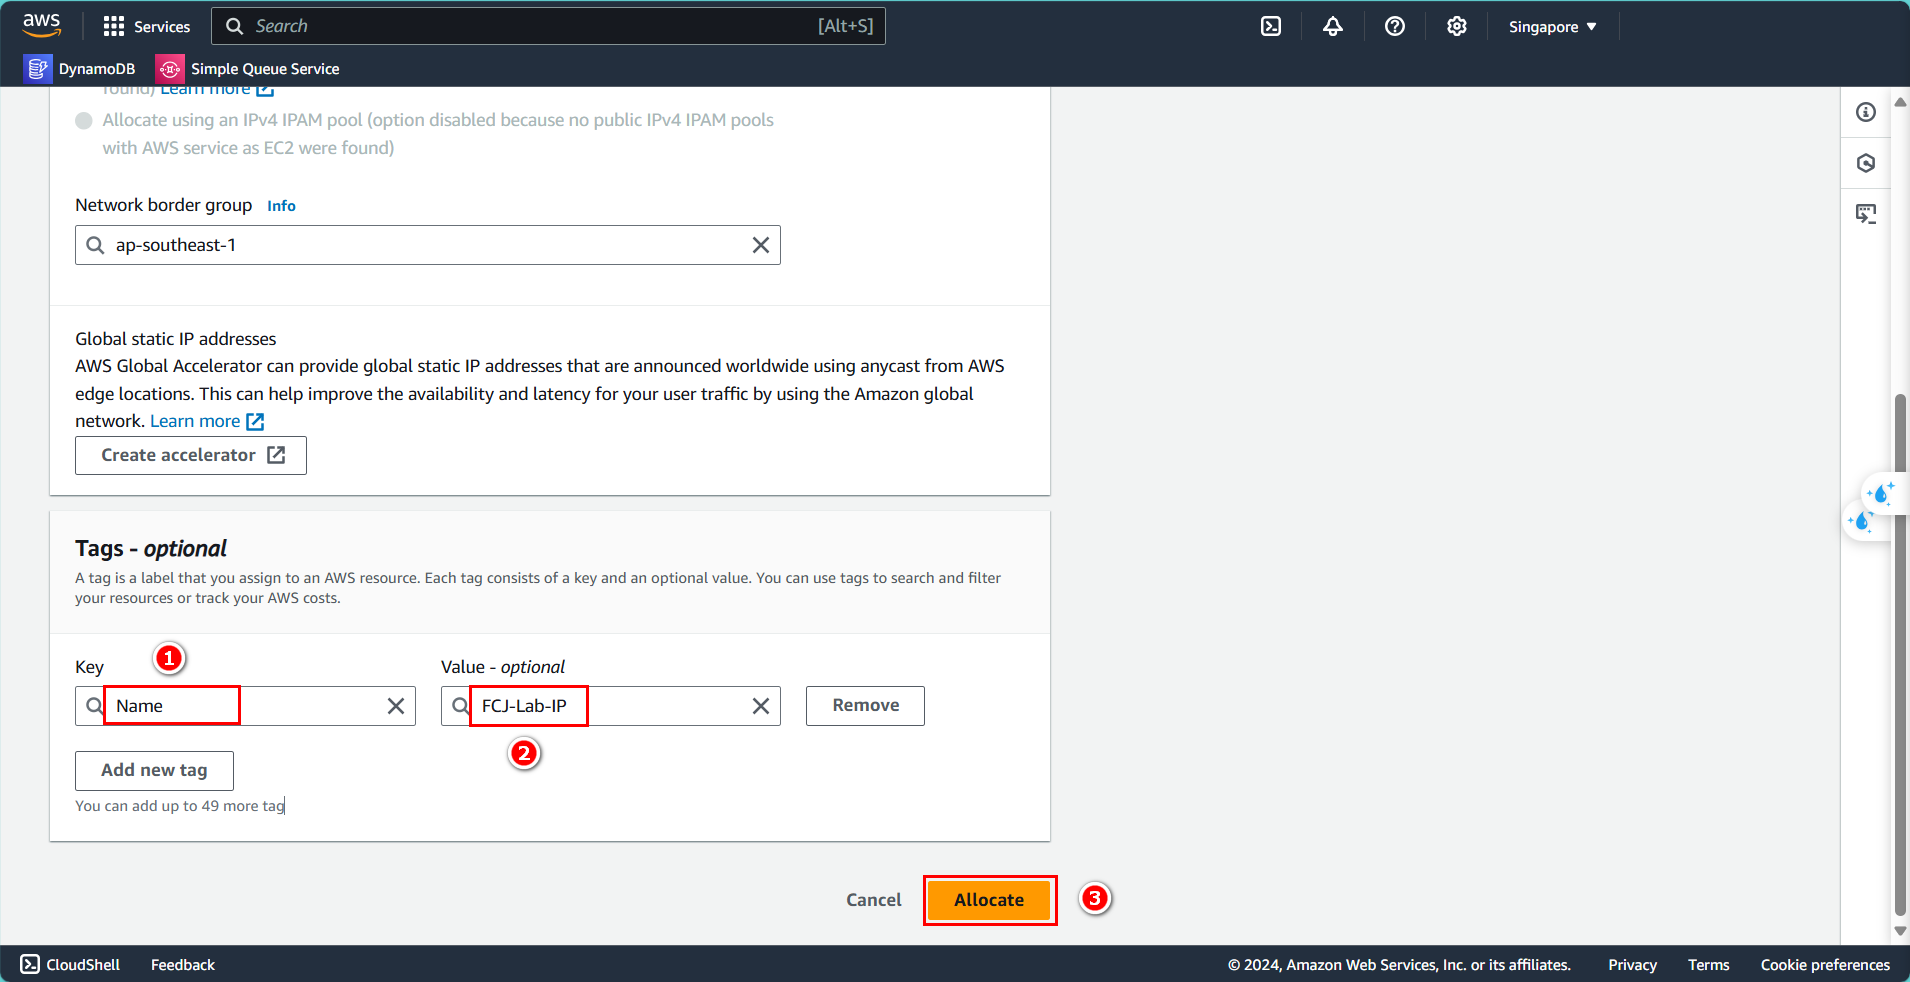
In the tags section (optional):
- Key:
Name - Value:
FCJ-Lab-IP - Click Allocate
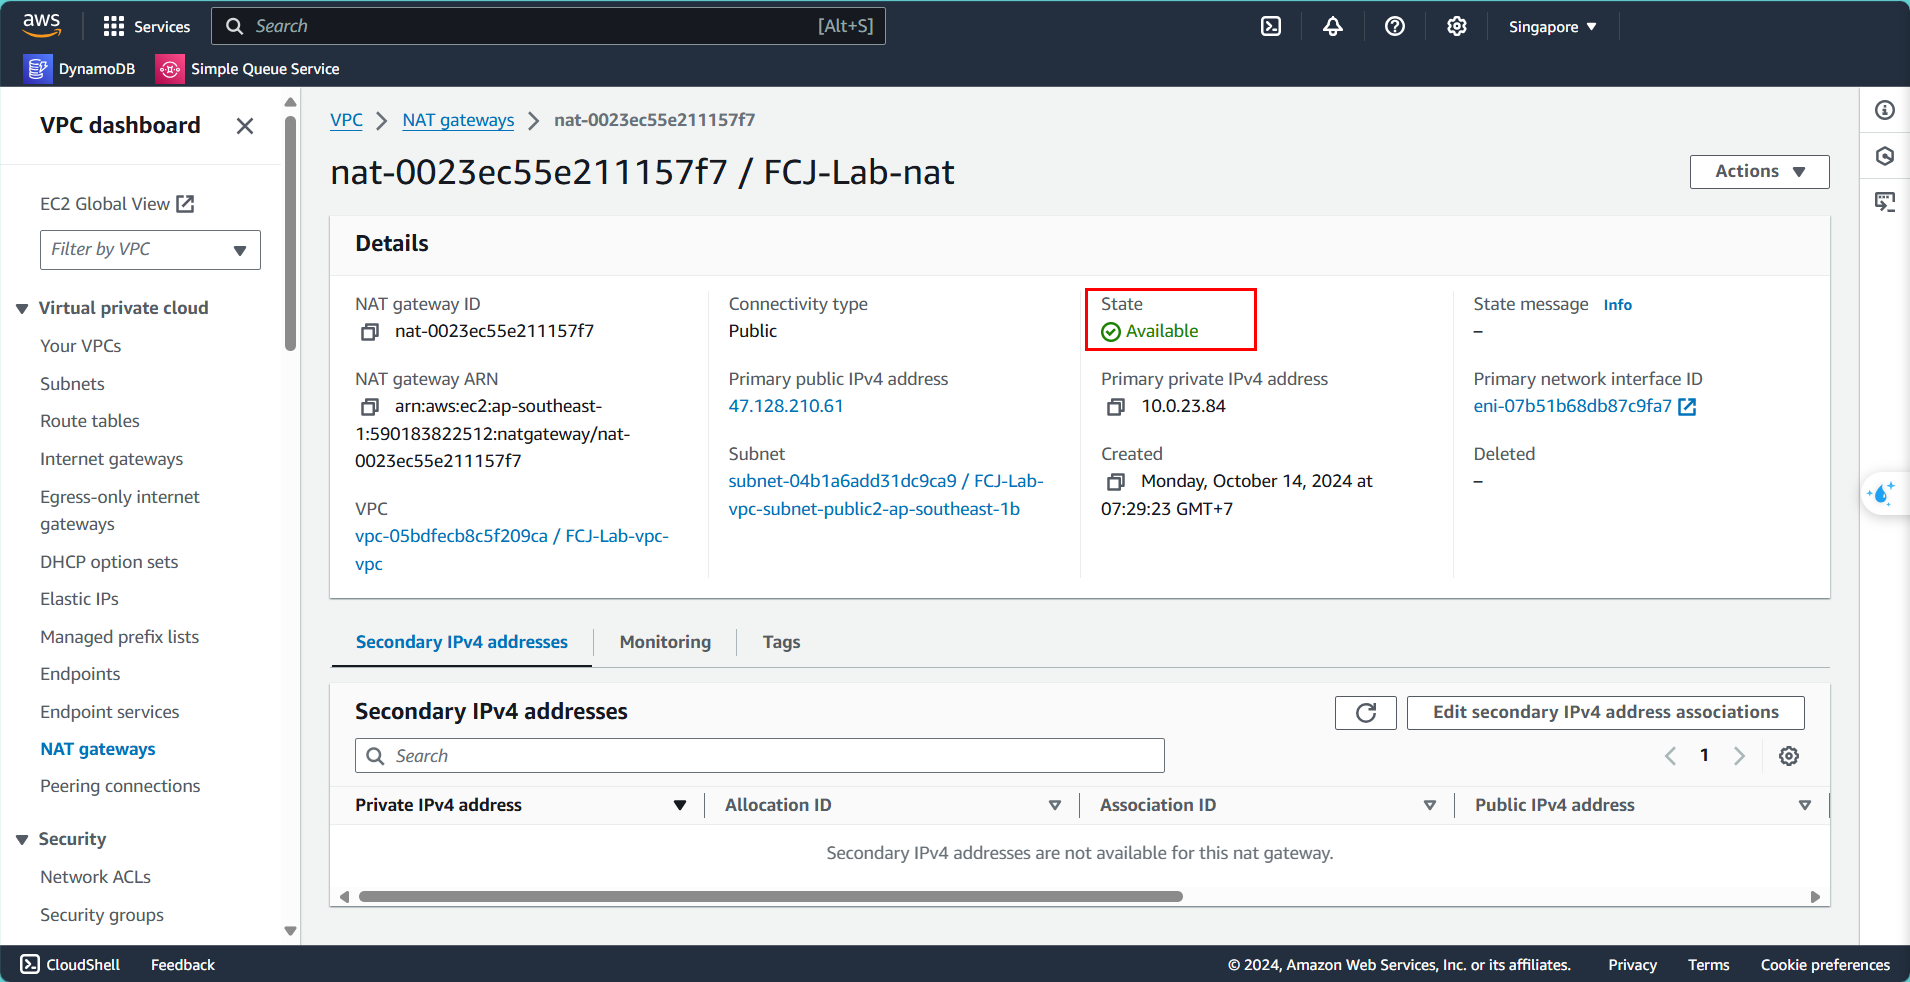
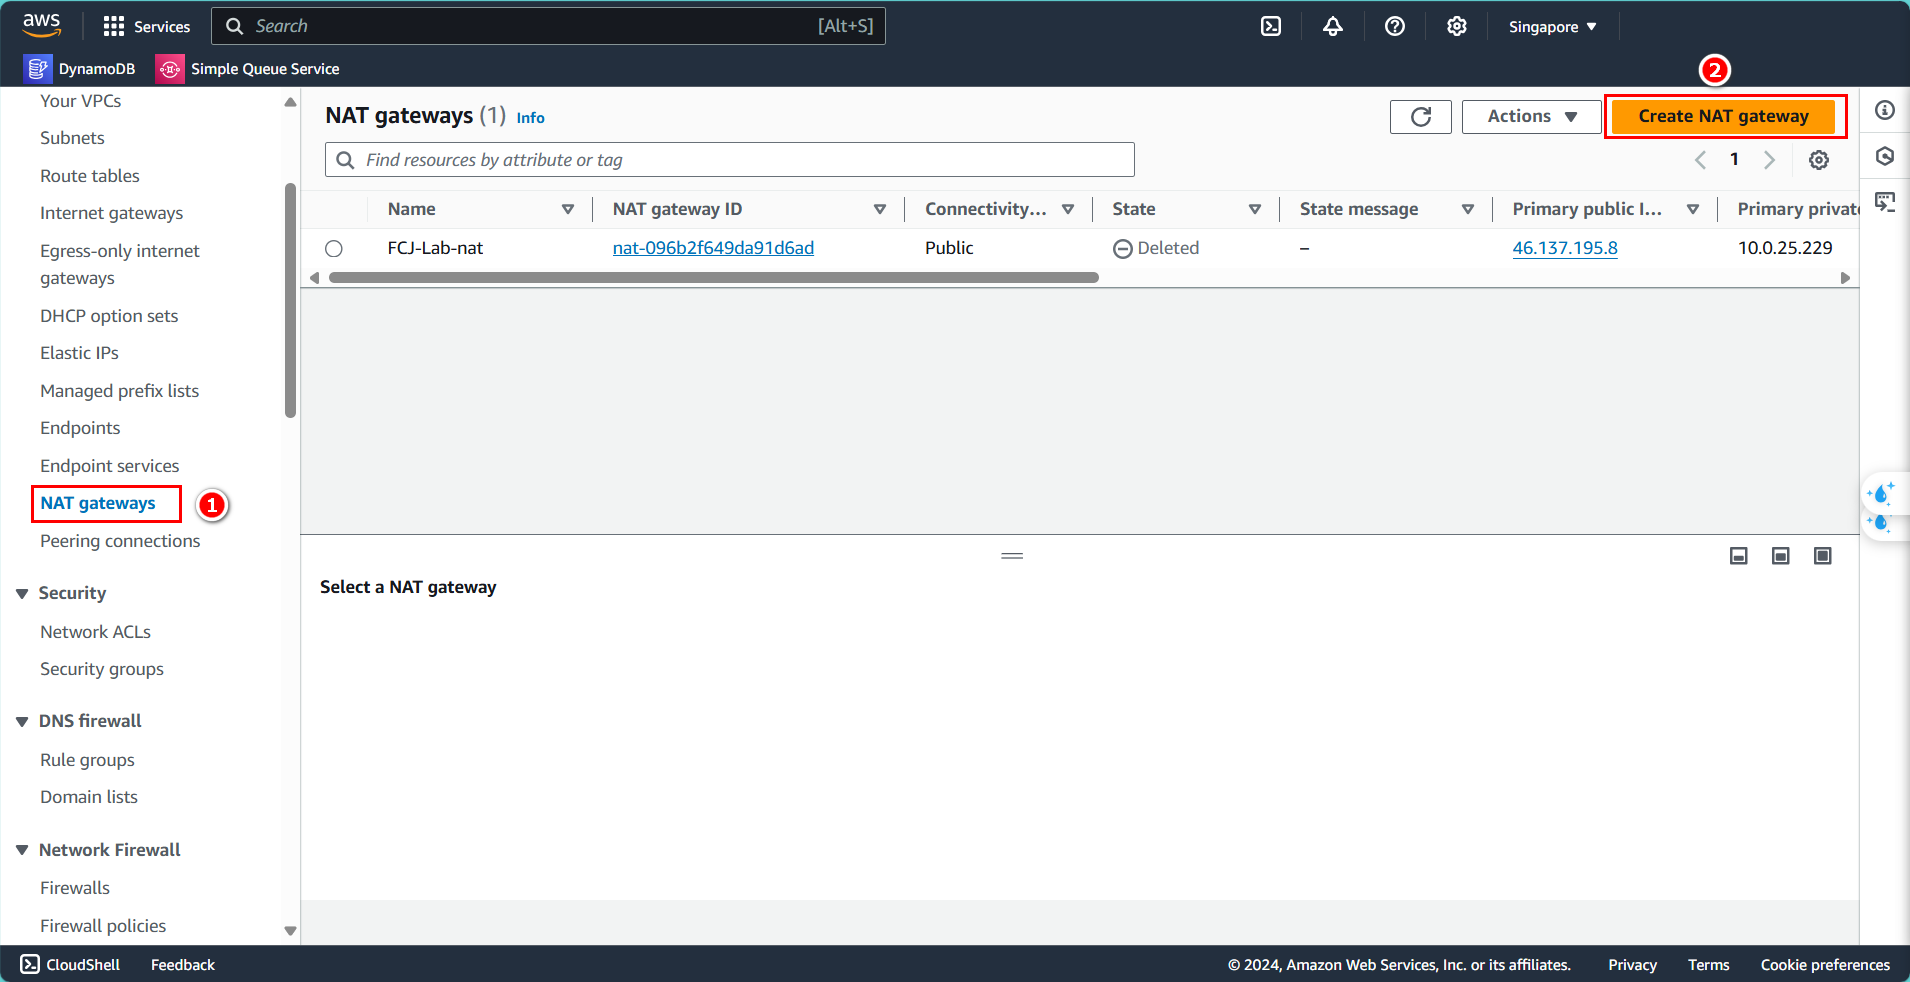
Next, create the NAT Gateway:
- Select NAT gateways
- Click on Create NAT gateway
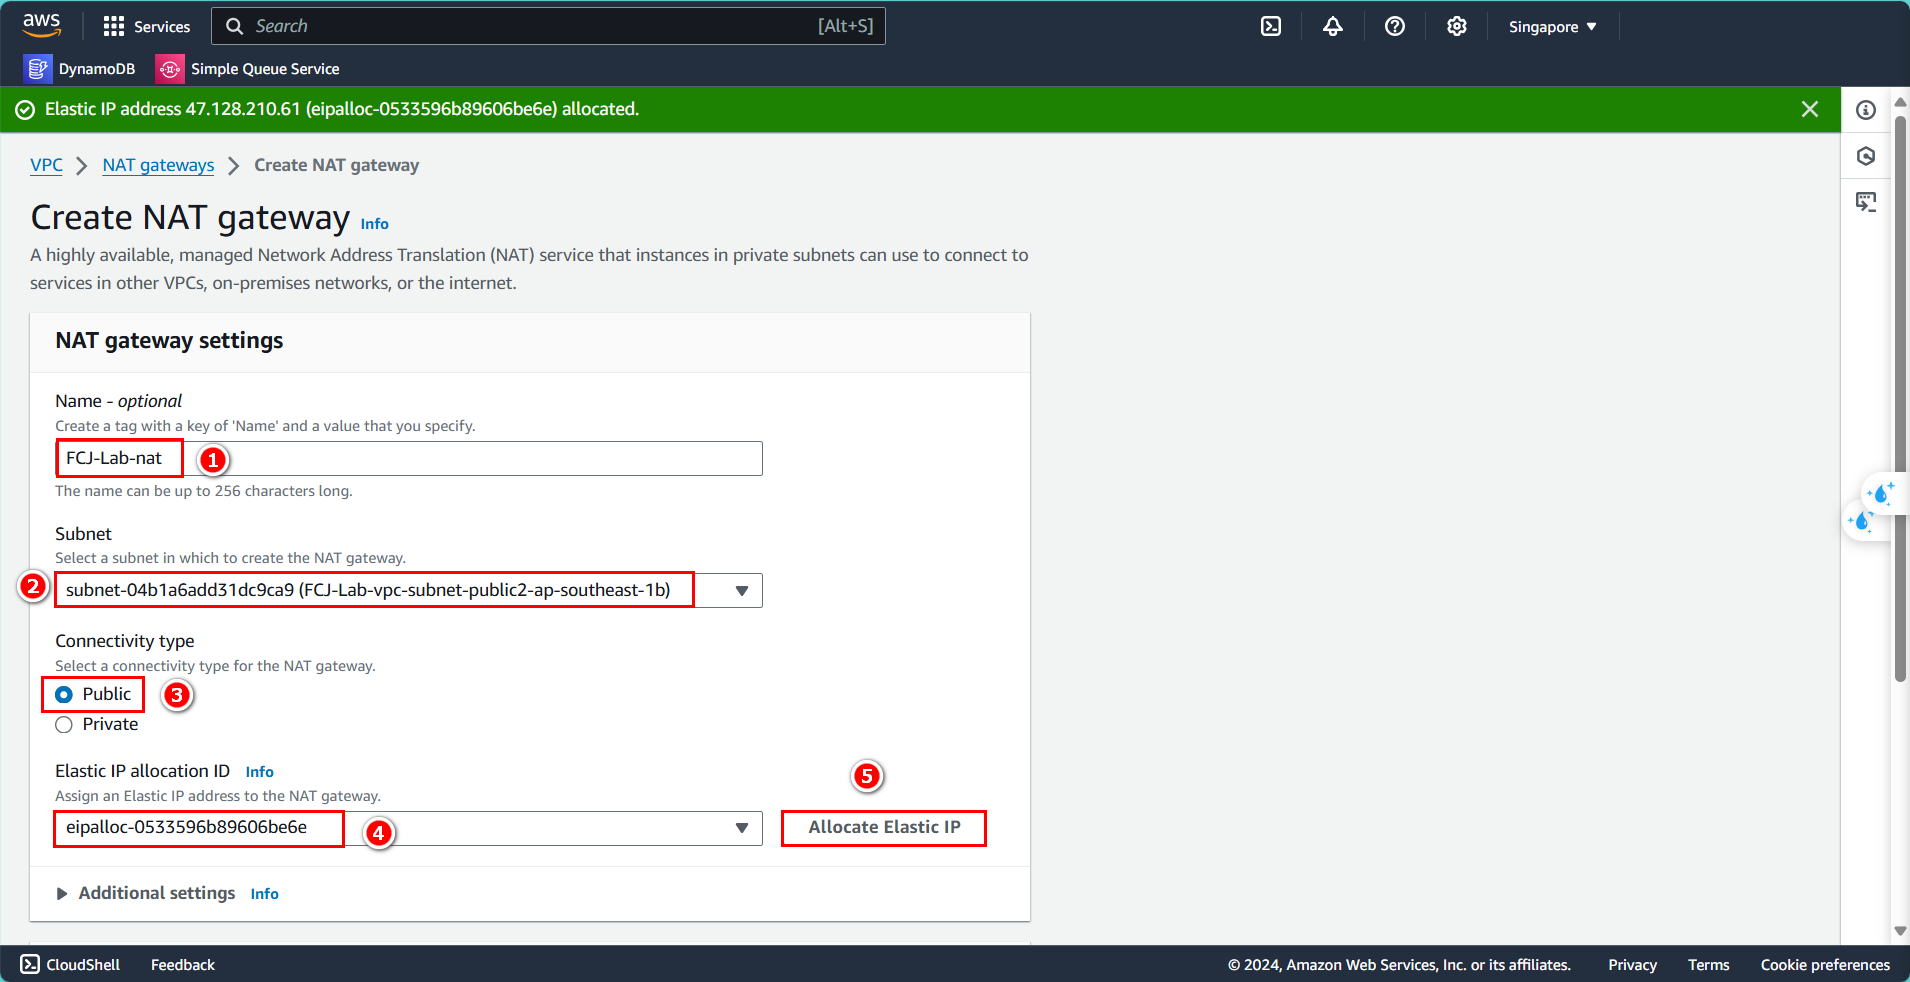
Configure the NAT Gateway:
- Name:
FCJ-Lab-nat - Select the public subnet you created
- Connectivity type: Public
- Associate the Elastic IP you just created
- Click Create NAT gateway
After creation, wait for the status to change to Available.