Create IAM Roles for ECR Access
Policy Configuration
In the AWS Console interface:
- Search for and select
IAM
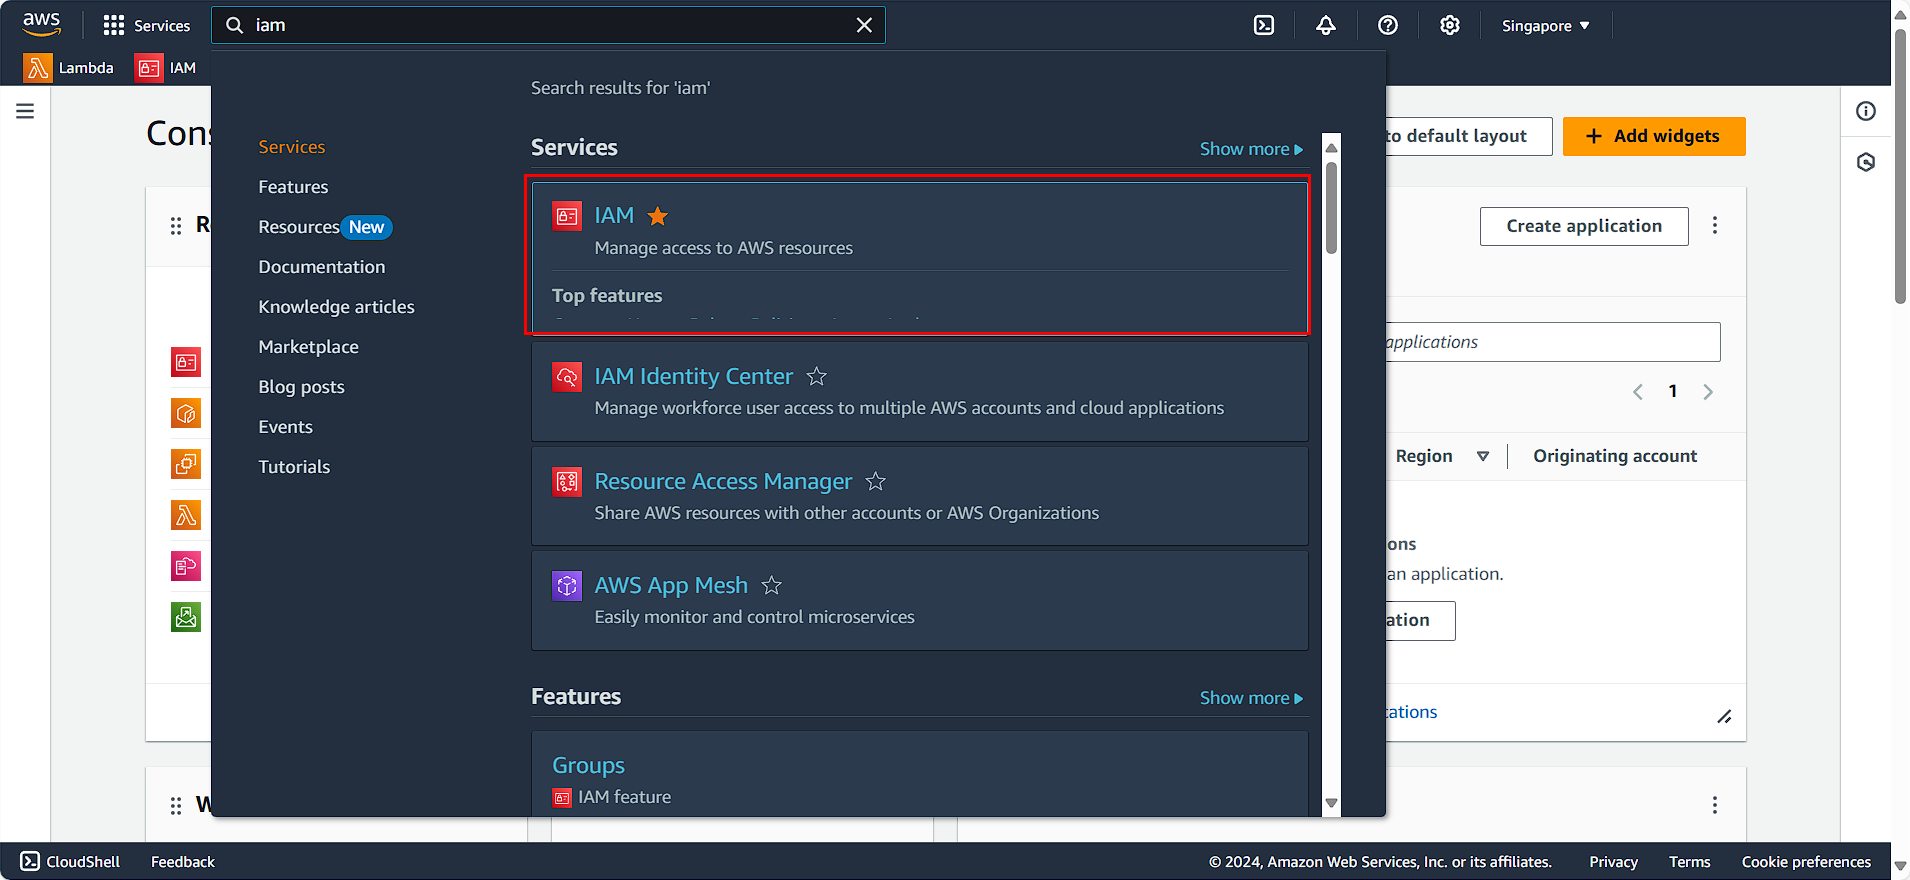
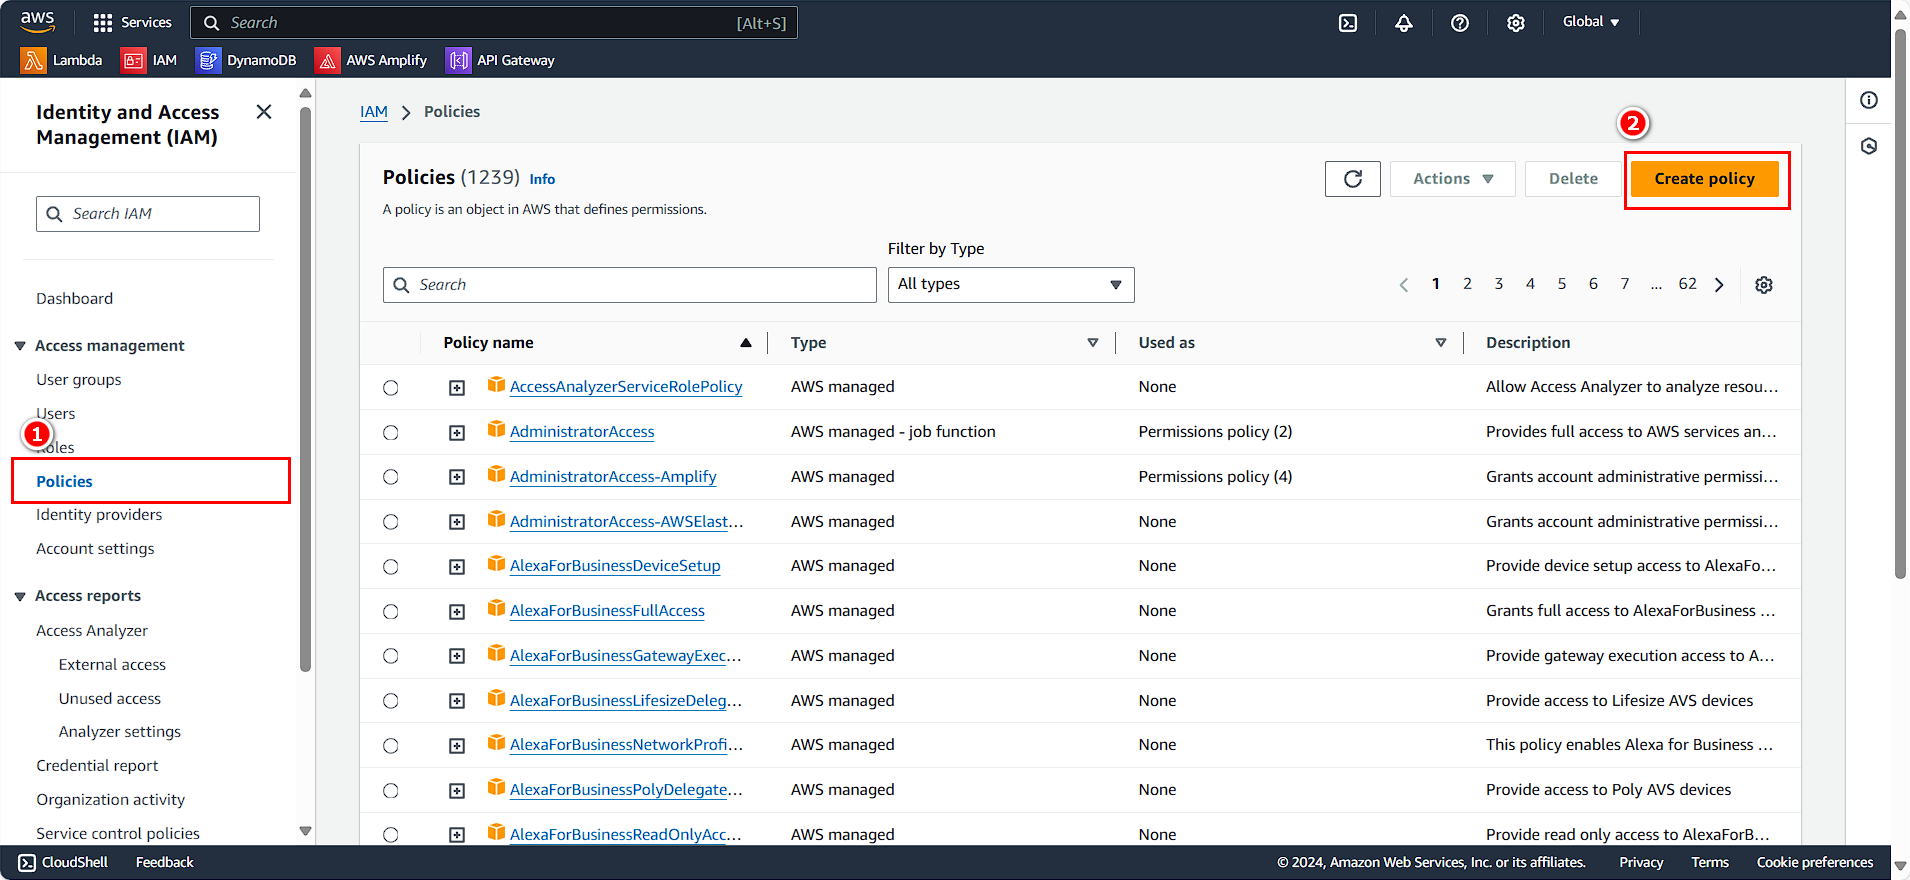
In the right selection menu:
- Select Policy
- Click on Create Policy
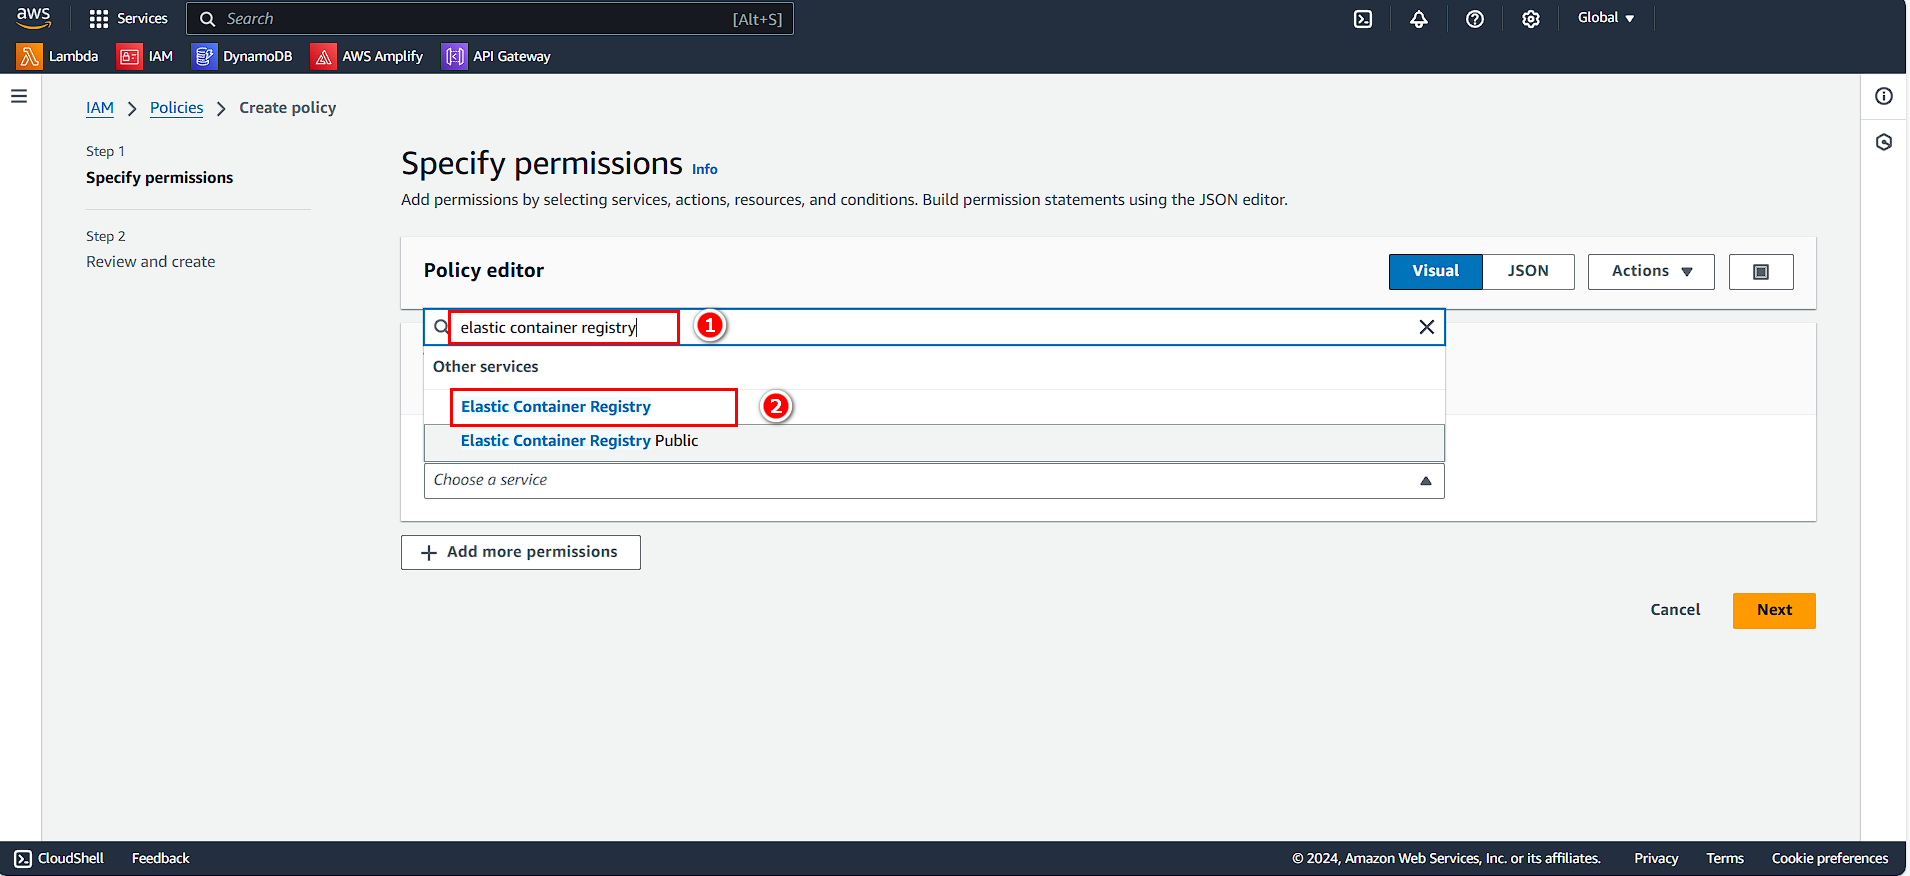
In the Policy Editor:
- Search for and select Elastic Container Registry
- Click Next
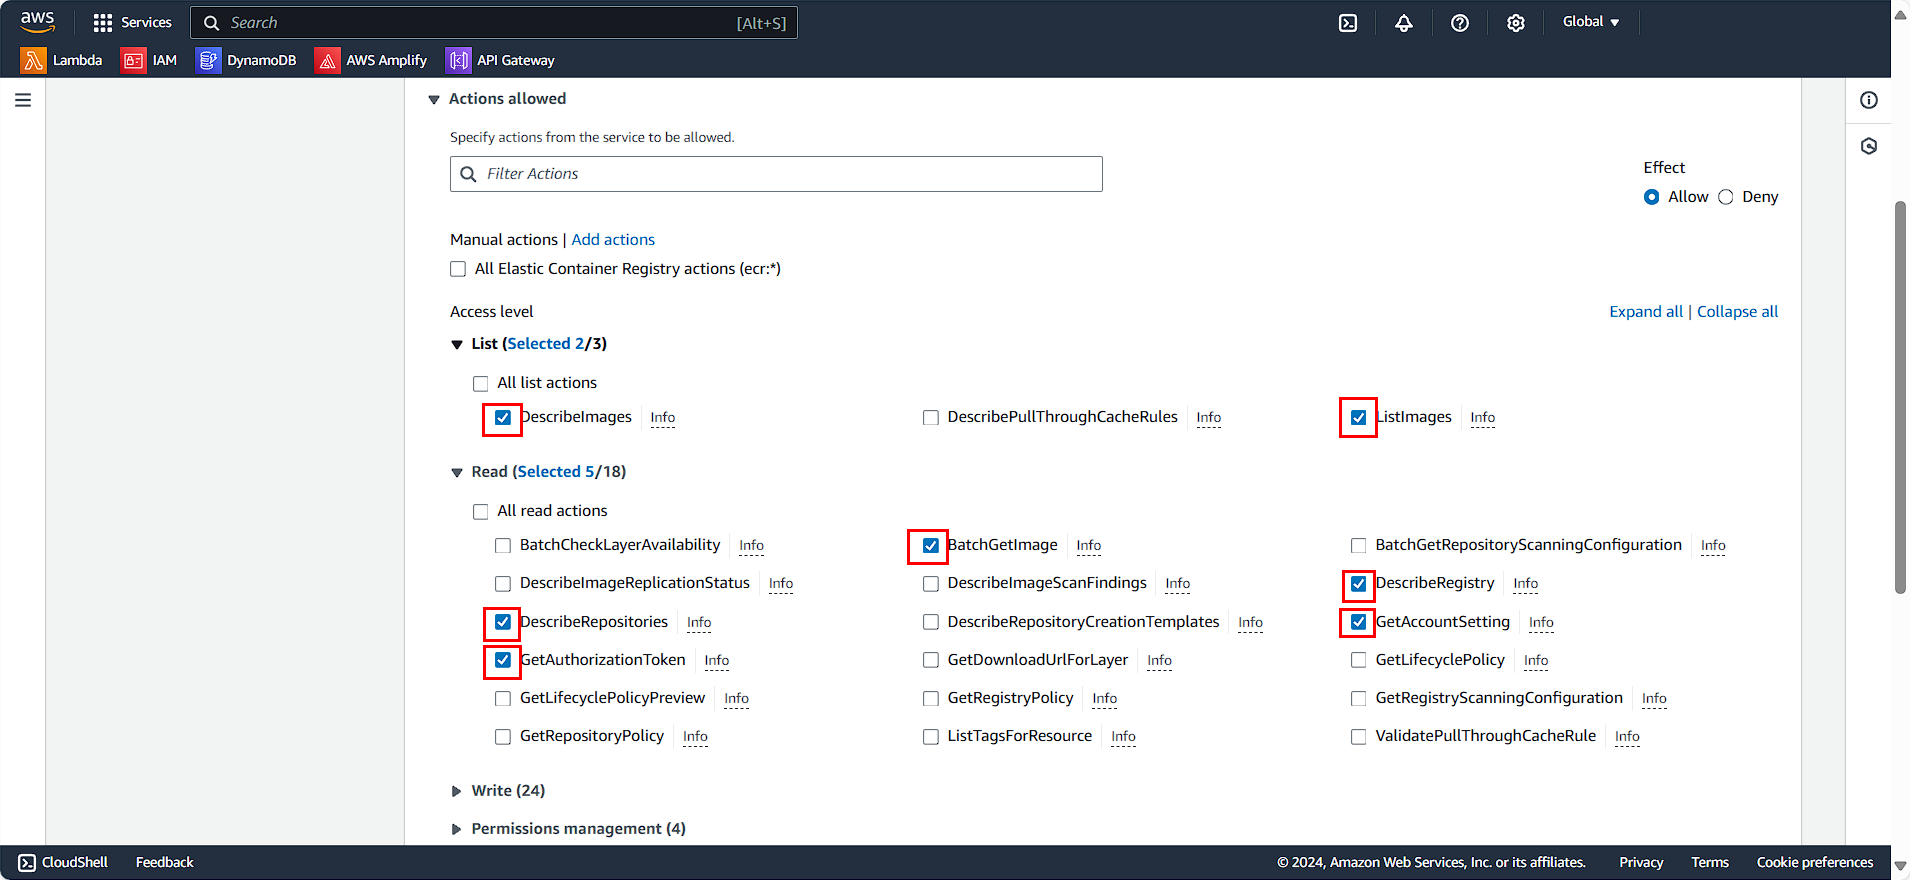
A rule selection panel appears:
- In the List section:
- Select DescribeImage
- Select ListImages
- In the Read section:
- Select BatchGetImage
- Select DescribeRegistry
- Select DescribeRepositories
- Select GetAccountSetting
- Select GetAuthorizationToken
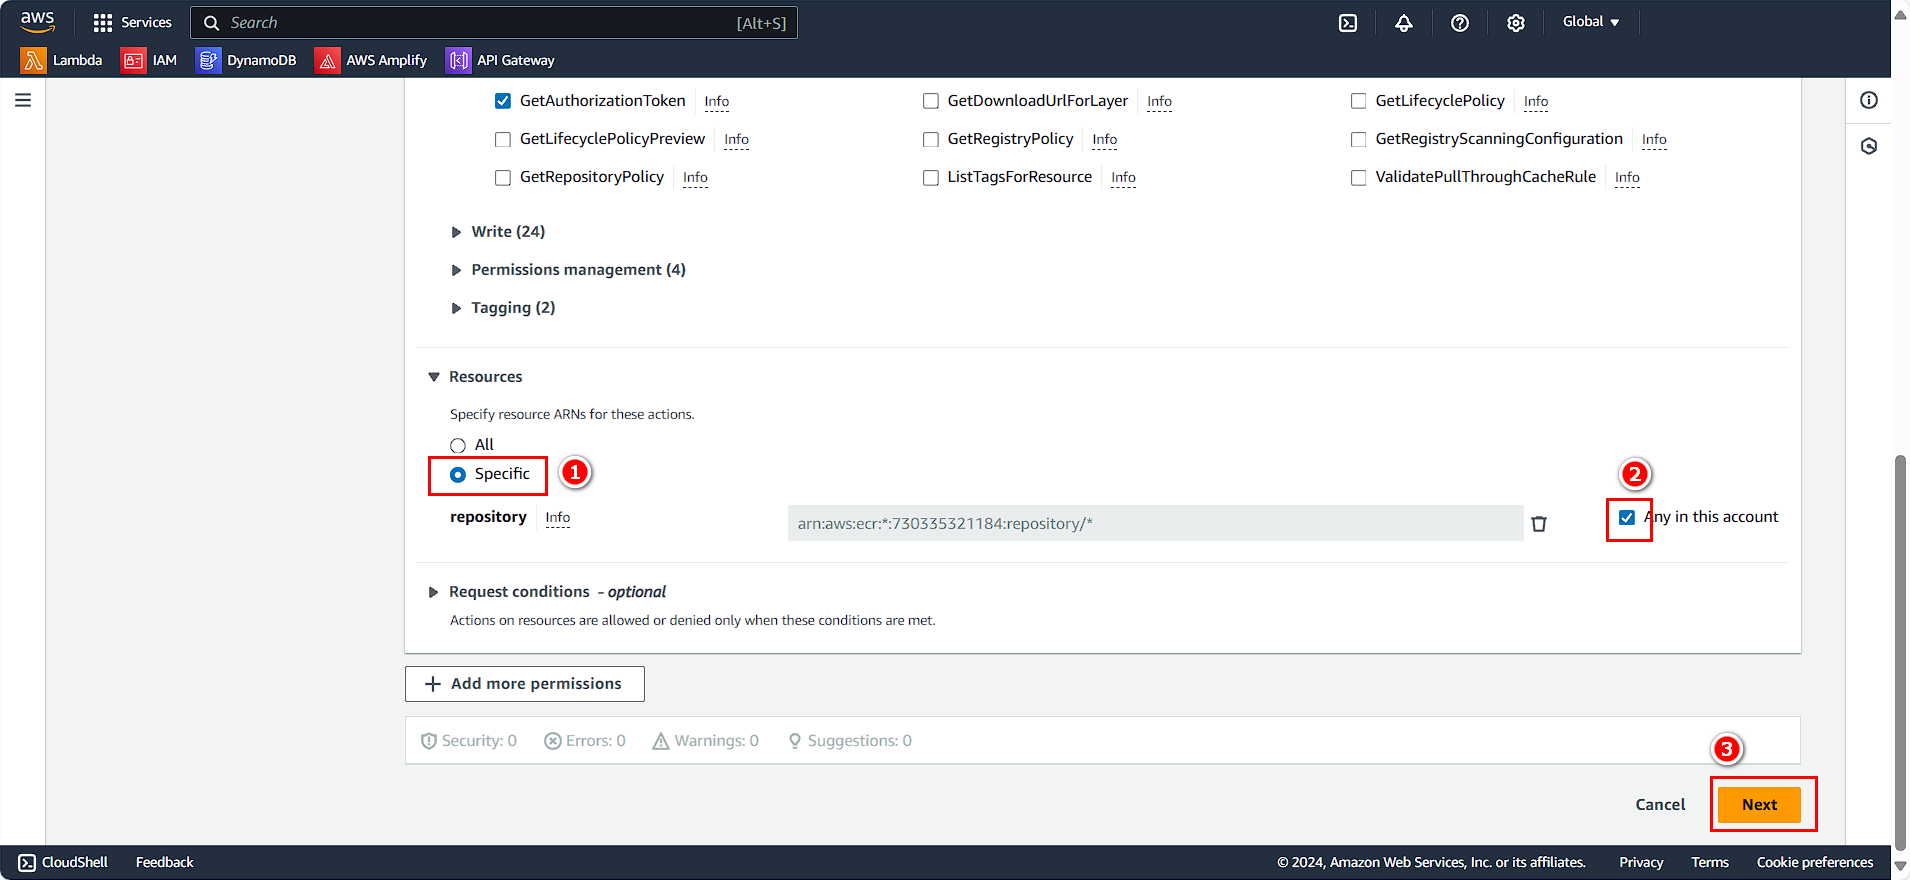
- In the Resources section:
- Select Specific
- Select Any in this account
- Click Next
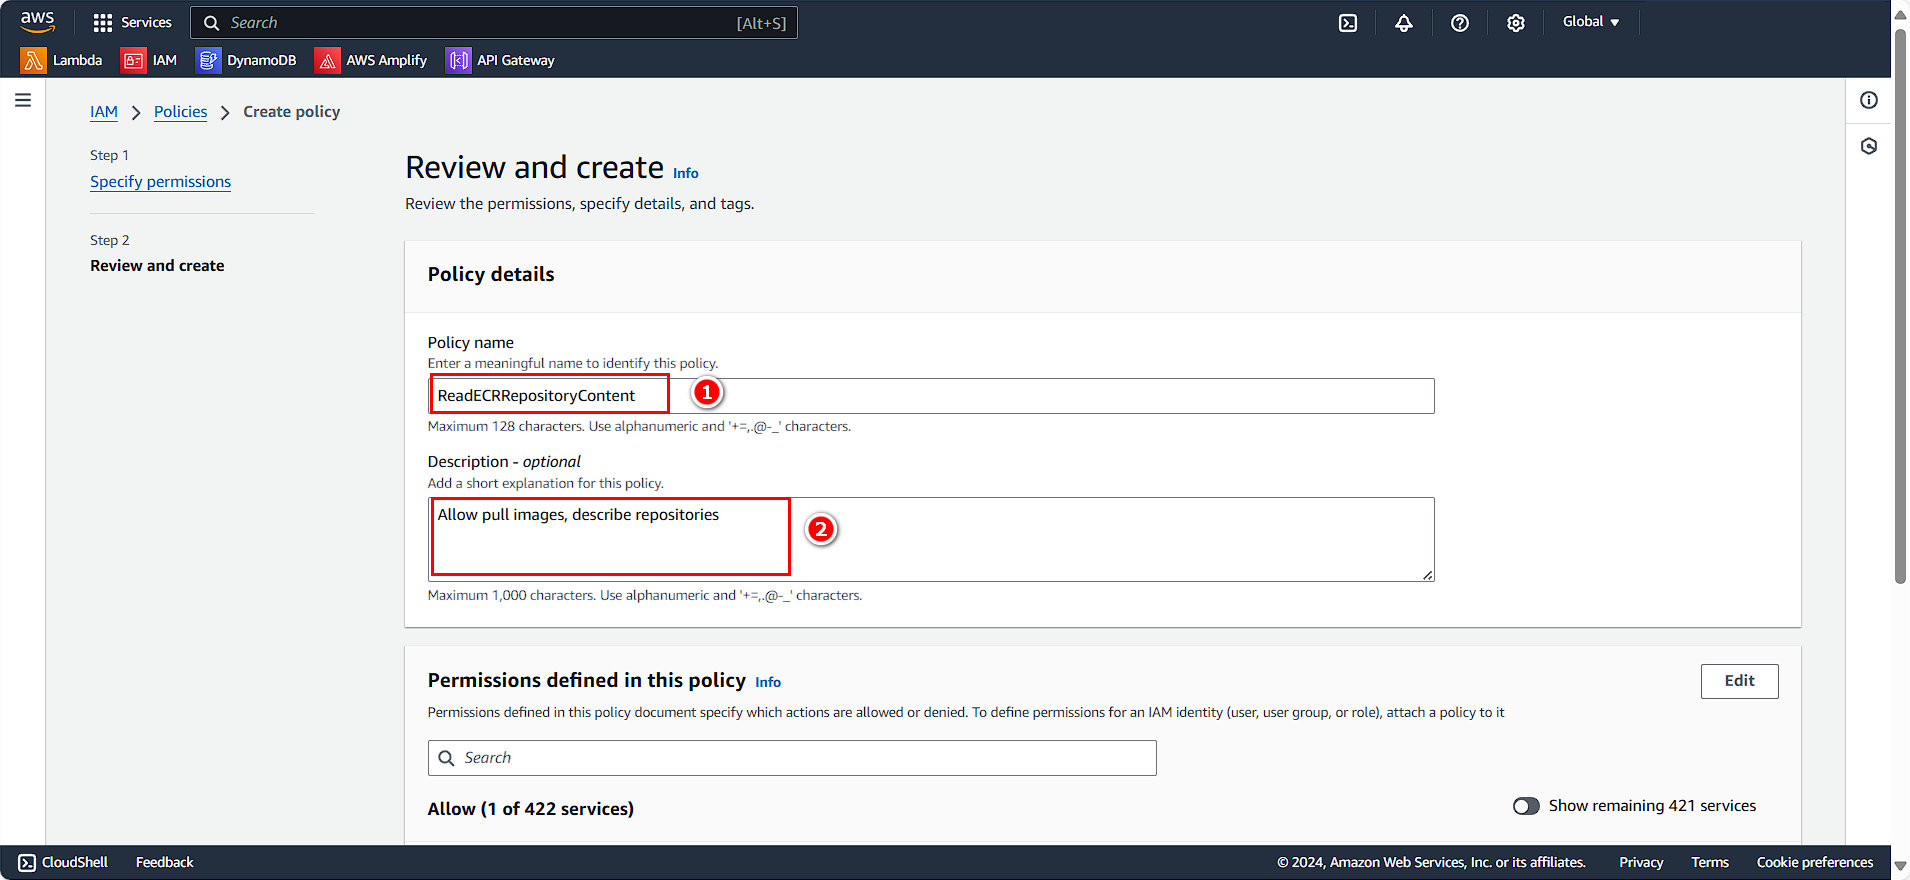
In the Policy details section:
- Policy name:
ReadECRRepositoryContent - Description:
Allow pull images, describe repositories
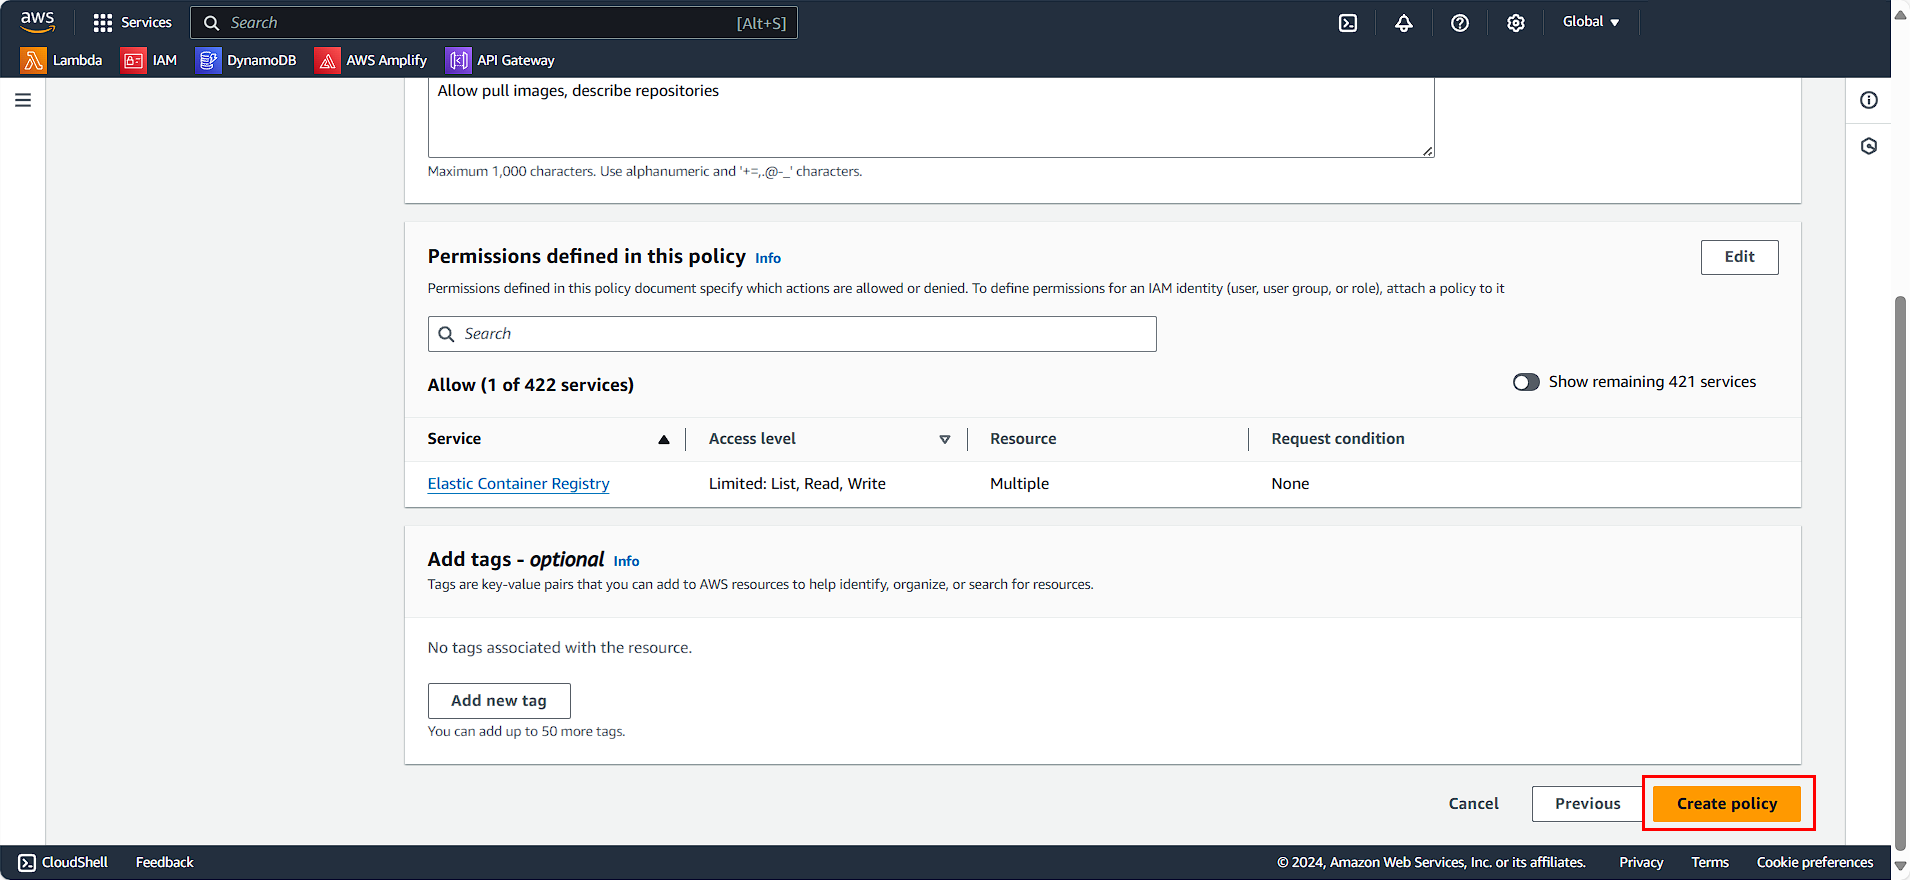
- Click Create policy
Similarly, we will create an additional policy for writing to ECR:
- Click Create Policy
A rule selection panel appears:
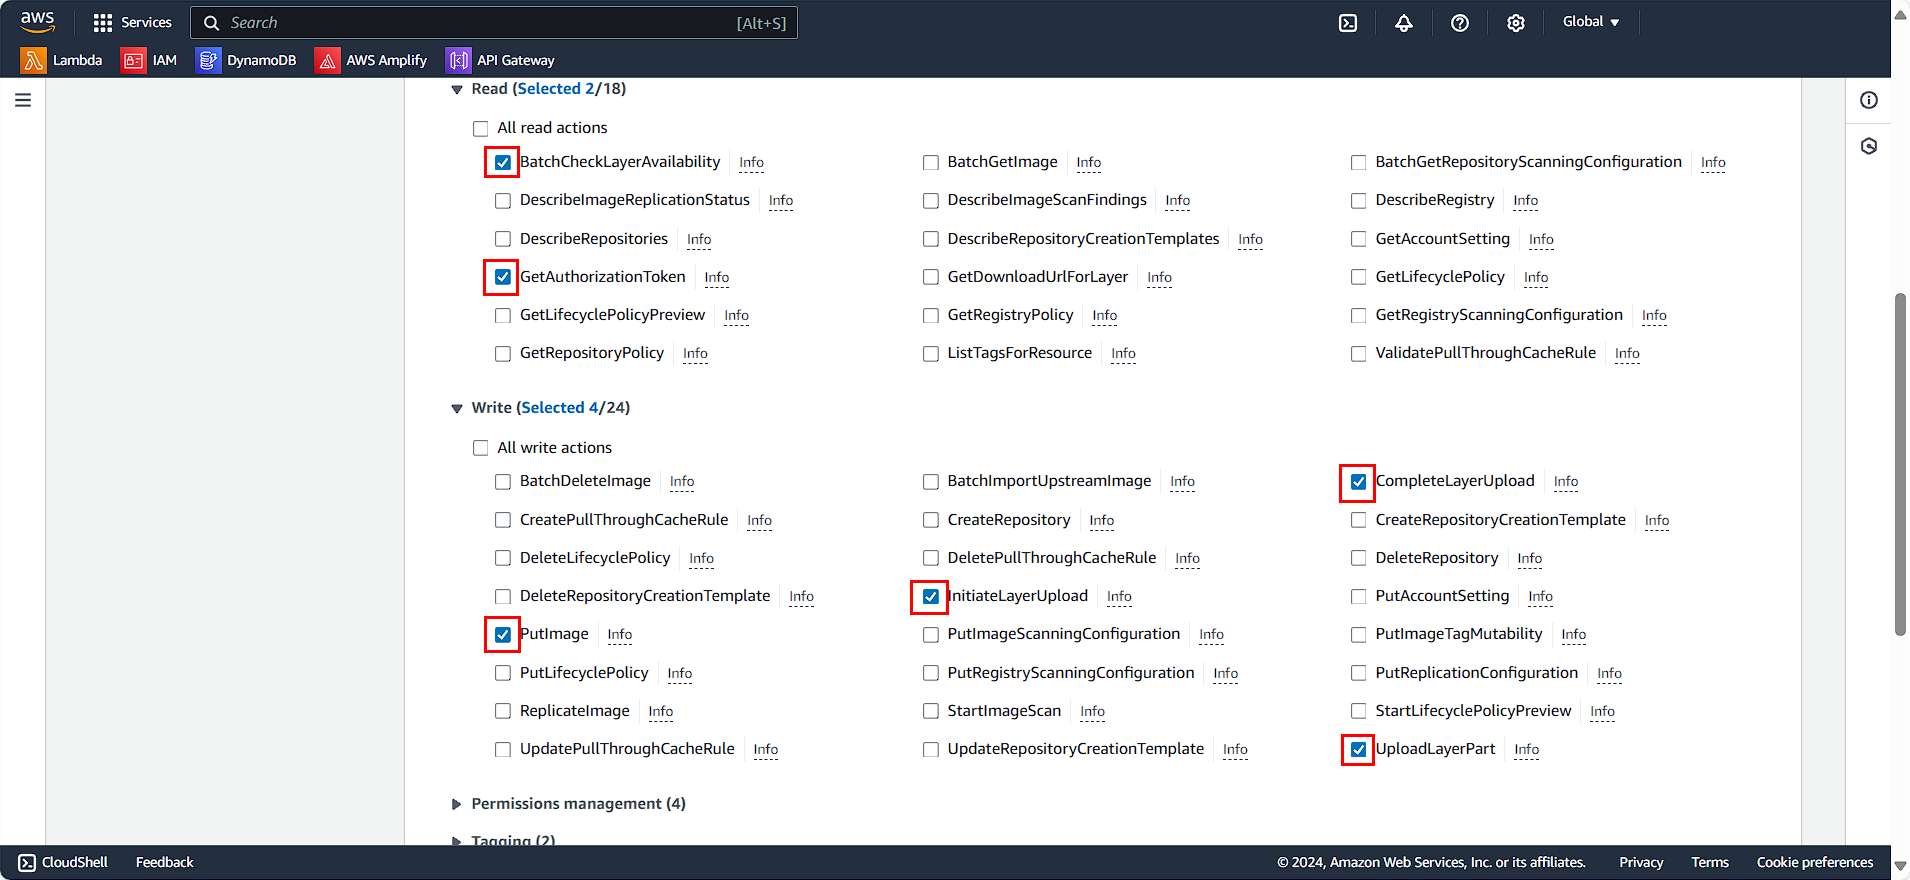
- In the Read section:
- Select BatchCheckLayerAvailability
- Select GetAuthorizationToken
- In the Write section:
- Select CompleteLayerUpload
- Select InitialLayerUpload
- Select PutImage
- Select UploadLayerPart
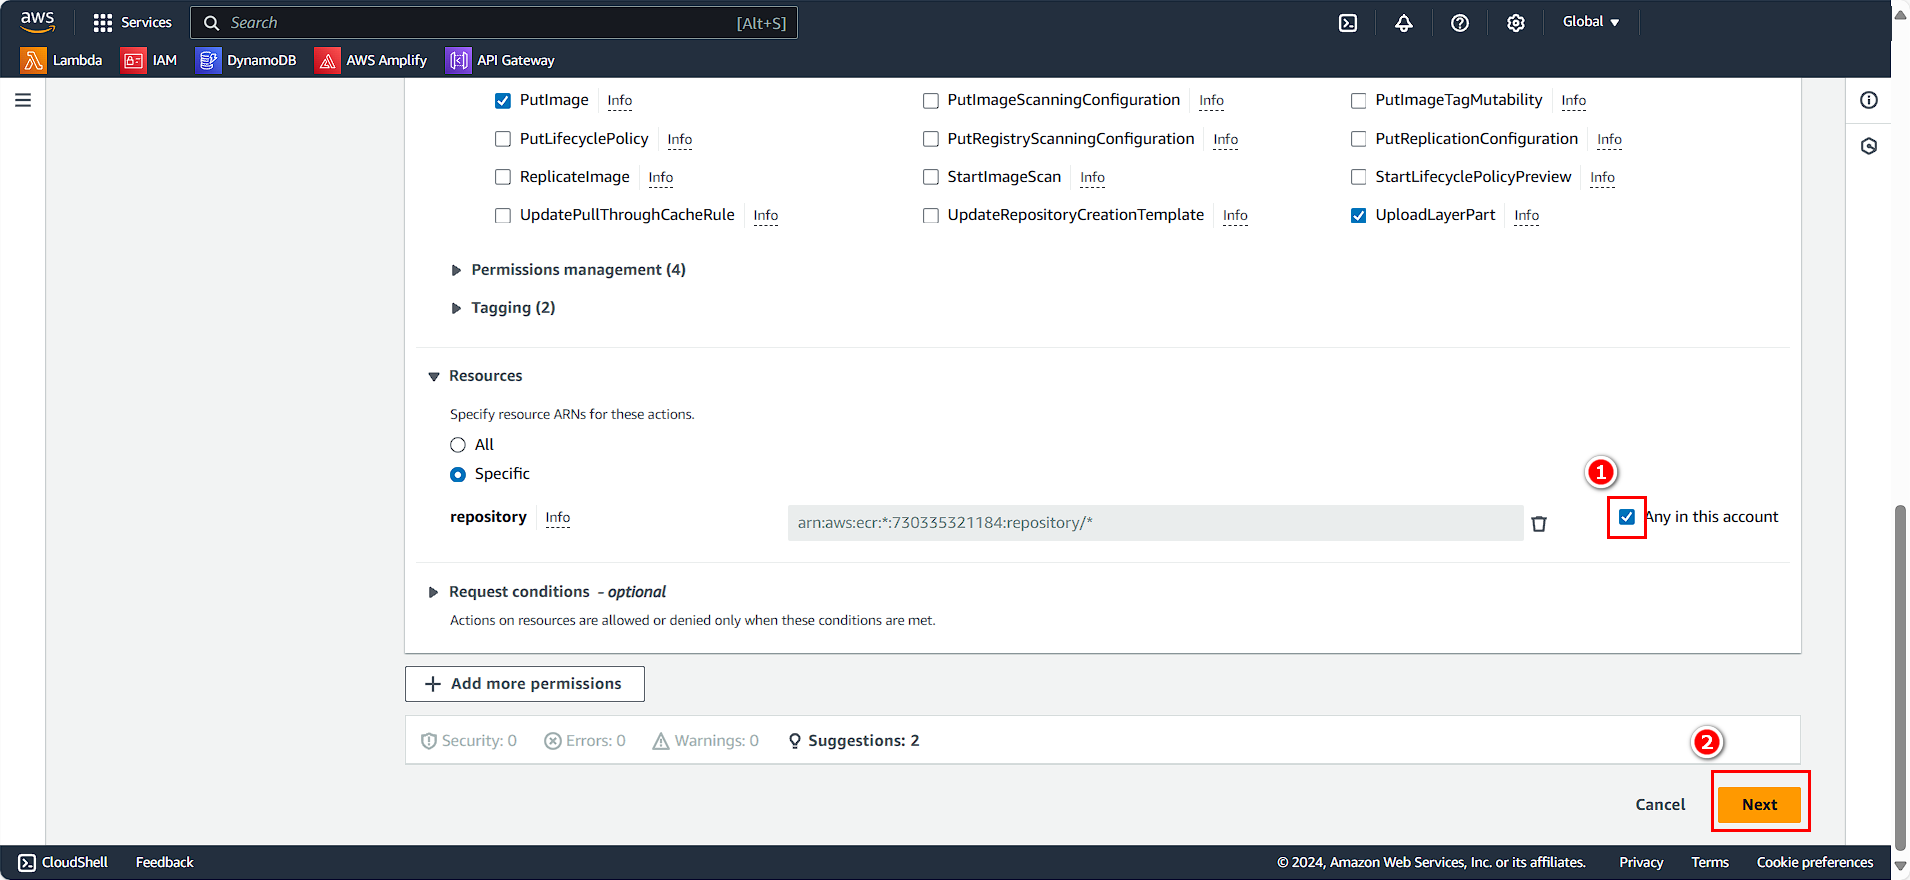
- In the Resources section:
- Select Any in this account
- Click Next
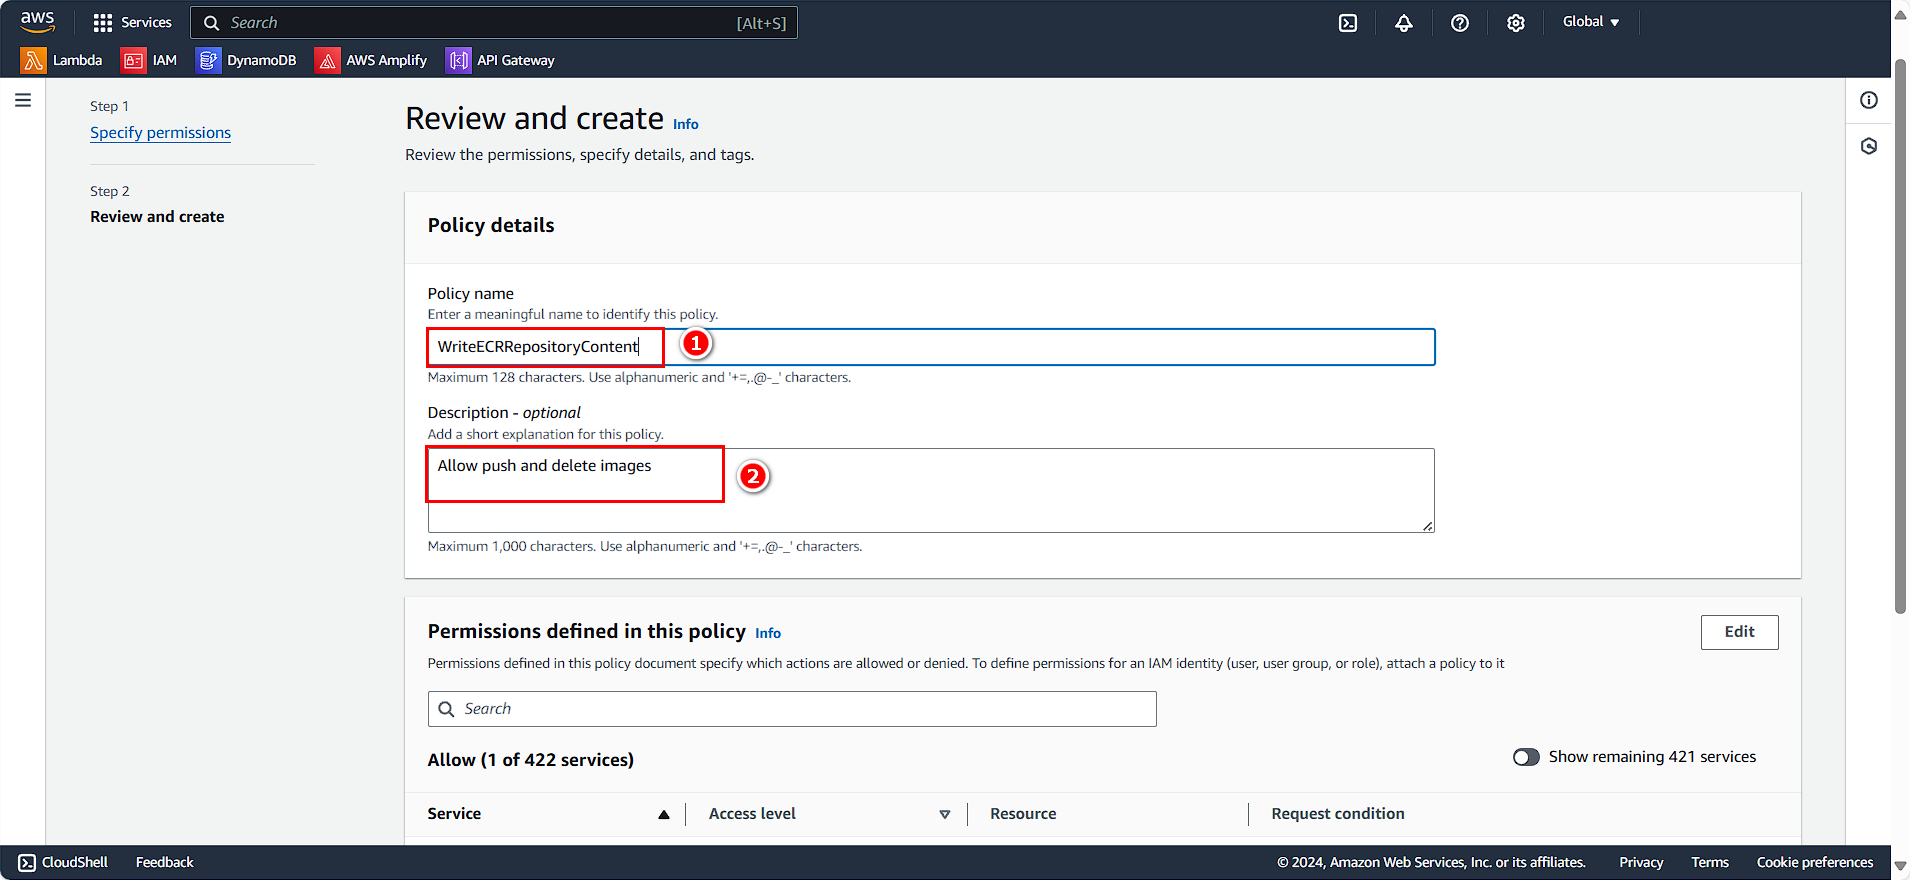
The Policy details panel appears:
- Policy name:
WriteECRRepositoryContent - Description:
Allow push and delete images
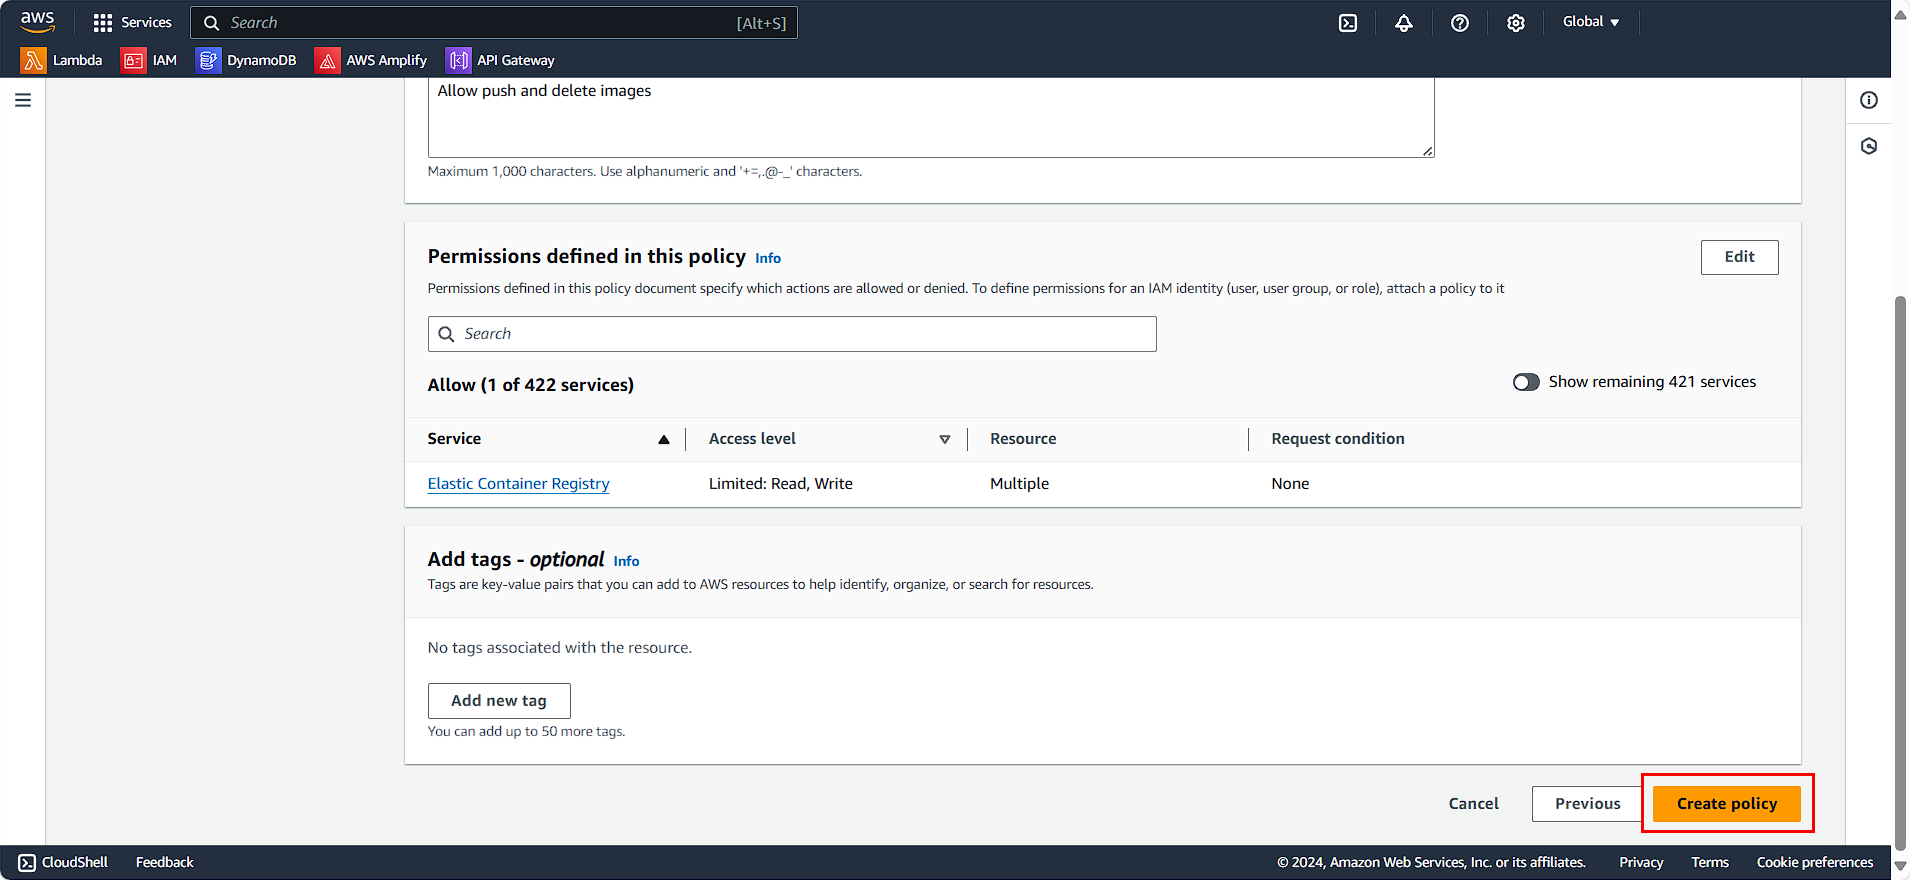
- Click Create policy
Create Role for ECR
In the EC2 management interface:
- Select Roles
- Click on Create role
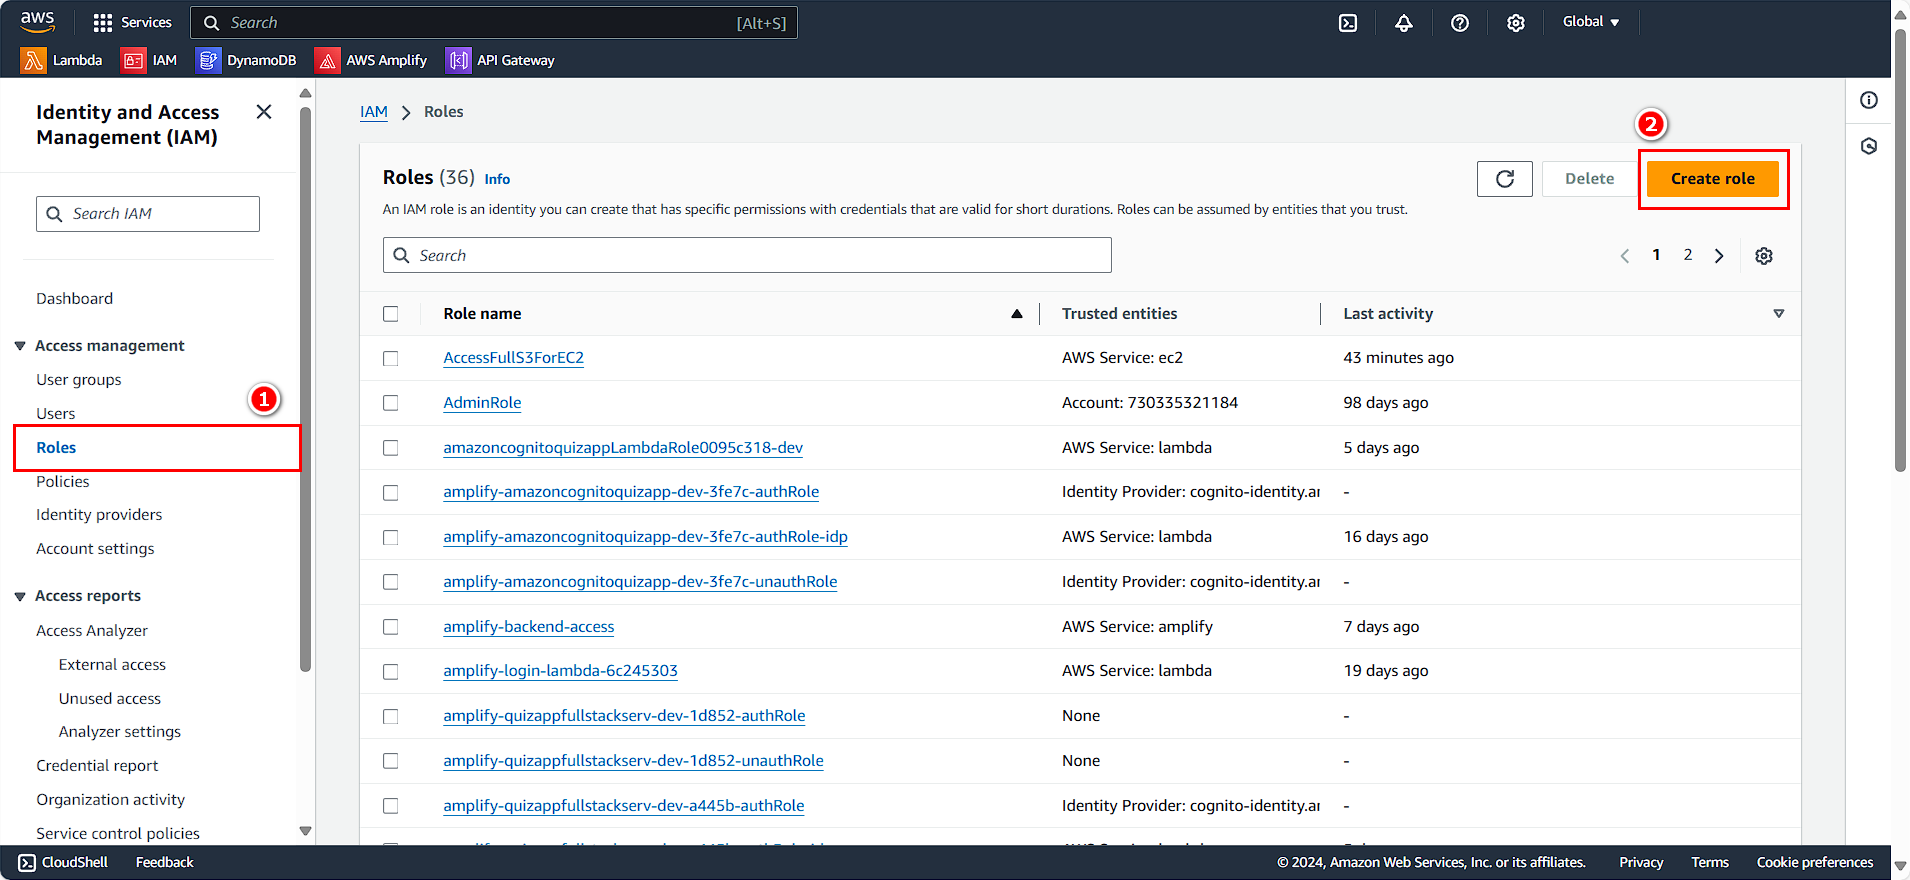
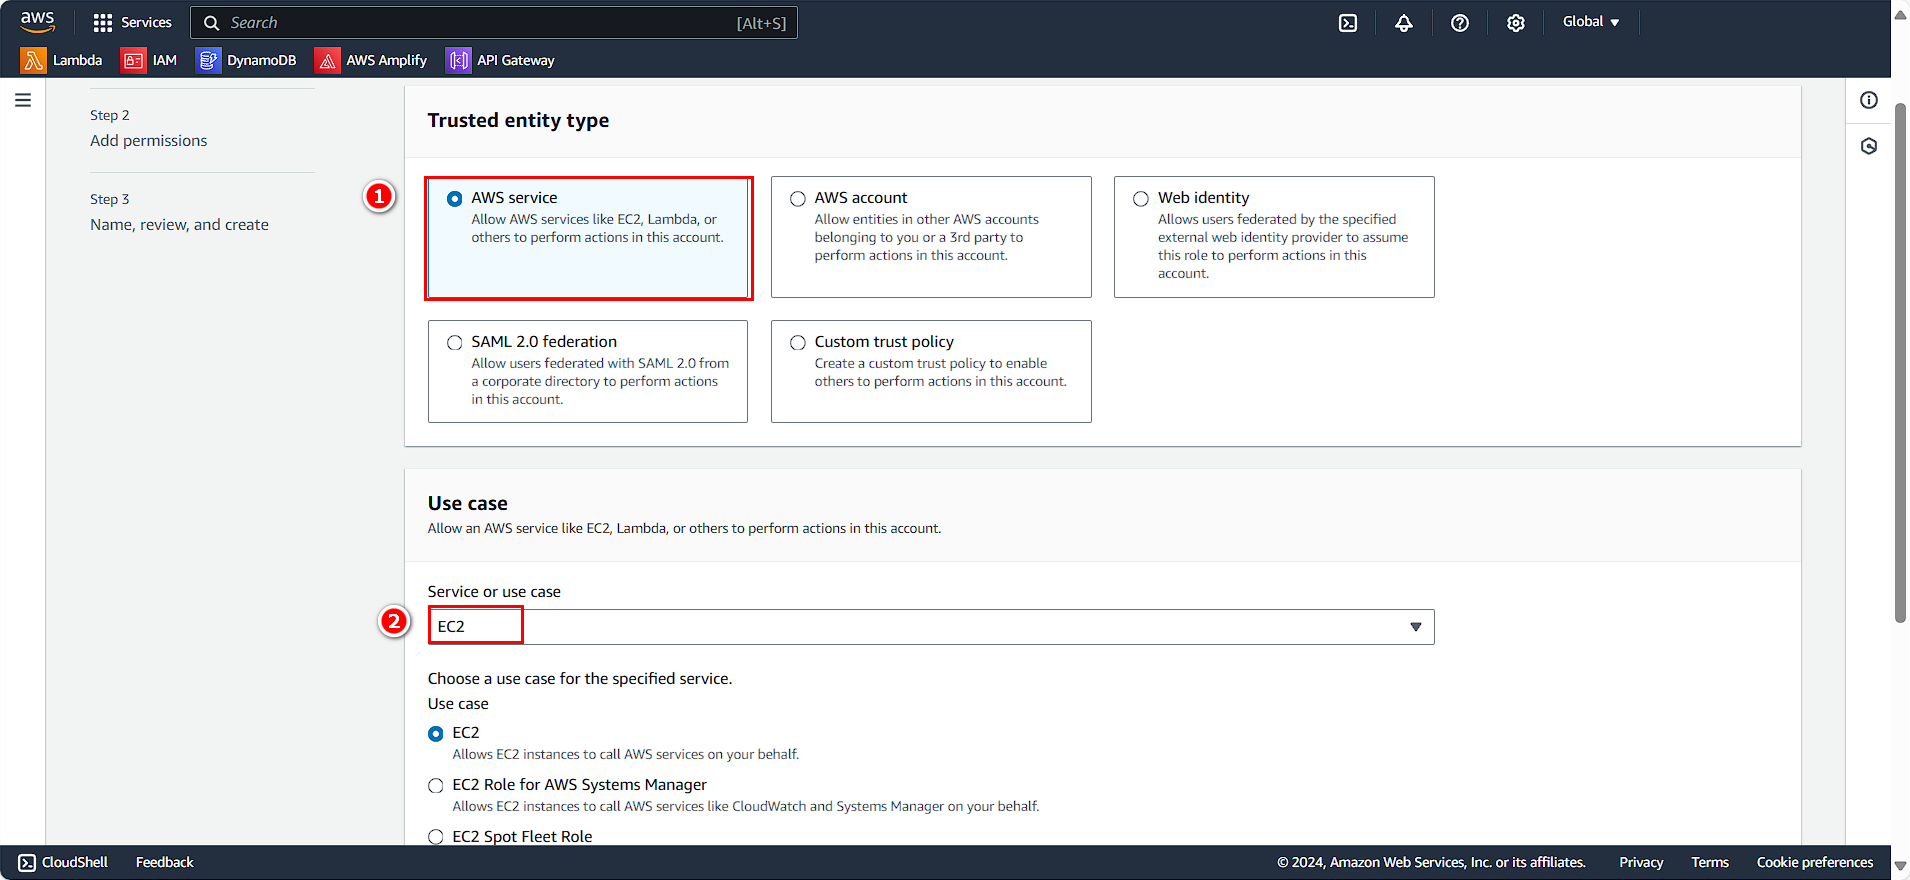
- Select AWS service
- Choose EC2
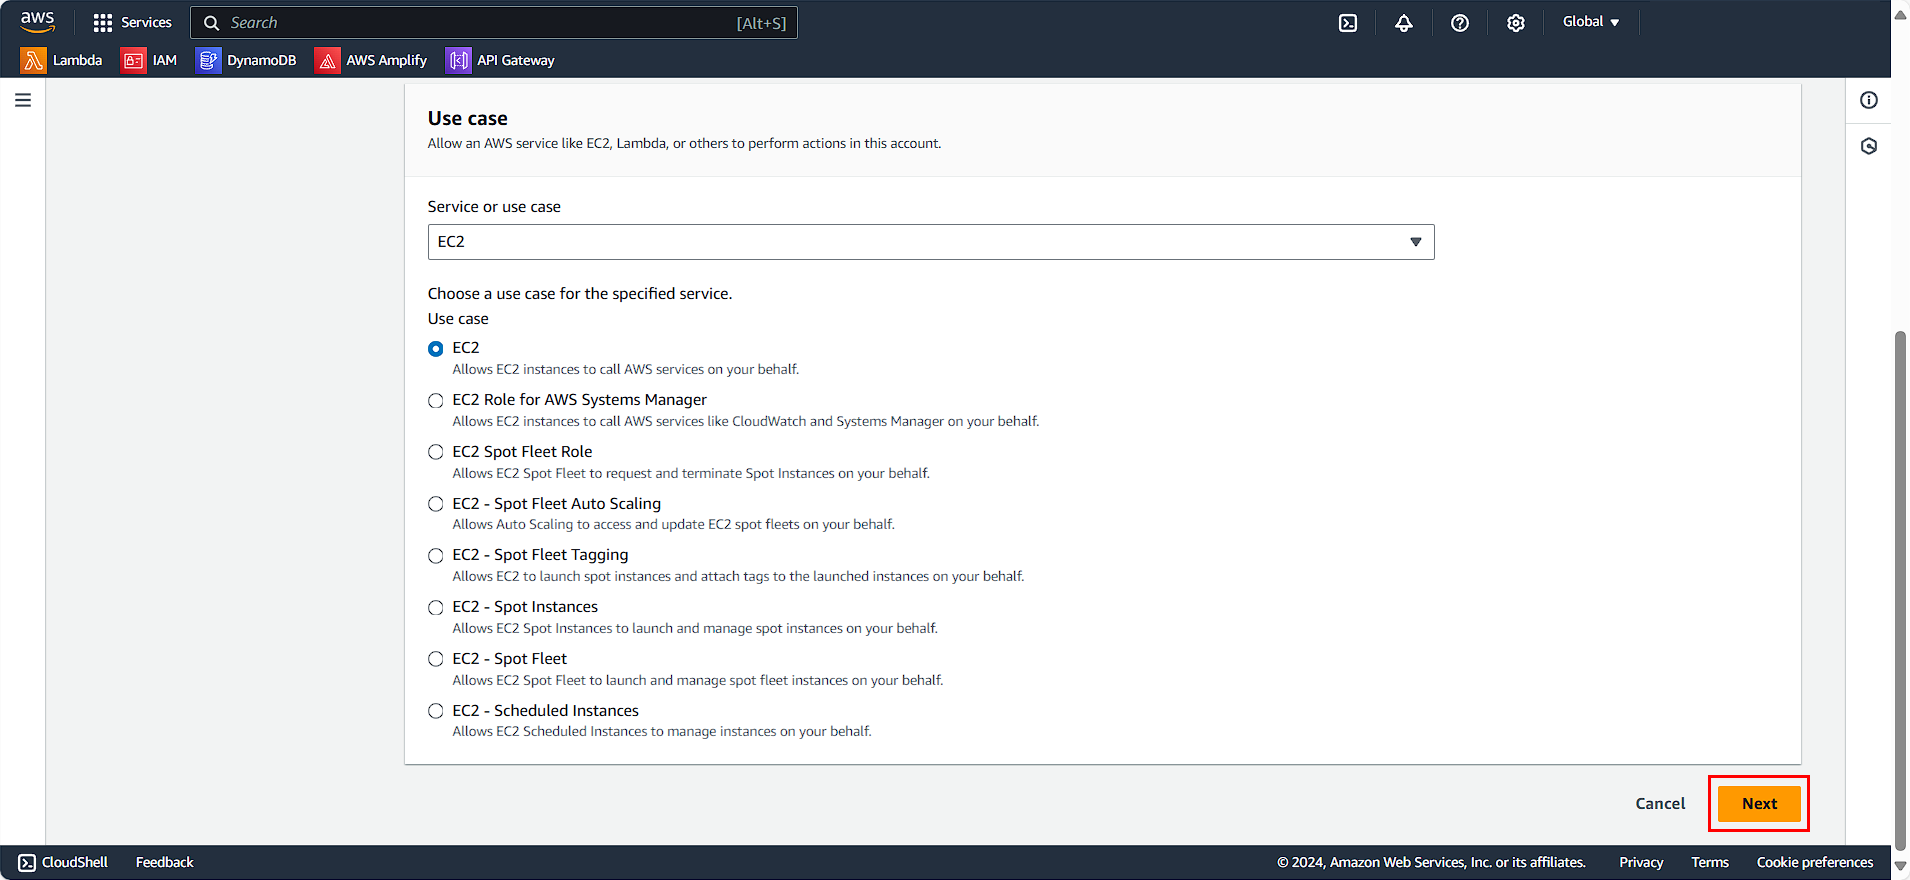
- Click Next
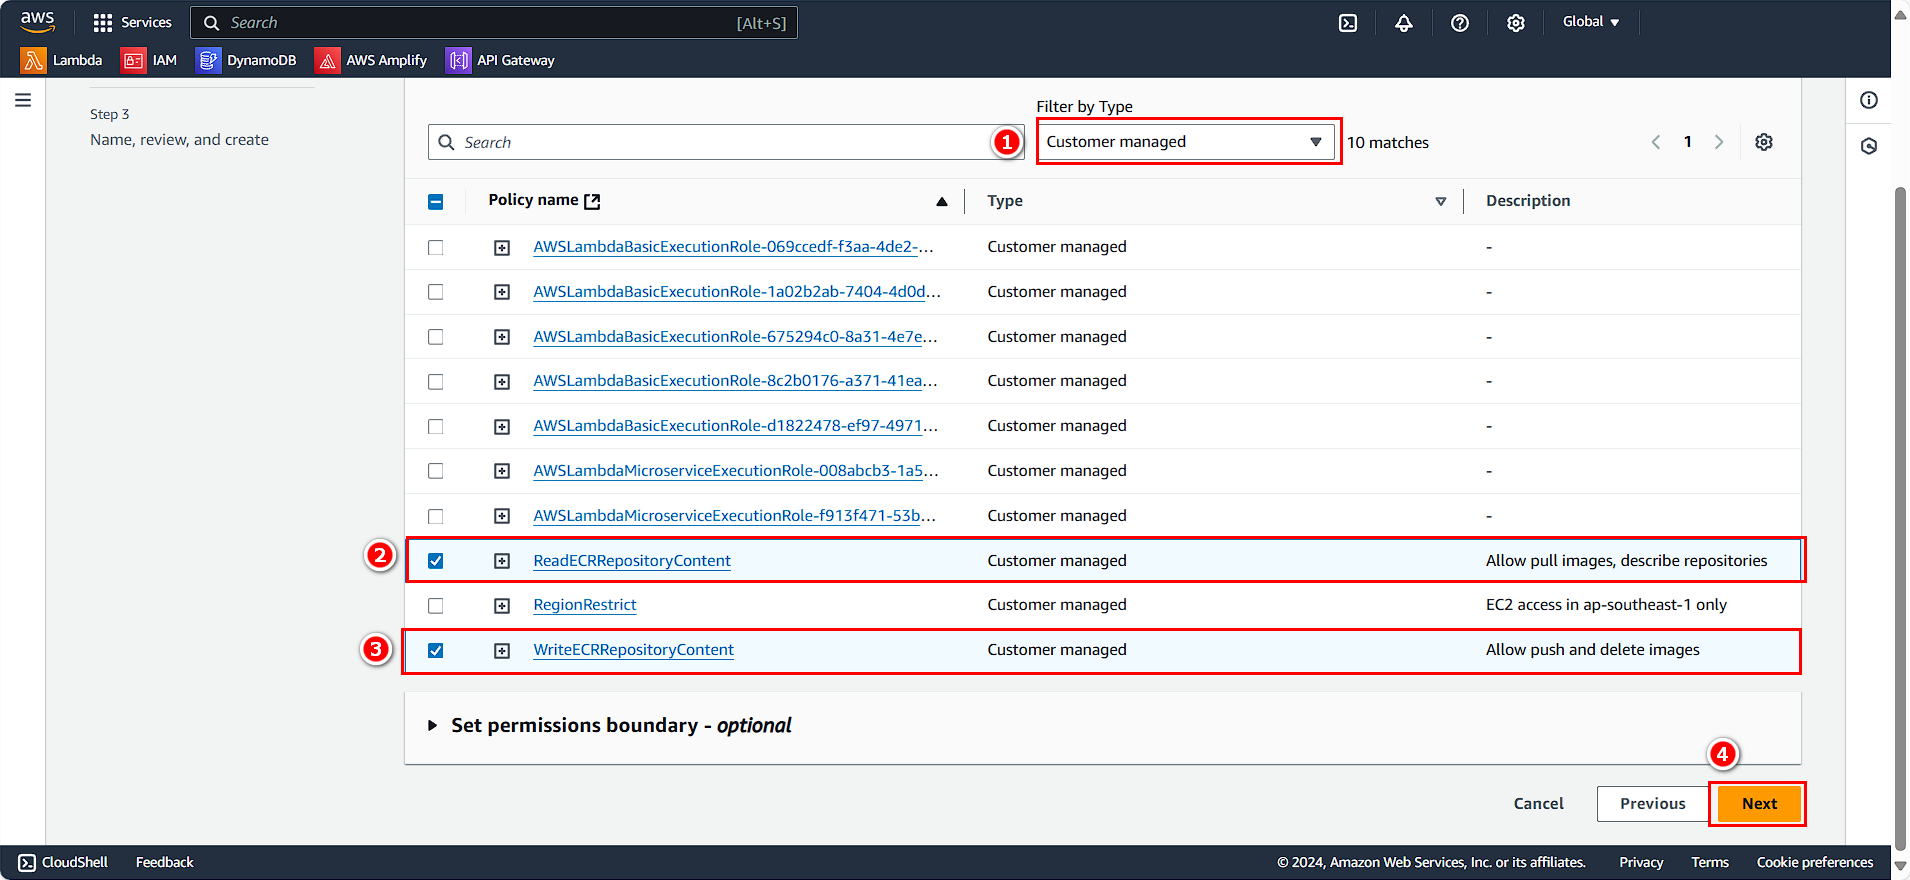
- Filter by Type: Customer managed
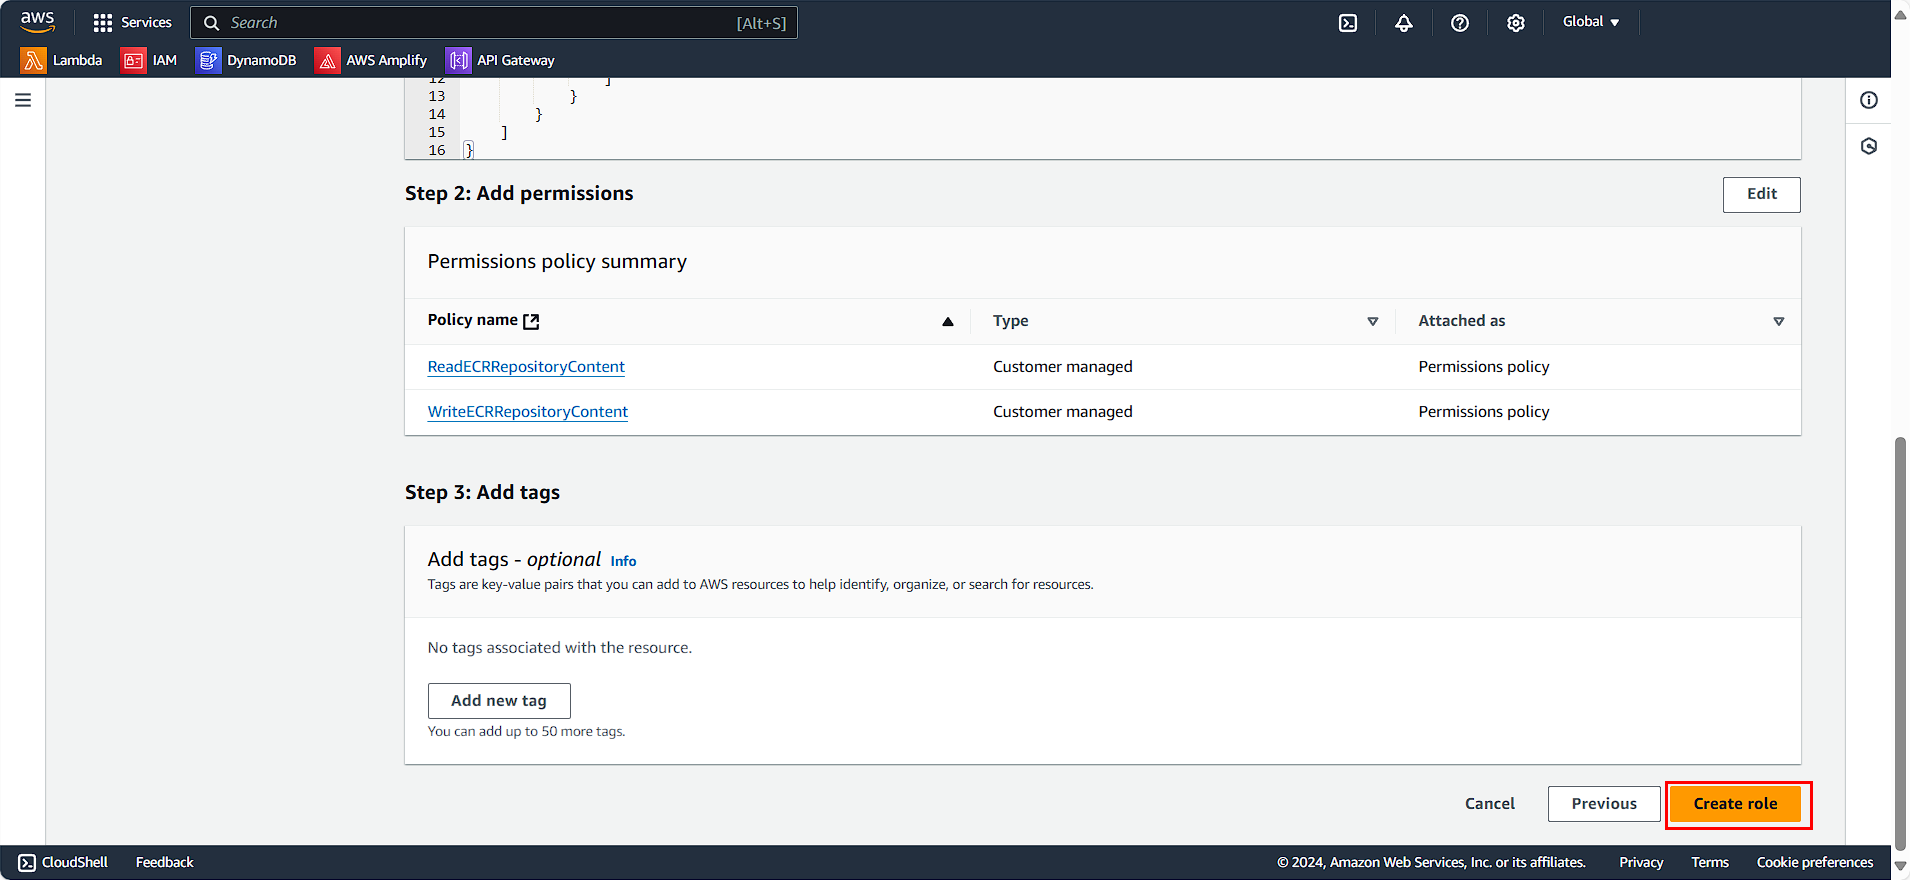
- Select the two policies we just created
- Click Next
In the Role details section:
- Role name:
CustomRWECRRole - Description:
Custom Read and Write role for ECS
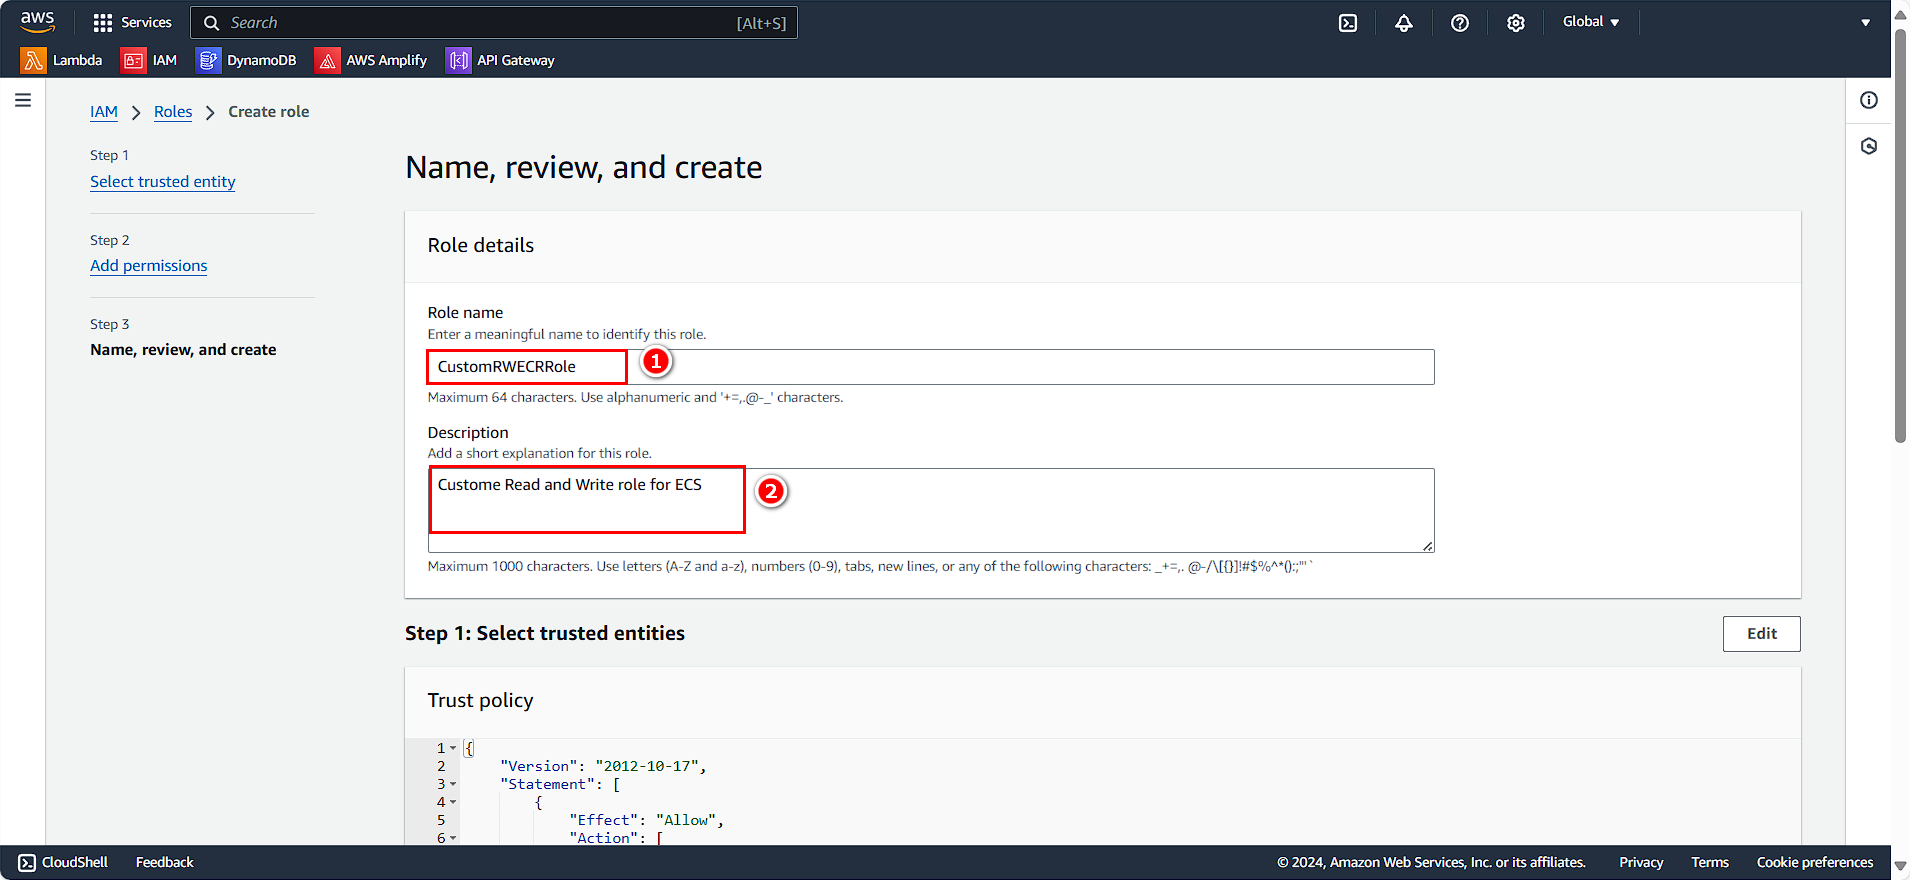
- Click Create role
