VPC Configuration
VPC Configuration
In the AWS console interface, perform the following:
- Search for and select VPC
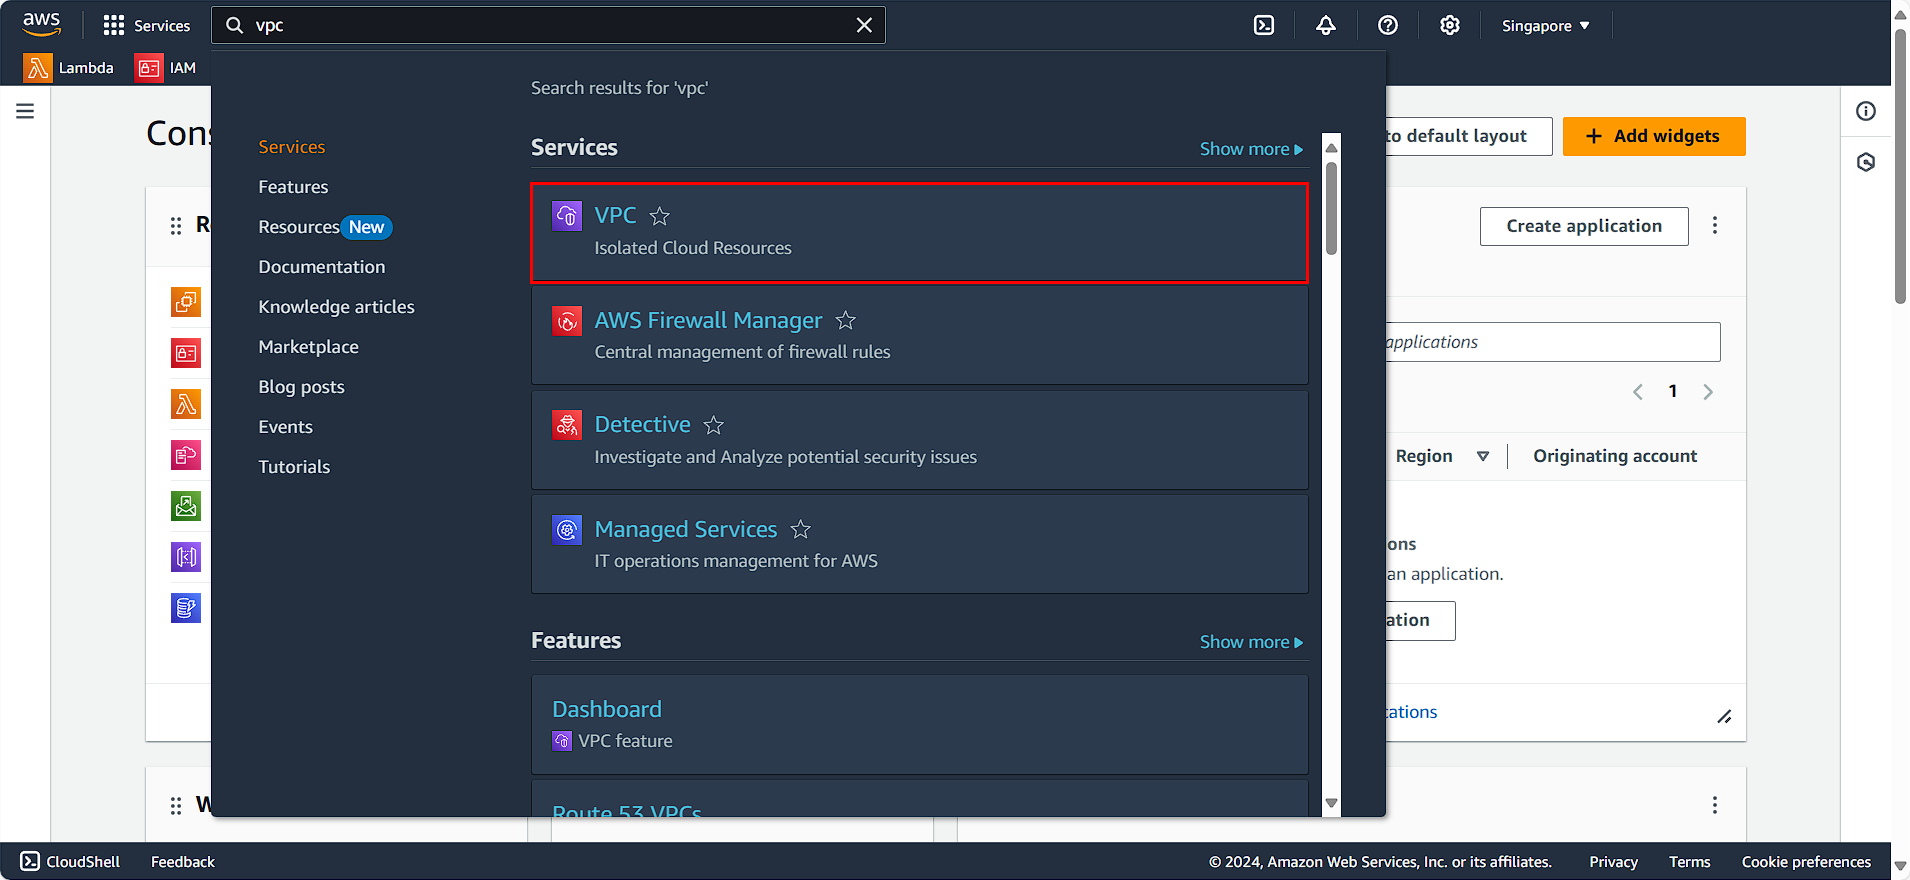
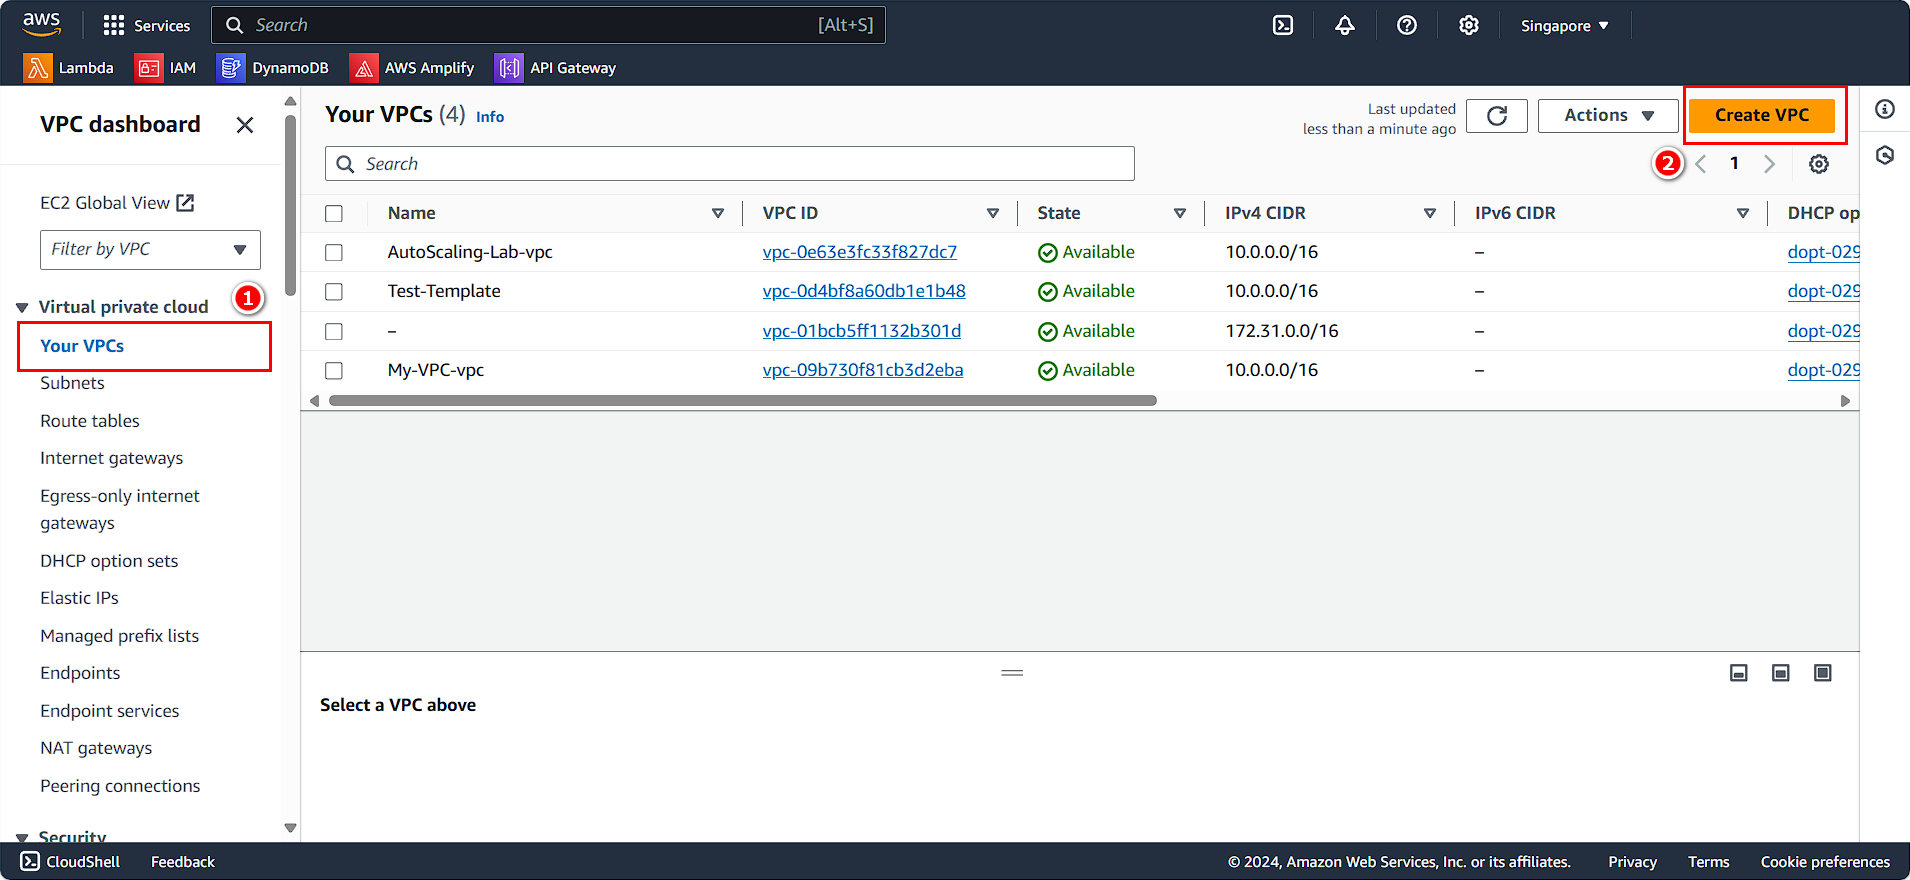
In the VPC management interface:
- Select Your VPC
- Click on Create VPC
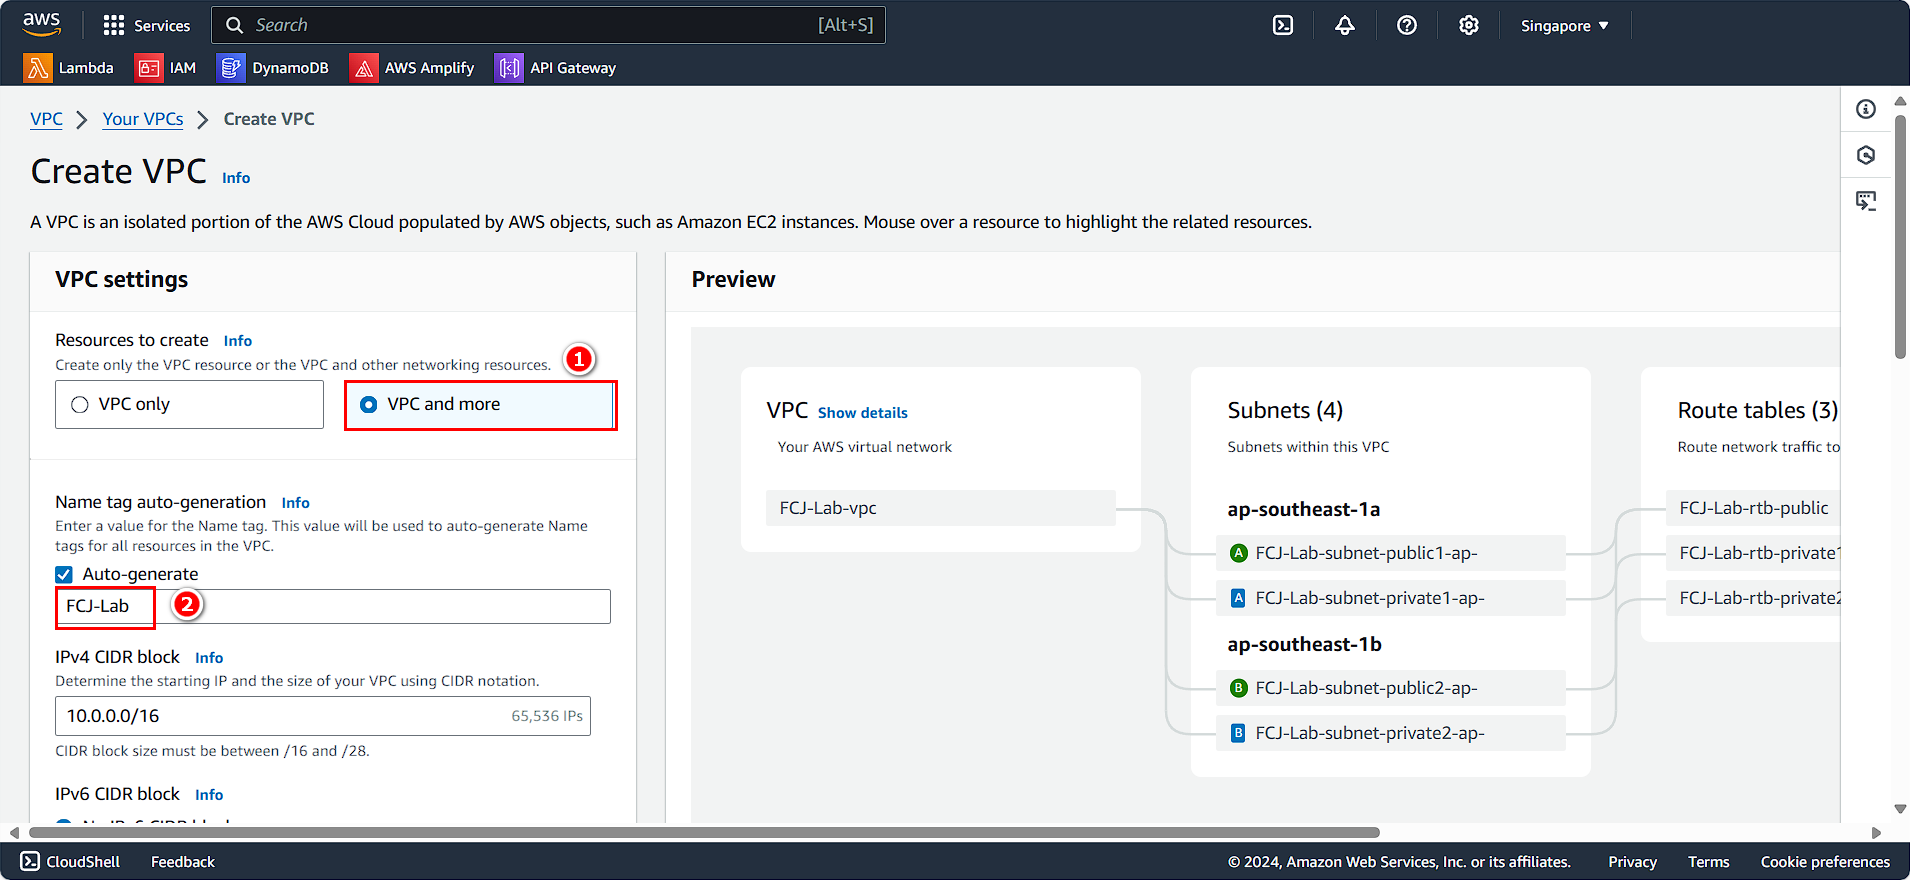
The VPC configuration panel appears:
- Choose VPC and more
- Name it
FCJ-Lab
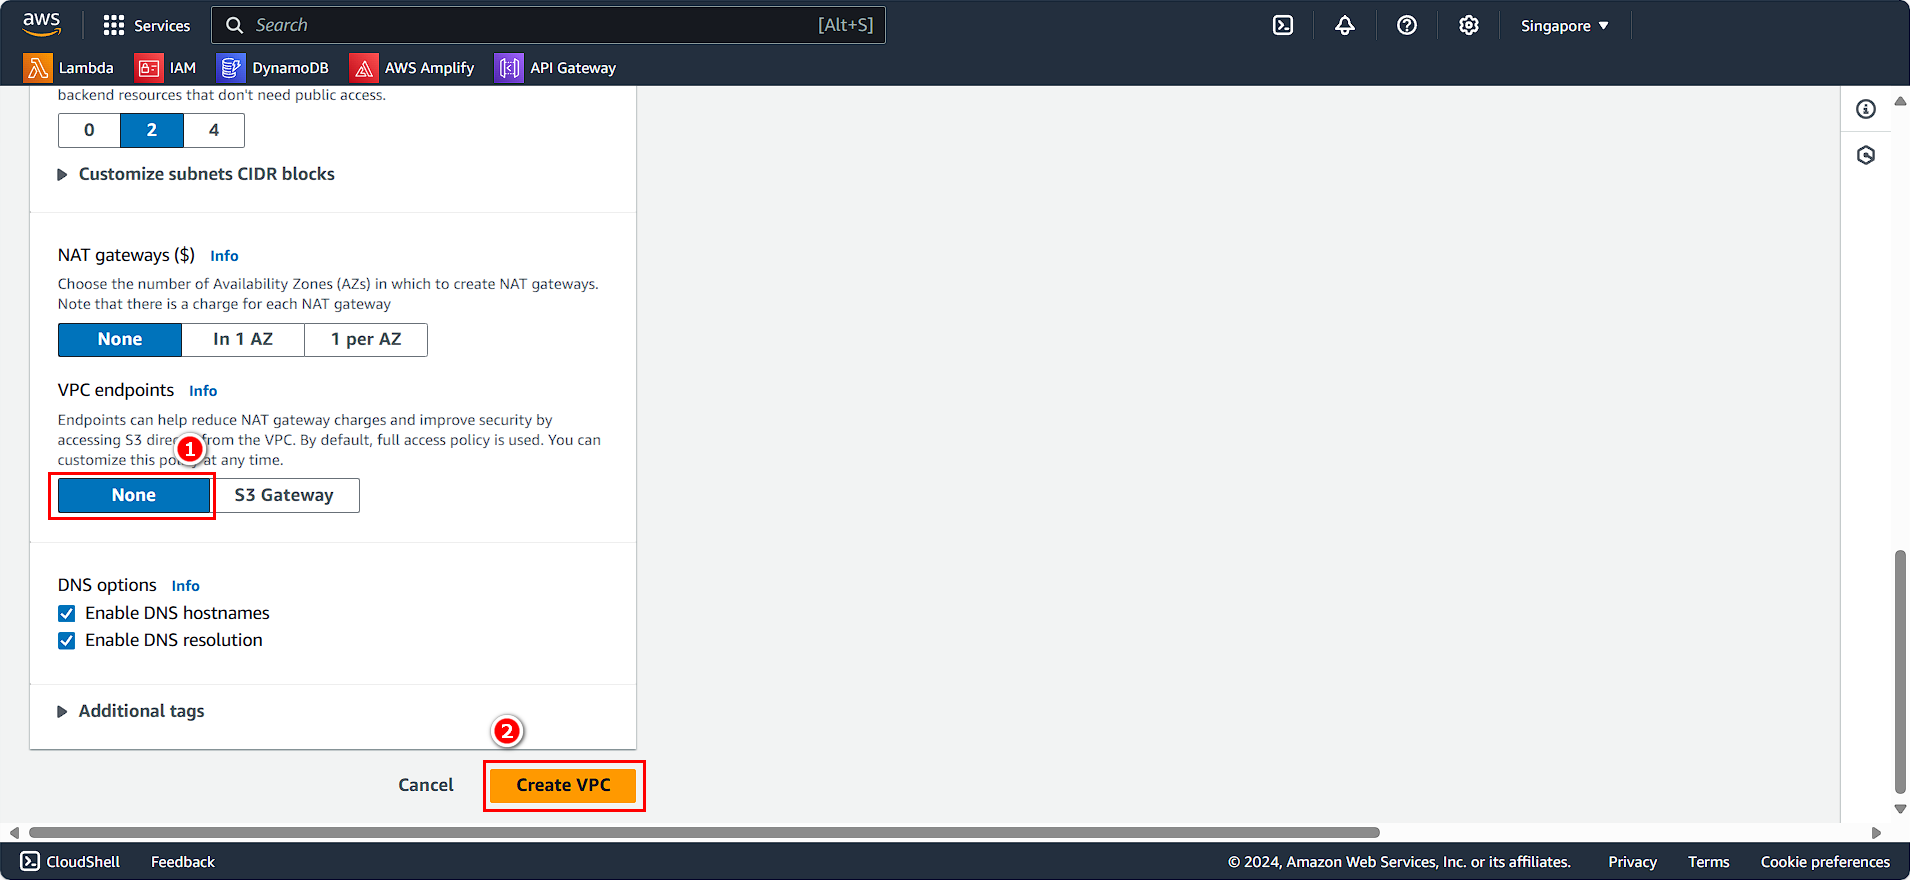
In the VPC endpoint section:
- Select None
- Click on Create VPC
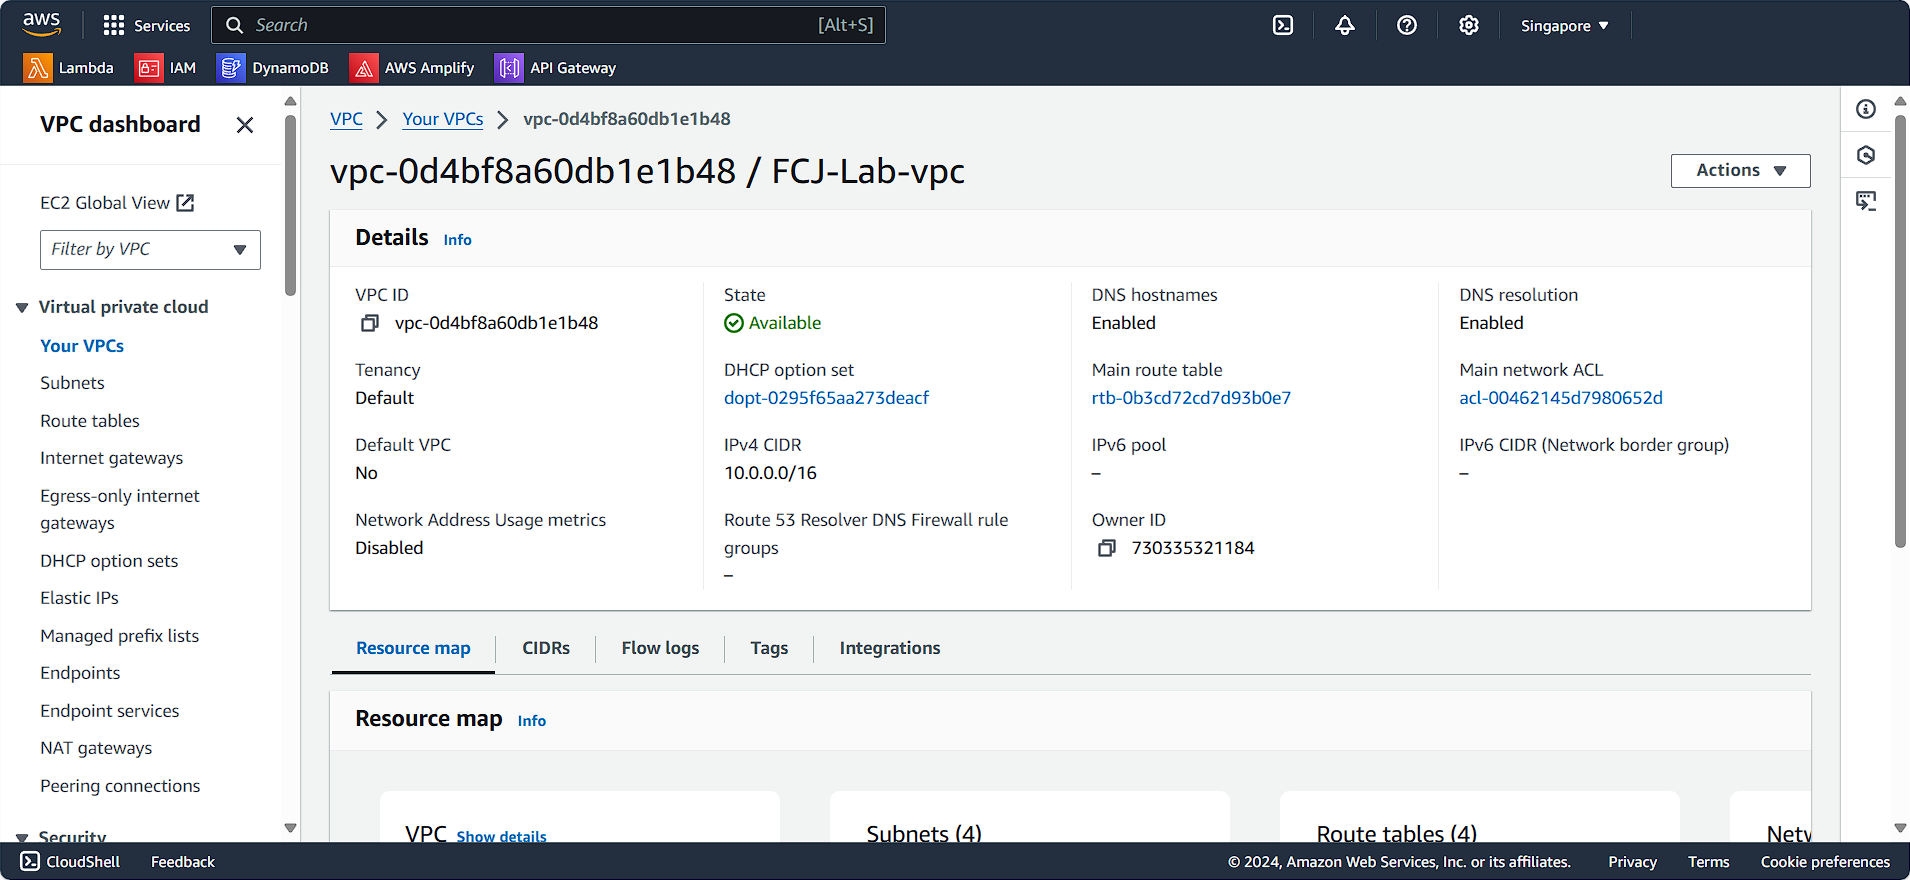
After creating the VPC, we will check the information of the newly created VPC:
- Select FCJ-Lab-vpc
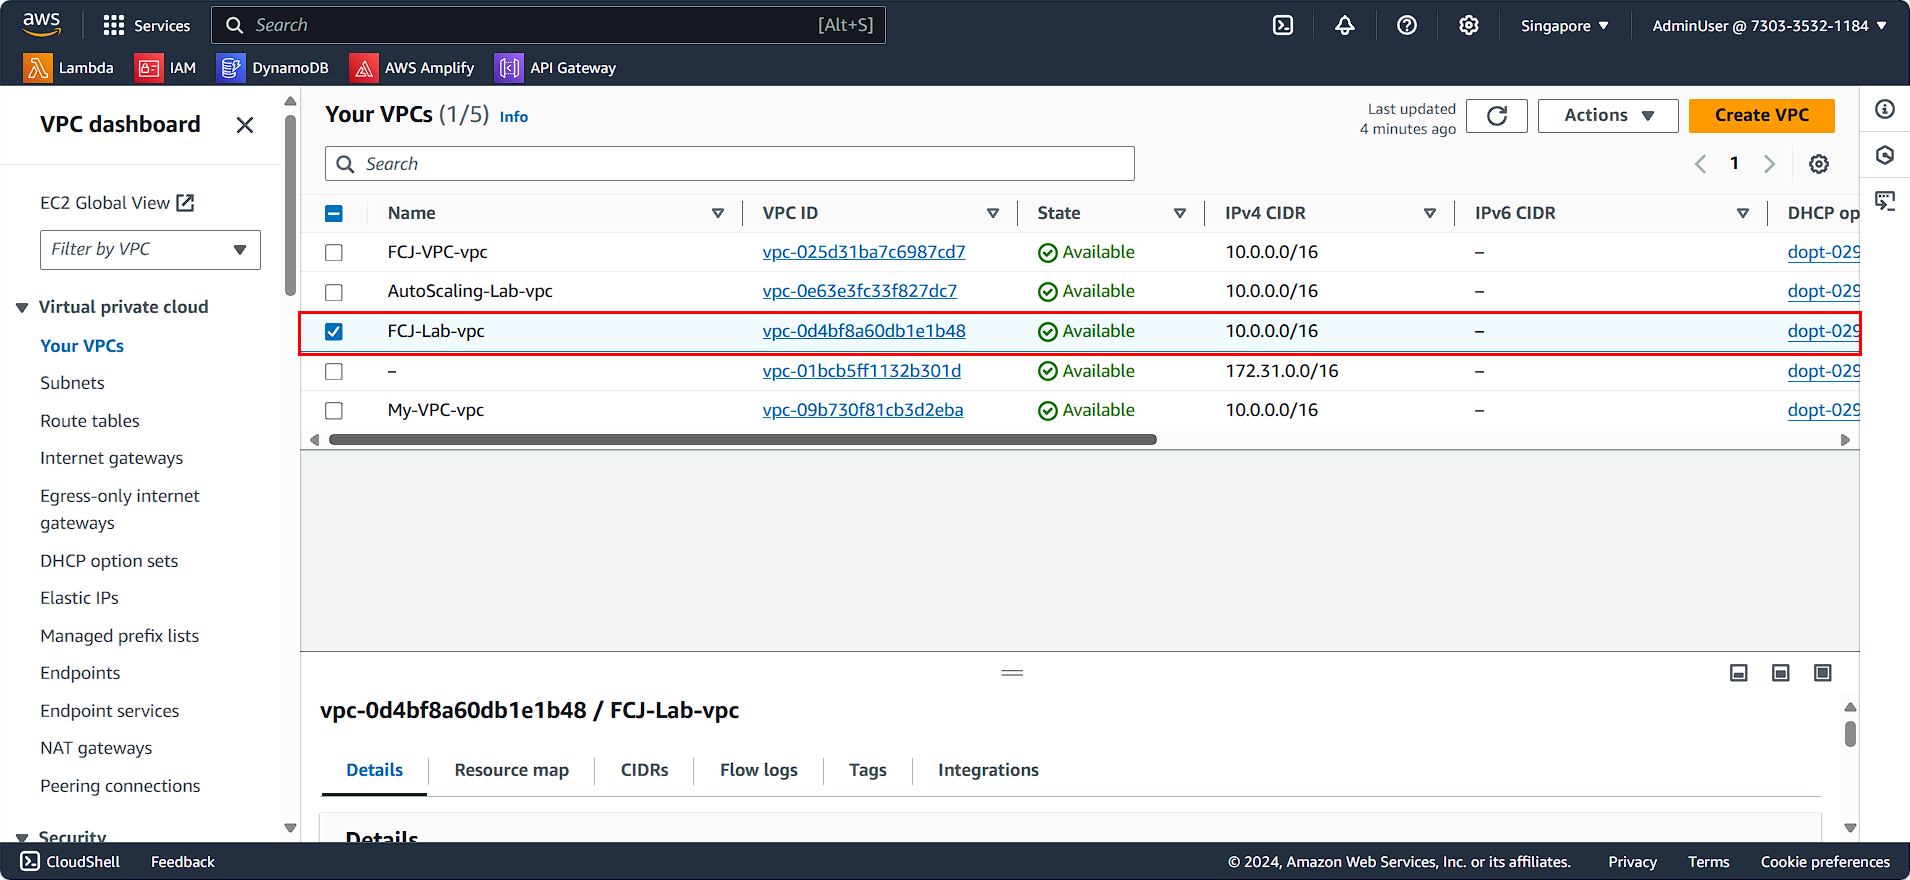
View the overview of the VPC configuration:
Public Subnet Configuration
In the VPC management interface, scroll down in the left sidebar:
- Select Subnet
- Search for FCJ-Lab
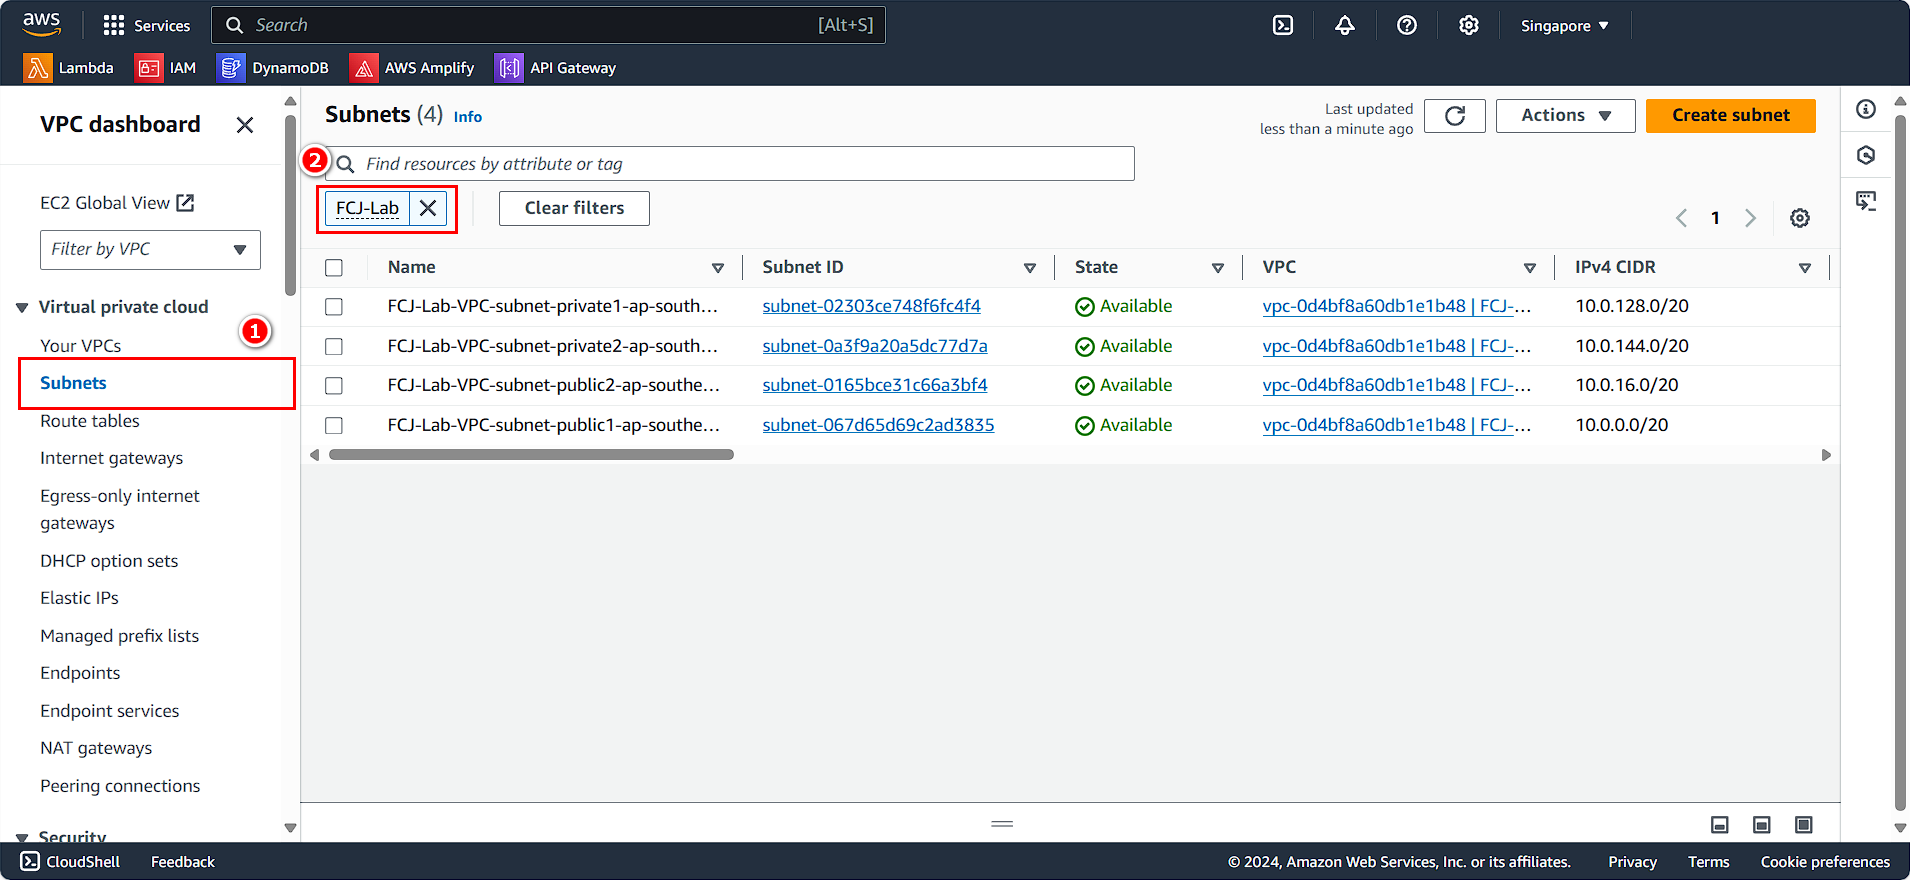
You will see two subnets: FCJ-Lab-subnet-public-1a and FCJ-Lab-subnet-public-1b.
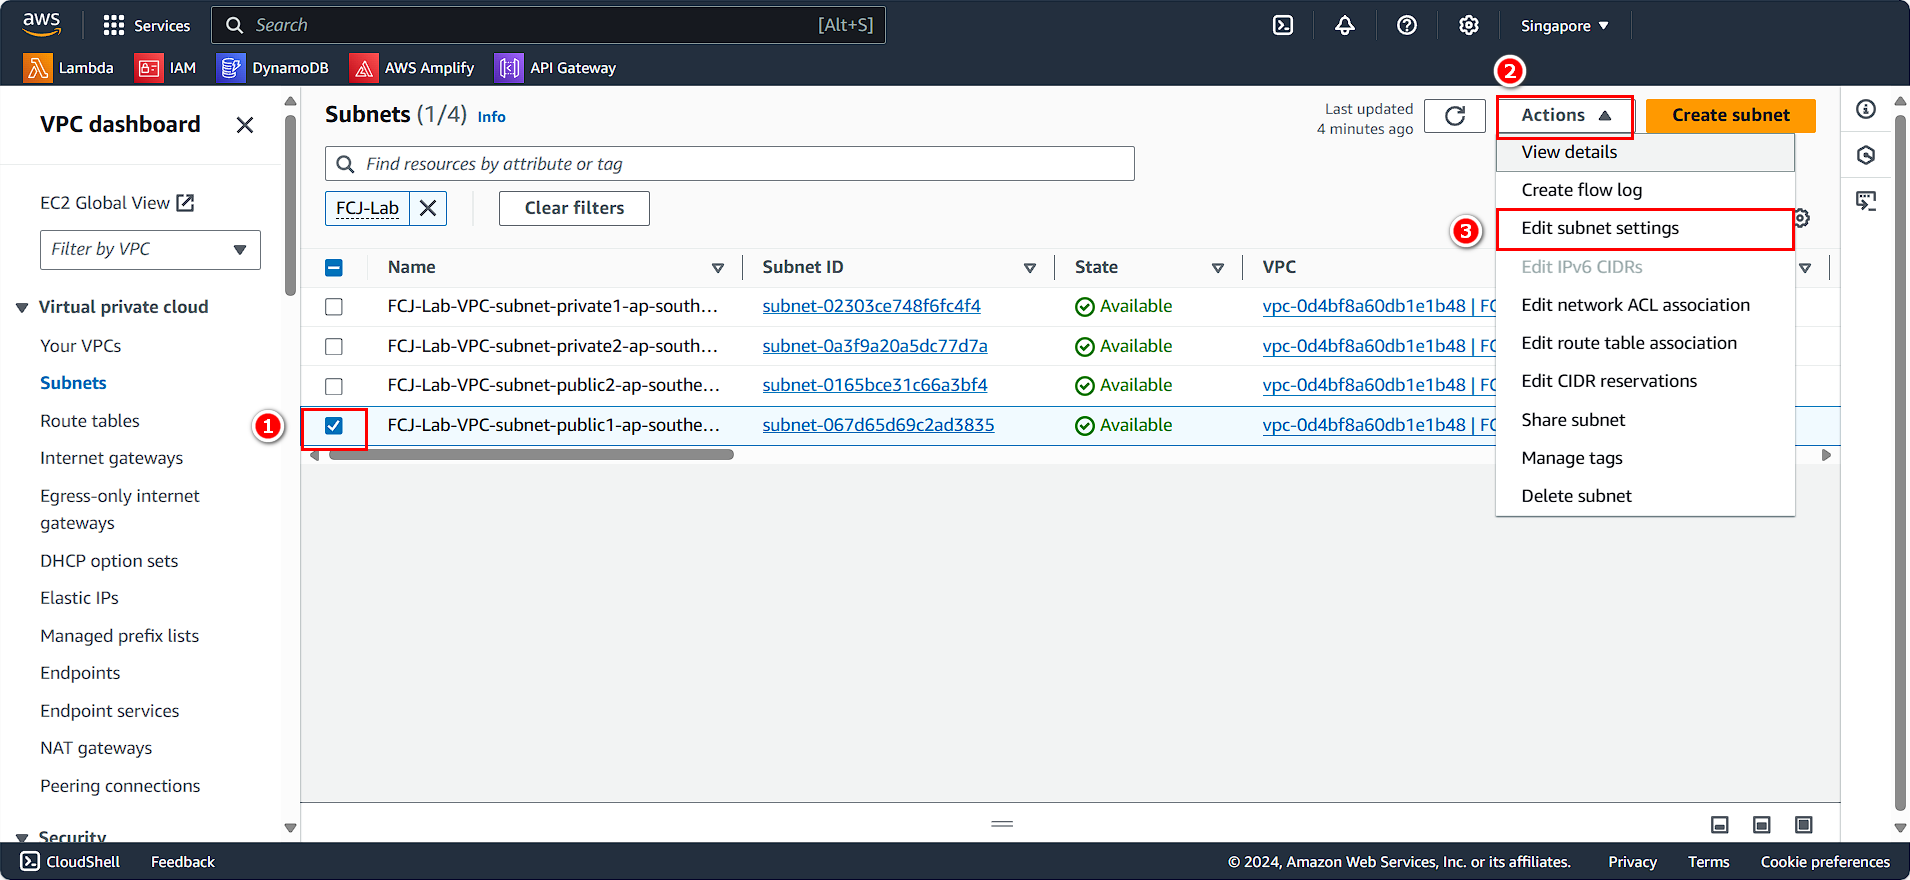
First, we will configure FCJ-Lab-subnet-public-1a:
- Select FCJ-Lab-subnet-public-1a
- Click on Action
- Choose Edit subnet settings
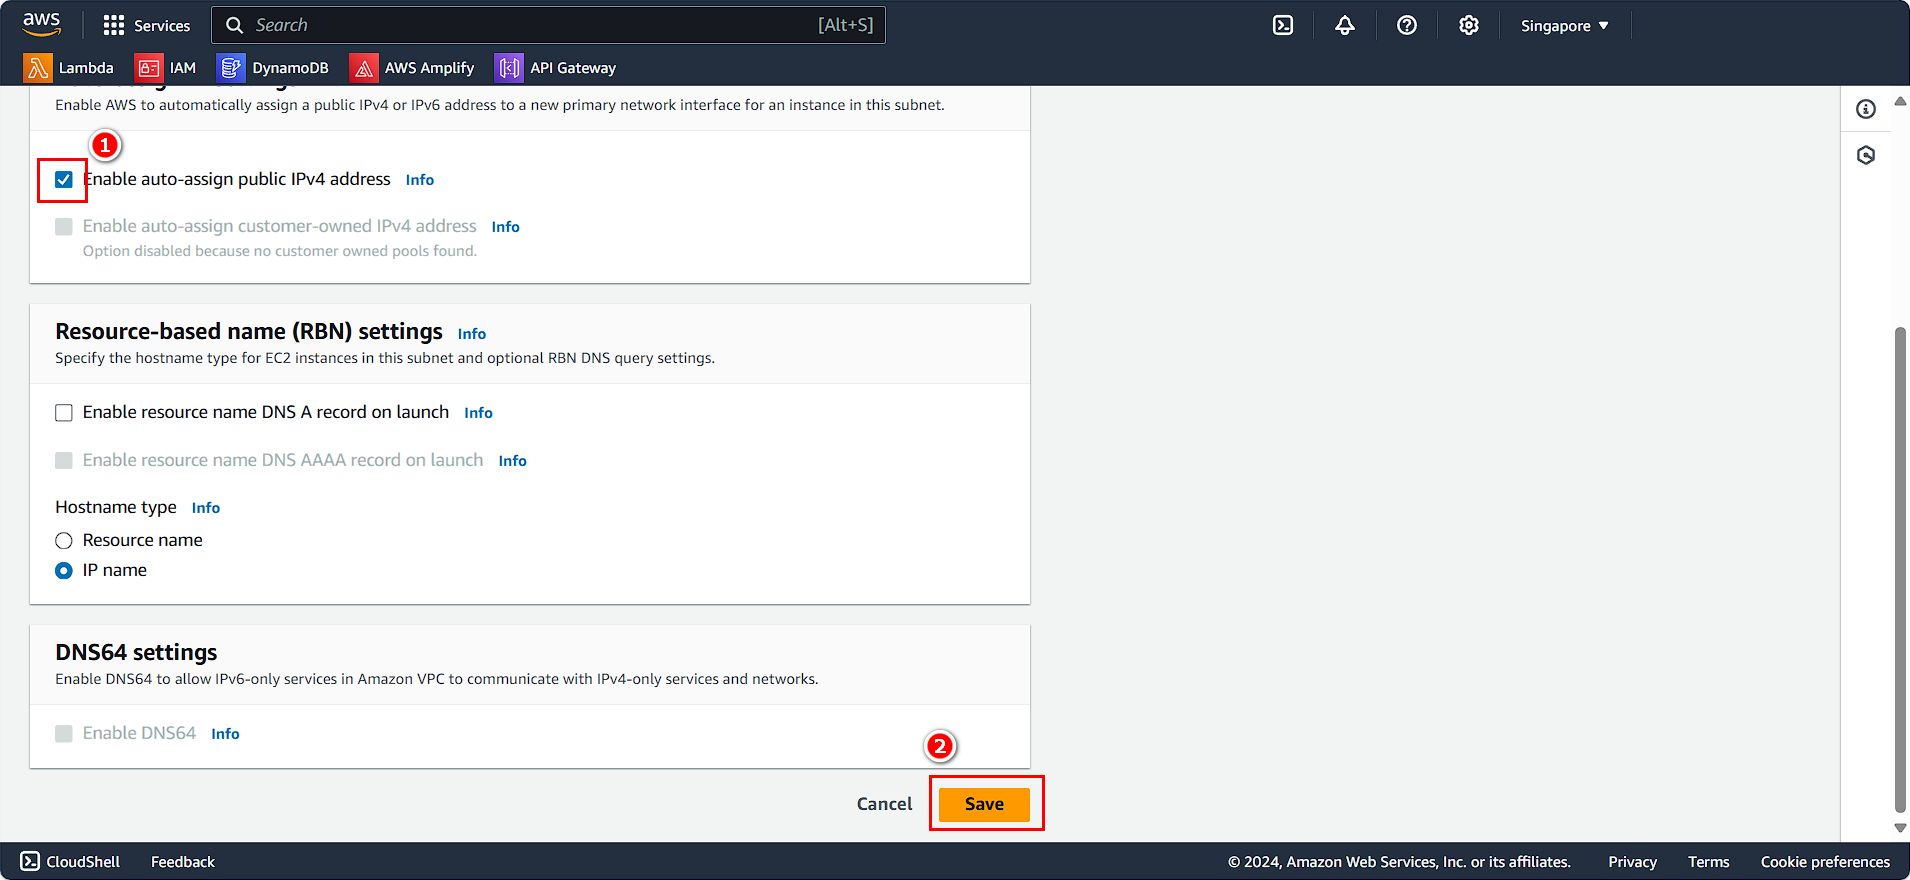
The public subnet configuration panel appears:
- Check Enable auto-assign public IPv4 address
- Click Save
Similarly, we will configure FCJ-Lab-subnet-public-1b:
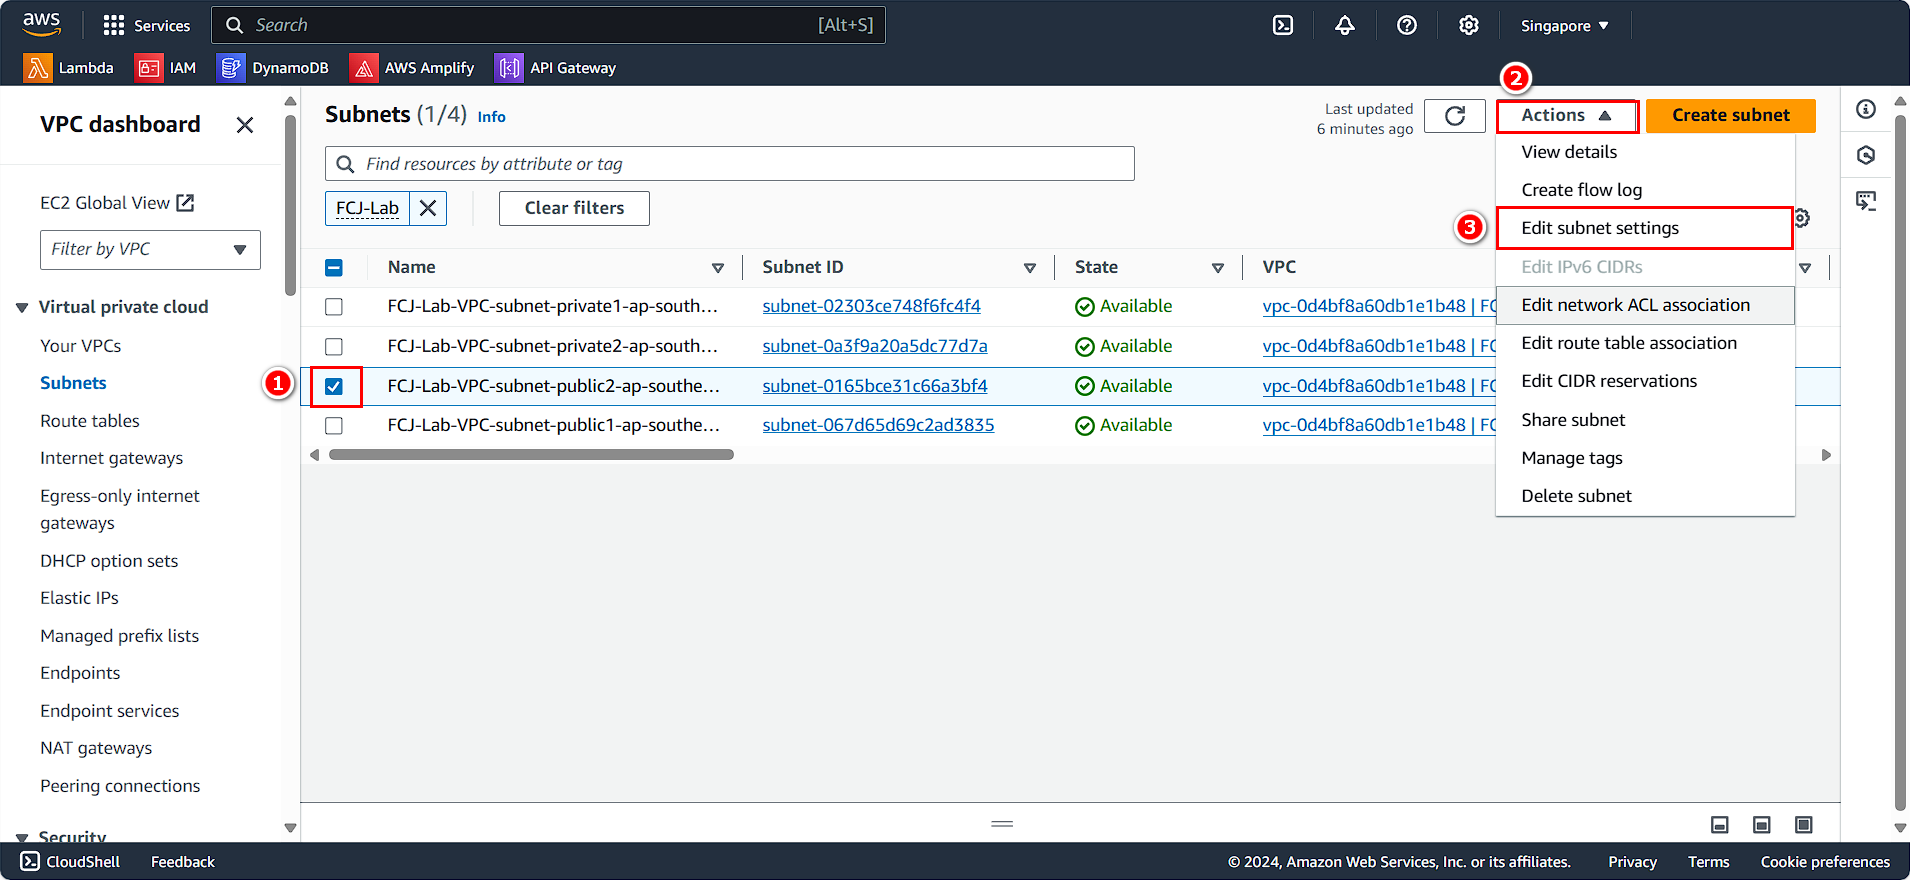
- Select FCJ-Lab-subnet-public-1b
- Click on Action
- Choose Edit subnet settings
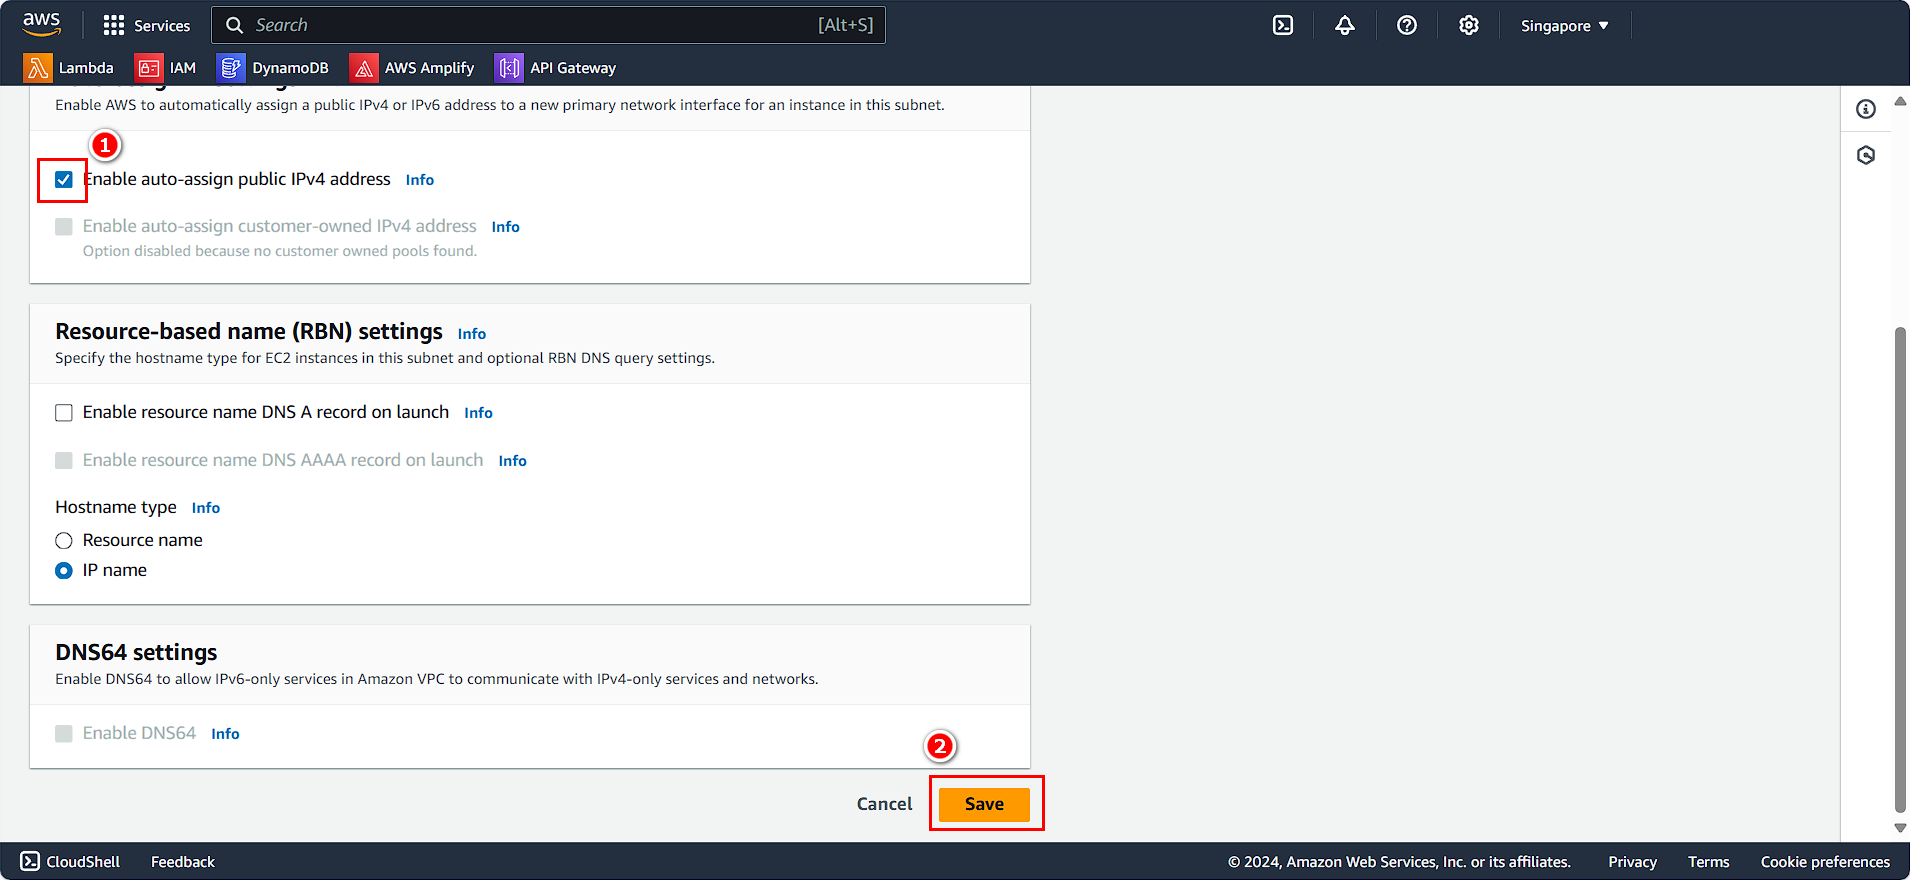
- Check Enable auto-assign public IPv4 address
- Click Save
Thus, we have configured the VPC and enabled public IPv4 for the public subnets.