Create Load Balancer
Create Load Balancer
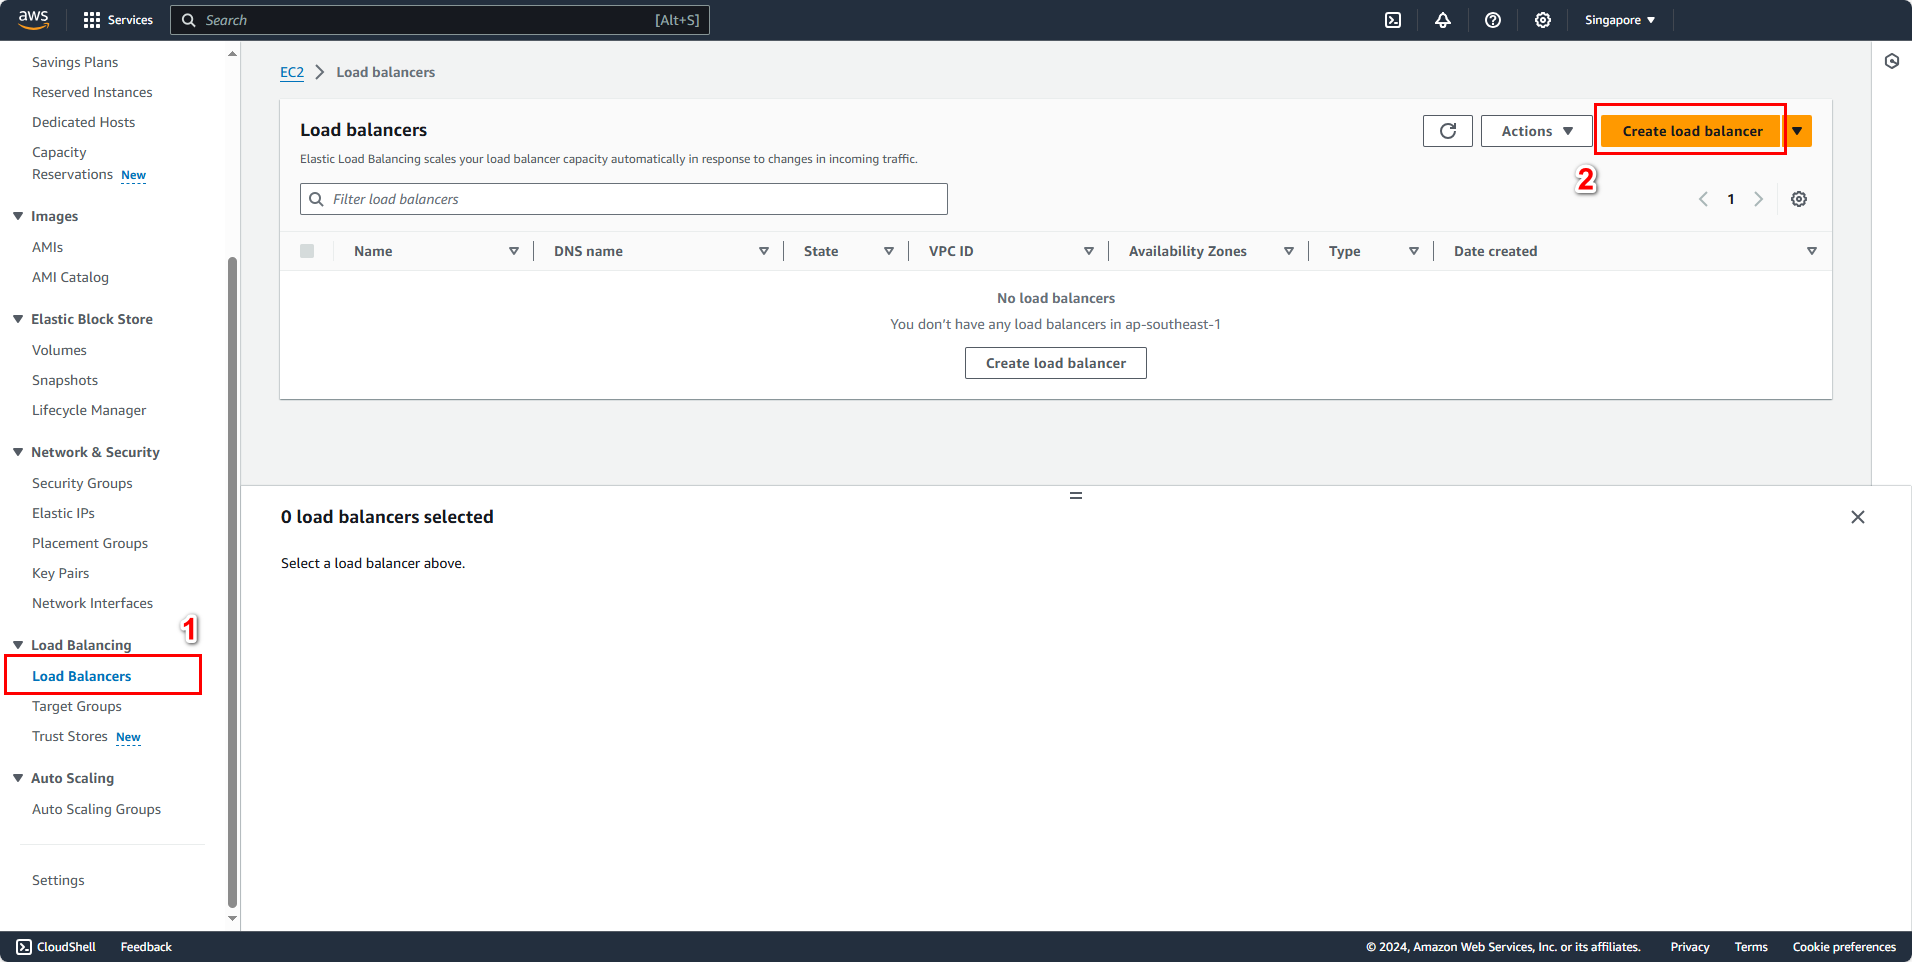
In the EC2 management interface, in the left selection panel:
- Select Load Balancers
- Click the Create Load Balancer button
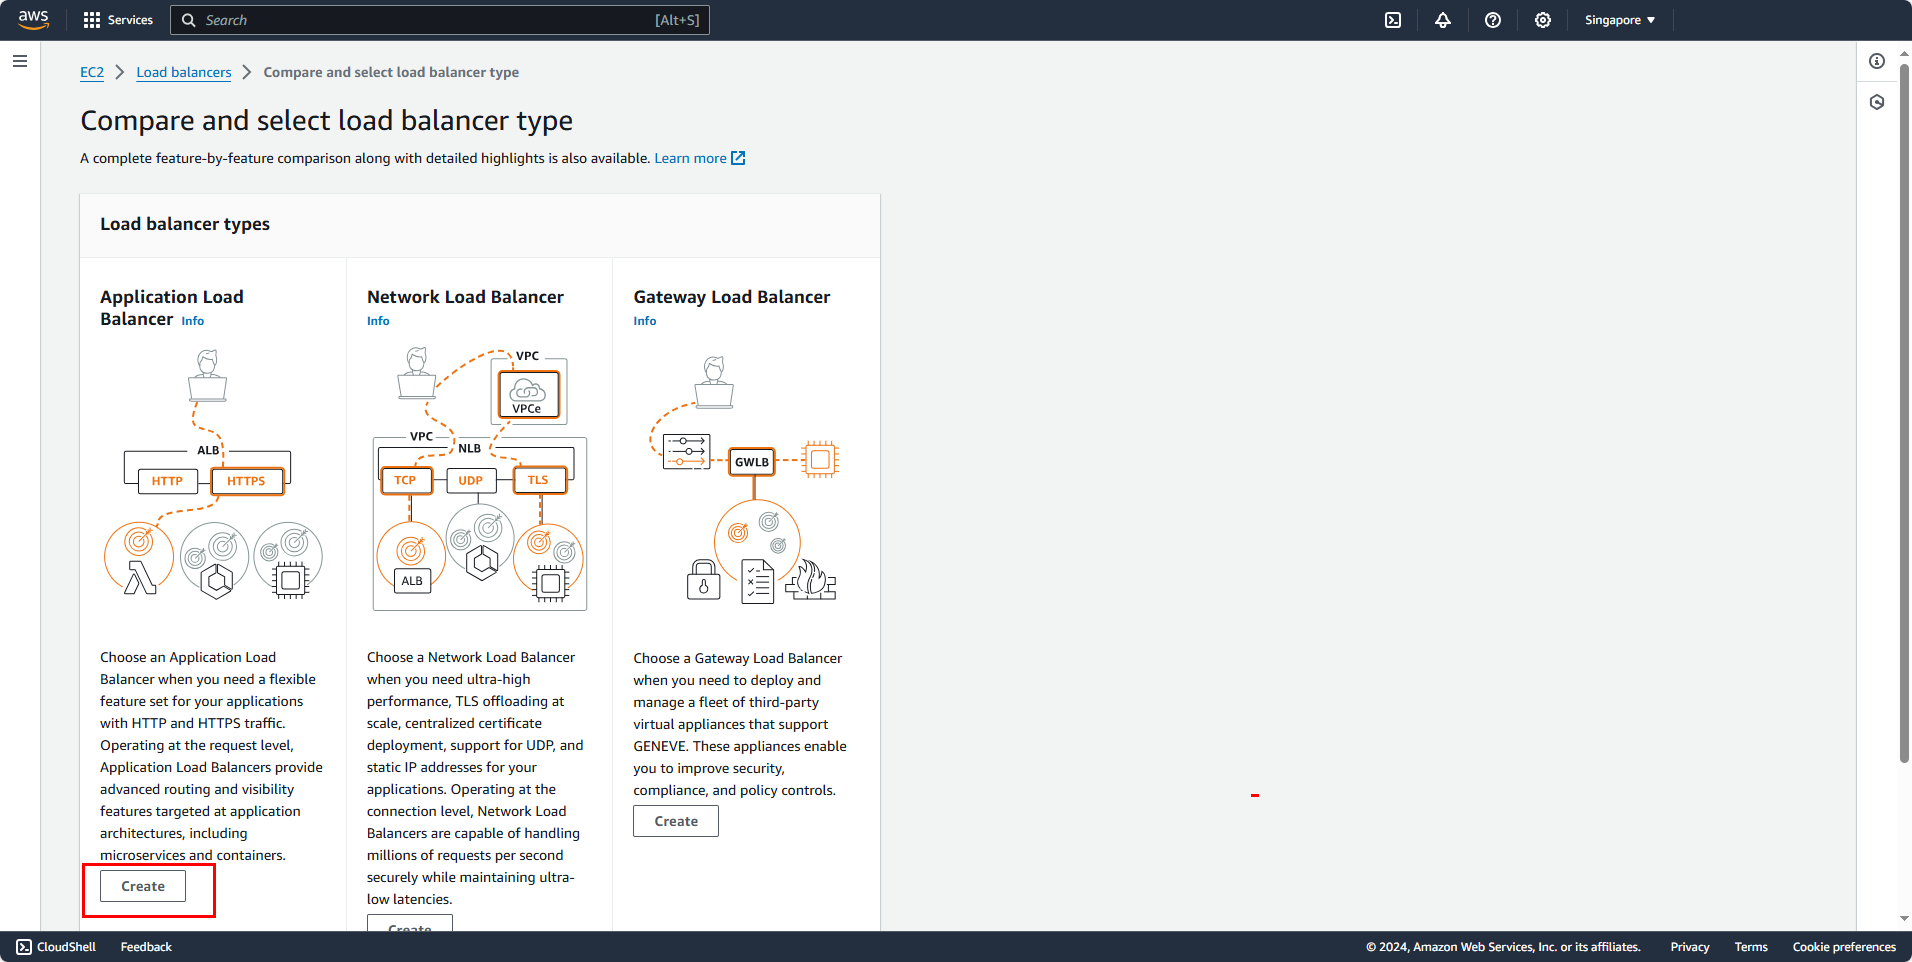
A “Compare and select load balancer type” panel appears.
- In the Load balancer types section:
- Under Application Load Balancer
- Click Create
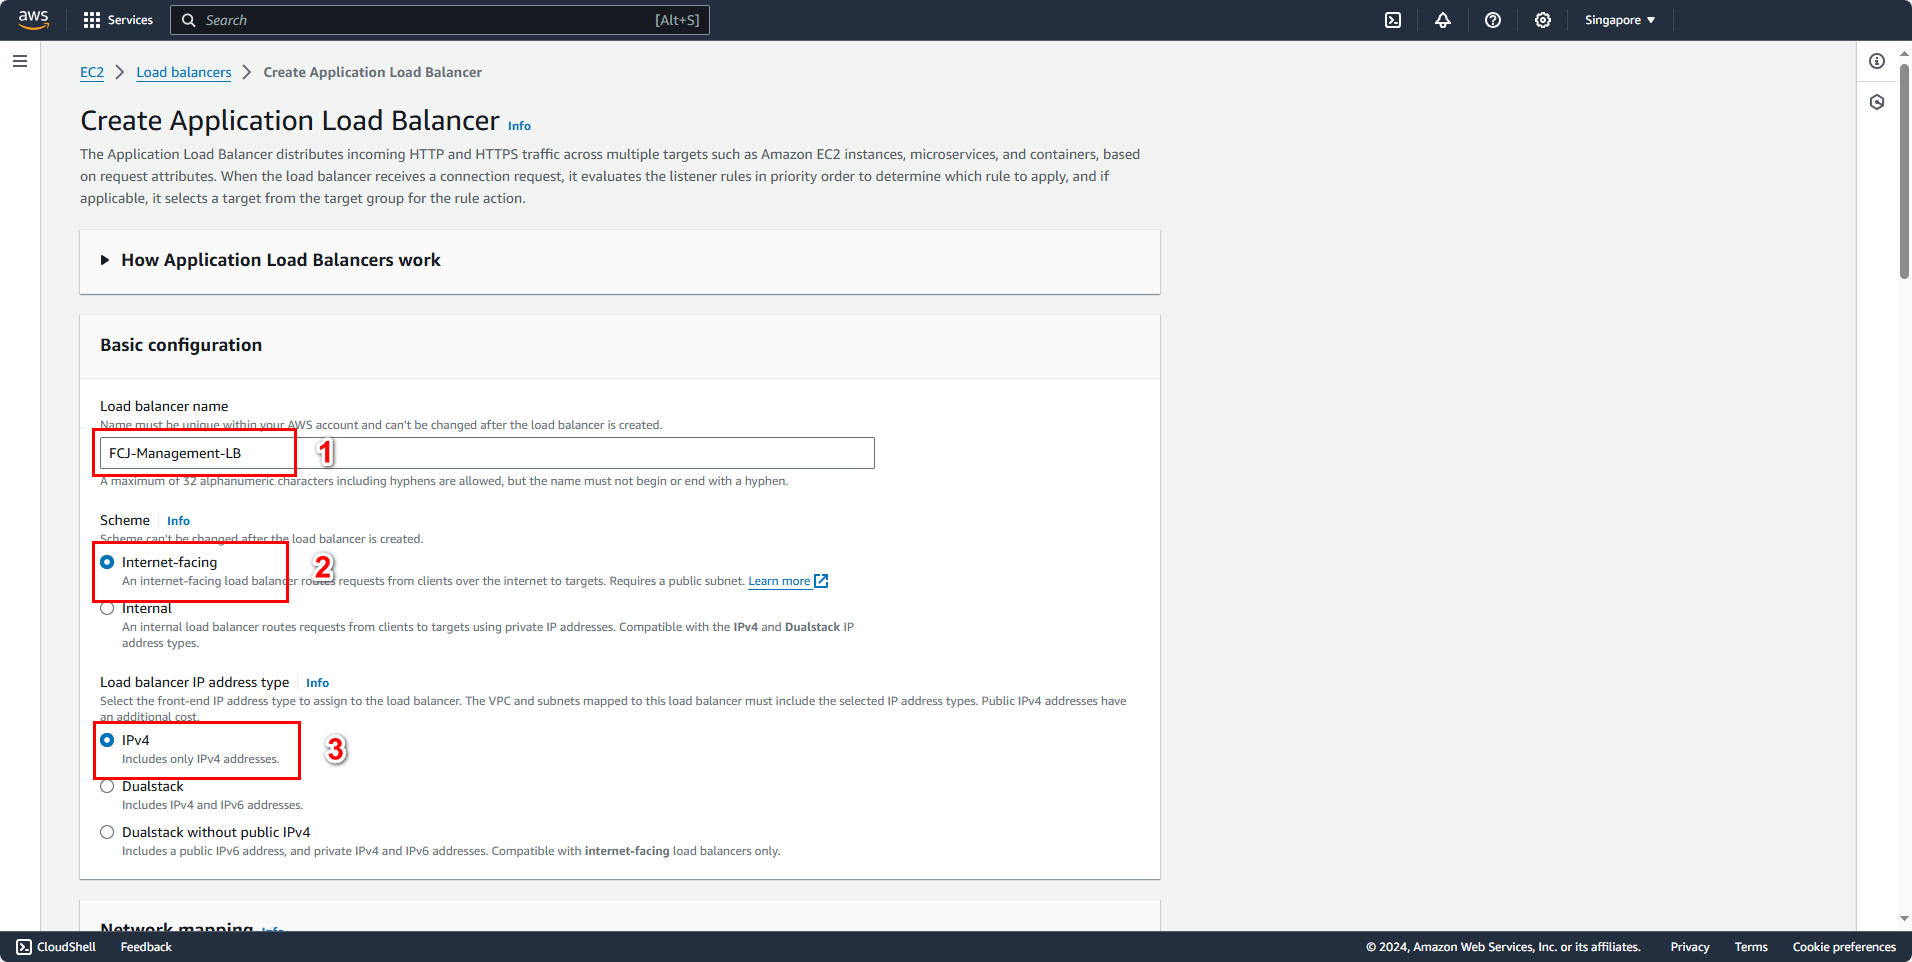
You will see the “Create Application Load Balancer” panel.
- In the Basic configuration section:
- Load balancer name:
FCJ-Management-LB - Scheme: Internet-facing
- Load balancer IP address type: IPv4
- Load balancer name:
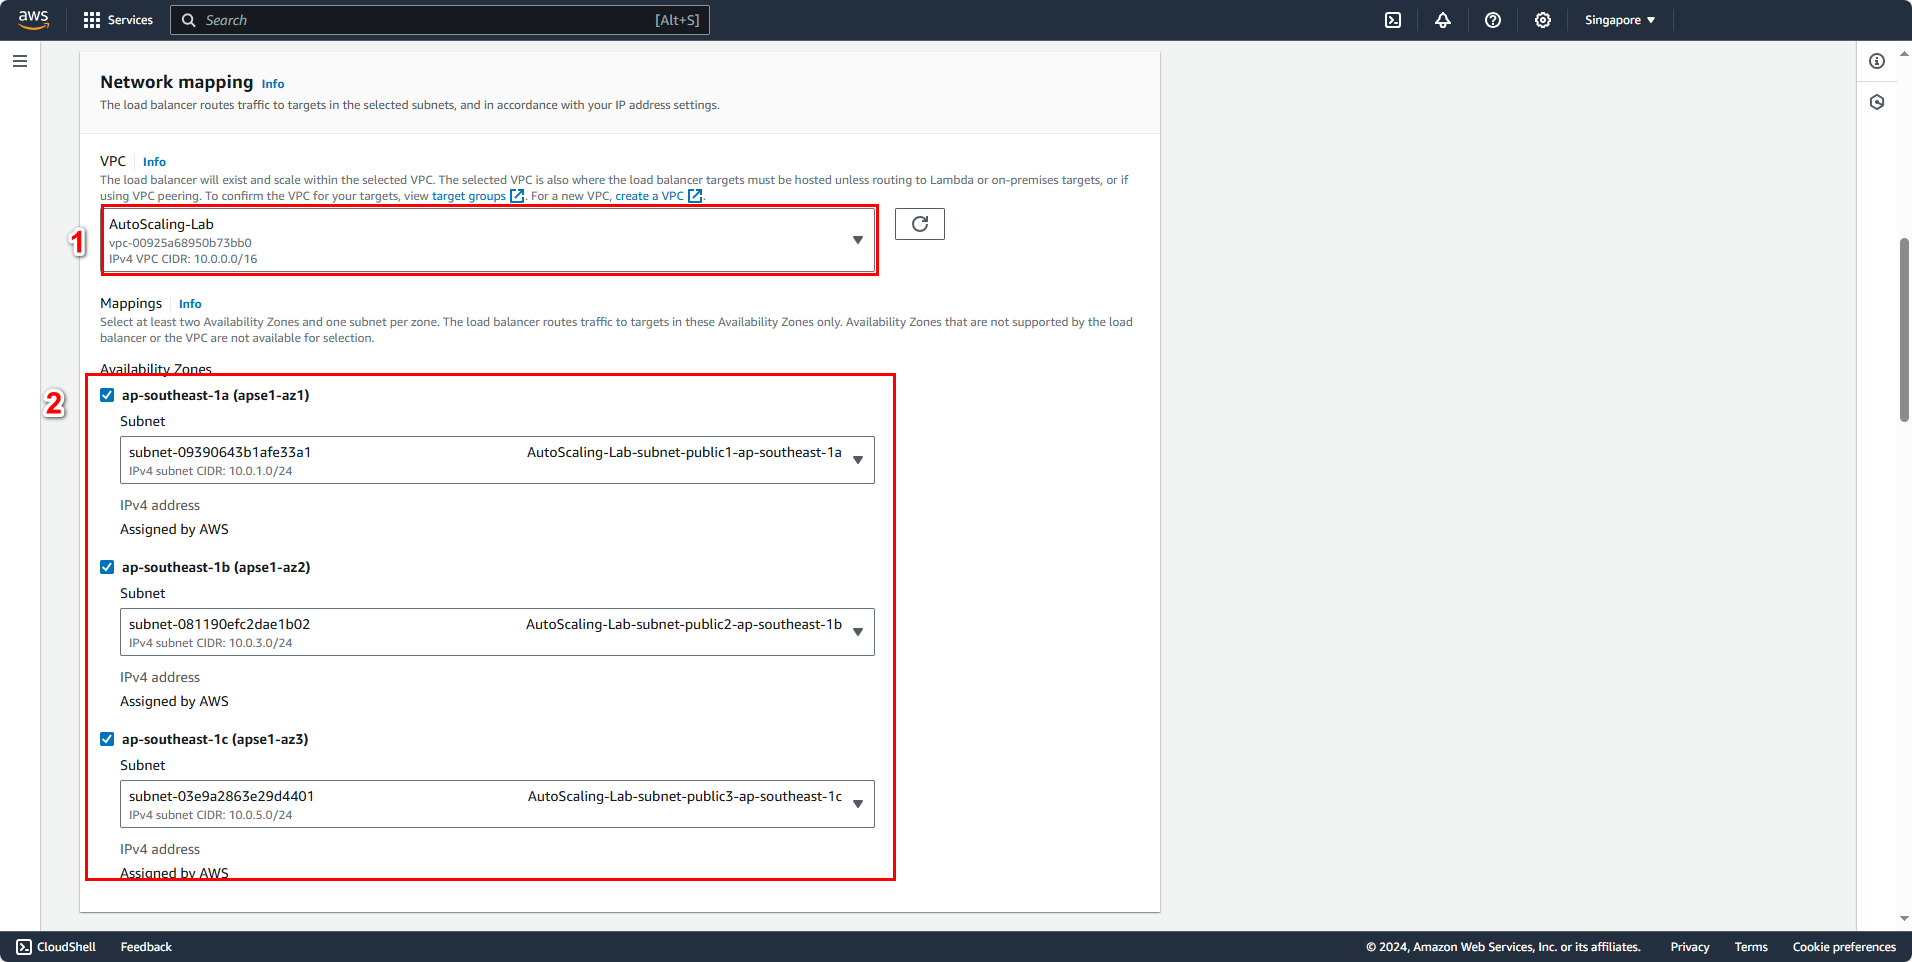
- In the Network mapping section:
- Select VPC: AutoScaling-Lab
- Choose Public Subnets: ap-southeast-1a, ap-southeast-1b, ap-southeast-1c. Note: choose public subnet
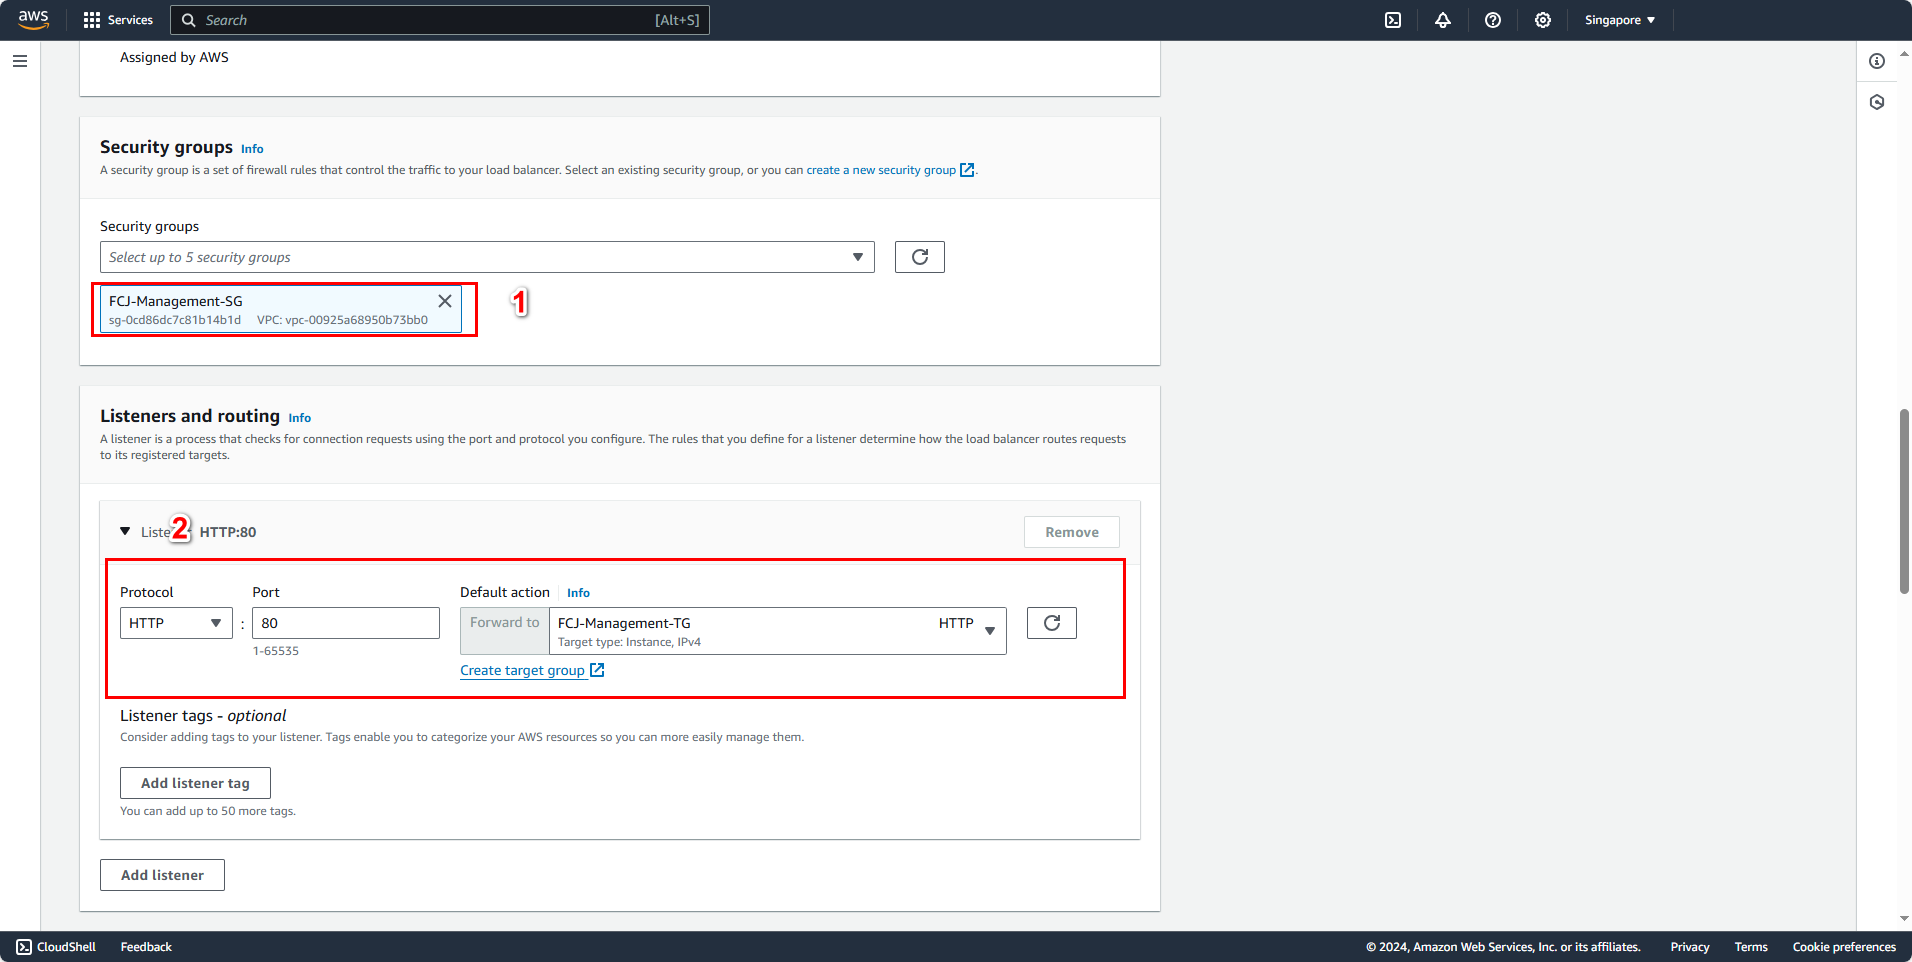
- In the Security groups section:
- Security groups: FCJ-Management-SG
- In the Listeners and routing section:
- Default action: FCJ-Management-TG
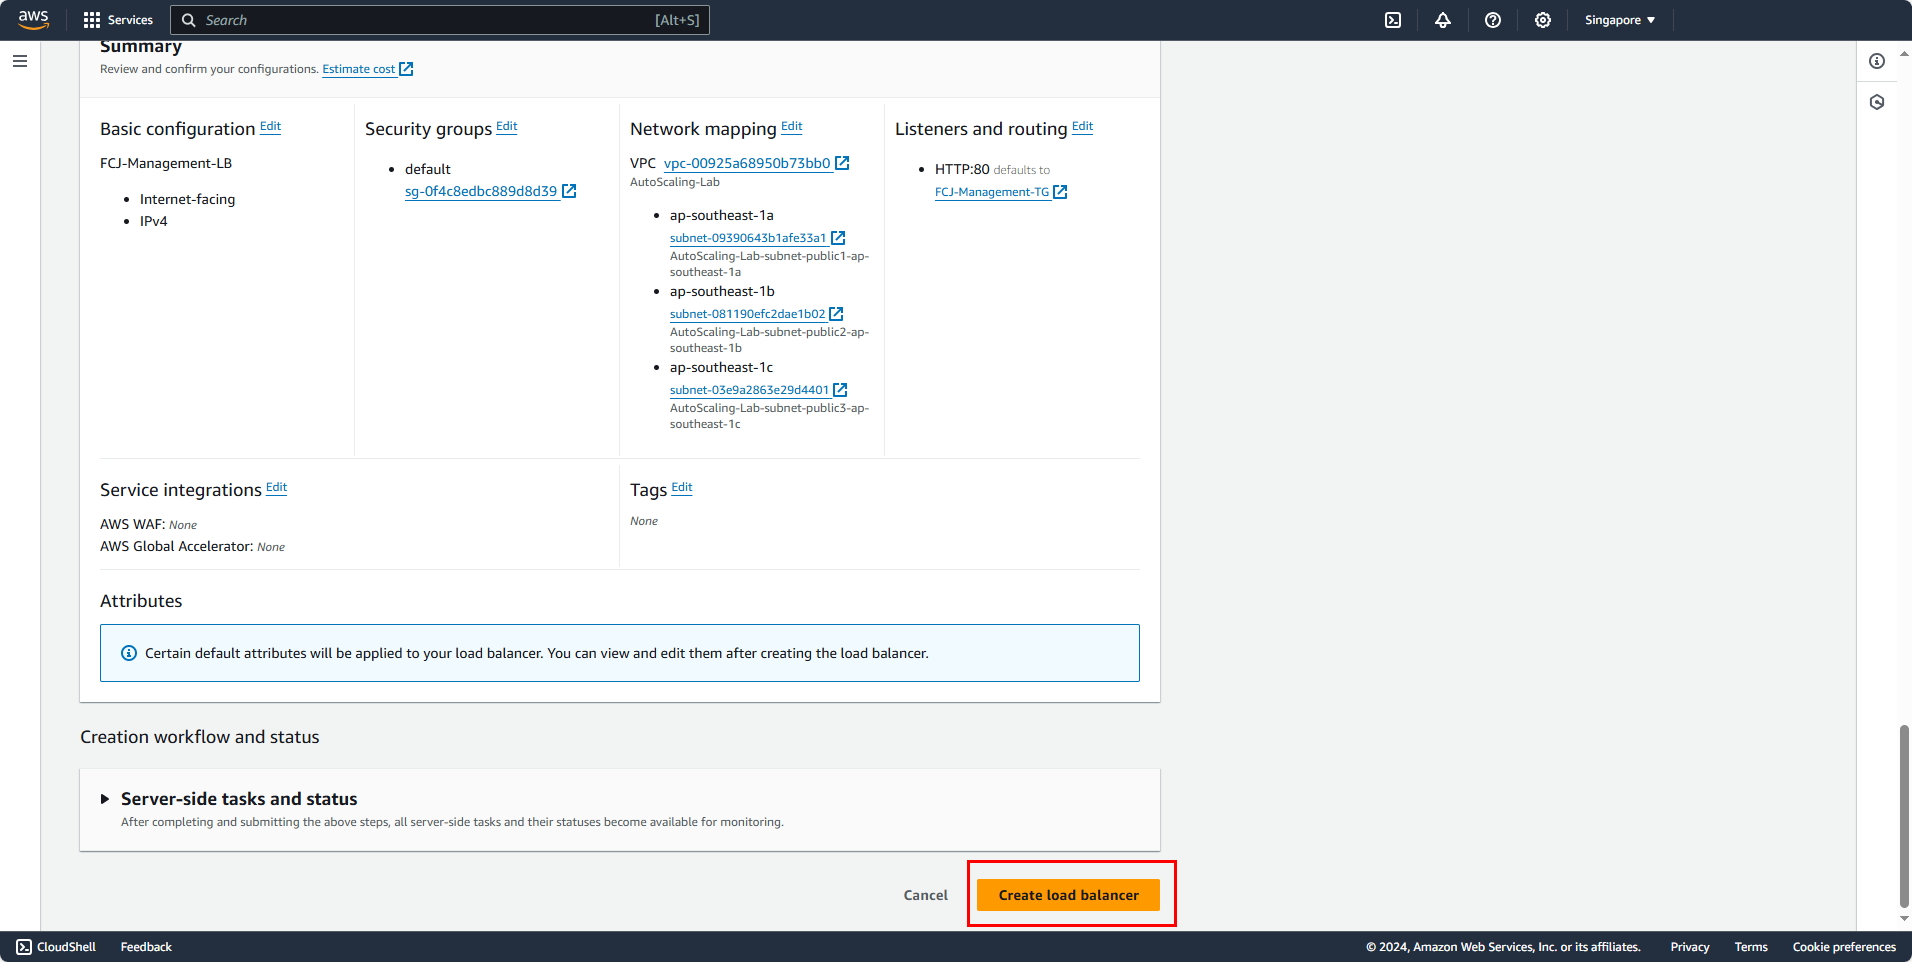
- In the Summary section, you can review the information configured for the Load Balancer:
- Click the Create Balancer button
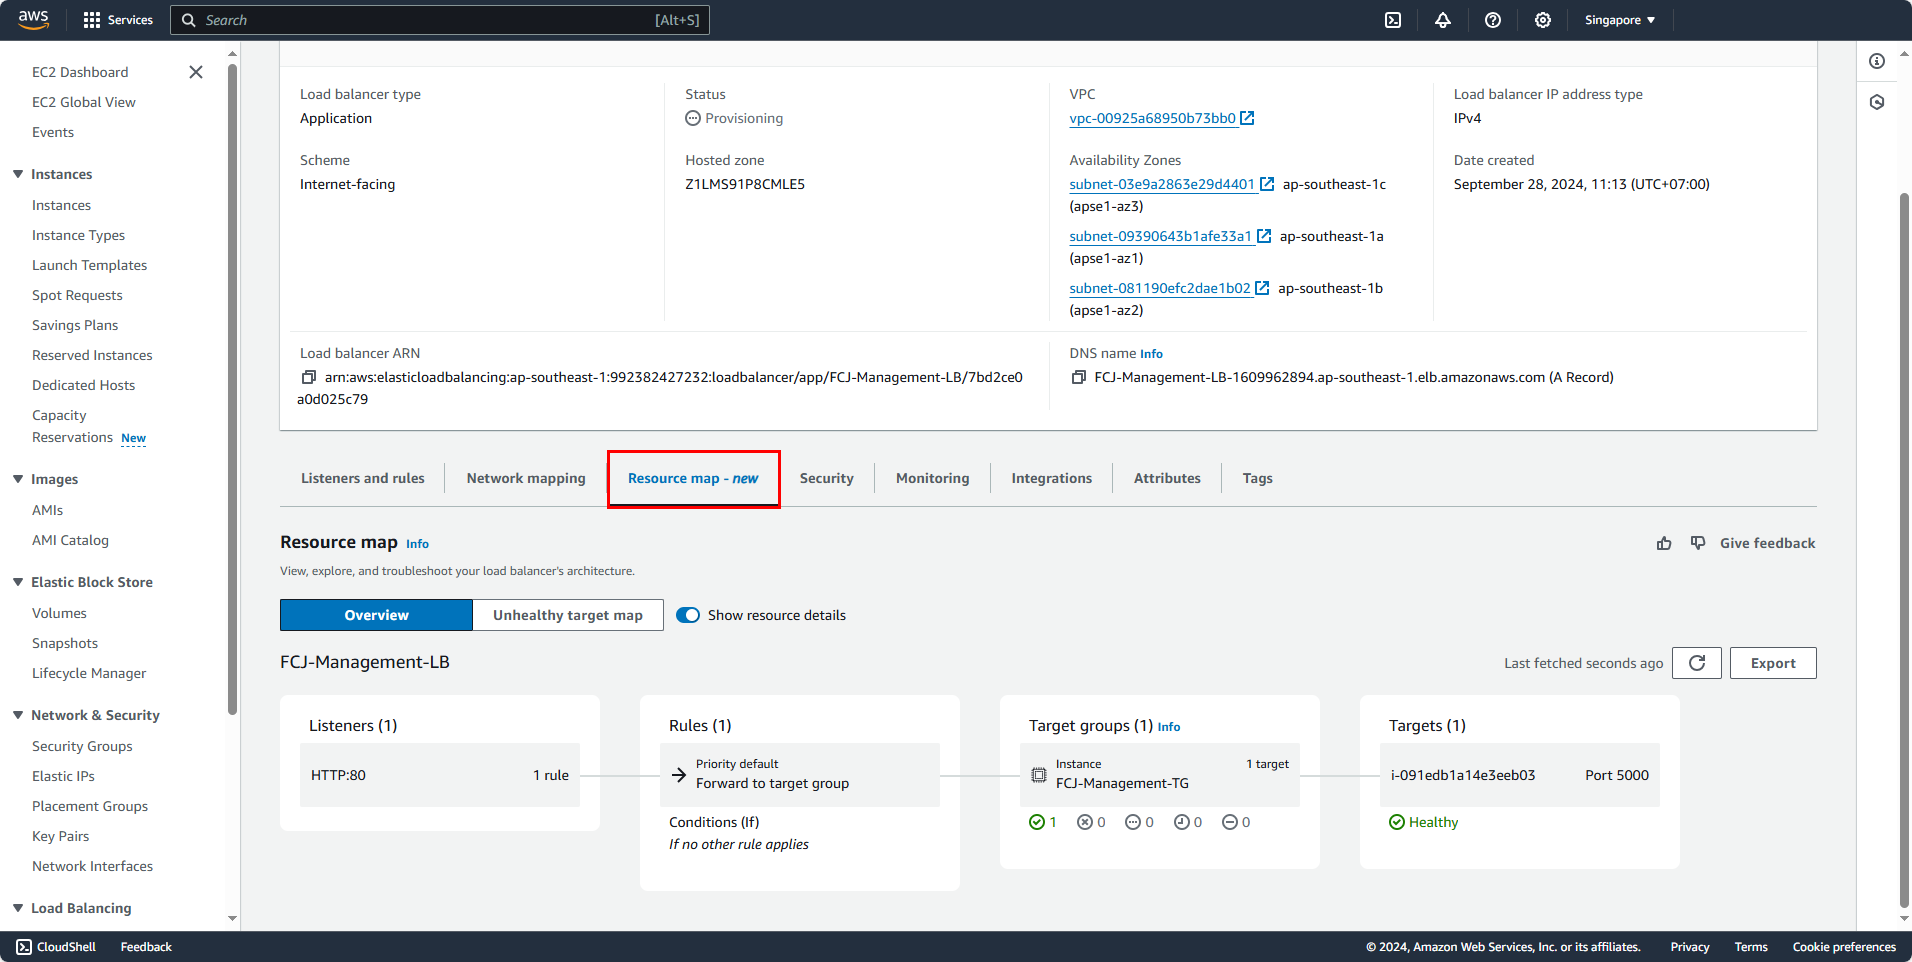
Result
After creating the Load Balancer, select FCJ-Management-LB to view its information.
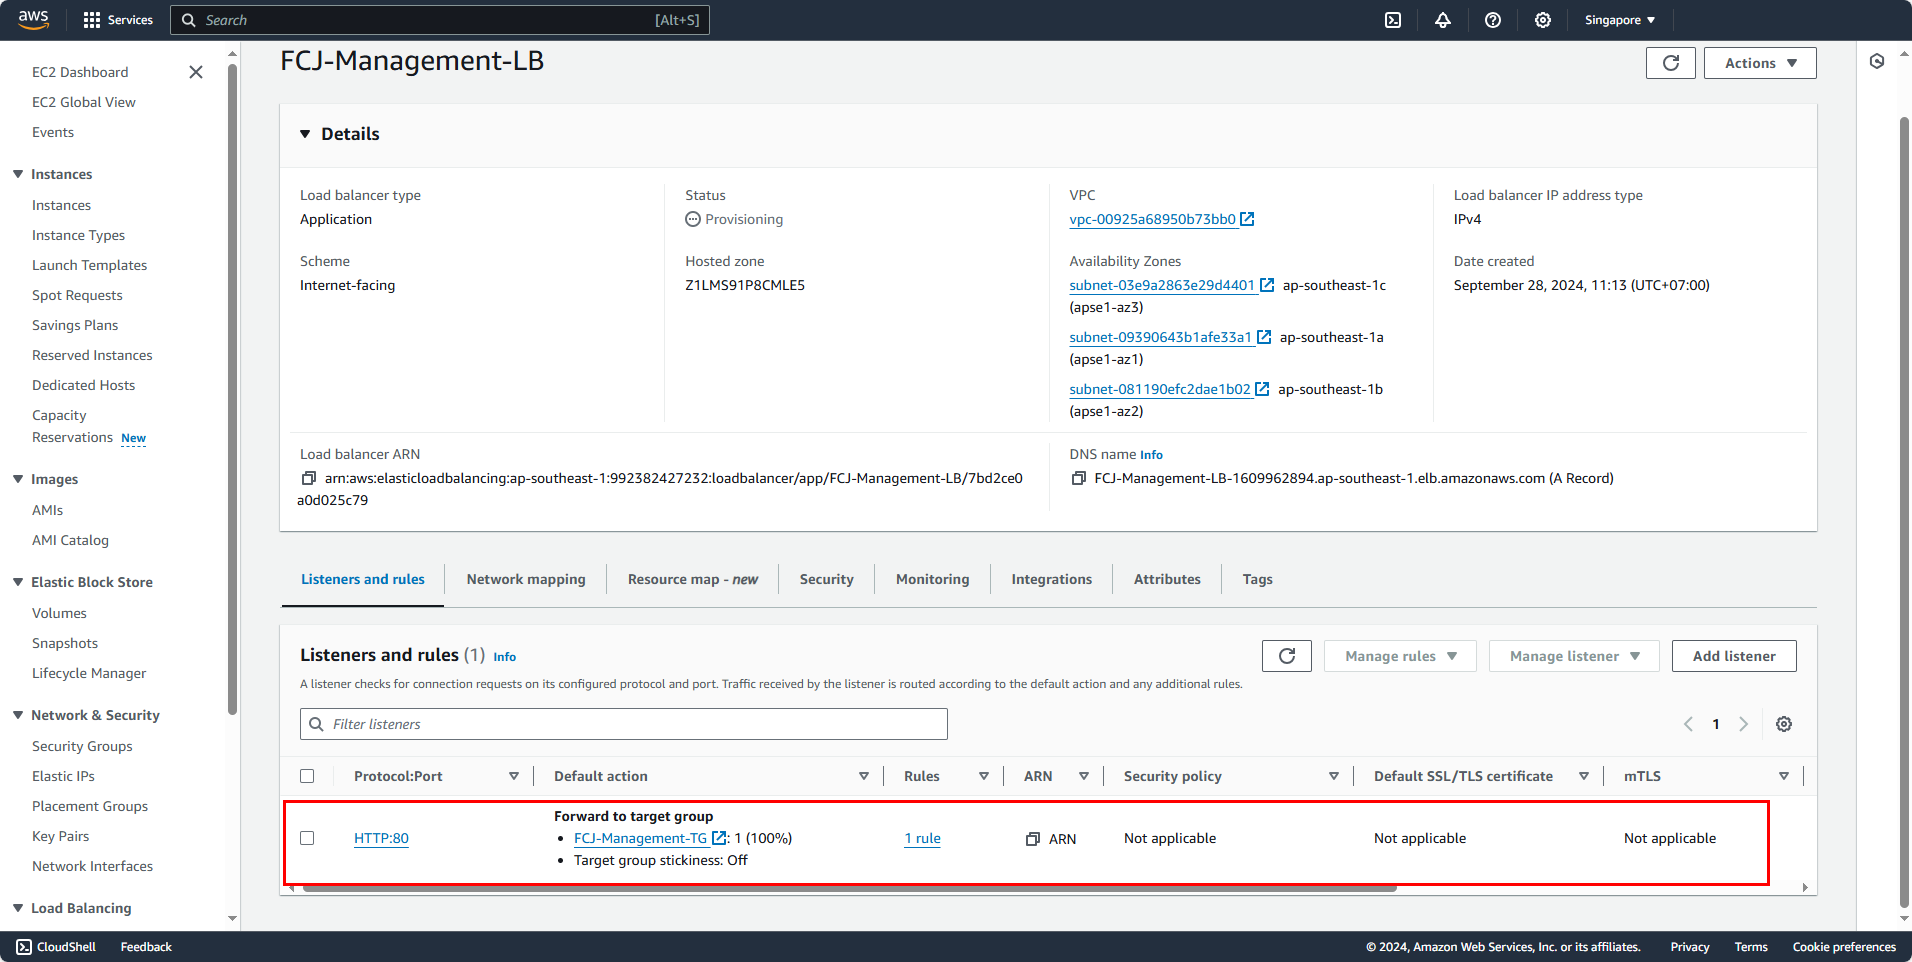
- In the management section for the created Load Balancer:
- Select Resource map - new to view an overview of the Load Balancer’s connections
