Create Target Group
Create Target Group
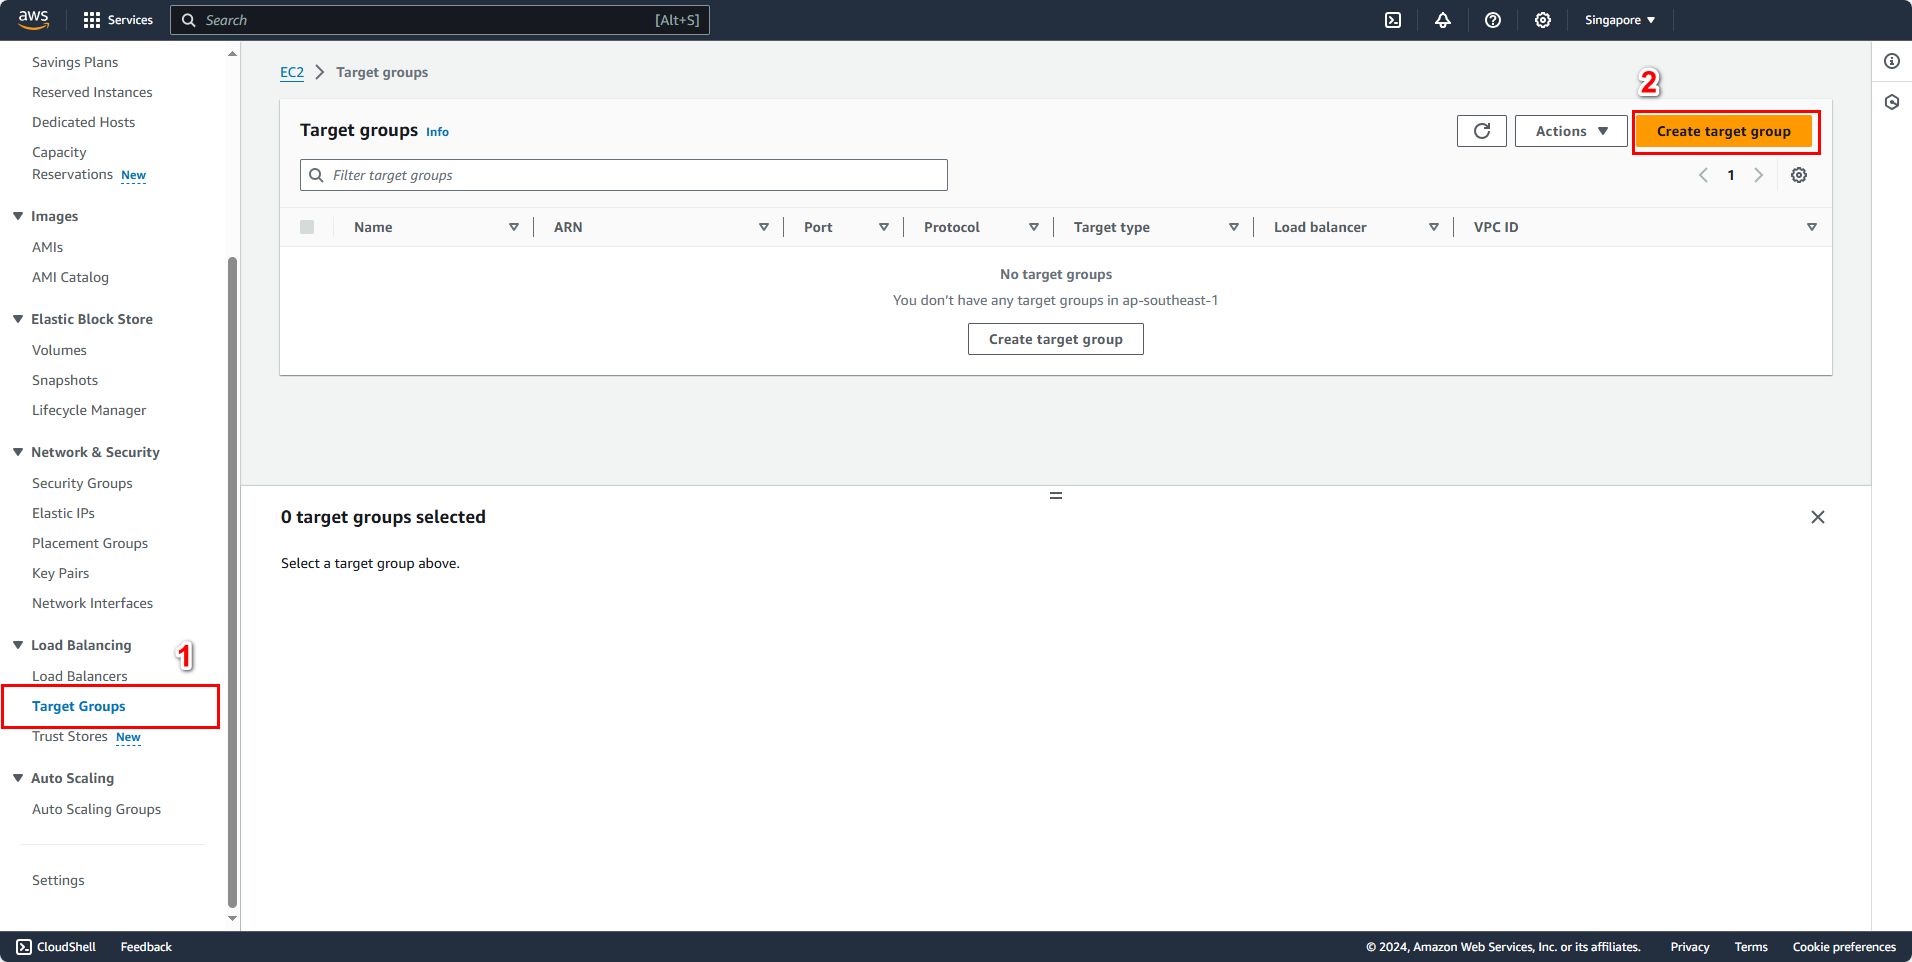
In the EC2 management interface, on the left side panel, scroll down to the Load Balancing section.
- Select Target Group
- Click on Create target group
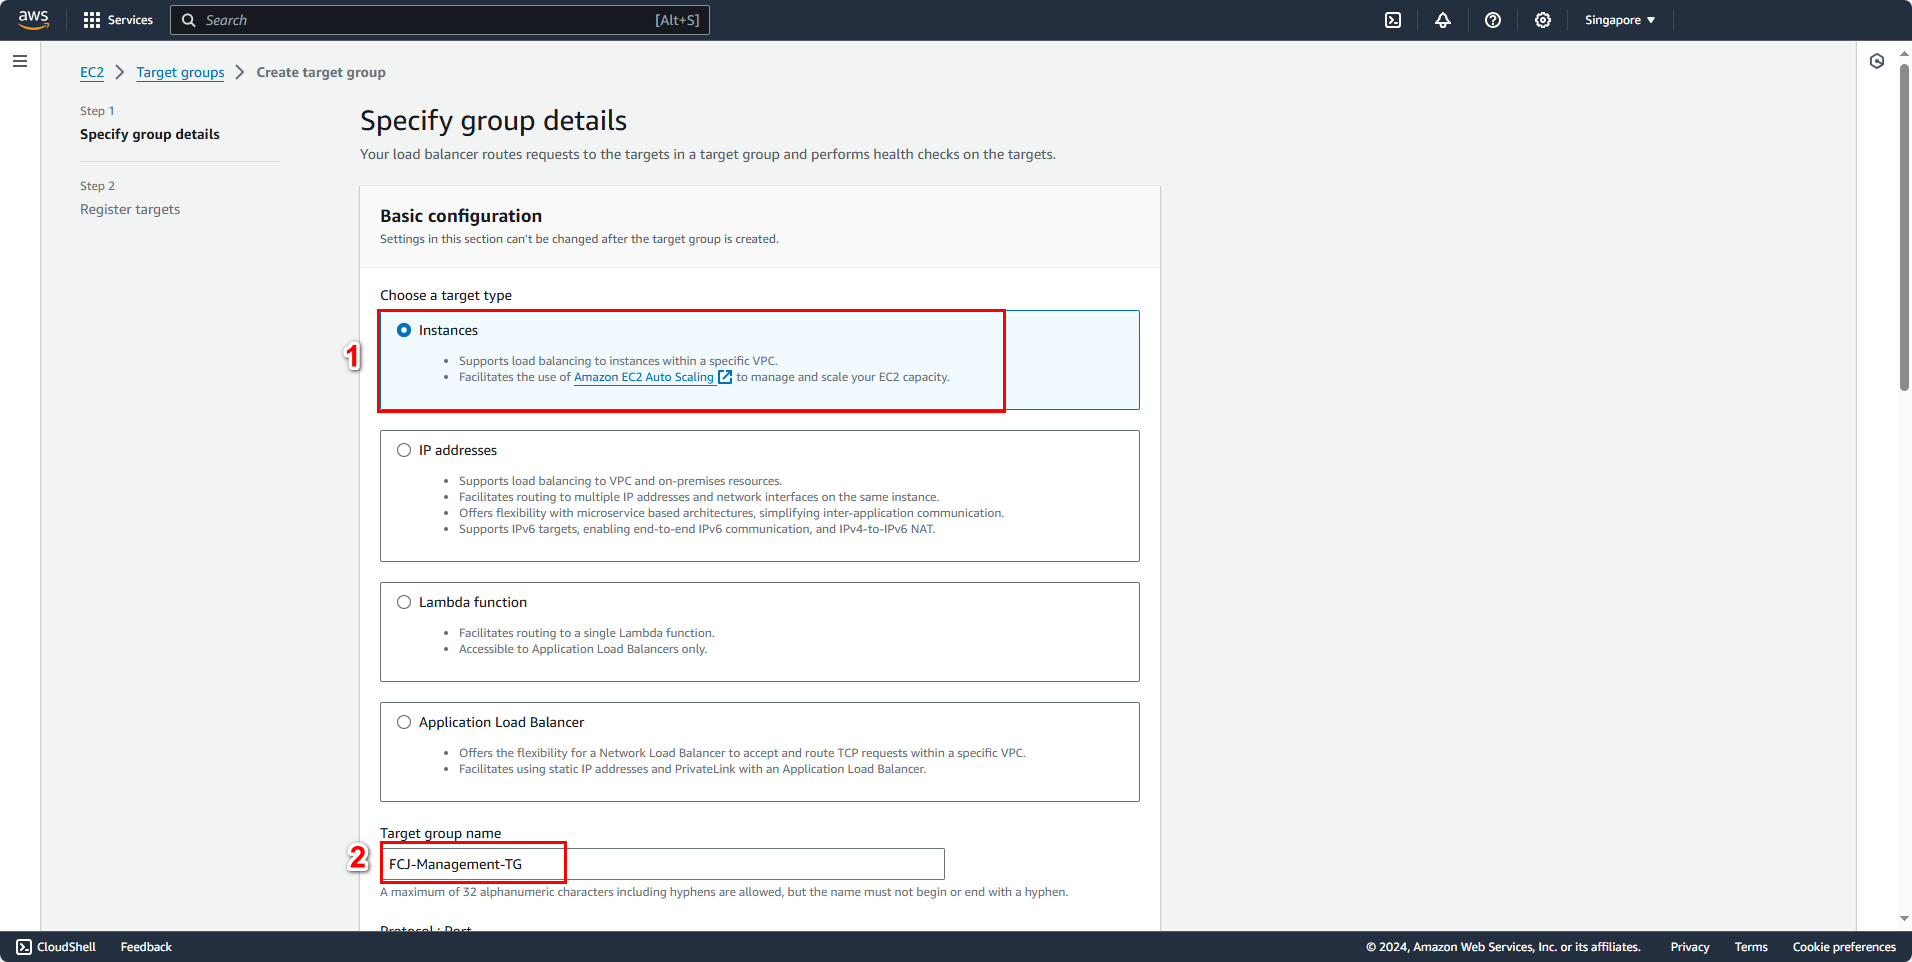
The Specify group details dialog will appear. Configure it as follows:
- In the Basic configuration section:
- Choose a target type: Instances
- Target group name:
FCJ-Management-TG
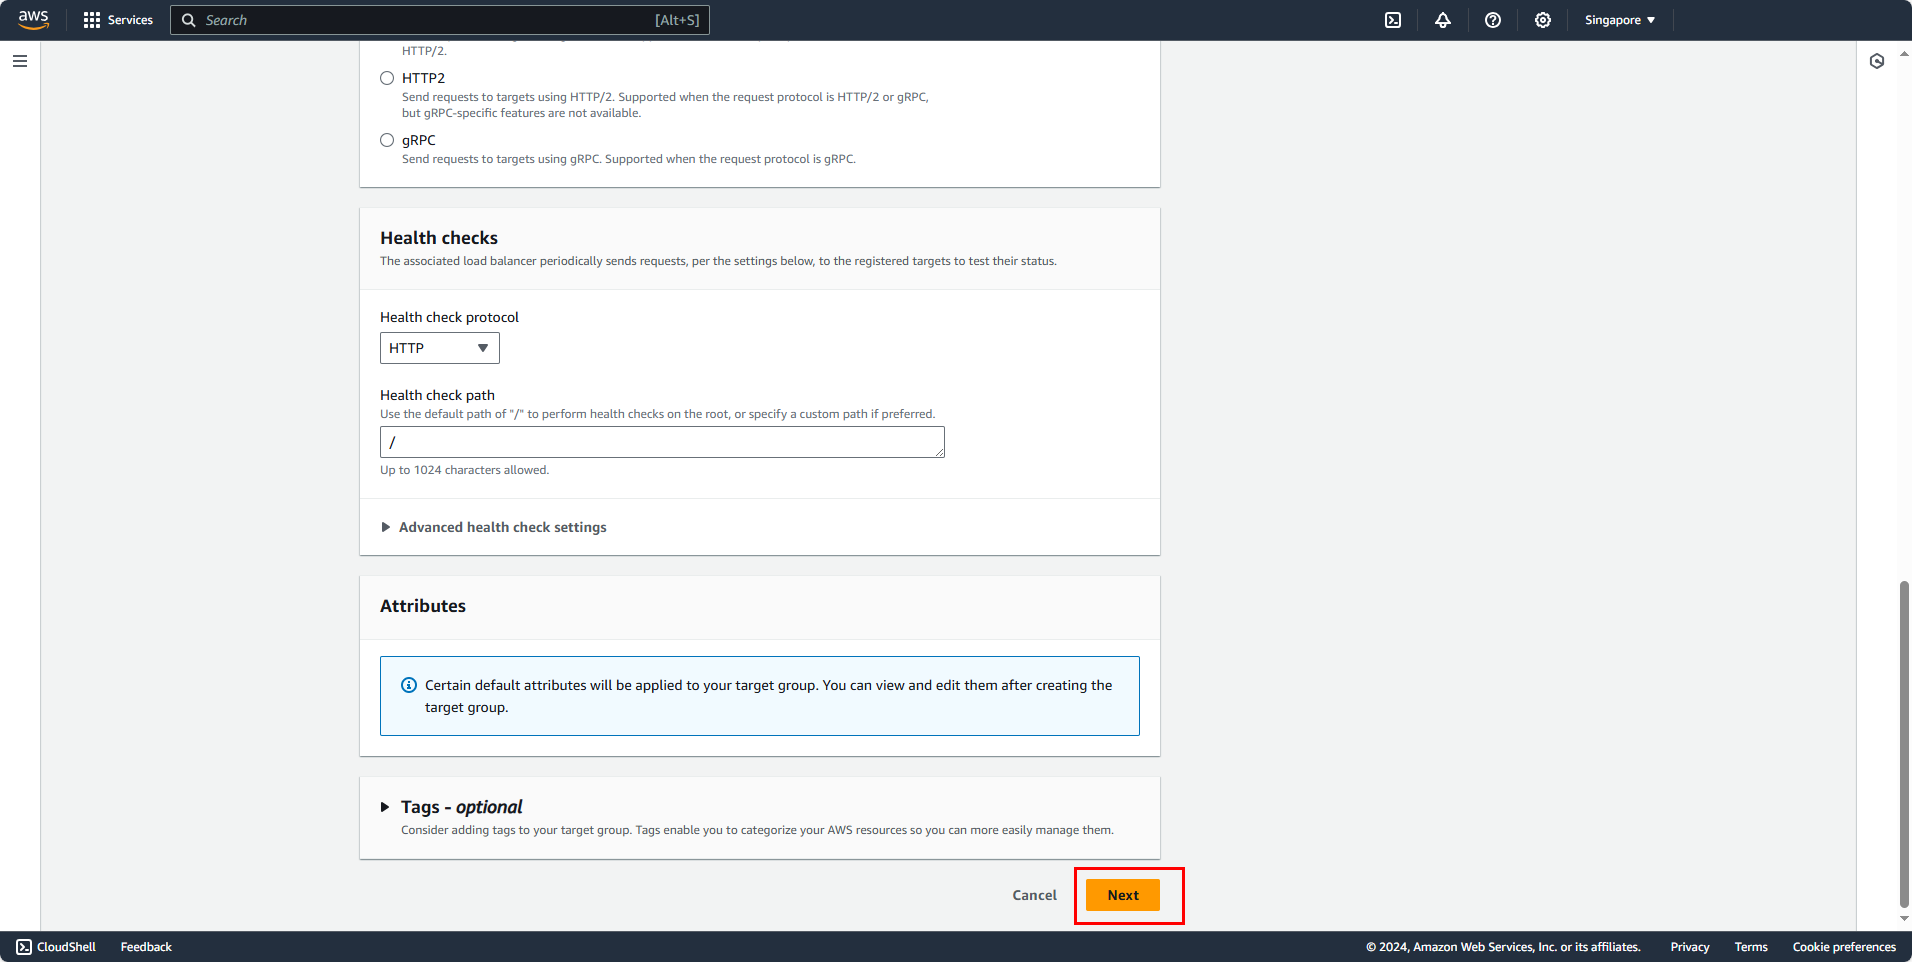
- Continue in the Basic configuration section:
- Protocol: port HTTP, 5000
- IP address: IPv4
- VPC: AutoScaling-Lab
- Protocol version: HTTP1
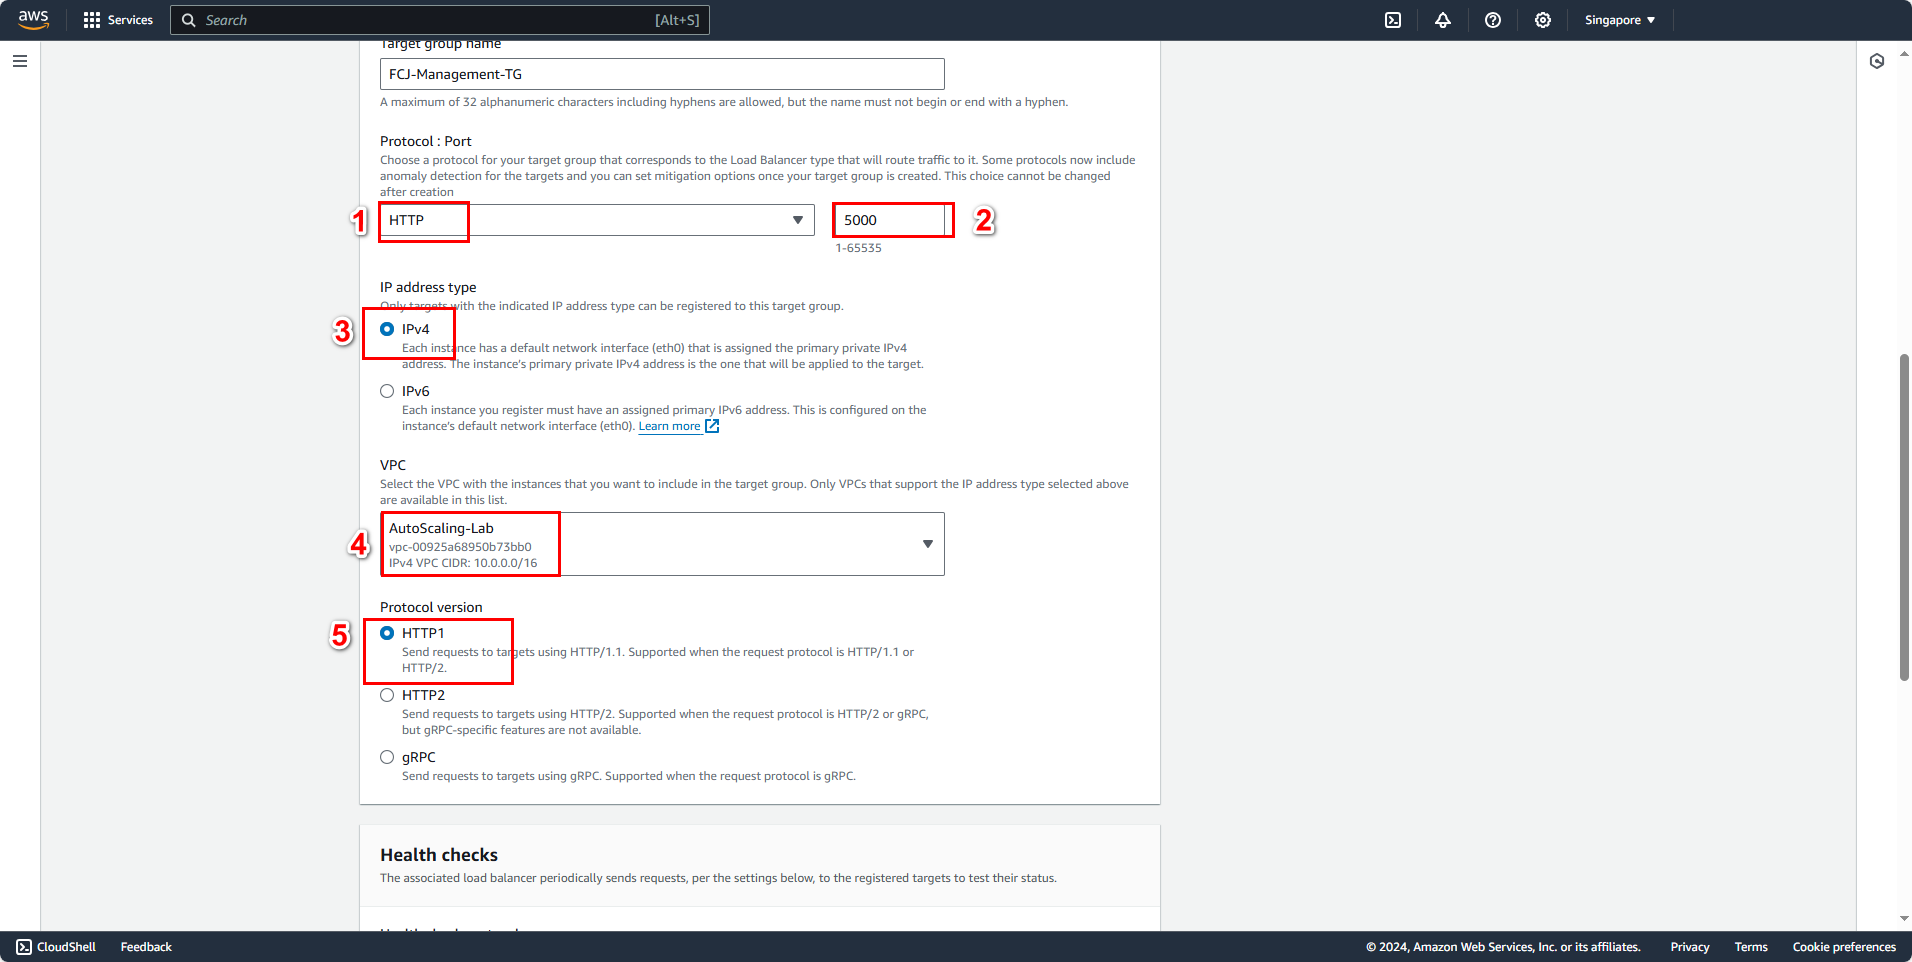
- Click Next
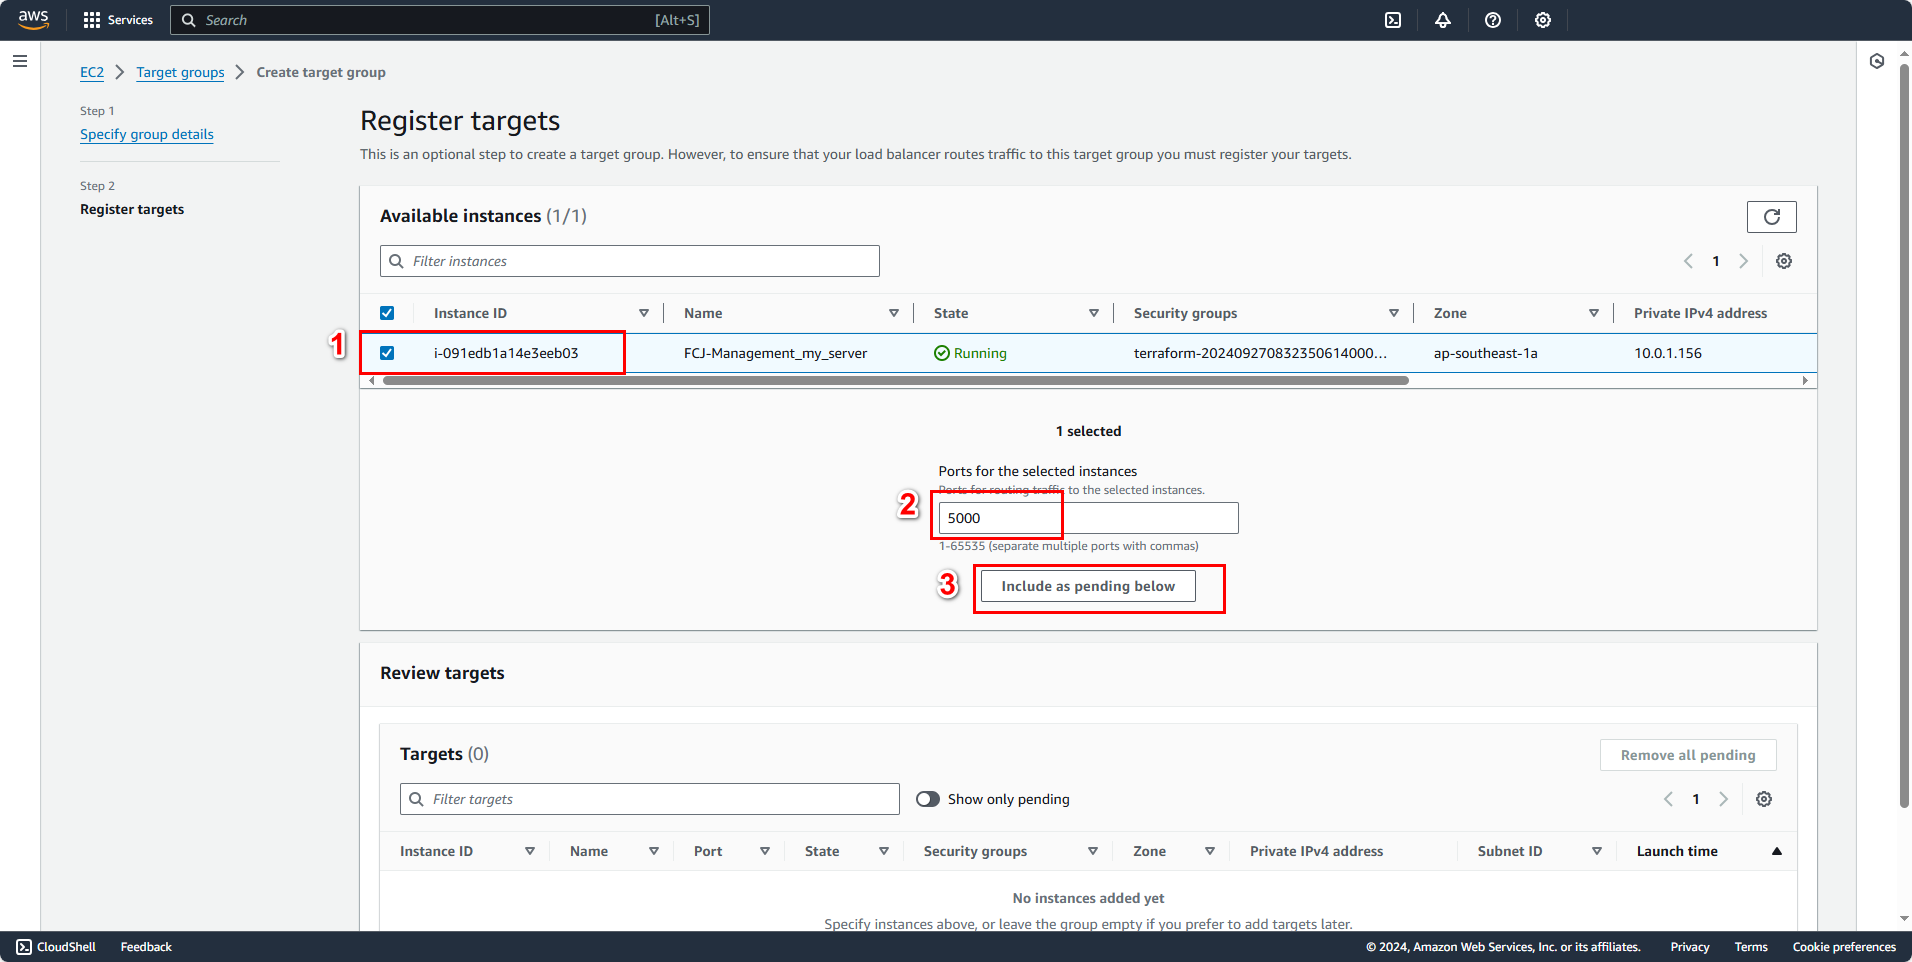
Next, we proceed to Register target.
- In the Available instance section:
- Select target group FCJ-Management-TG
- Ports for the selected instances: 5000
- Choose Include as pending below
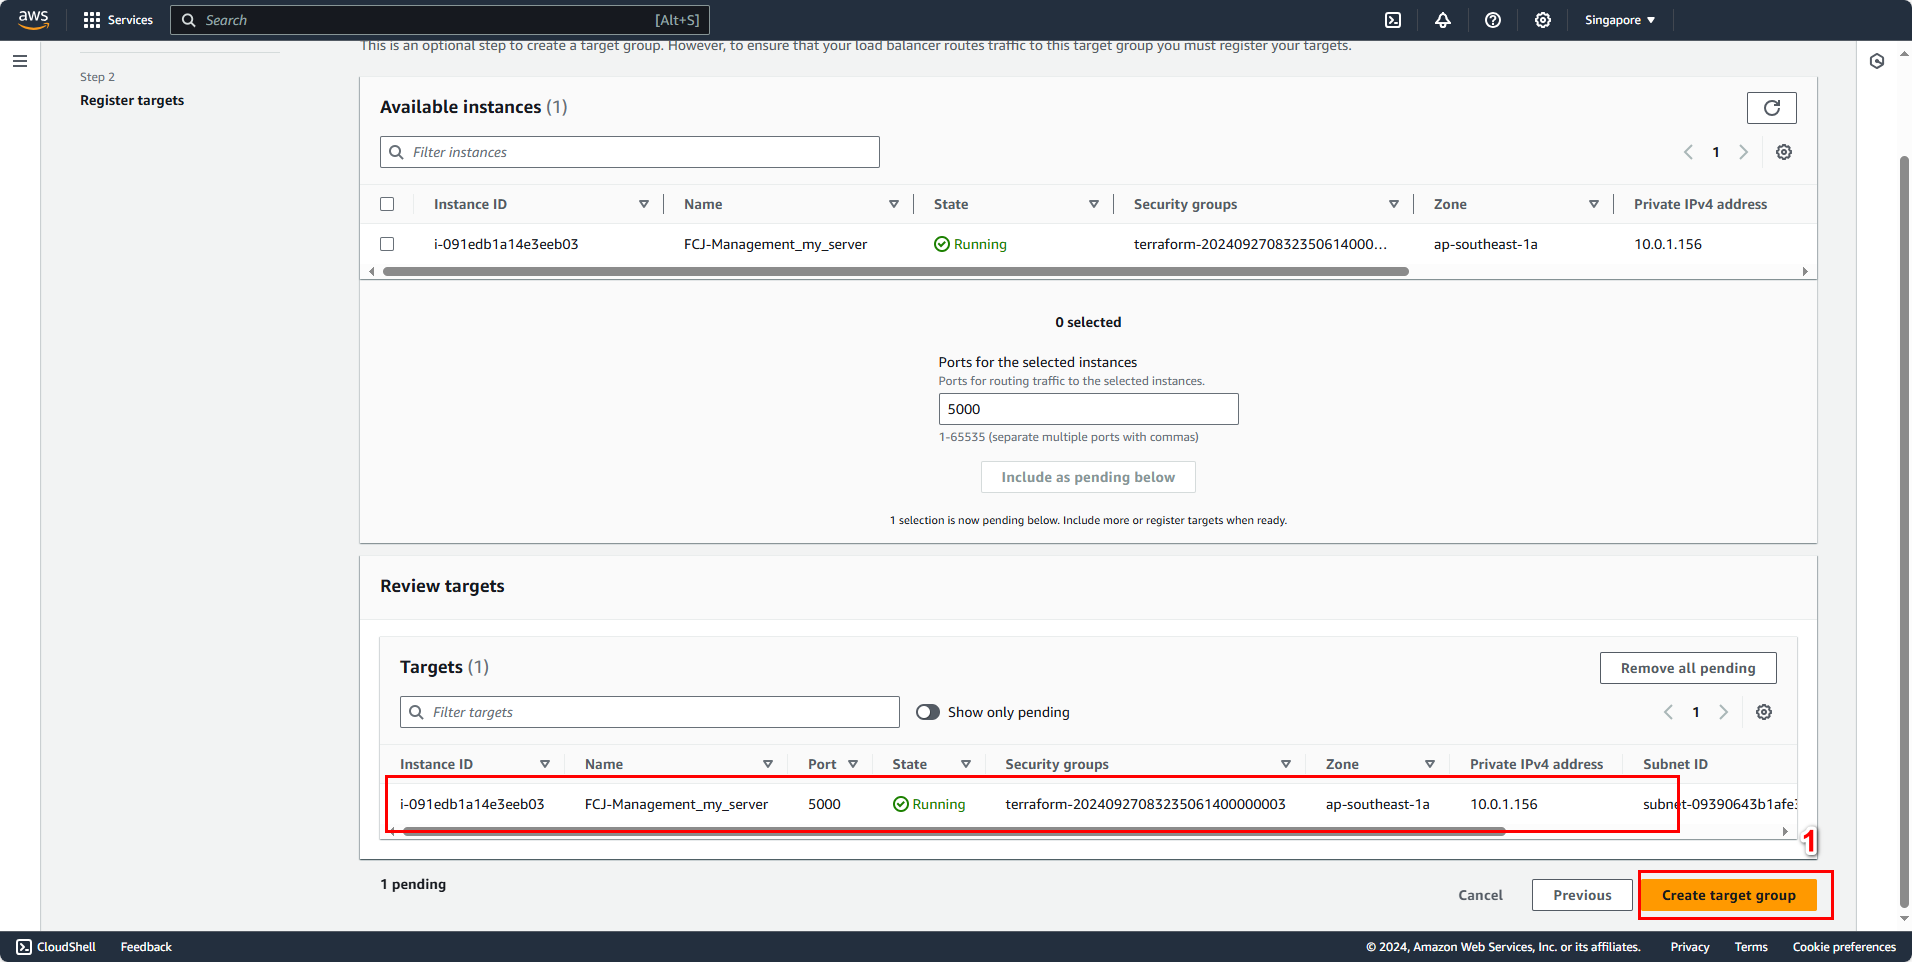
- In the Review targets section:
- You will see the target group has been registered previously
- Click Create target group
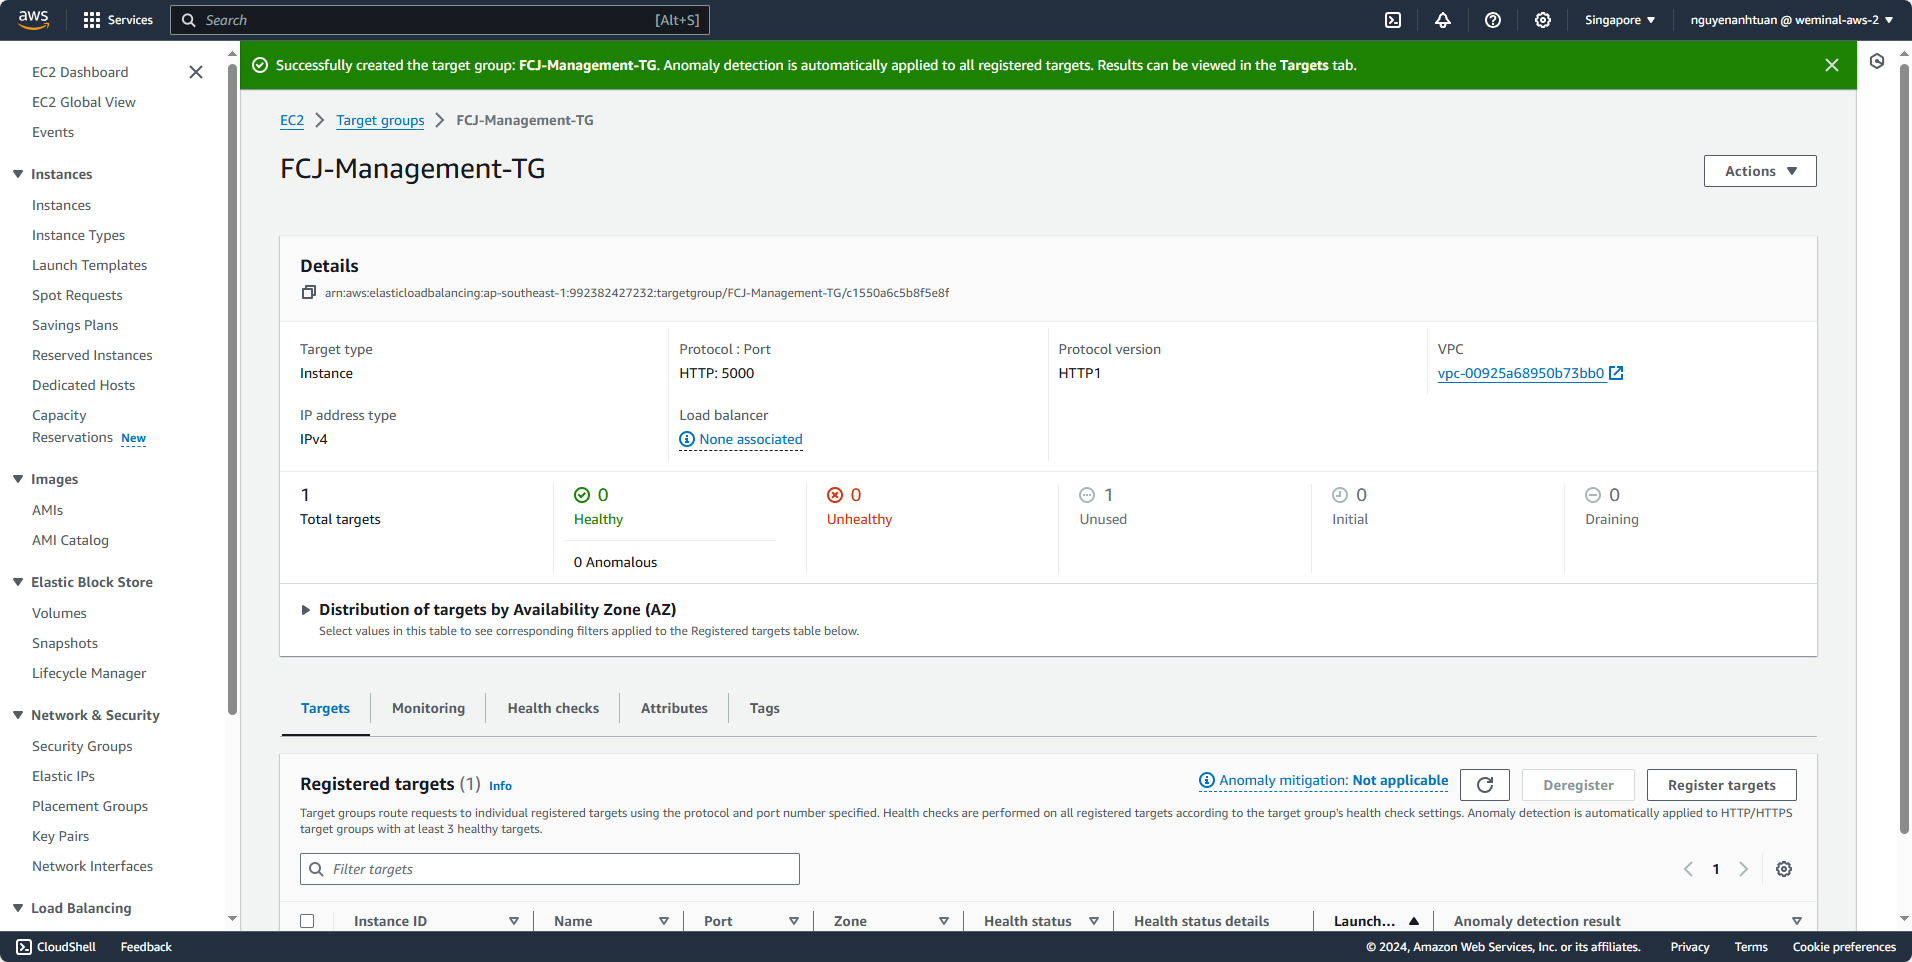
Result
We have completed the creation of the Target Group. Select the Target Group FCJ-Management-TG that was just created to view its information.