Launch EC2 Instance
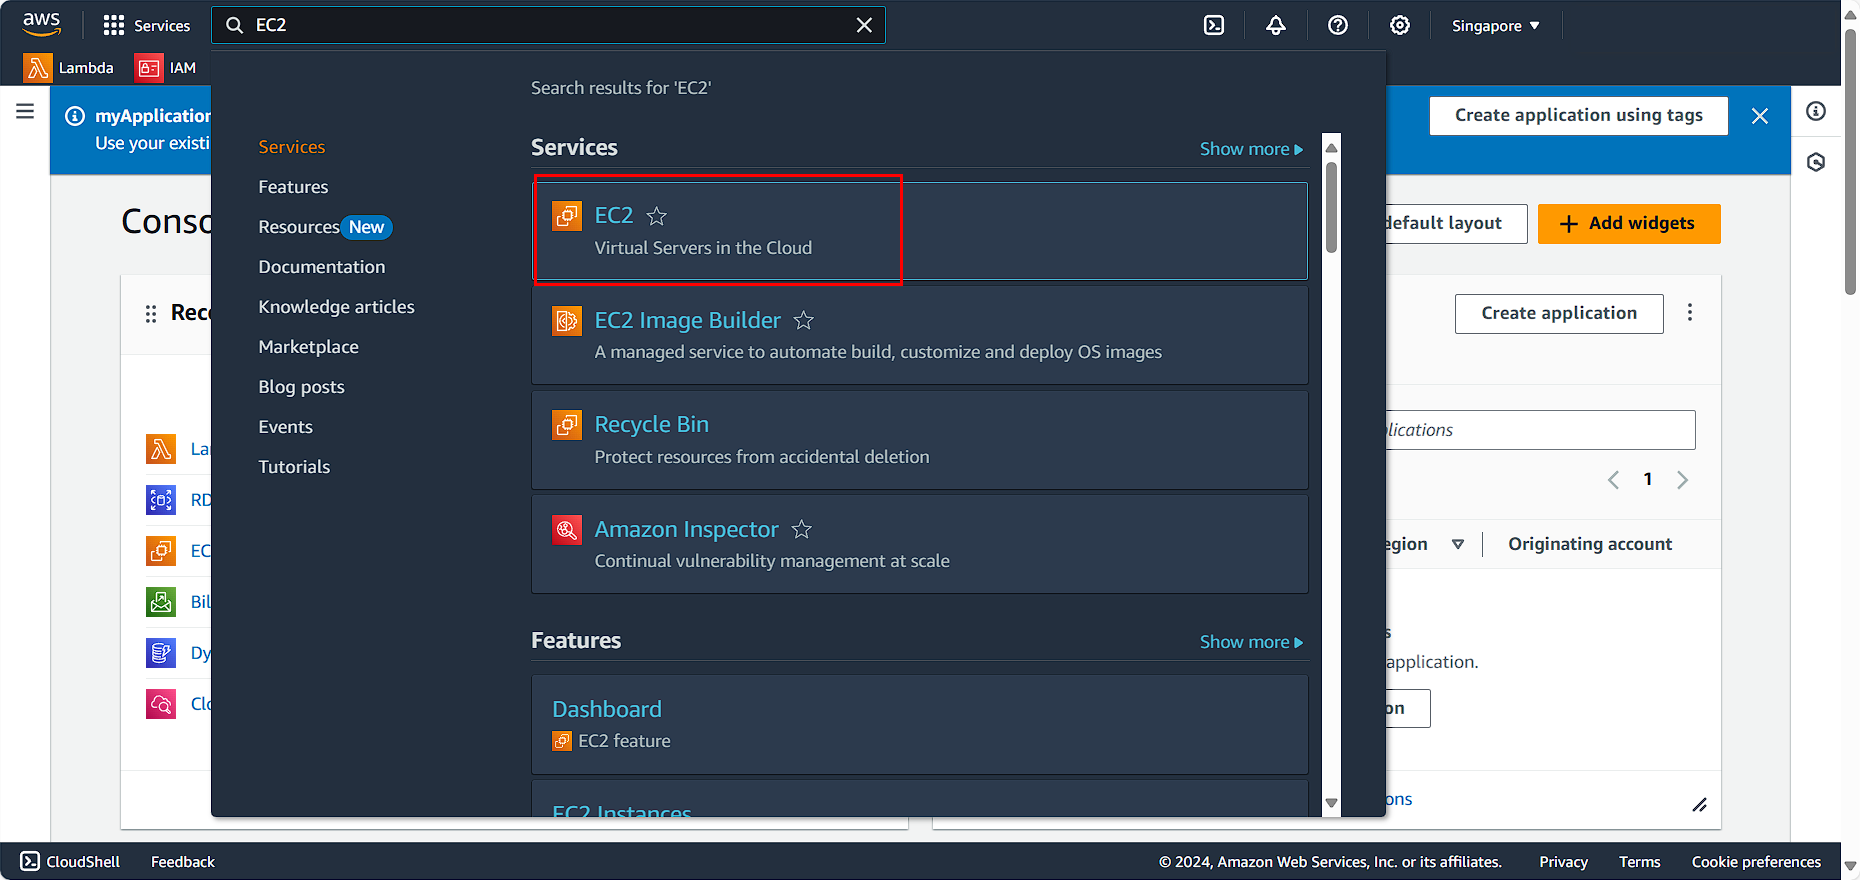
Access the AWS Management Console:
- Search for EC2
- Select EC2
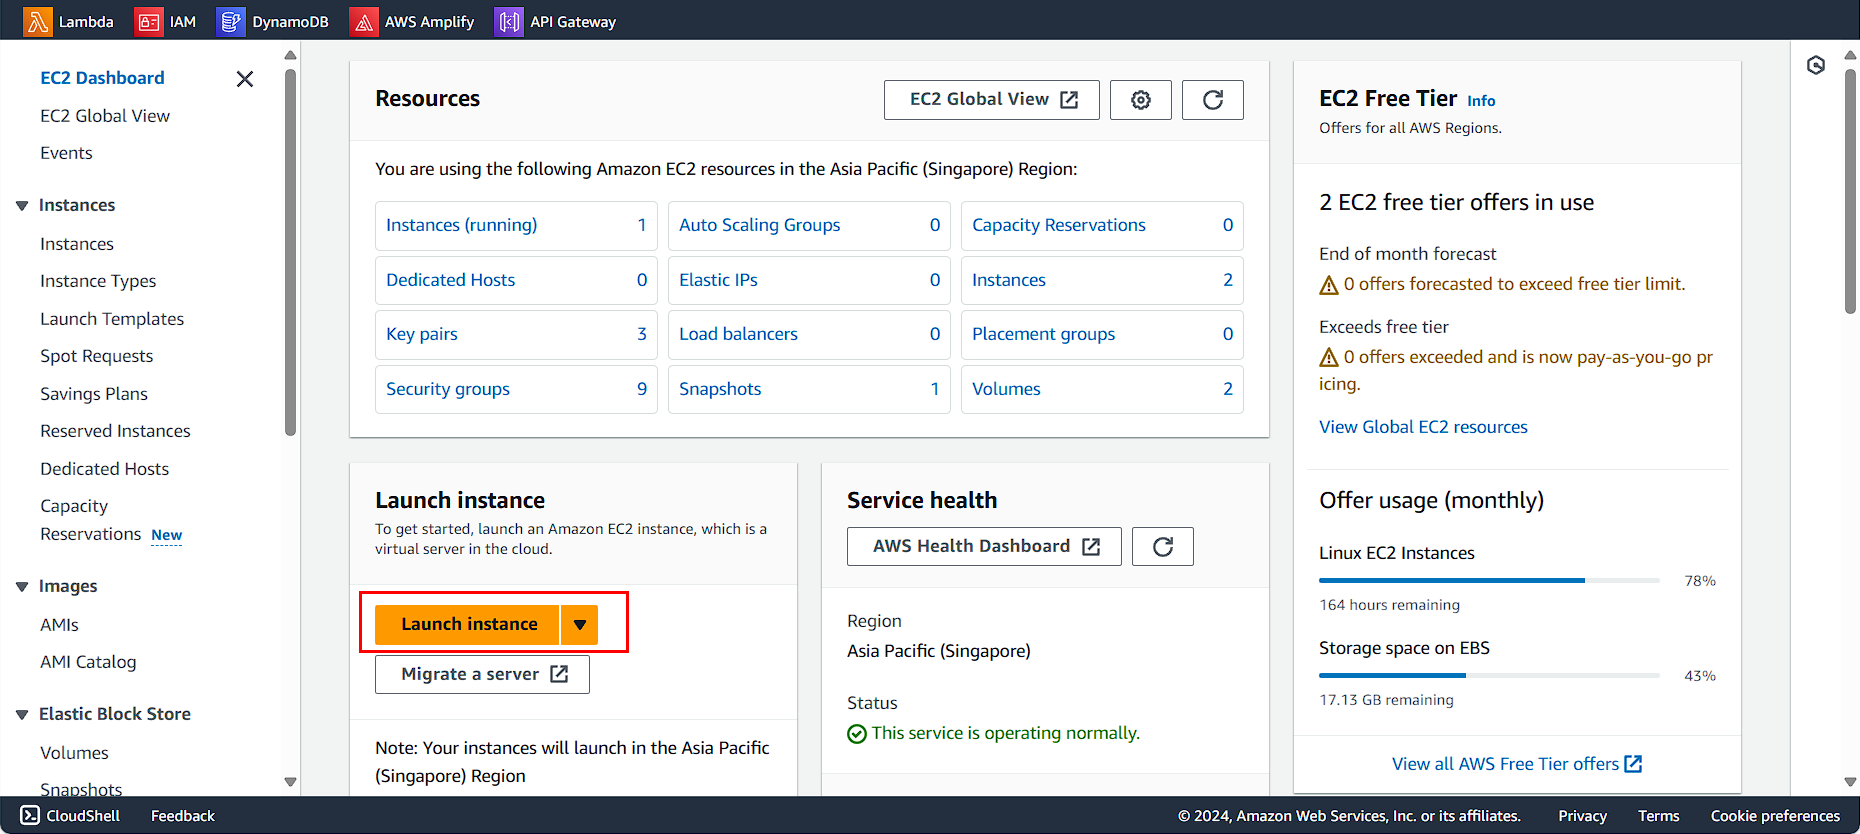
In the EC2 console:
- Click on Launch instances
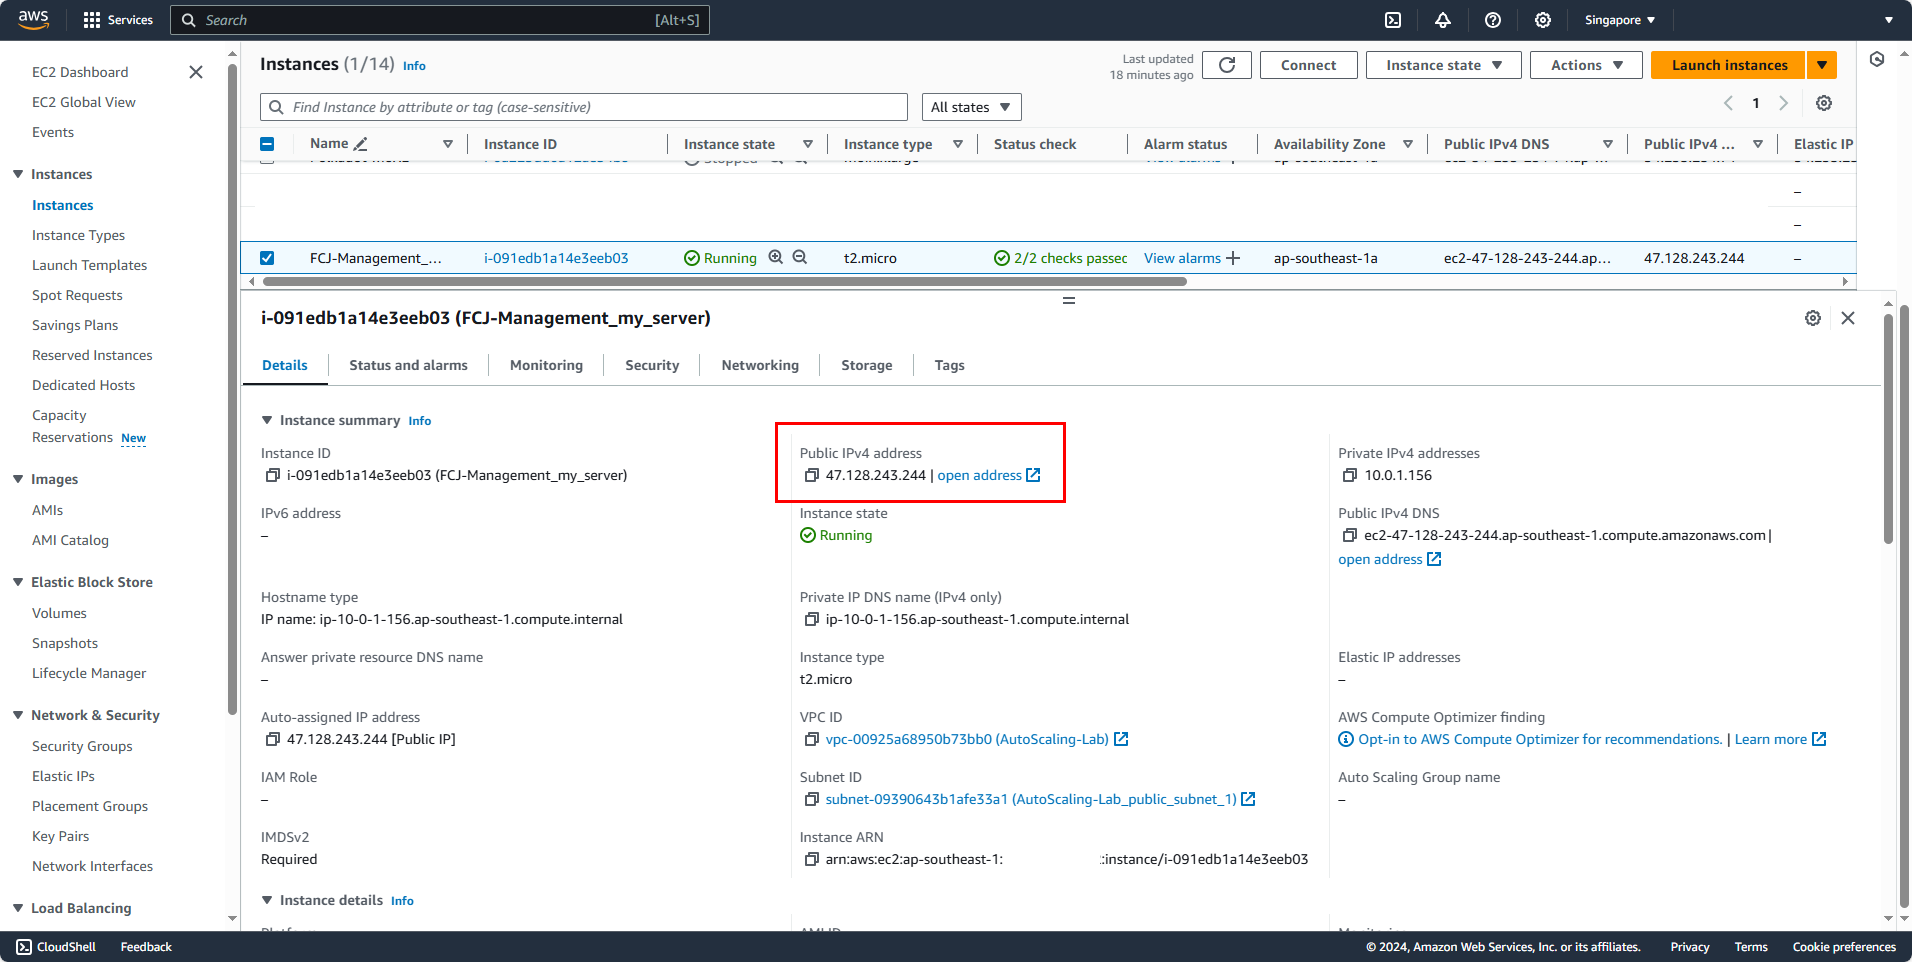
Name the instance, enter FCJ-Management
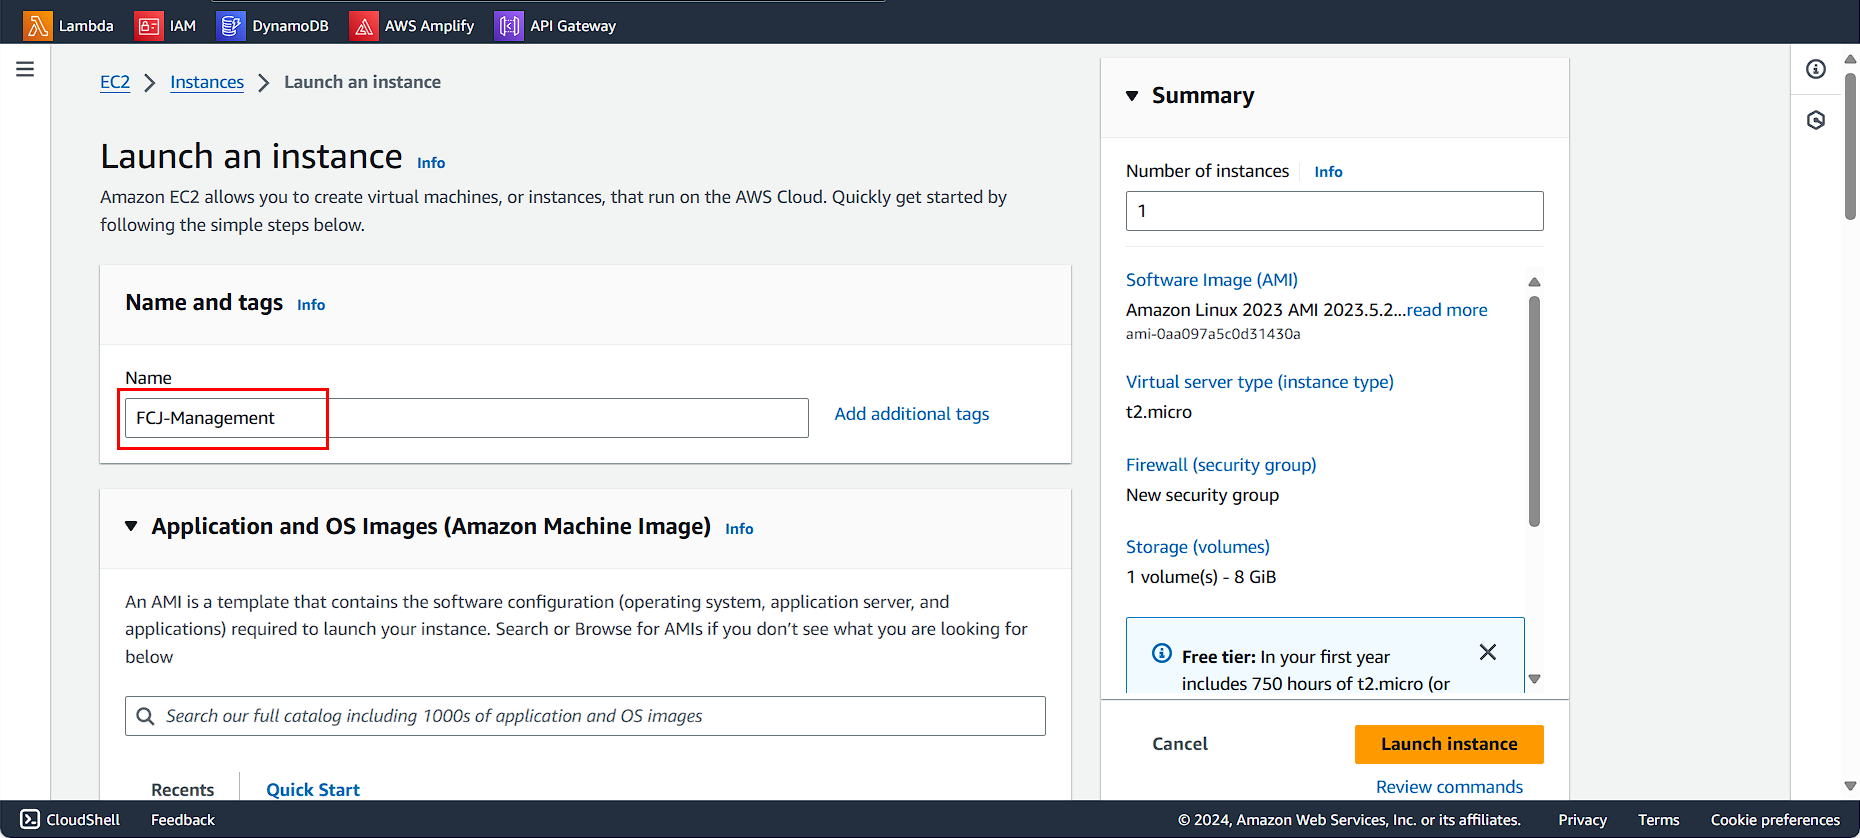
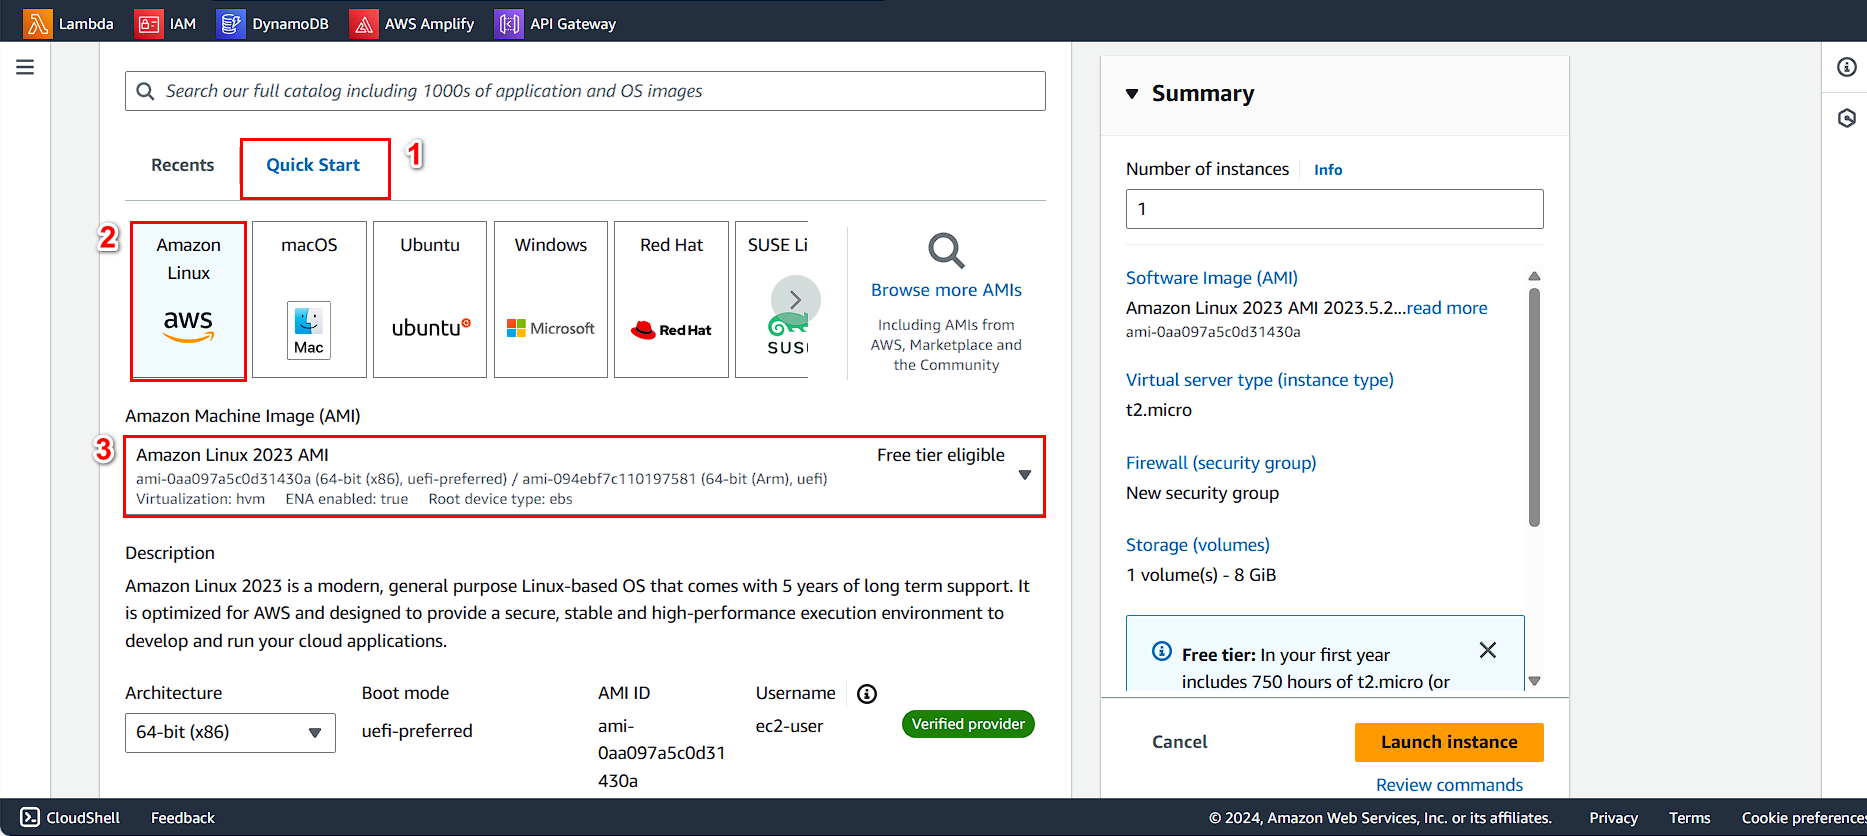
For AMI:
- Select Quick Start
- Selec Amazon Linux
- Select Amazon Linux 2023 AMI
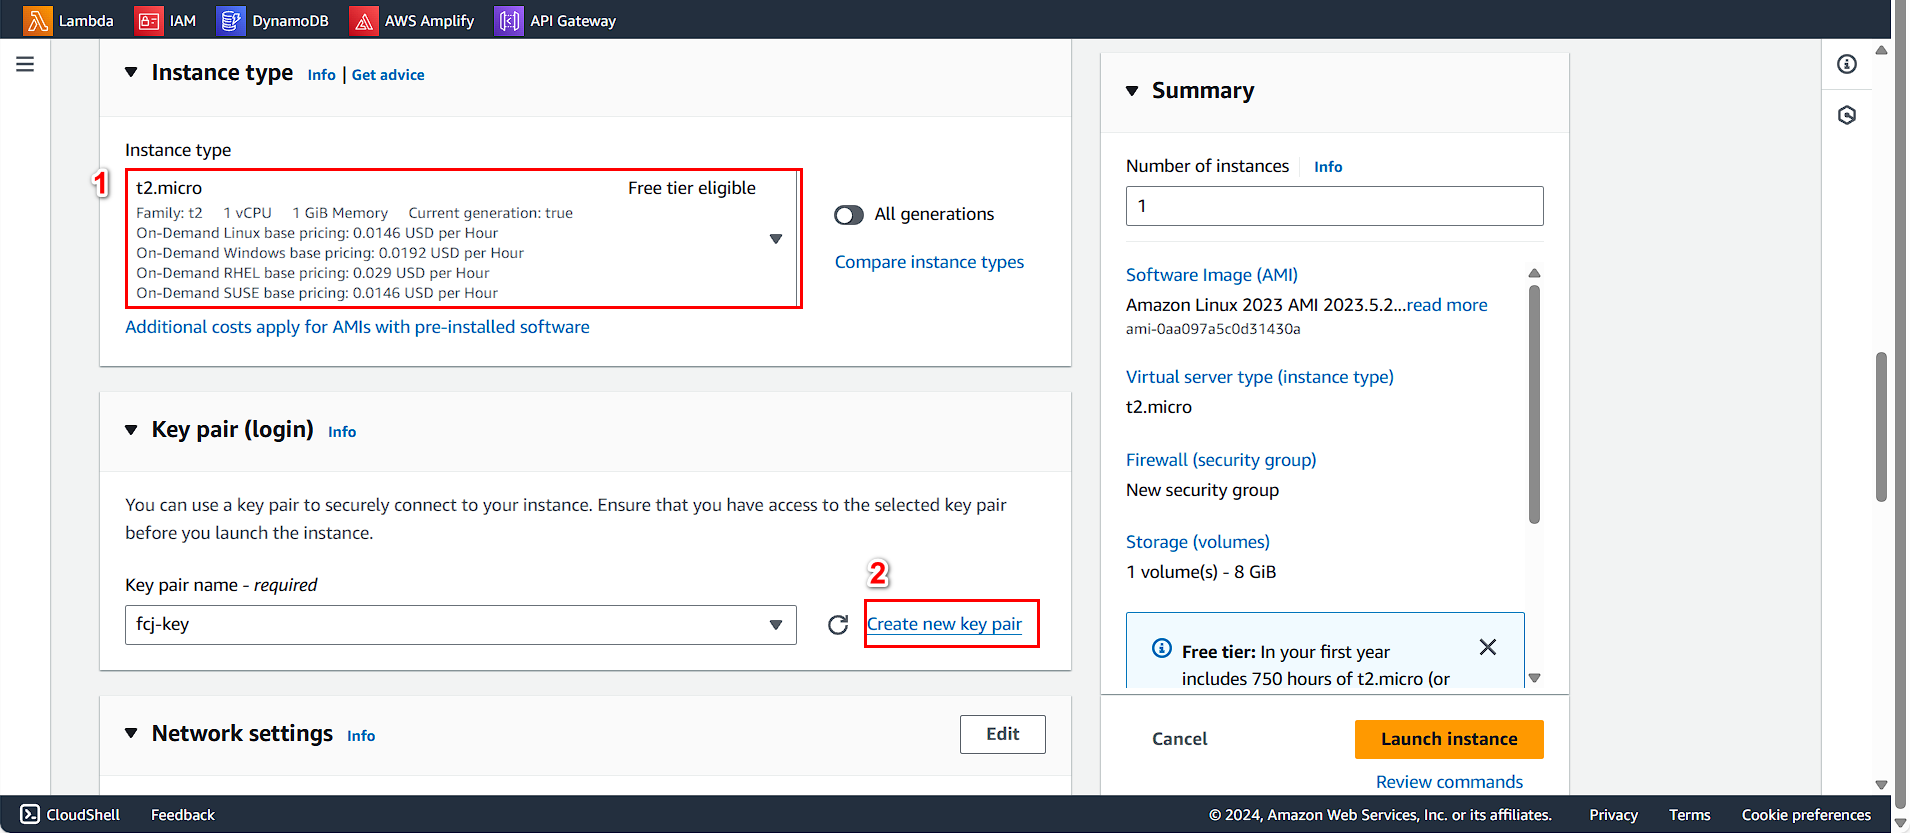
Select Instance type:
- Select t2.micro
- Click Create new key pair
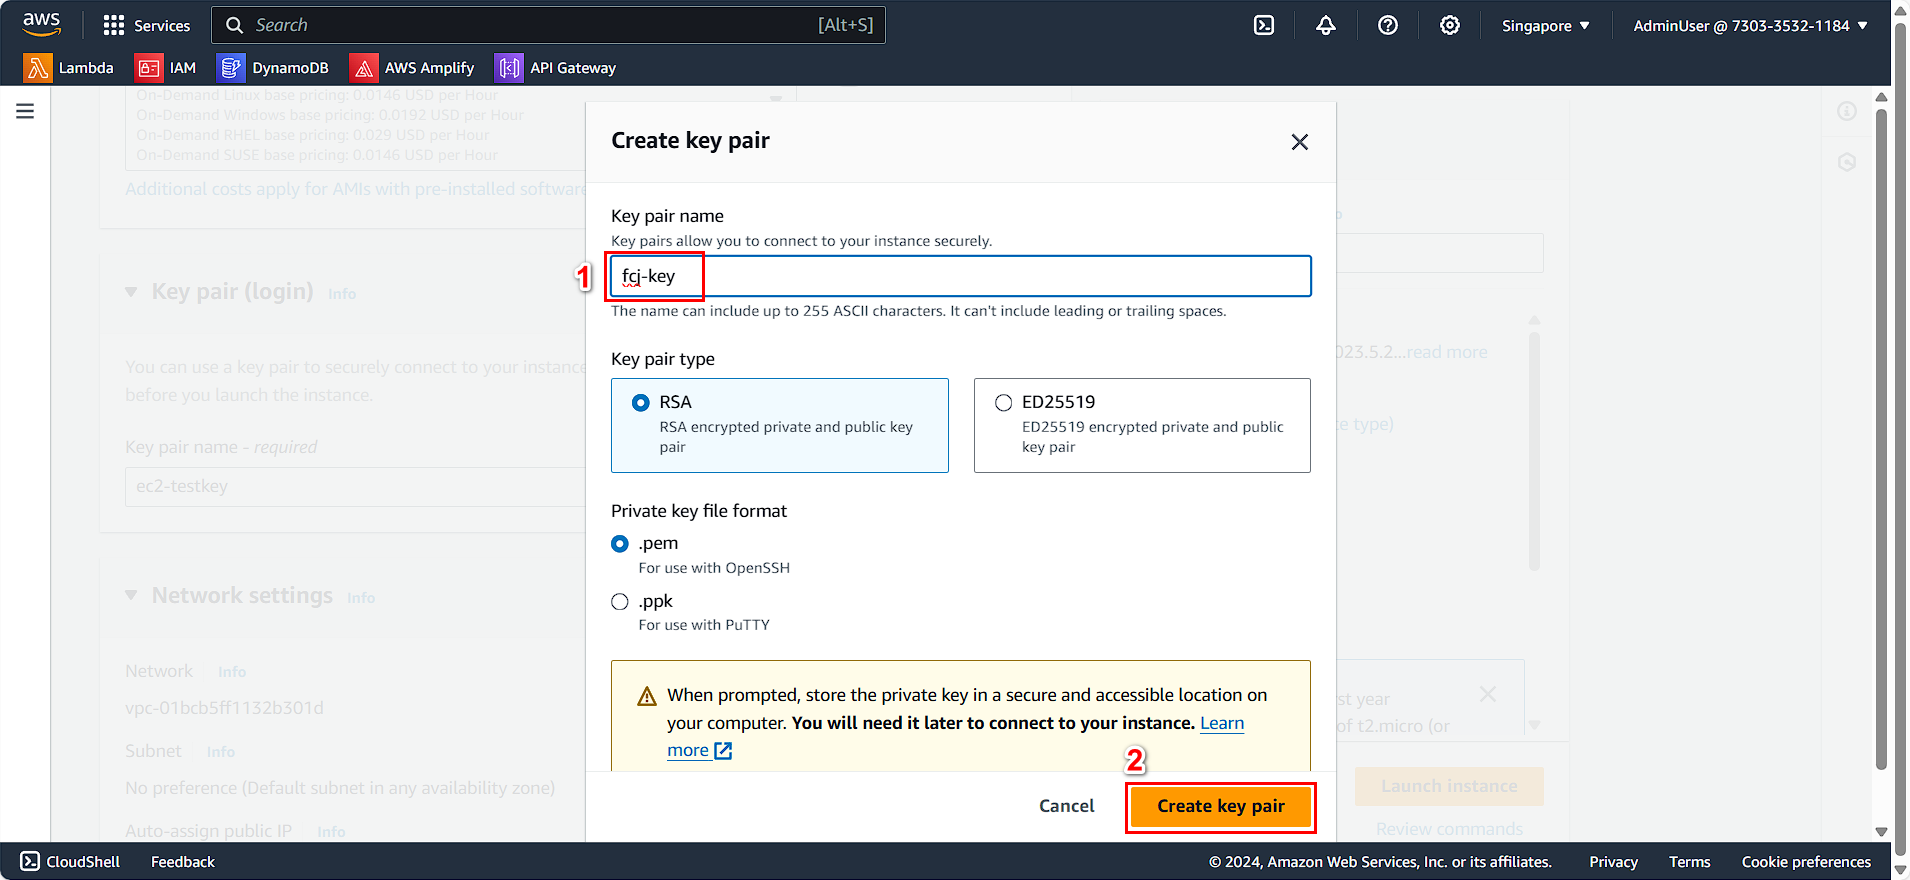
Configure the key pair
- Name it
fcj-key - Key pair type: RSA
- Private key format: .pem
- Click Create key pair
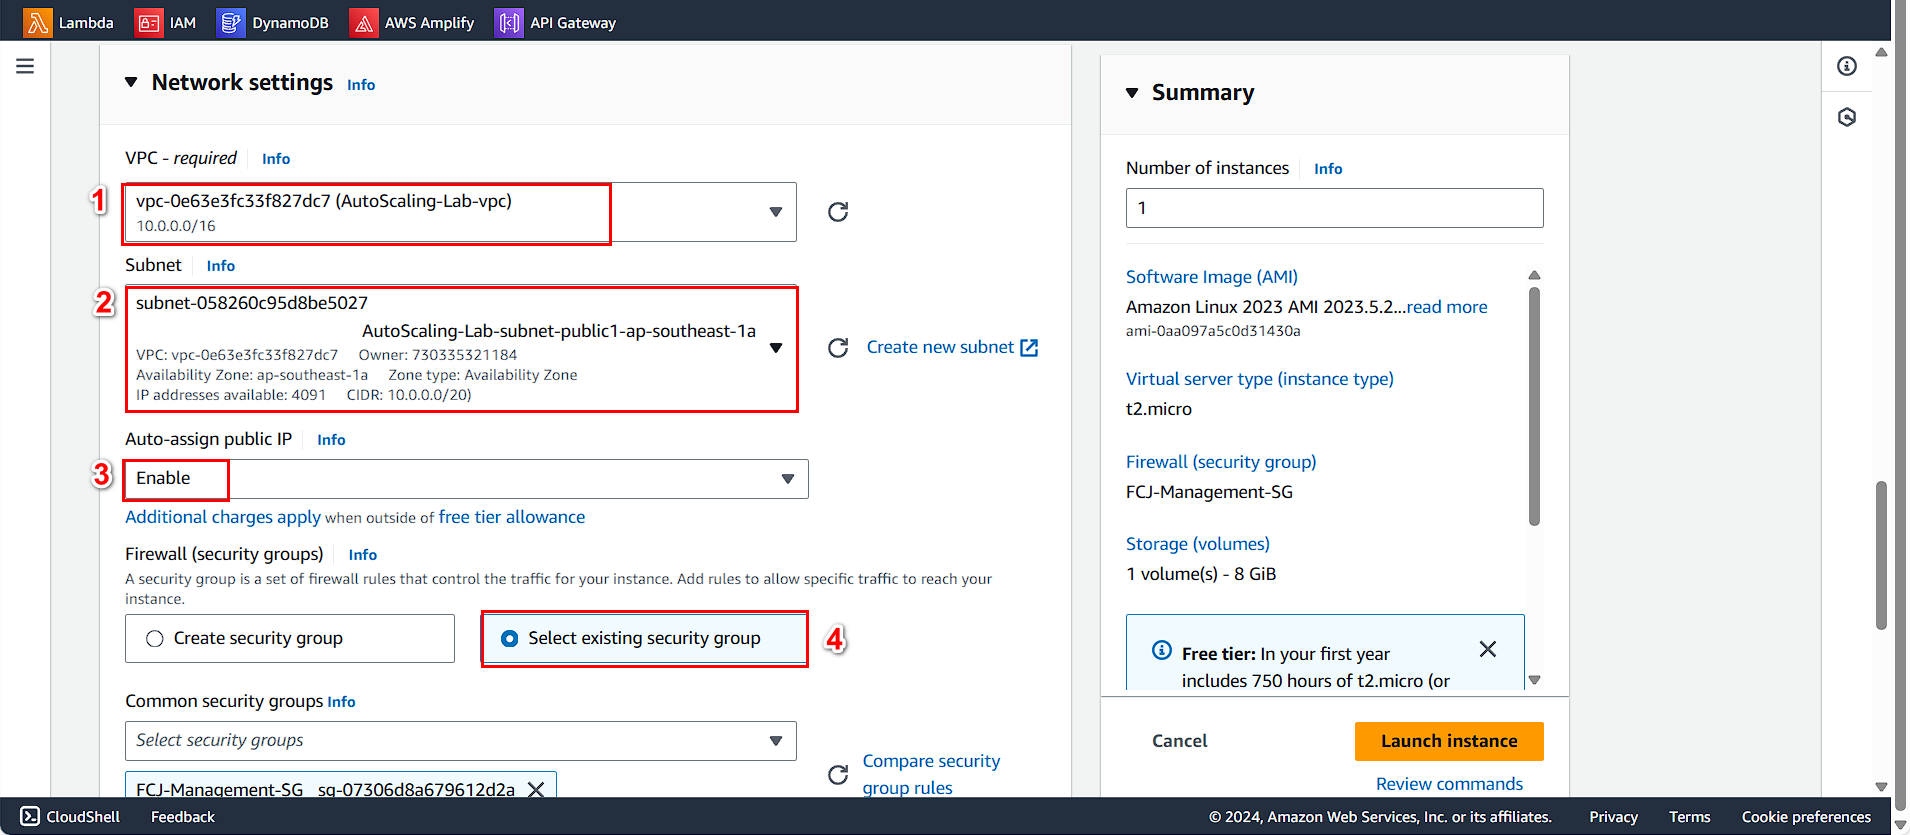
Configure the Network:
- Click the Edit button
- For VPC, select the VPC you created.
- For Subnet, choose Public subnet
- Check if Auto-assign public IP is enabled. If not, review the step for allocating a public IP when creating the VPC.
 8. Continue:
- Select Select existing security group and then choose FCJ-Management-SG.
- Click Launch instance.

Complete the creation of the Security Group for the database.