Setup network infrastructure
Create VPC
Go to the AWS Management Console
- Find VPC
- Select VPC
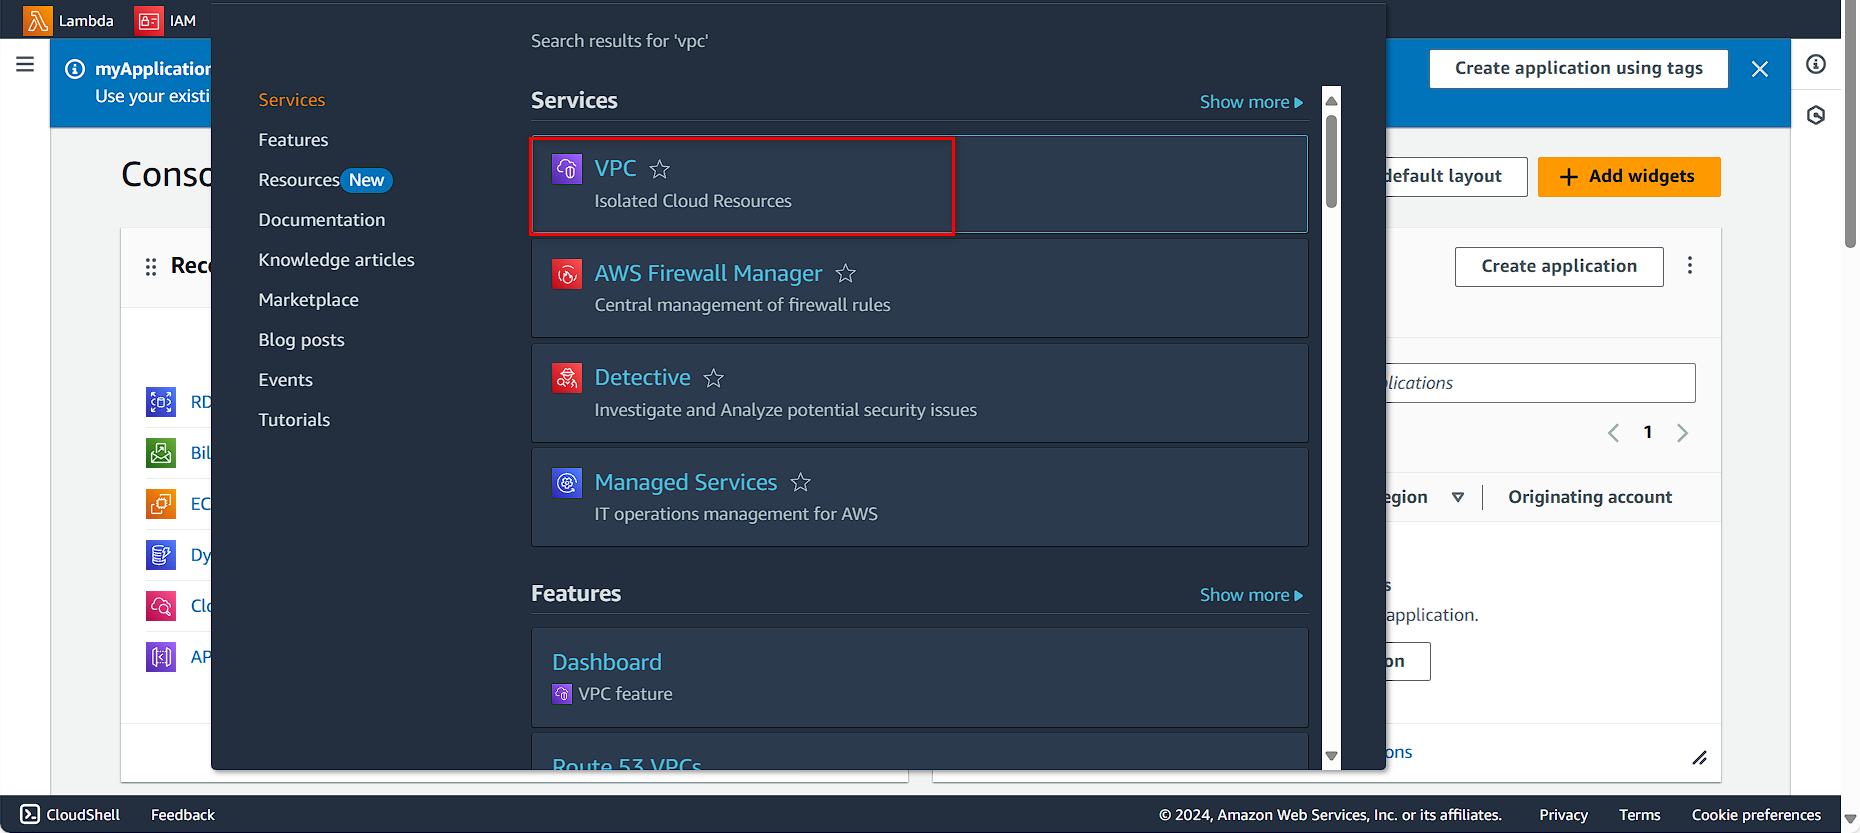
In the VPC Console
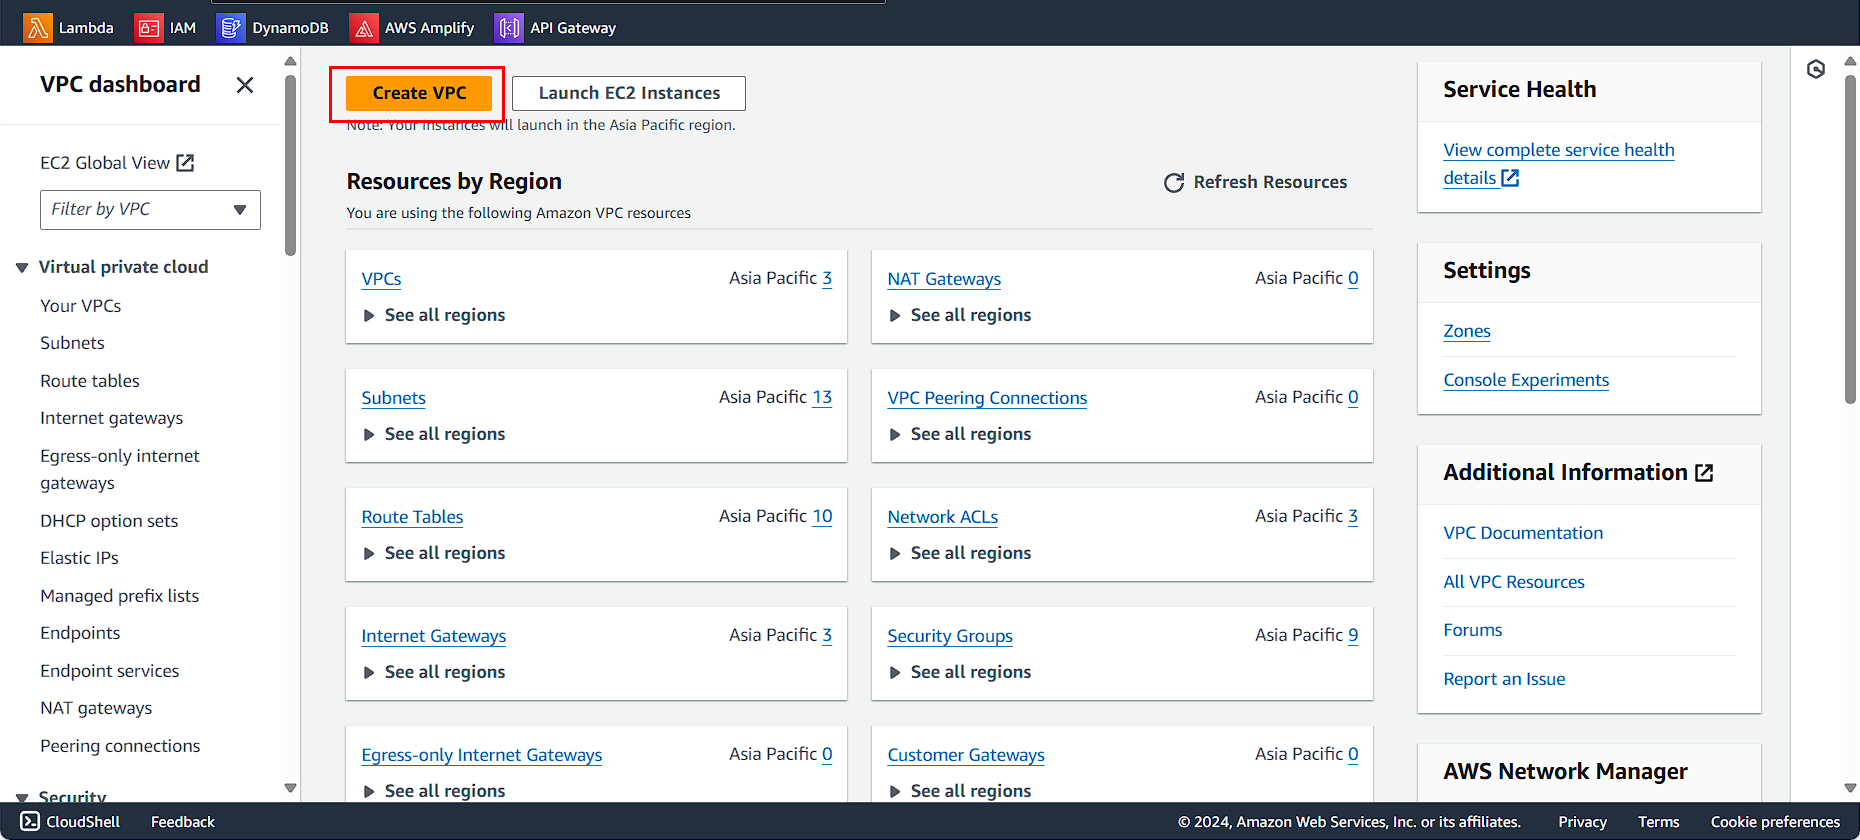
- Click Create VPC
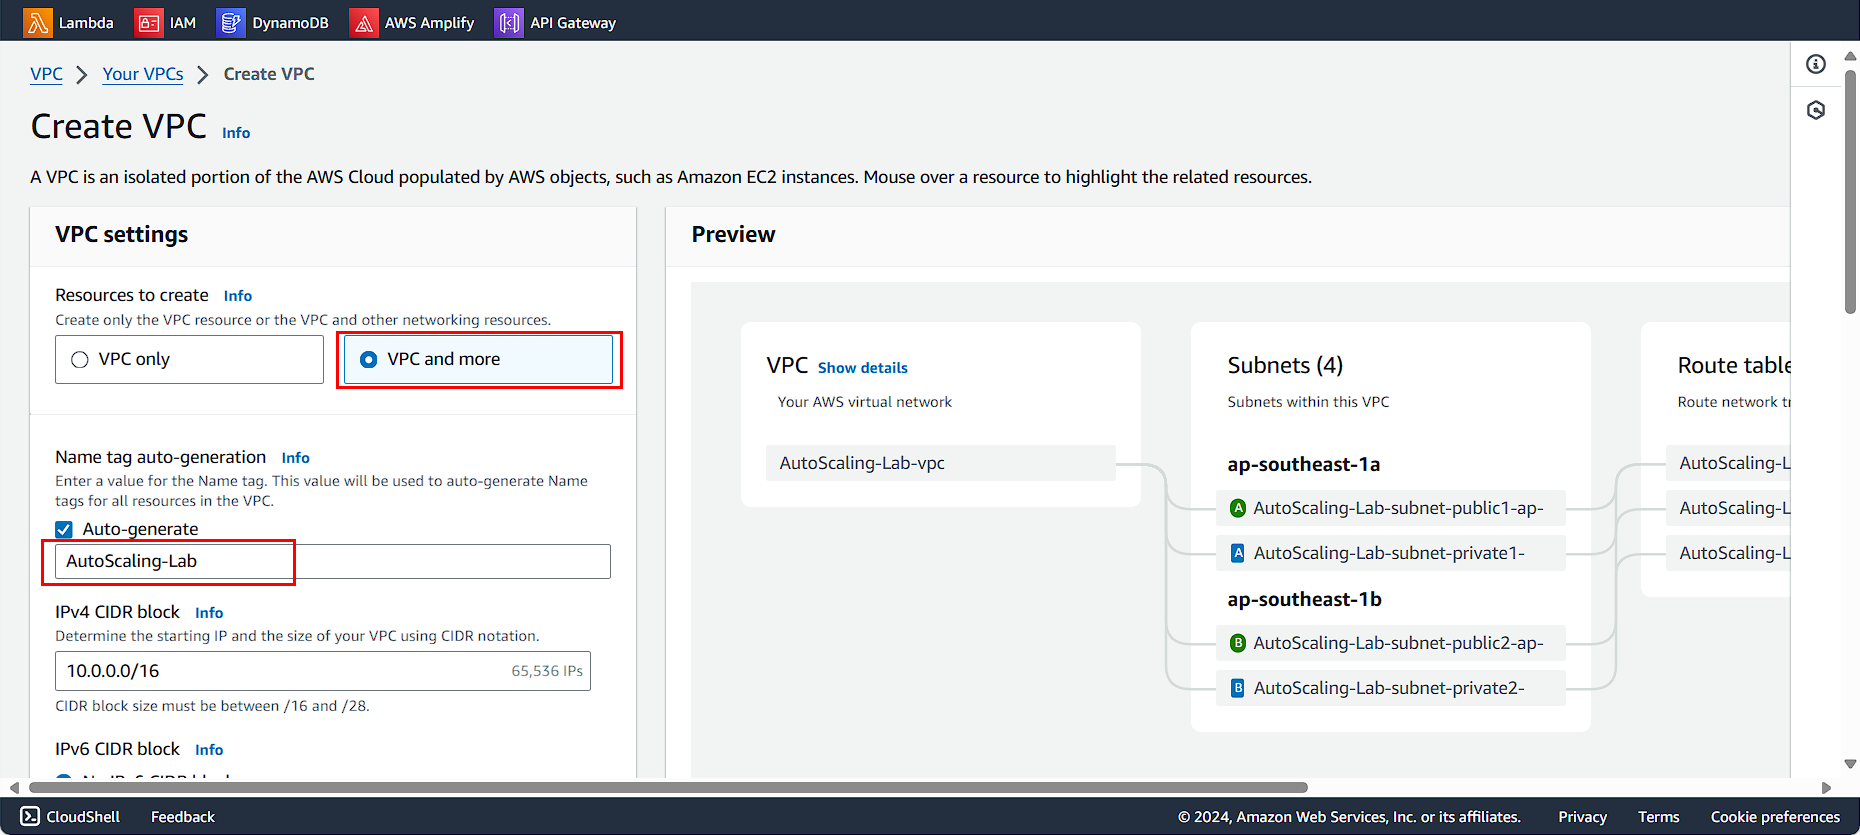
In the Create VPC interface
- Select VPC and more
- Next, type your VPC name. In this lab, we name it
AutoScaling-Lab - IPv4 CIDR block, type
10.0.0.0/16
Select as follows:
- Number of AZs: 3
- Number of public subnets: 3
- Number of private subnets: 3
- NAT gateways: None
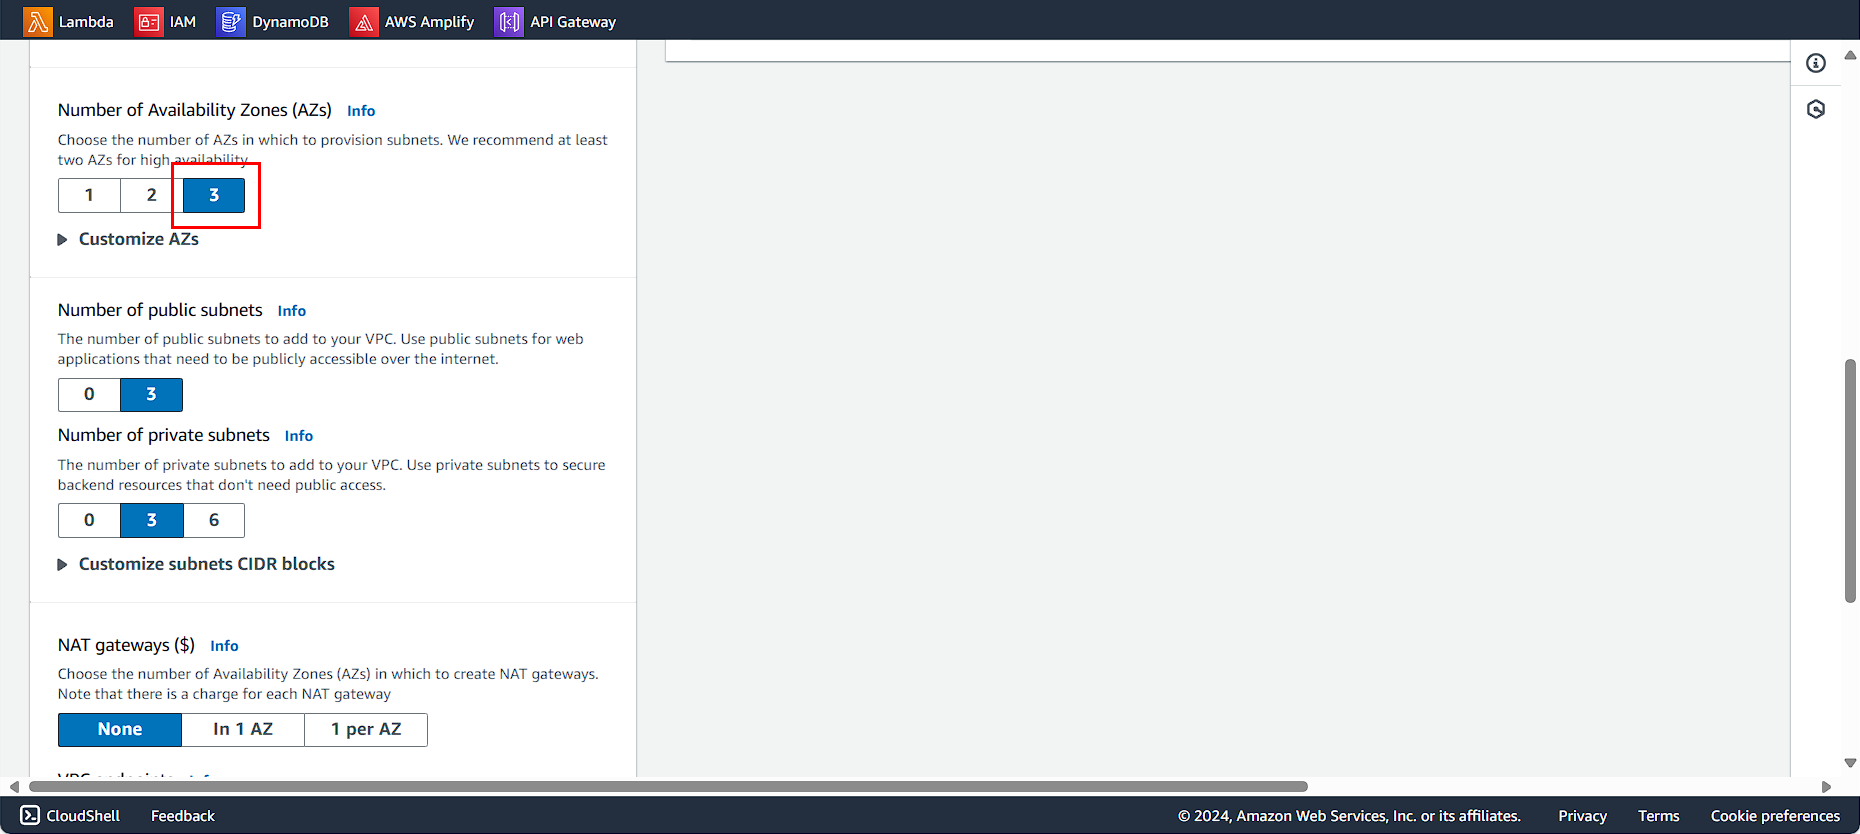
Select as follows:
- VPC endpoints: None
- Choose Create VPC
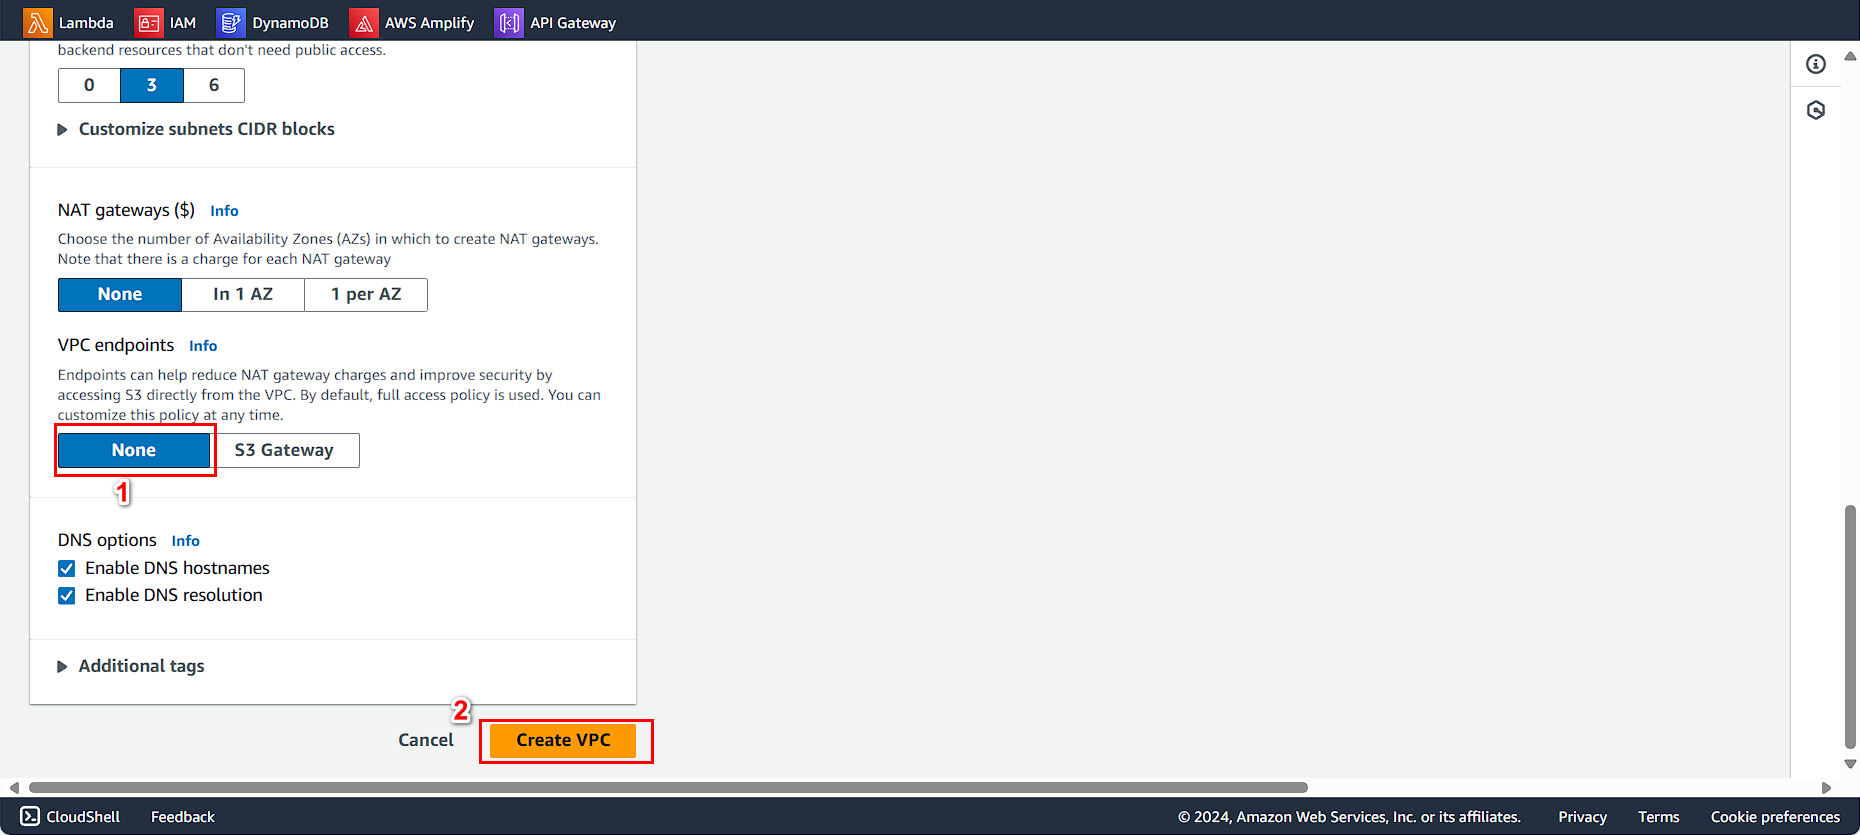
Allocate a public IP.
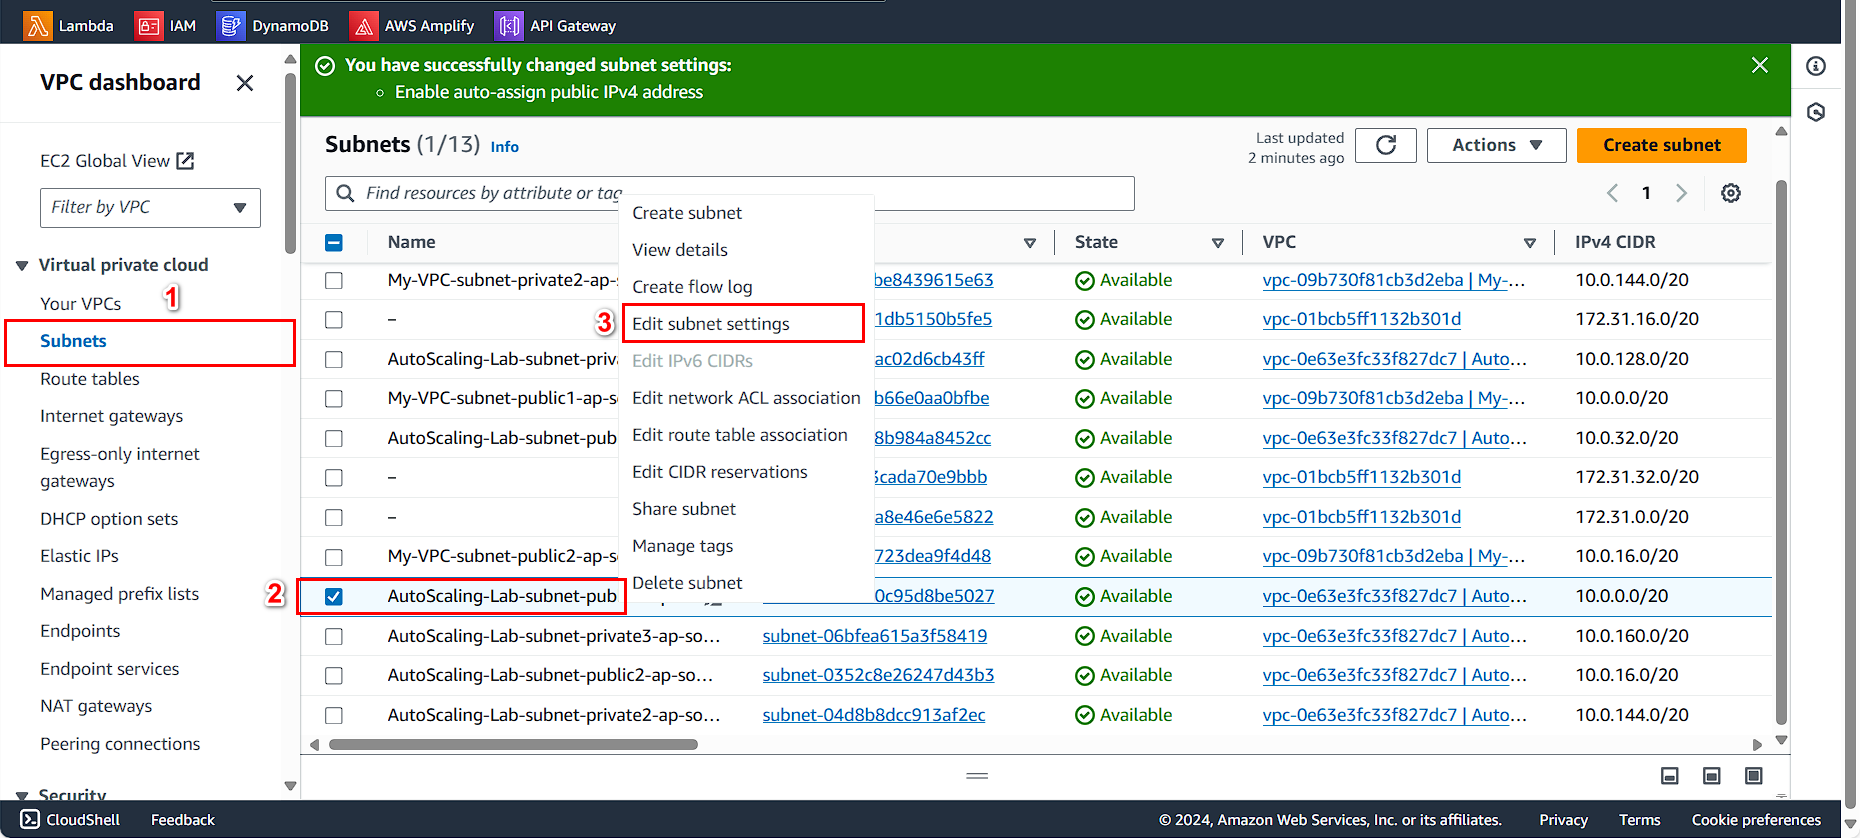
Allocate a public IP.
- Select Subnets
- Select public subnet
- Select Edit subnet settings
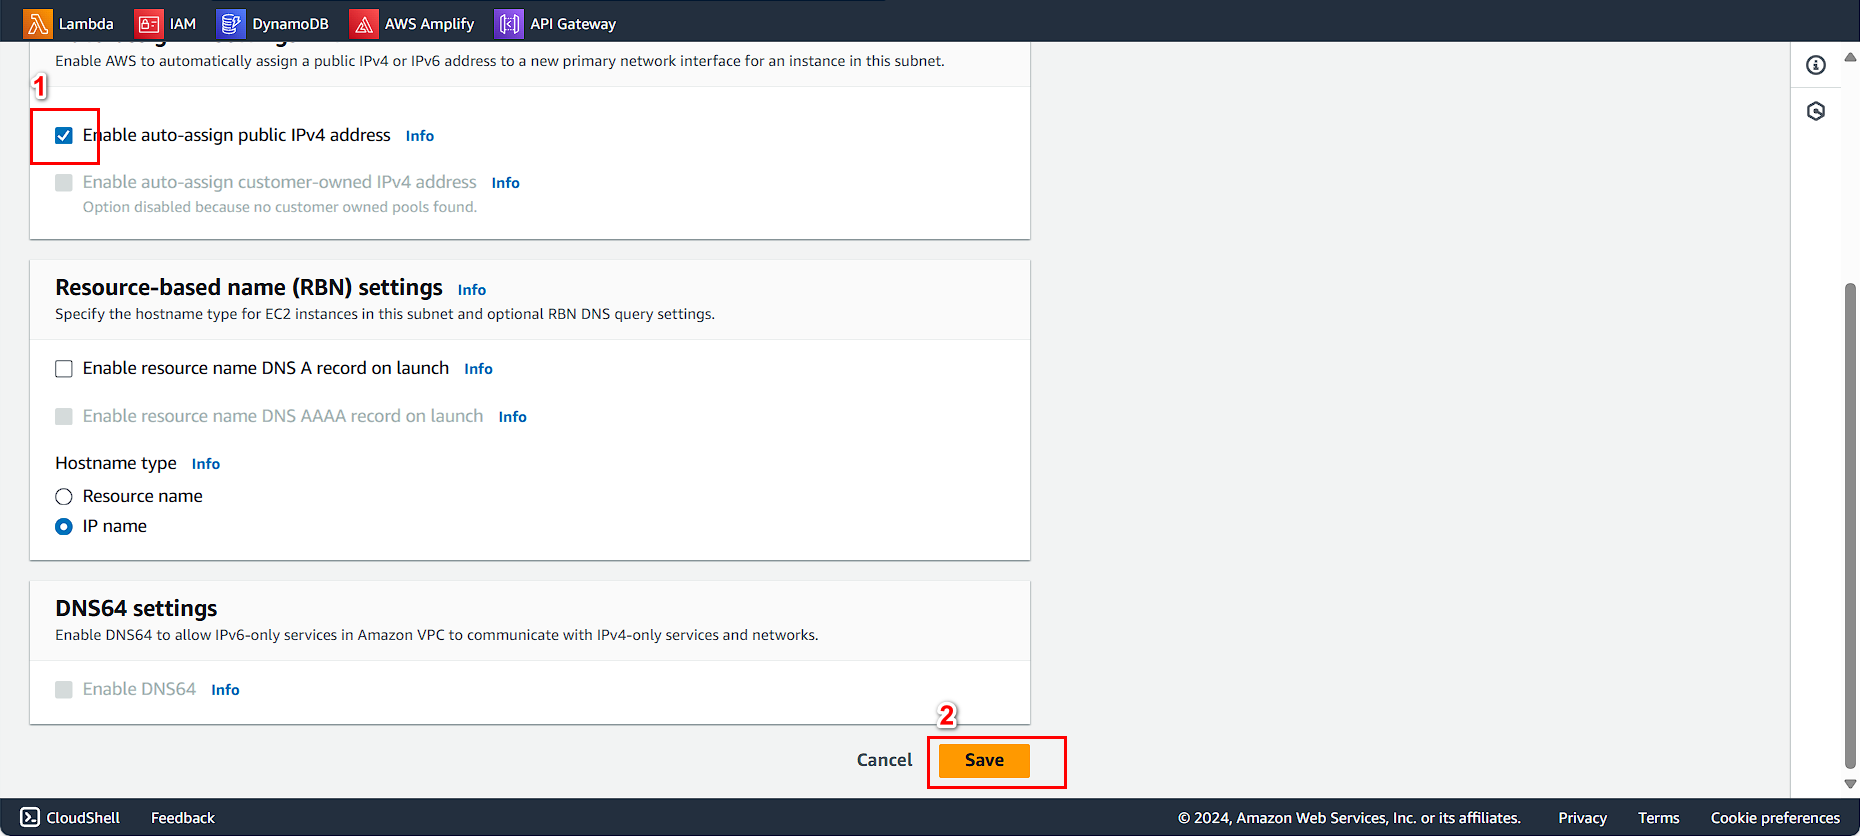
Select Enable auto-assign public IPv4 address. Then select Save
Check if the allocation was successful.
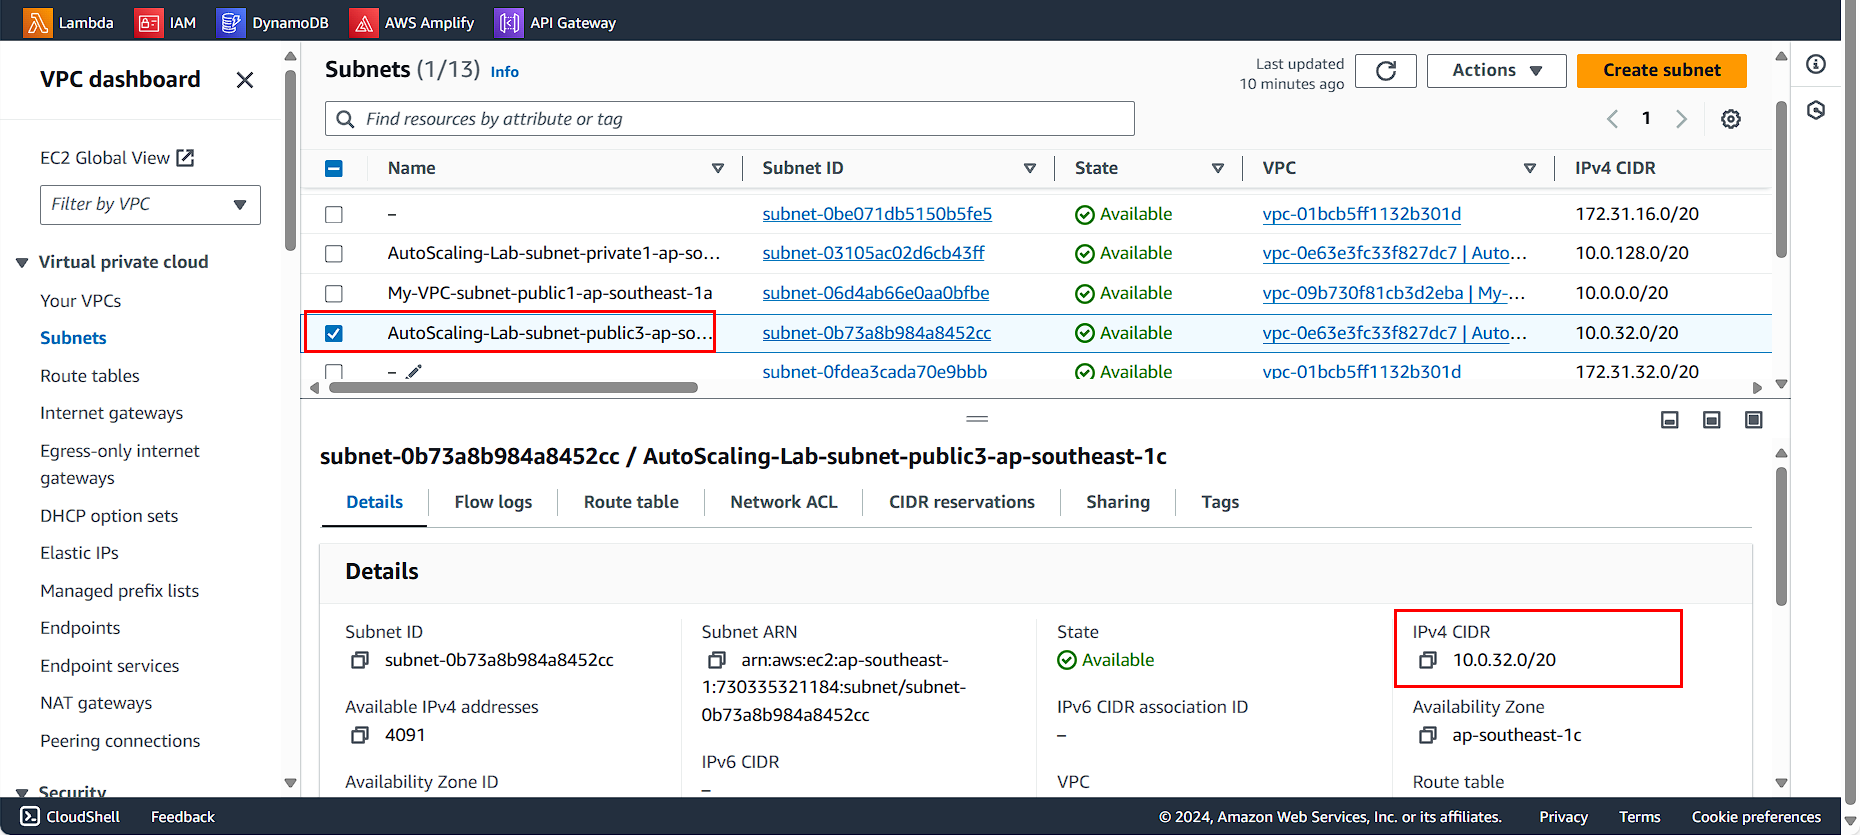
Allocate for the remaining public subnet (do the same).
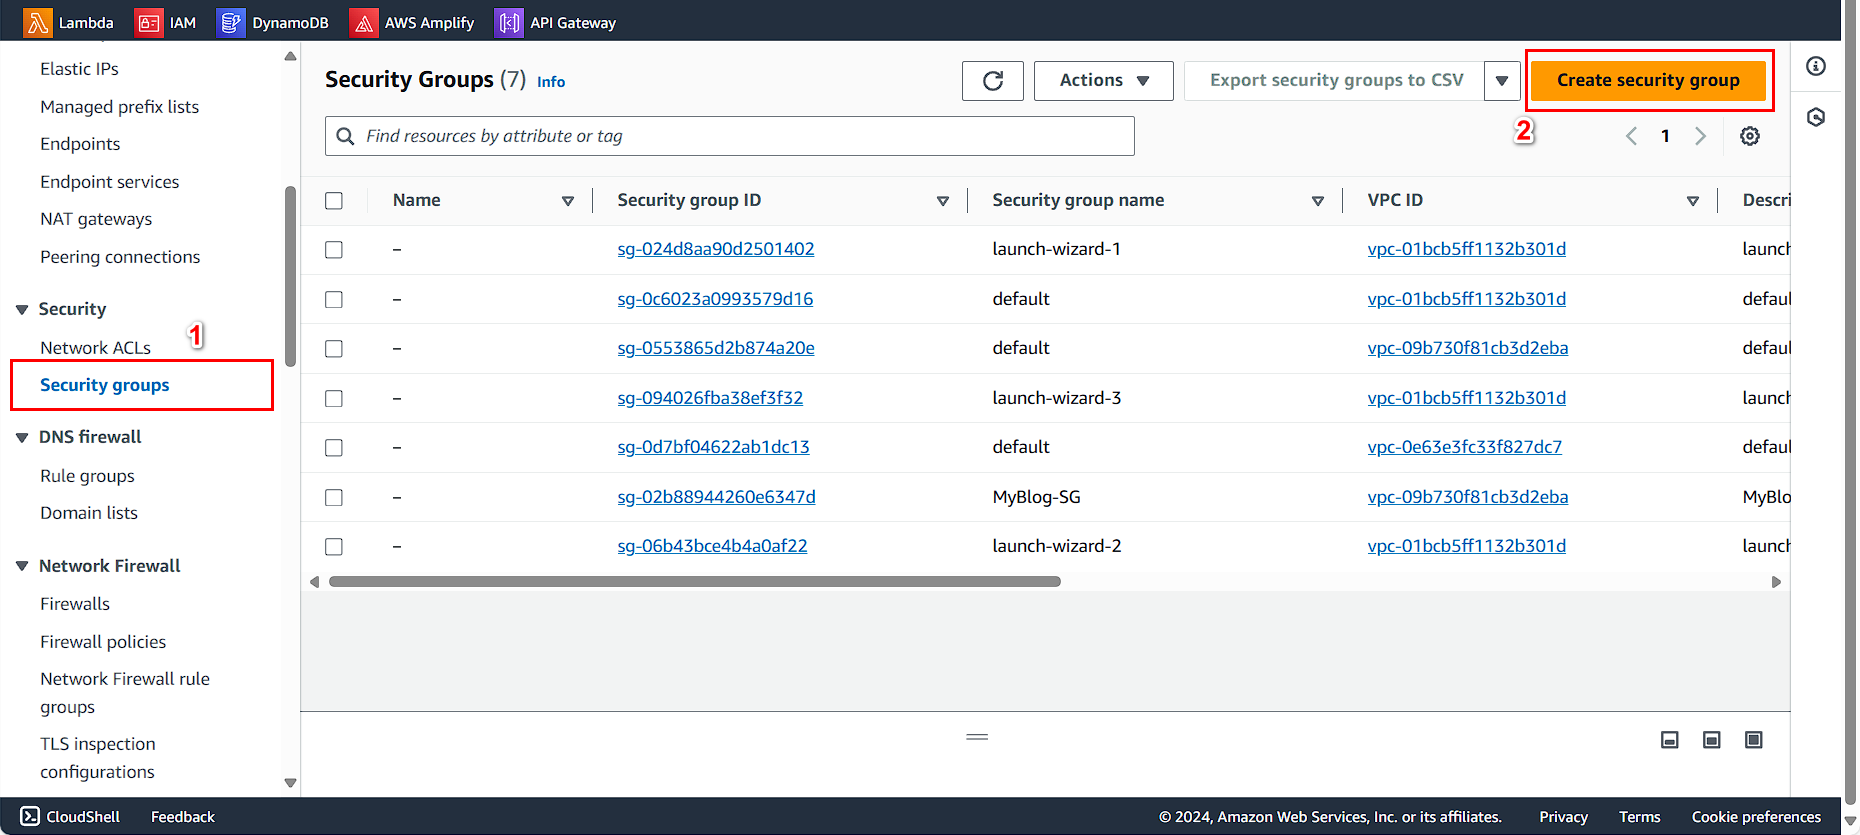
Next, we will create a Security group. - In the VPC console, select Security groups - Click Create security group
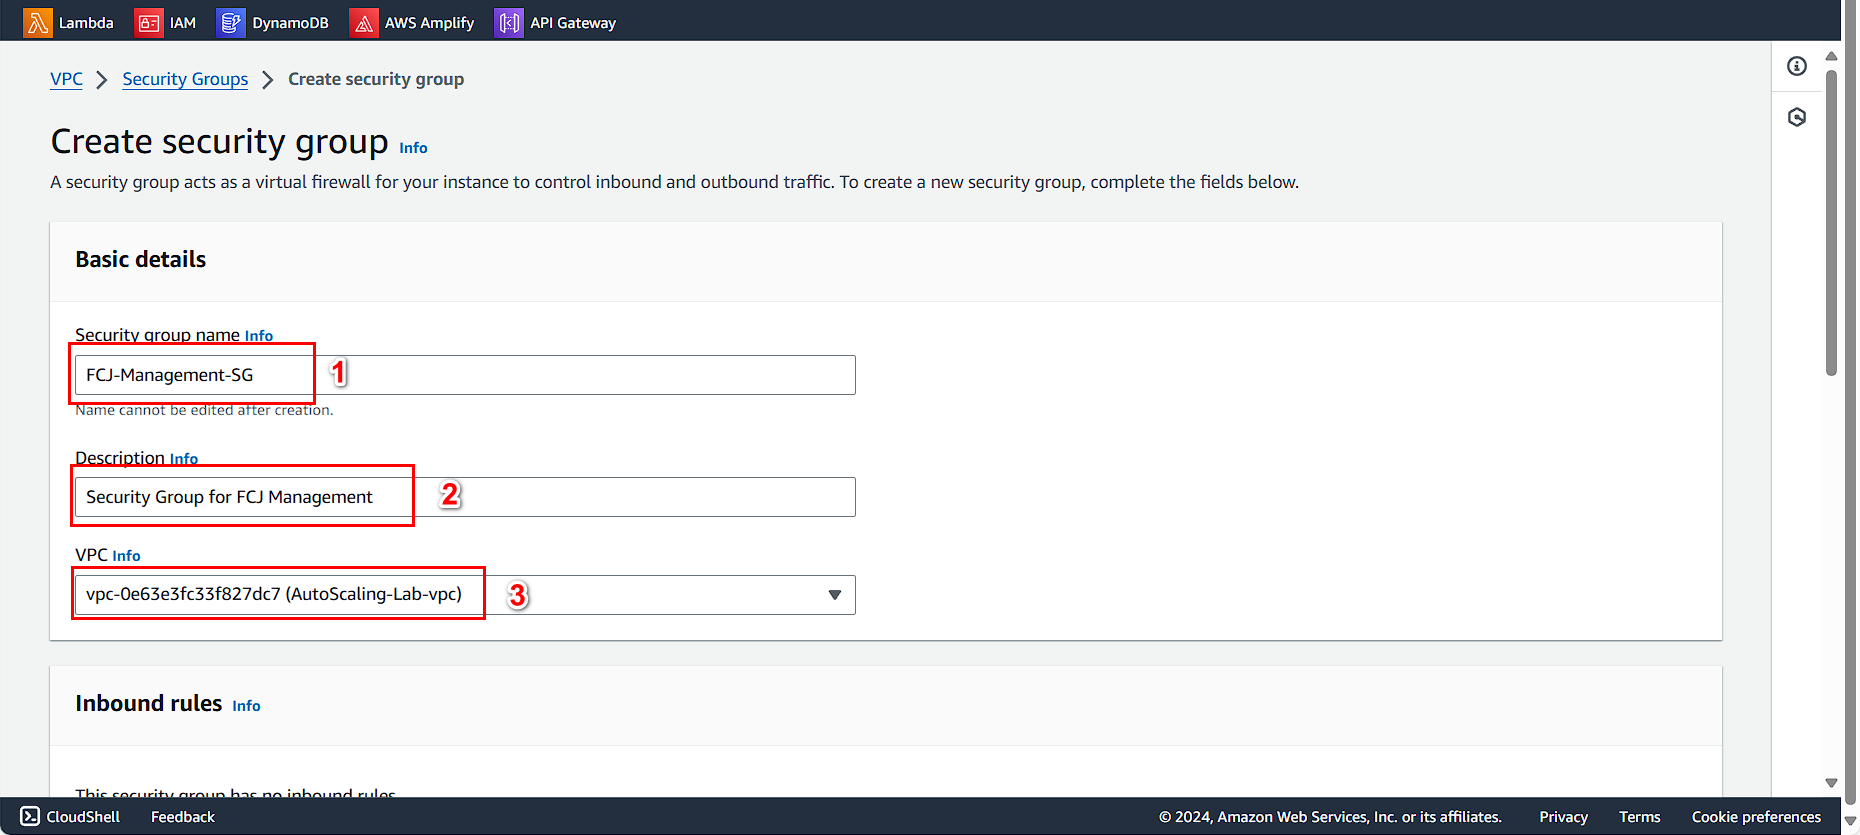
Configure the Security Group - Security group name, enter FCJ-Management-SG - Description, enter Security Group for FCJ Management - VPC,select the VPC you just created: AutoScaling-Lab.
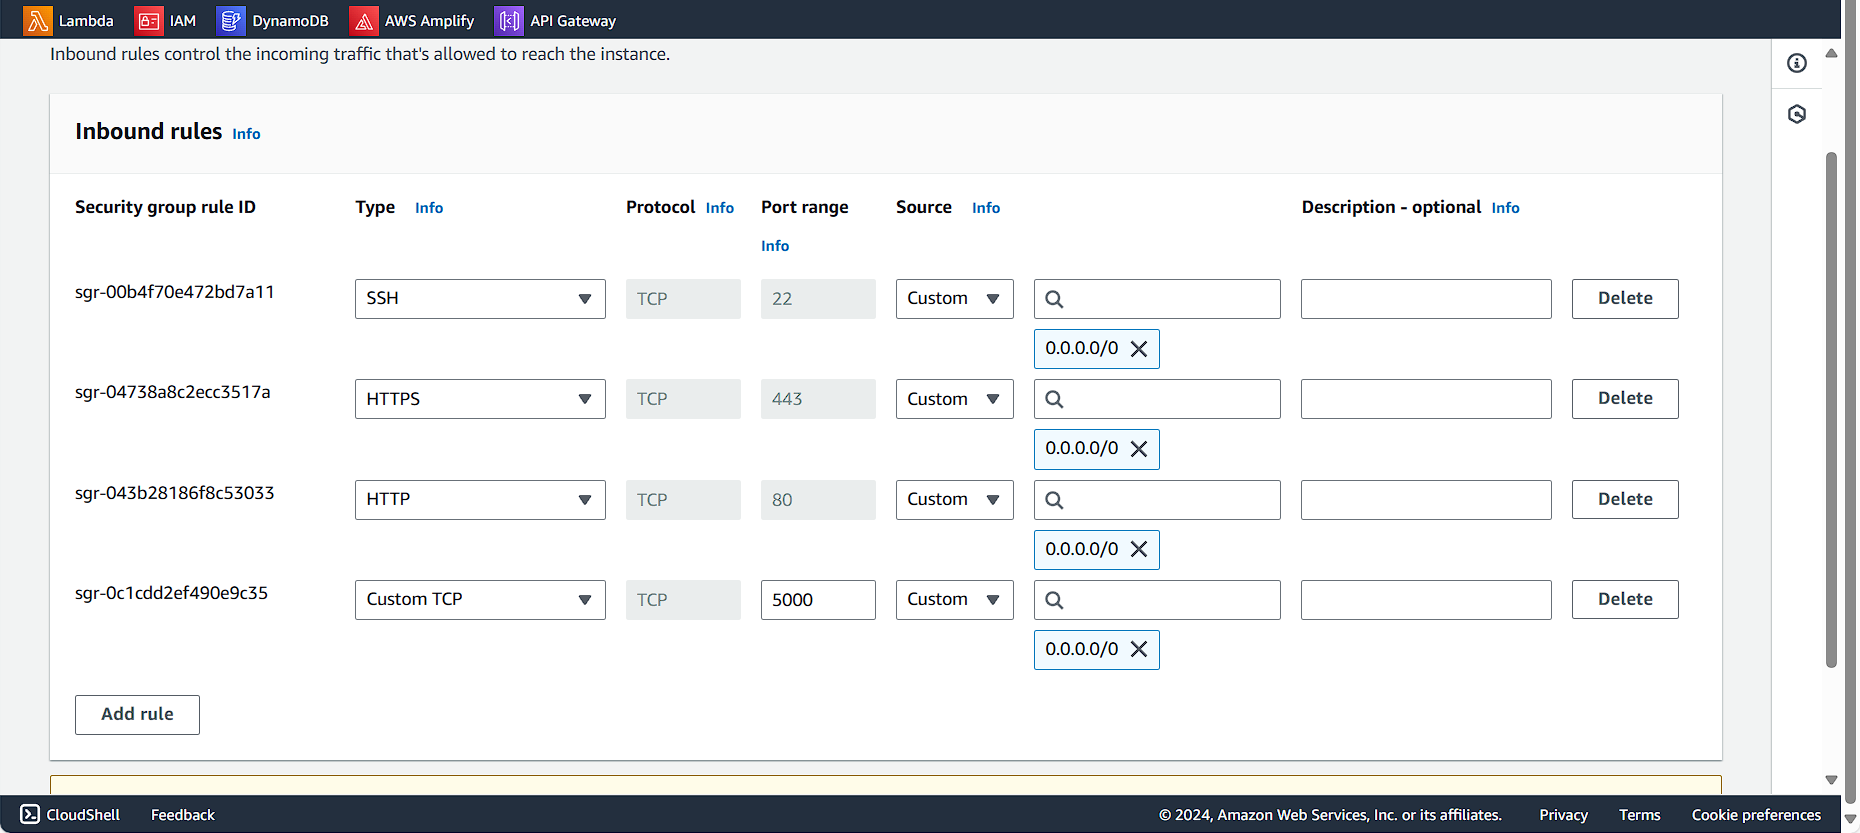
Configure the Inbound rules - First, configure SSH on port 22 with Source: MyIP to allow access to the instance. - Next, allow HTTP on port 80. - Add Custom TCP on port 5000 for FCJ Management - Finally, allow HTTPS on port 443.
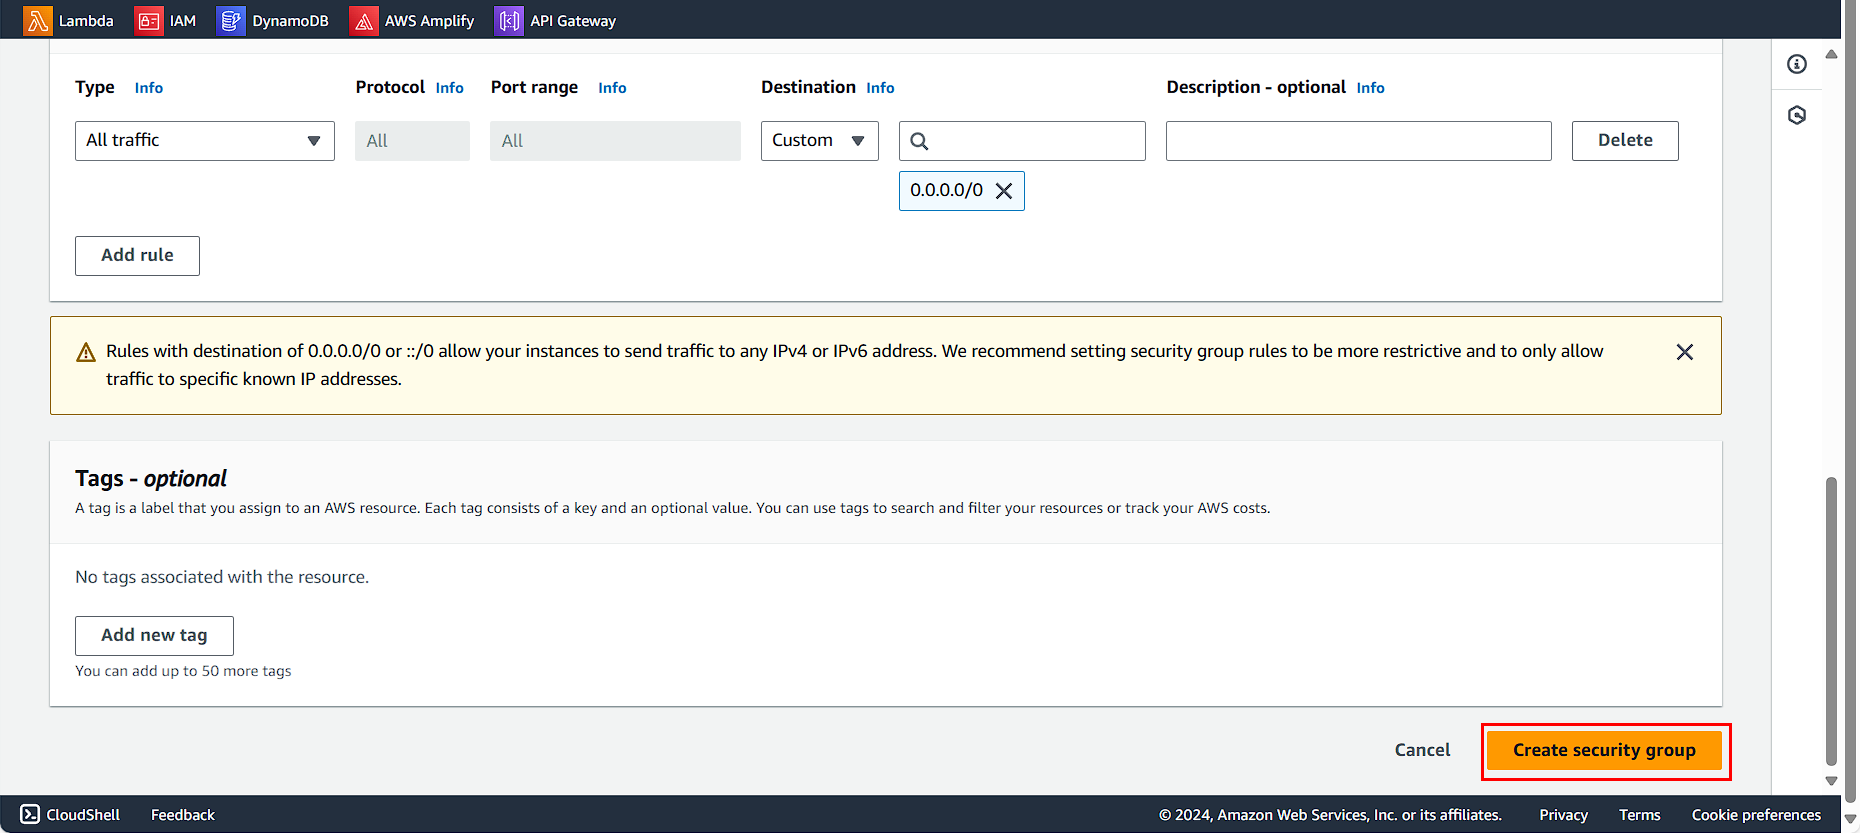
Check the Outbound rules and click Create security group
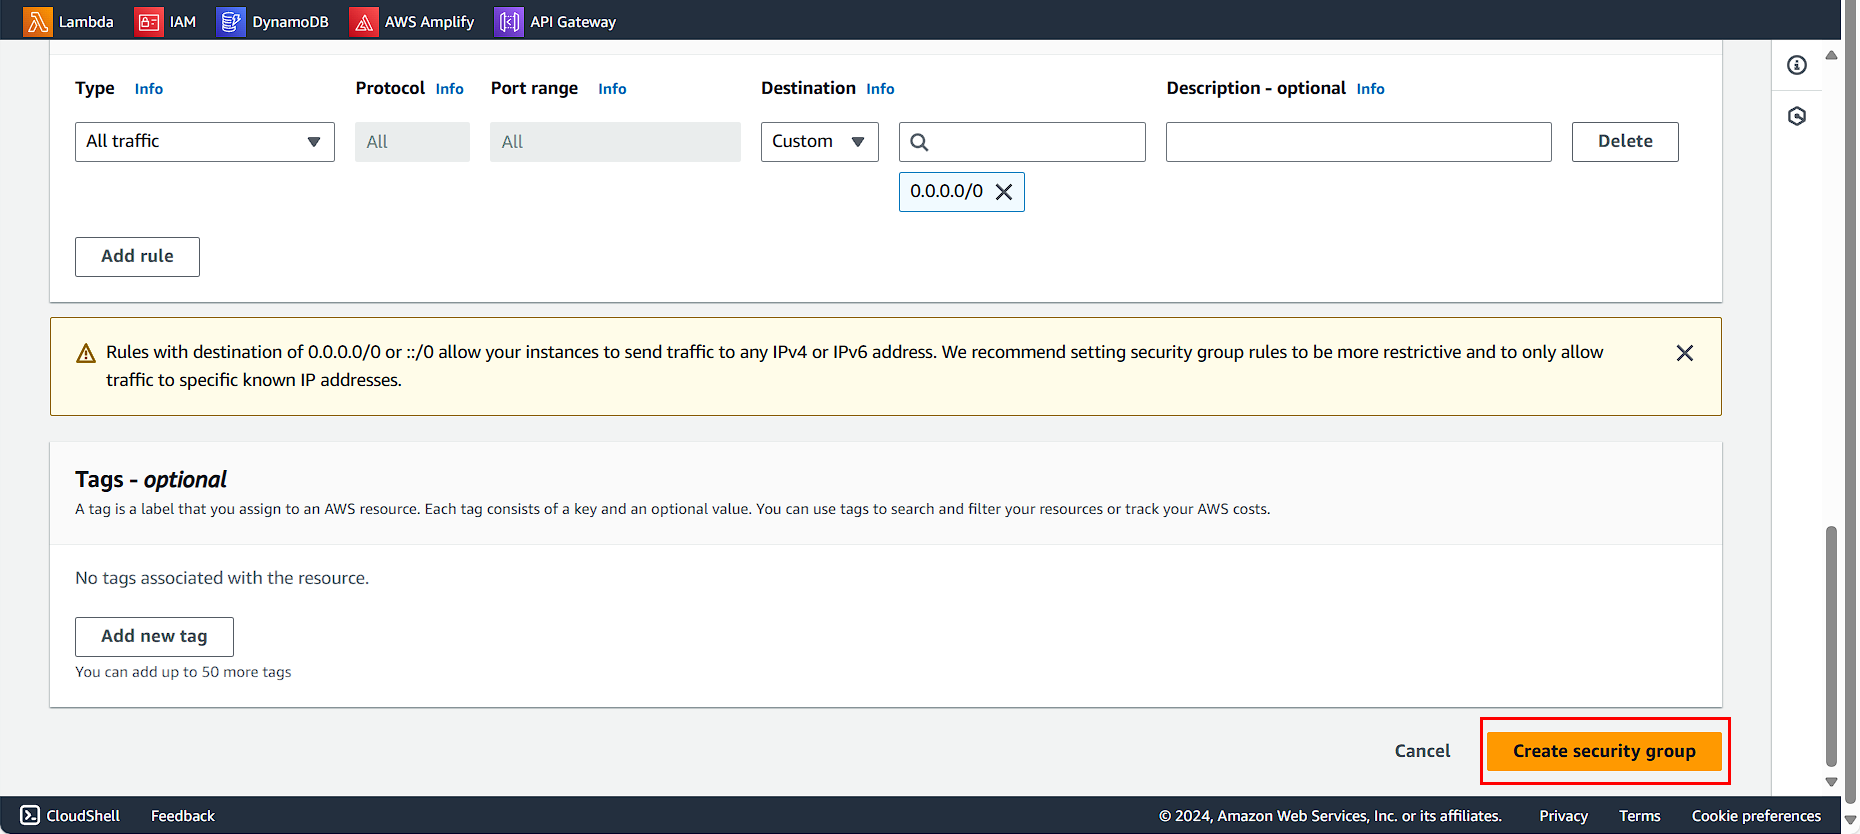
Create a security group for the database instance.
We create a security group for the database instance. To ensure security, we do not configure the application’s security group.
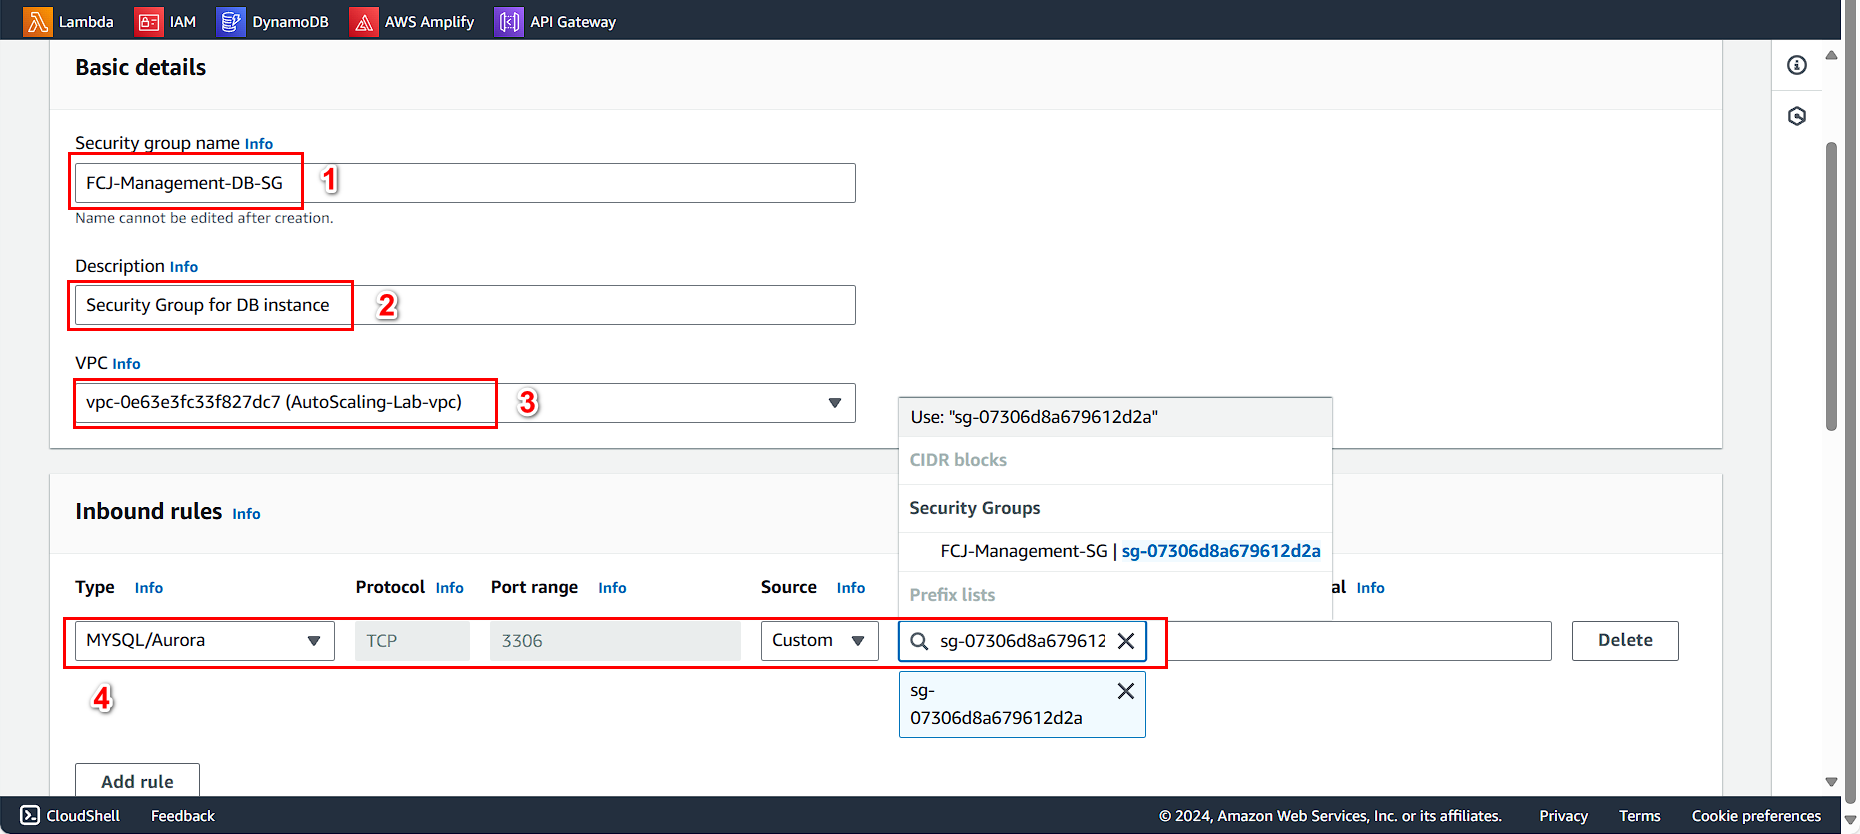
Configure the security group
- Security Group name, enter
FCJ-Mangement-DB-SG - Description, enter
Security Group for DB instance - Select the VPC you just created.
Configure the Inbound rules
- Select Add rule
- Choose MYSQL/Aurora on port 3306
- Then select the source as FCJ-Management-SG
Check the Outbound Rules and finally click on Create Security Group.
